If you grew up going to summer camp, there’s a good chance you’ve made a God’s Eye craft (sometimes called Ojo de Dios). Two sticks, some bright yarn, and a little bit of wrapping magic—suddenly you have this beautiful, woven diamond that you can hang in a window or on a wall.
This is one of those timeless kids’ crafts that never goes out of style. It’s easy, affordable, and completely customizable, which is why it has lasted through generations of crafty kids. And the best part? It’s just as fun now as it was back then.
When my kids and I made these recently, we set up outside with a basket of colorful yarn and a stack of popsicle sticks. It turned into a whole afternoon project: they experimented with different colors, patterns, and even made them as gifts. It reminded me that weaving doesn’t have to be complicated—this simple craft checks all the boxes.
In this post, I’ll share everything you need to know about how to make a God’s Eye craft with kids, why it’s such a wonderful project for building skills, and step-by-step instructions (with all the little tips I wish I had known when we first started).
Why You’ll Love Making a God’s Eye Craft with Kids
- Great for all ages: Even preschoolers can do this with a bit of help. Older kids can get fancy with patterns.
- Low-cost materials: Popsicle sticks or dowels, yarn, and scissors—that’s it.
- Portable: You can take this anywhere. We’ve done these at the beach, on camping trips, and in the backyard.
- Boosts fine motor skills: Wrapping yarn around sticks builds coordination and patience.
- Teaches patterns and sequencing: Without even realizing it, kids are learning about color repetition and order.
- Beautiful keepsakes: These look gorgeous hanging in windows, on walls, or even as part of a gift.

Materials You’ll Need
You only need a few basic supplies to get started:
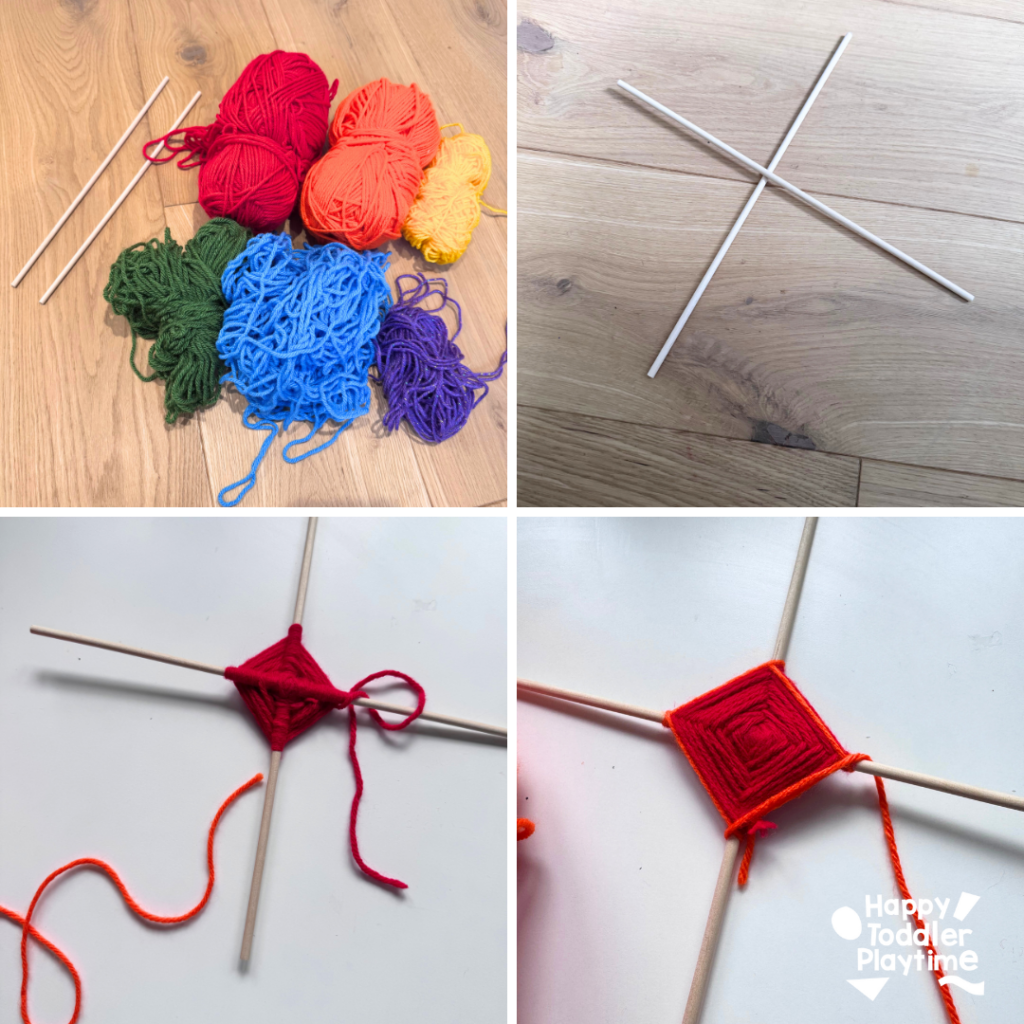
- 2 popsicle sticks (craft sticks) or small wooden dowels
- Yarn in multiple colors
- Scissors
Optional: A bit of glue or tape if you want to secure the sticks before you start (I’ll explain this below).
Step-by-Step Instructions: How to Make a God’s Eye Craft
This craft looks fancy when it’s done, but trust me—it’s incredibly simple once you see the steps. Here’s how to do it from start to finish.
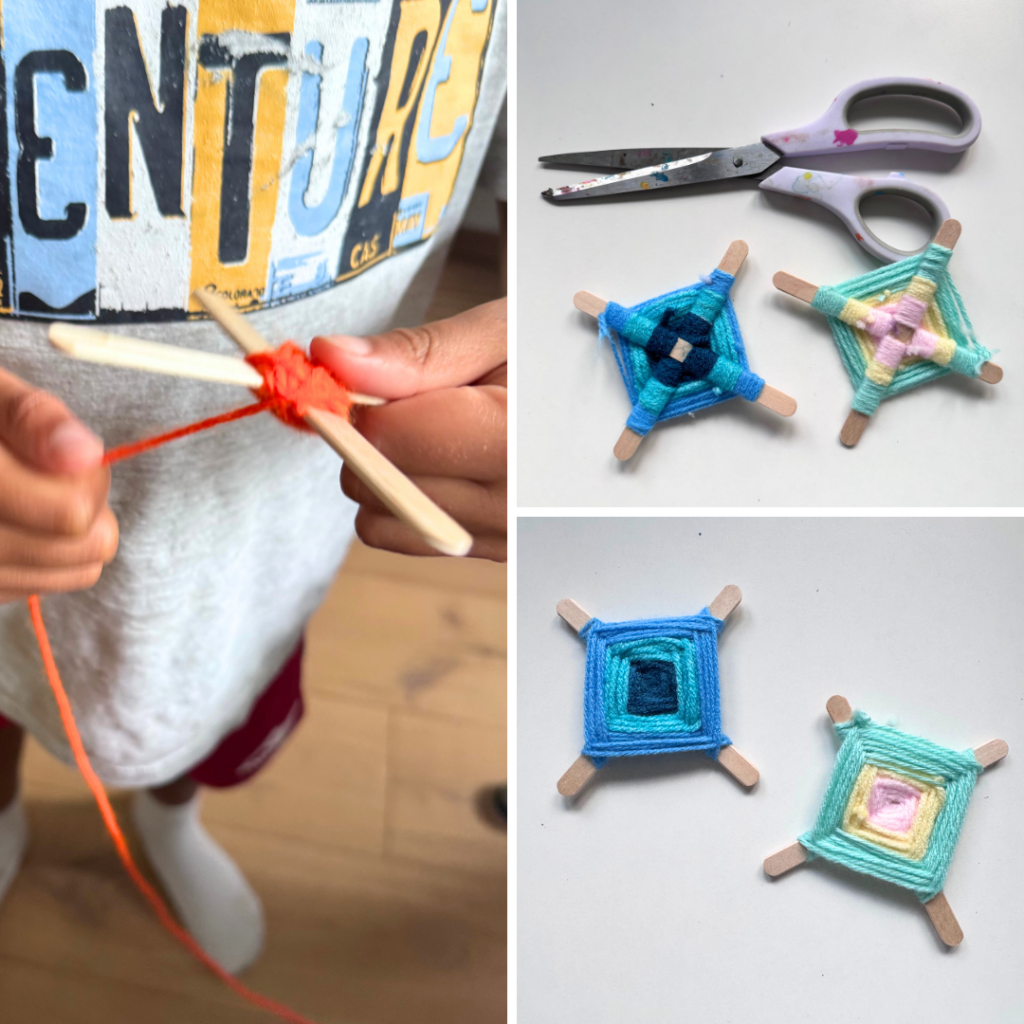
Step 1: Cross Your Sticks
Take your two popsicle sticks (or dowels) and cross them in the shape of a plus sign (+).
If you’re crafting with younger kids, you can add a small dot of hot glue or tape in the center where the sticks cross so they don’t move around while weaving. If your kids are older and have a steady hand, you can skip this and just hold them in place with your fingers for the first few wraps.
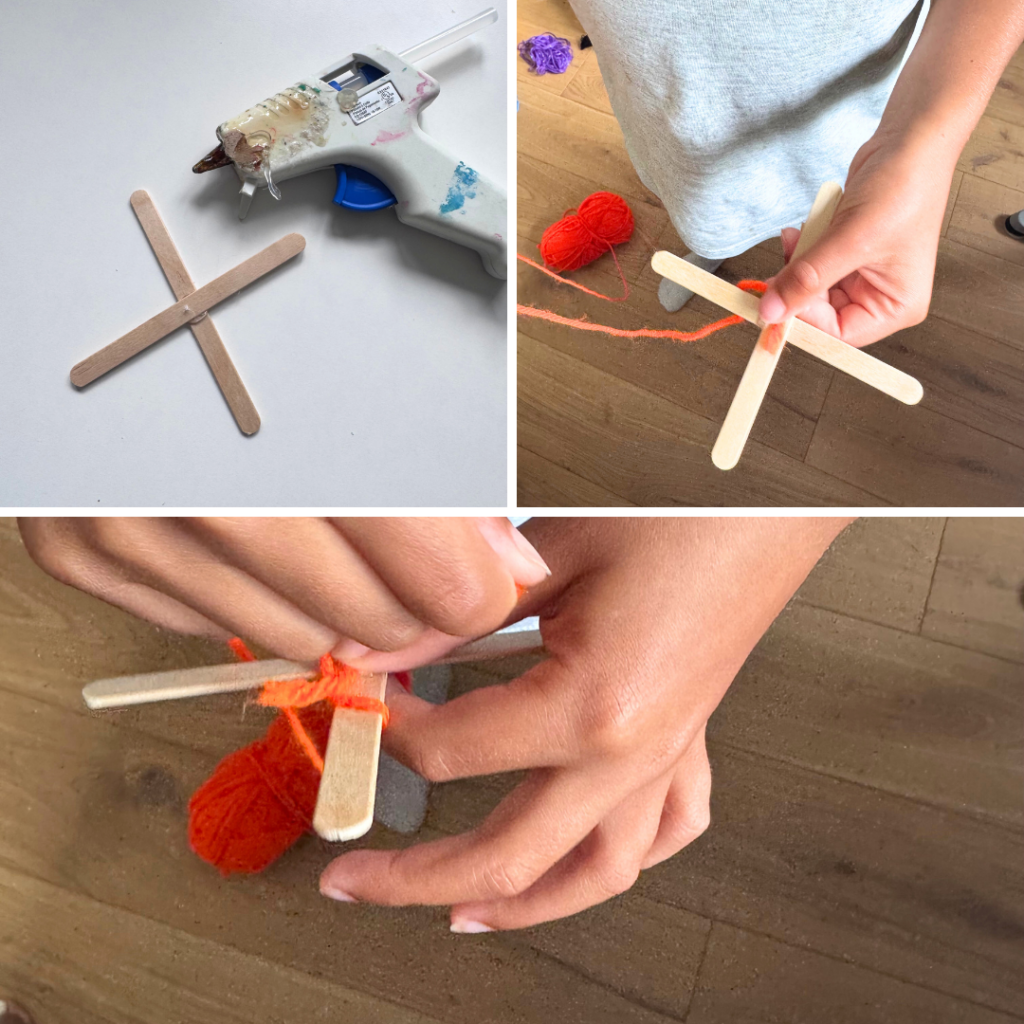
Step 2: Secure with Yarn
Pick your first yarn color. Cut a piece about 24 inches long to start. Place the end of the yarn on the center where the sticks cross and wrap it around several times, going over and under in an “X” pattern to lock the sticks into place.
After 6–8 wraps, the sticks should feel secure and stay in place on their own. Tie a small knot at the back to secure the yarn, or just hold the loose end against the stick as you start weaving.
Step 3: Start Wrapping
Here’s the basic weaving pattern:
- Bring the yarn over the first stick (from the front to the back).
- Wrap it around that stick so the yarn comes out on the right-hand side.
- Move to the next stick (turn the whole cross a quarter turn clockwise).
- Bring the yarn over that stick and wrap it around in the same way.
Repeat: over, around, and onto the next stick.
Step 4: Keep Going
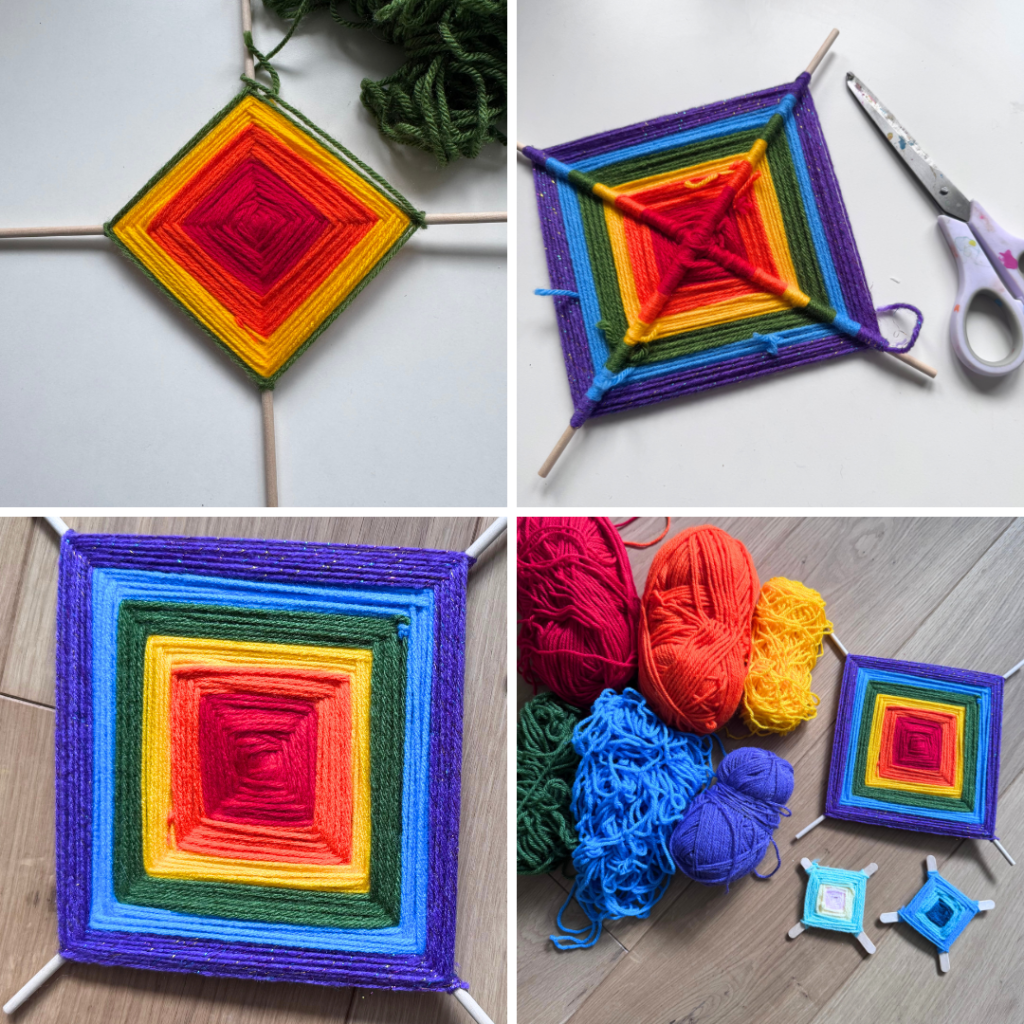
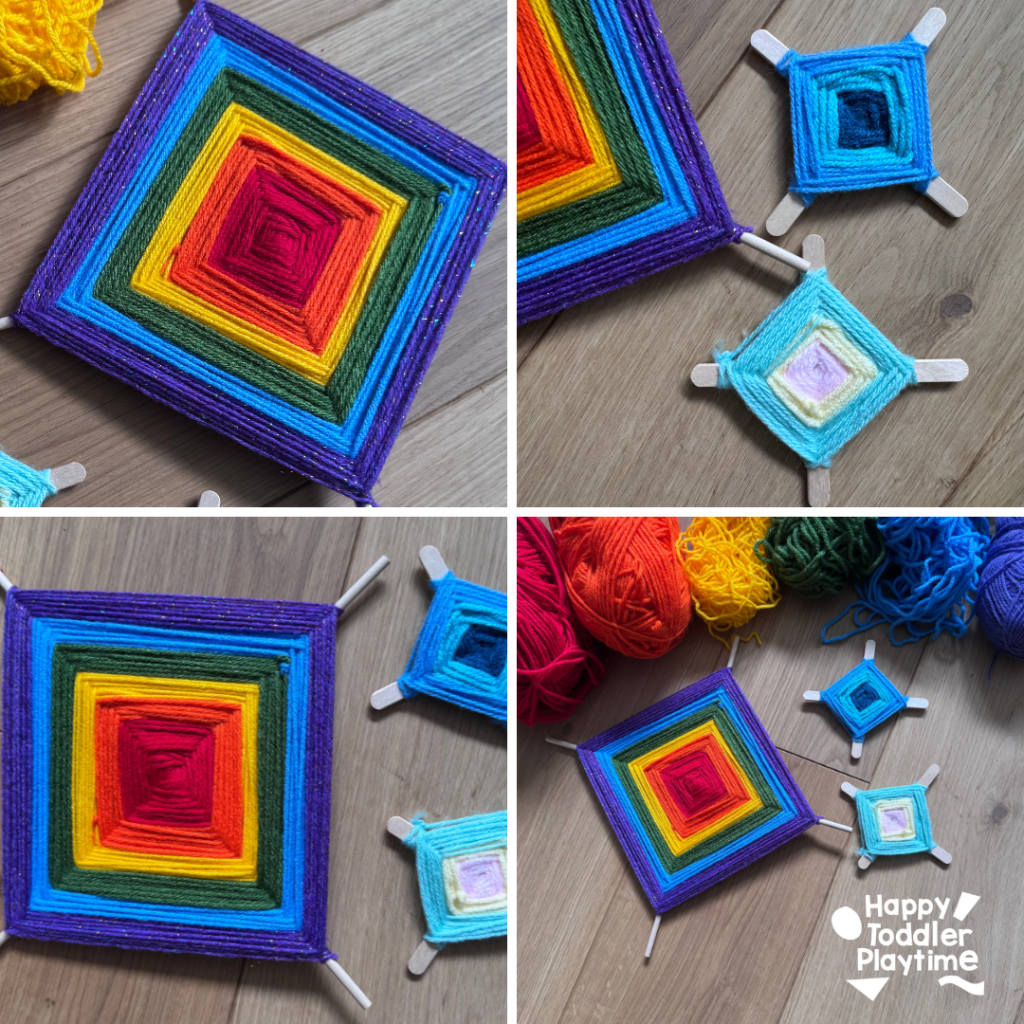
As you keep wrapping, you’ll see a diamond shape start to form in the center. That’s your God’s Eye pattern!
Make sure to push the yarn snugly toward the center after every few wraps so there aren’t any gaps. But don’t pull too tightly—the yarn should be secure, not bending the sticks.
Step 5: Switching Colors
One of the fun parts of making a God’s Eye is switching colors to create stripes and patterns.
When you’re ready to change colors:
- Cut the yarn, leaving a small tail.
- Tie the new color onto the old yarn with a simple knot.
- Tuck the loose tails to the back so they stay hidden, and keep wrapping with your new color.
Kids love experimenting with different color combinations!
Step 6: Wrapping Tips for Kids
- Turn the sticks, not your hands: It’s easier if the kids keep the yarn in their dominant hand and use the other hand to turn the sticks.
- Go slow at first: The pattern becomes automatic after a while.
- Keep the yarn untangled: If your yarn twists, pause and let it dangle so it can untwist before you keep going.
- If you pause or put the sticks and weaving down and pick it up again, be sure that you are holding it in the same orientation as before so that the pattern is consistent.
Step 7: Finishing the God’s Eye
Once the weaving reaches near the ends of the sticks, it’s time to finish:
- Wrap the yarn around one stick a final time.
- Cut the yarn, leaving a tail about 6 inches long.
- Tie a knot around the back of the stick so it doesn’t unravel.
You can tuck the tail under a few wraps or leave it hanging if you’d like to use it as a hanging loop.
Step 8: Display It!
Your God’s Eye is complete! Now the fun part: deciding where to put it.
- Hang it in a window as a suncatcher.
- Use it as wall art in a playroom or bedroom.
- Give it as a handmade gift to grandparents or friends.
- Make a bunch and hang them together for a colorful display.

Extra Ideas and Variations
Once you get the hang of the basic God’s Eye, you can mix things up with fun twists:
- Add beads: String beads onto the yarn before wrapping for a decorative touch.
- Use natural sticks: Go on a nature walk and collect small straight sticks or twigs for a rustic look.
- Make a double-layered God’s Eye: After finishing the first diamond, tie two more sticks across the back and start a second layer.
- Go big: Use long dowels and chunky yarn to make a giant one for outdoor decor.
Troubleshooting
- Loose center: If the sticks wobble, just add a few extra wraps right in the center before continuing.
- Gaps between yarn: Gently push the wraps together with your fingers as you go.
- Knots slipping: Double knot and pull snug, or add a tiny bit of glue if needed.
Why This Craft Is So Good for Kids
I love this craft because it’s so adaptable.
- For younger kids, it’s a way to practice fine motor skills, color recognition, and patience.
- For older kids, it can become a creative design challenge—experimenting with patterns, textures, and color combinations.
- And for parents? It’s a craft that doesn’t require constant supervision after the first few minutes.
Plus, making a God’s Eye is meditative. The over-under rhythm of wrapping is calming, which makes it a lovely “quiet time” activity.
Our Experience Making God’s Eyes at Home
The first time we did this as a family, we set up a little “weaving station” outside on the picnic table. We put all our yarn in a basket, laid out a pile of popsicle sticks, and let everyone pick their favorite colors.
My oldest decided to go with rainbow stripes, one twin did a pattern of red-blue-red-blue, and the other twin used one single color and was perfectly happy wrapping away. It was one of those afternoons where everyone was engaged and peaceful (rare, right?).
At the end, we hung them on our patio and it instantly looked like a summer art gallery.
How Long Does It Take?
A small God’s Eye (made with popsicle sticks) takes about 20–30 minutes, depending on the age of the child. Bigger ones with dowels take longer.
It’s a great project to leave out and come back to if attention spans wander.
Making a God’s Eye craft is one of those summer activities every kid should try at least once.
With just a few simple supplies, you can create something colorful and beautiful while also giving kids a chance to work on skills that don’t feel like “learning.”
So next time you’re looking for a low-prep, screen-free activity, grab a couple of sticks and some yarn, and show your kids how to weave a God’s Eye. You might be surprised at how much they love it—and how many they want to make!
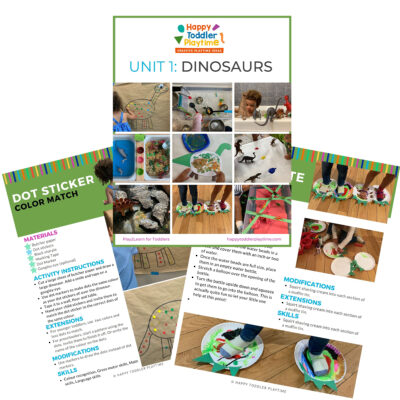
Play2Learn Toddler & Preschool Programs for Curious Toddlers
There is no limit to your toddler’s energy and curiosity. That energy and curiosity although a joy can be challenging at times. Their interest in just about everything around them is what makes them great learners. One and two year olds can soak up so much just from their senses!
But as a teacher or parent that thirst for learning can be exhausting. That is why I created this toddler and preschooler program. To help you get the most out of this time with your curious toddler without having to come up with creative ways to play and interact with them.
Play2Learn for Toddlers includes 20 Units for toddlers. Each 2-week toddler unit has 20 super easy to set up and engaging activities for toddlers 18 months to 3 years.
Play2Learn Preschool which includes 20 Units for preschoolers. Each 2-week preschoolers unit has 20 unique and easy to set up and engaging activities for preschoolers 3 years to 5 years. That’s over 800 learning activities for your toddler and preschooler at your fingertips! So many ideas you and your child will never be bored again!
These toddler and preschool lesson plans and activities will definitely keep you and your toddler and preschooler busy playing and learning!
Click here for more information: Play2Learn
Book: Exciting Sensory Bins for Curious Kids
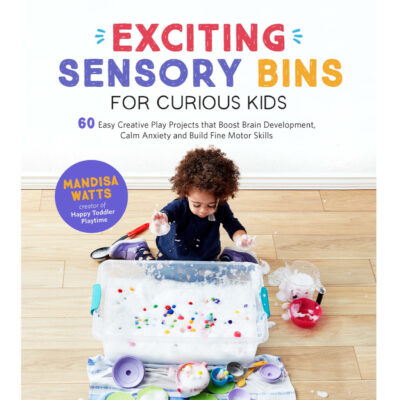
Did you know I wrote a book of sensory bins? Click here for more information Exciting Sensory Bin for Curious Kids. Or grab your copy at Amazon.
Boring afternoons are made exciting with awesome animal-based bins, like Salty Shark Bay or Yarn Farm. Pretend play bins like Birthday Cake Sensory Play or Bubble Tea Party encourage creativity and imagination. And your kids will have so much fun they won’t even know they’re getting smarter with STEAM (science, technology, engineering, art and math) activities like Sink or Float Soup, Magnetic Letter Hunt or Ice Cream Scoop and Count.
Designed for toddlers 18 months and up.
Book: Super STEAM Activity Book for Kids
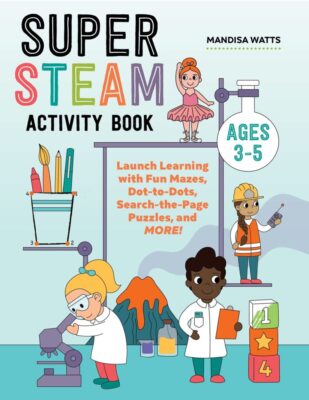
Learning all about science, technology, engineering, art, and math sets kids up for scholastic success―and it can be so much fun! Watch kids enjoy building STEAM skills as they color friendly fish, help water find its way to tree roots, solve math problems with mazes, and more.
Find out more and grab your copy here.
Designed for preschoolers 3 years old and up.
Book: Big Book of Riddles for Kids
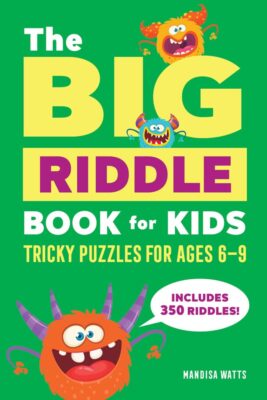
Riddle me this: What’s an exciting way to practice critical thinking while having a blast? The Big Riddle Book for Kids, of course! From hilarious puns to tough brain teasers, kids can build problem-solving skills with hundreds of riddles tha. t show them how to think outside the box.
- 350 riddles for kids—Have hours of fun with riddles, puns and jokes, and math and logic puzzles that’ll get their wheels turning!
- Level up their skills—Riddles get trickier as kids progress through the book, challenging them as they get better at solving puzzles!
- Double-check their work—Kids can check their answers in the back of the book with a handy answer key.
Help children expand their minds while having fun with this puzzle book for kids!
Designed for kids ages 6 years old and up.
TV Show: Curious Crafting
I’m so excited to share my crafting TV show Curious Crafting which launched in July 2022 on TVOkids and TVOkids YouTube! Season 2 aired in August 2023! My show was also nominated in 2023 for Best Live Action Preschool Series by the Youth Media Alliance Awards of Excellence.
Curious Crafting Season 1 is also now airing in Australia on ABC! Watch it here!
Set in the ultimate crafting space, Curious Crafting is a short form pre-school age series about the joy of making crafts. I lead a rotating cast of adorable little preschoolers (including my own) making magic out of common household objects.
In each episode we transform recycled items into magical crafts like a milk carton school bus, paper bag puppet or cotton pad turtle. The crafters learn and laugh their way through each activity while demonstrating what their young imaginations can create.
Curious Crafting shares the adventure and joy of making art with takeaway lessons for creating crafts at home.
This show designed for toddlers and preschoolers 2.5 years old and up.