Crafting with items you already have at home brings a unique satisfaction, especially when it turns into an adorable project that the whole family can enjoy. Enter the toilet paper roll stamped bunny craft – a simple, eco-friendly activity that transforms ordinary household items into a springtime scene bursting with cuteness. This craft is not just about making something pretty; it’s about unleashing creativity, practicing fine motor skills, and spending quality time together. Whether it’s a rainy day or you’re gearing up for Easter, this bunny craft promises a hoppy time for all.
The magic of this project lies in its simplicity and the joy of turning something as mundane as a toilet paper roll into art. With just a few basic supplies and a sprinkle of imagination, you can create a playful array of bunnies and eggs that are as unique as they are colorful. It’s a perfect activity for kids who love getting their hands dirty and parents who love a craft that requires minimal setup and cleanup.
Materials Needed
- Toilet paper roll
- Glue gun
- White, pink, blue, and yellow paint
- Blue cardstock
- Paintbrush
- Paper plate
Toilet Paper Roll Stamped Bunny Craft Instructions
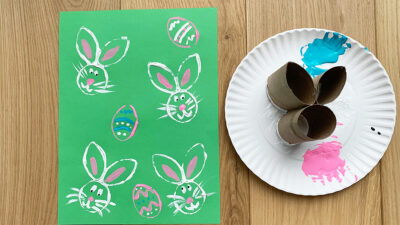
- Gather Your Toilet Paper Roll: Start with a single toilet paper roll. Ensure it’s clean and free from any paper residue.
- Cut the Roll: Using a pair of scissors, carefully cut the toilet paper roll into four equal sections. These sections will be transformed into parts of your bunny stamps.
- Form the Ears: Take one of the cut sections and gently pinch two opposite points at one of the ends. This pinching will create the shape of bunny ears. It helps to press down on a hard surface to flatten and maintain the ear shapes.
- Assemble the Bunny Body: Select another cut section to serve as the bunny’s body. Using a glue gun, apply a small amount of glue on the edge of the section with the ears. Carefully attach it on top of the body section, ensuring the ears are aligned symmetrically to the body.

- Shape the Egg Stamp: Take another section of the toilet paper roll. Instead of pinching two points, you’ll pinch only one side to create an oval or egg shape. This will be used to stamp Easter eggs around your bunnies.
Preparing the Paints
- Set Up Your Painting Station: Place a paper plate on your work surface. Squeeze out a generous amount of white paint onto the plate for the bunny stamps. In separate areas of the plate or on additional plates, squeeze out blue and pink paint for the Easter eggs.
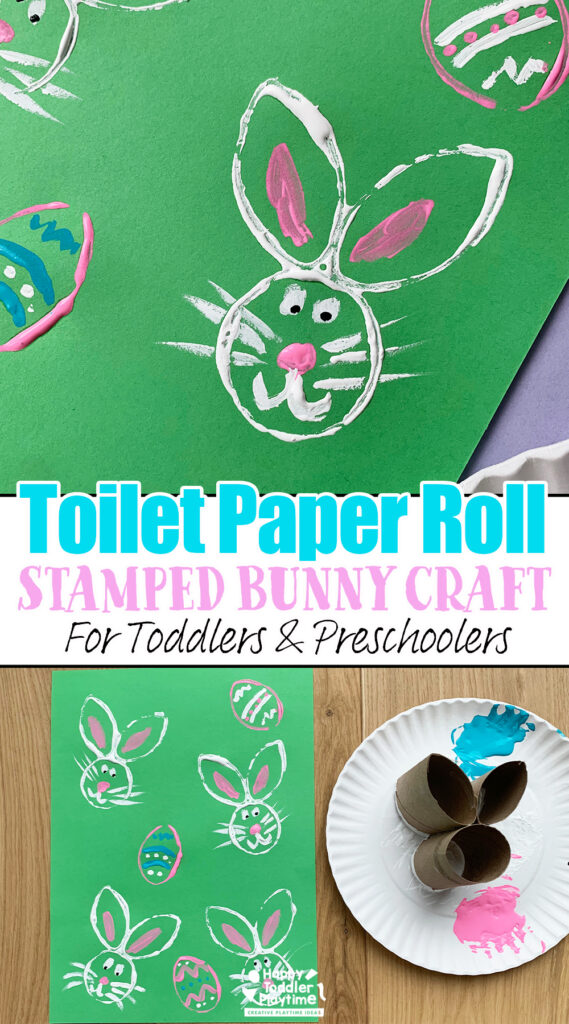
- Dip and Stamp: Dip the bunny-shaped end of your toilet paper roll into the white paint. Ensure the entire bottom is evenly coated but not dripping with paint. Press the paint-coated end onto your blue cardstock or chosen paper, applying even pressure to ensure a complete stamp. Lift to reveal your bunny shape.


- Adding Details: Using a paintbrush, dip into the remaining paints to add details to your bunny. Add a pink nose, draw thin lines for whiskers, and don’t forget the eyes and inner ear details. Use your creativity to give each bunny its unique character.


- Egg Stamping: Now, dip the egg-shaped toilet paper roll into the blue and pink paints you’ve prepared. Stamp these around your bunnies to create a festive Easter scene. You can overlap colors or blend them slightly on the plate before stamping to create different effects.
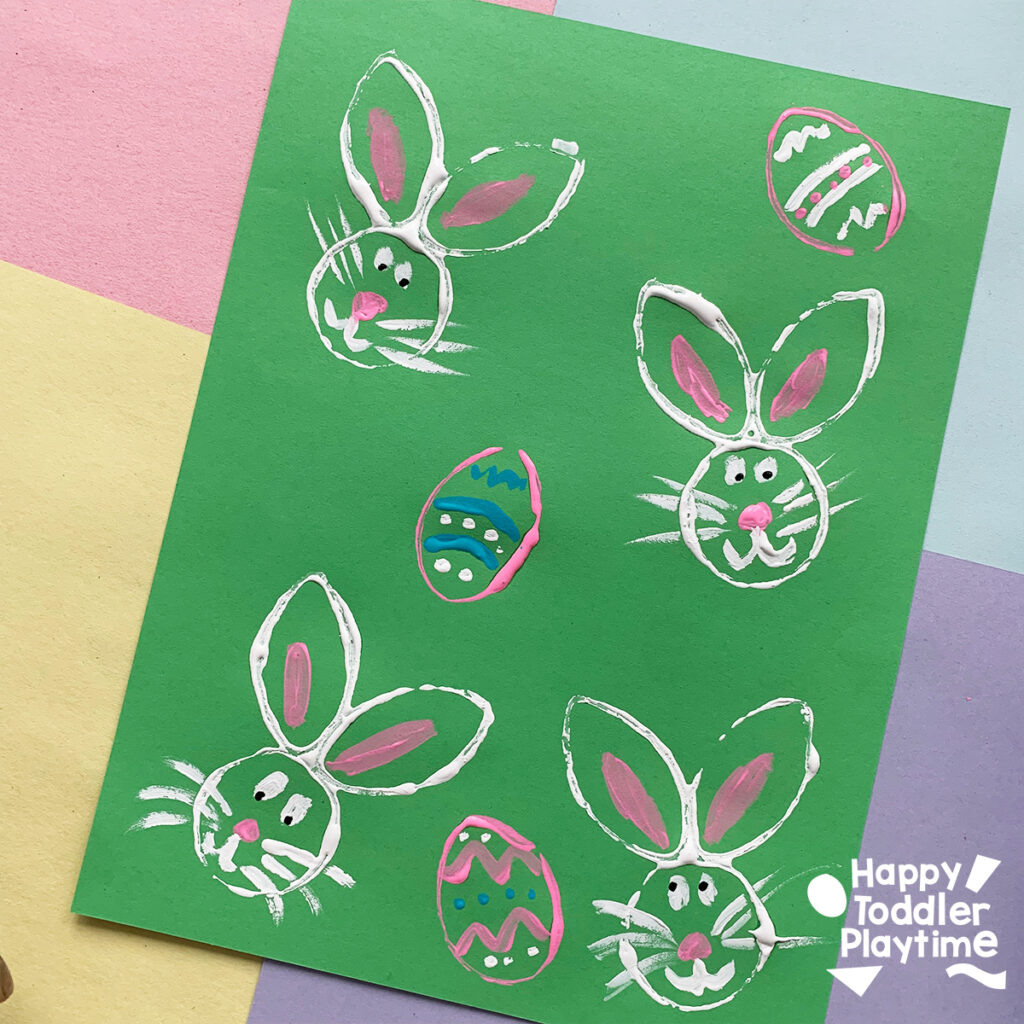
- Decorate Your Eggs: Using the paintbrush, add designs to your stamped eggs. Stripes, dots, and zigzags in contrasting colors make for visually appealing Easter eggs. Encourage kids to come up with their own patterns for each egg.

How They Played
Watching my kids engage with this activity was a highlight of the week. They dove into the crafting with enthusiasm, each one eager to create their own bunny and egg designs. The simplicity of the stamps allowed them to experiment with different colors and patterns, while drawing the bunny faces sparked conversations about expressions and emotions. They even named their bunny characters and invented stories about their adventures, turning the craft session into an imaginative playtime that stretched well beyond painting.
Tips for Success
- Let the paint dry between steps to avoid smudging.
- Ensure that the bunny ears and head are lined up when gluing it together so that stamping with it is easier.
- Encourage kids to personalize their bunnies and eggs with unique designs, fostering a sense of ownership and creativity.
Skills Learned
This craft is about more than just fun; it’s a hands-on learning experience. Kids practice fine motor skills through cutting, gluing, and painting, crucial for development and academic tasks. The project also encourages creativity and imagination, as children decide how to decorate their bunnies and eggs. Additionally, following instructions boosts their ability to process and implement steps, while the storytelling aspect enhances language skills and emotional expression. It’s a comprehensive activity that combines arts and crafts with essential developmental milestones, all under the guise of playful creativity.
Play2Learn Toddler & Preschool Programs for Curious Toddlers
There is no limit to your toddler’s energy and curiosity. That energy and curiosity although a joy can be challenging at times. Their interest in just about everything around them is what makes them great learners. One and two year olds can soak up so much just from their senses!
But as a teacher or parent that thirst for learning can be exhausting. That is why I created this toddler and preschooler program. To help you get the most out of this time with your curious toddler without having to come up with creative ways to play and interact with them.
Play2Learn for Toddlers includes 20 Units for toddlers. Each 2-week toddler unit has 20 super easy to set up and engaging activities for toddlers 18 months to 3 years.
Play2Learn Preschool which includes 20 Units for preschoolers. Each 2-week preschoolers unit has 20 unique and easy to set up and engaging activities for preschoolers 3 years to 5 years. That’s over 800 learning activities for your toddler and preschooler at your fingertips! So many ideas you and your child will never be bored again!
These toddler and preschool lesson plans and activities will definitely keep you and your toddler and preschooler busy playing and learning!
Click here for more information: Play2Learn
Book: Exciting Sensory Bins for Curious Kids
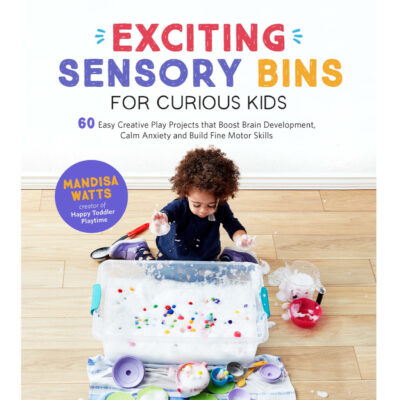
Did you know I wrote a book of sensory bins? Click here for more information Exciting Sensory Bin for Curious Kids. Or grab your copy at Amazon.
Boring afternoons are made exciting with awesome animal-based bins, like Salty Shark Bay or Yarn Farm. Pretend play bins like Birthday Cake Sensory Play or Bubble Tea Party encourage creativity and imagination. And your kids will have so much fun they won’t even know they’re getting smarter with STEAM (science, technology, engineering, art and math) activities like Sink or Float Soup, Magnetic Letter Hunt or Ice Cream Scoop and Count.
Designed for toddlers 18 months and up.
Book: Super STEAM Activity Book for Kids
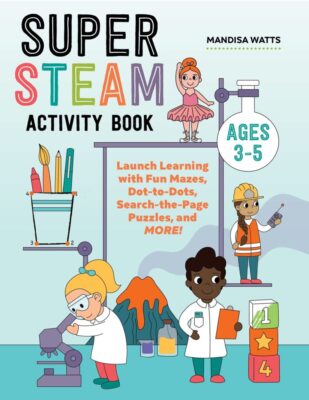
Learning all about science, technology, engineering, art, and math sets kids up for scholastic success―and it can be so much fun! Watch kids enjoy building STEAM skills as they color friendly fish, help water find its way to tree roots, solve math problems with mazes, and more.
Find out more and grab your copy here.
Designed for preschoolers 3 years old and up.
Book: Big Book of Riddles for Kids
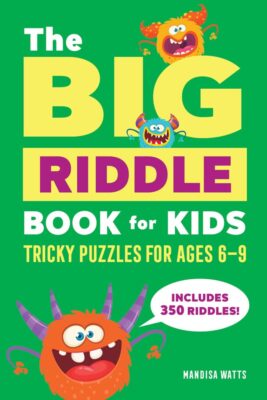
Riddle me this: What’s an exciting way to practice critical thinking while having a blast? The Big Riddle Book for Kids, of course! From hilarious puns to tough brain teasers, kids can build problem-solving skills with hundreds of riddles tha. t show them how to think outside the box.
- 350 riddles for kids—Have hours of fun with riddles, puns and jokes, and math and logic puzzles that’ll get their wheels turning!
- Level up their skills—Riddles get trickier as kids progress through the book, challenging them as they get better at solving puzzles!
- Double-check their work—Kids can check their answers in the back of the book with a handy answer key.
Help children expand their minds while having fun with this puzzle book for kids!
Designed for kids ages 6 years old and up.
TV Show: Curious Crafting
I’m so excited to share my crafting TV show Curious Crafting which launched in July 2022 on TVOkids and TVOkids YouTube! Season 2 aired in August 2023! My show was also nominated in 2023 for Best Live Action Preschool Series by the Youth Media Alliance Awards of Excellence.
Curious Crafting Season 1 is also now airing in Australia on ABC! Watch it here!
Set in the ultimate crafting space, Curious Crafting is a short form pre-school age series about the joy of making crafts. I lead a rotating cast of adorable little preschoolers (including my own) making magic out of common household objects.
In each episode we transform recycled items into magical crafts like a milk carton school bus, paper bag puppet or cotton pad turtle. The crafters learn and laugh their way through each activity while demonstrating what their young imaginations can create.
Curious Crafting shares the adventure and joy of making art with takeaway lessons for creating crafts at home.
This show designed for toddlers and preschoolers 2.5 years old and up.
Toilet Paper Roll Stamped Bunny Craft
Materials
- Toilet paper roll
- Glue gun
- White, pink, blue, and yellow paint
- Blue cardstock
- Paintbrush
- Paper plate
Instructions
- Start by cutting your toilet paper roll into four equal sections.
- Take two sections and pinch the two ends of each section to form bunny ears. Use the glue gun to attach these ears to another circular tube section, creating your bunny's head.
- Place white paint on a paper plate. Dip the bunny stamp into the white paint and then stamp it onto a sheet of paper.
- Use a paintbrush to add details to your bunny, such as a nose, whiskers, eyes, and the inner ears.
- For the Easter egg, take a single tube section and pinch one end to create an egg shape.
- Add blue and pink paint on the paper plate. Dip your egg stamp into the paint, then stamp it onto the paper.
- Decorate the stamped eggs with the paintbrush, adding designs or patterns as desired.