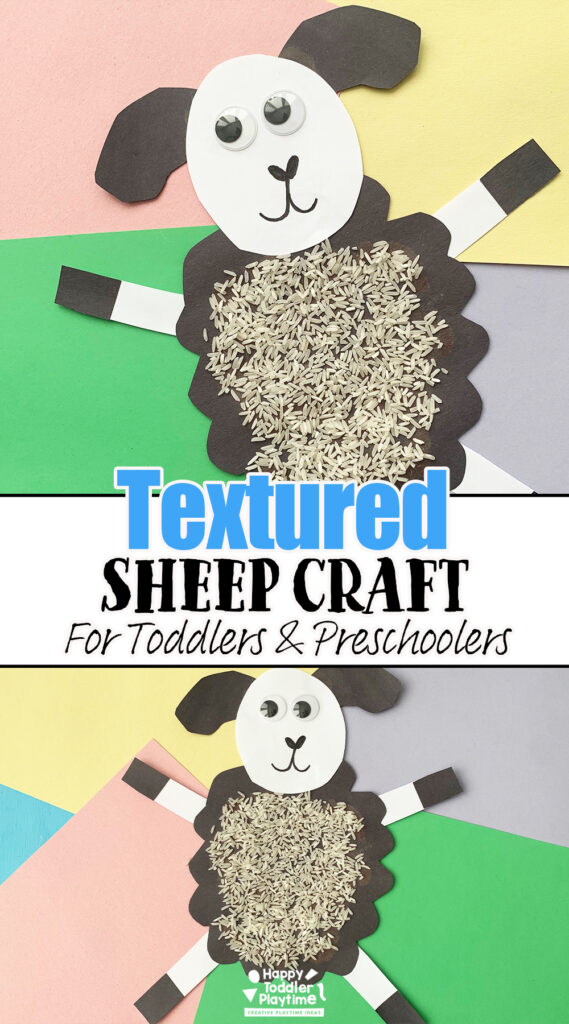
Crafting with kids is not just about creating something adorable to hang on the fridge; it’s about the laughter, the mess, the learning, and sometimes, the silence of concentration that fills the room. Our latest project, the textured sheep craft, ticks all these boxes and more. It’s a simple, tactile activity that combines art with a sensory experience, making it perfect for little hands and growing minds. Using basic materials like rice and construction paper, we embarked on a crafting adventure that was as educational as it was entertaining.
This craft is not only a fun way to spend an afternoon but also an excellent opportunity for children to develop fine motor skills, follow instructions, and express their creativity. As we navigated through the steps, the kids learned to recognize shapes and colors, and the tactile sensation of the rice added an unexpected layer of sensory play. Plus, the end result is incredibly cute!
Materials Needed:
- Black, blue, and white construction paper
- Glue
- White rice
- Googly eyes
- Scissors
Step by Step Instructions:
- Prepare Your Shapes: Start by cutting out the sheep shapes from the construction paper. You’ll need white paper for the head, arms, and legs; and black paper for the body, hooves, and eyes. Feel free to get creative with the sizes and shapes to make your sheep uniquely yours.
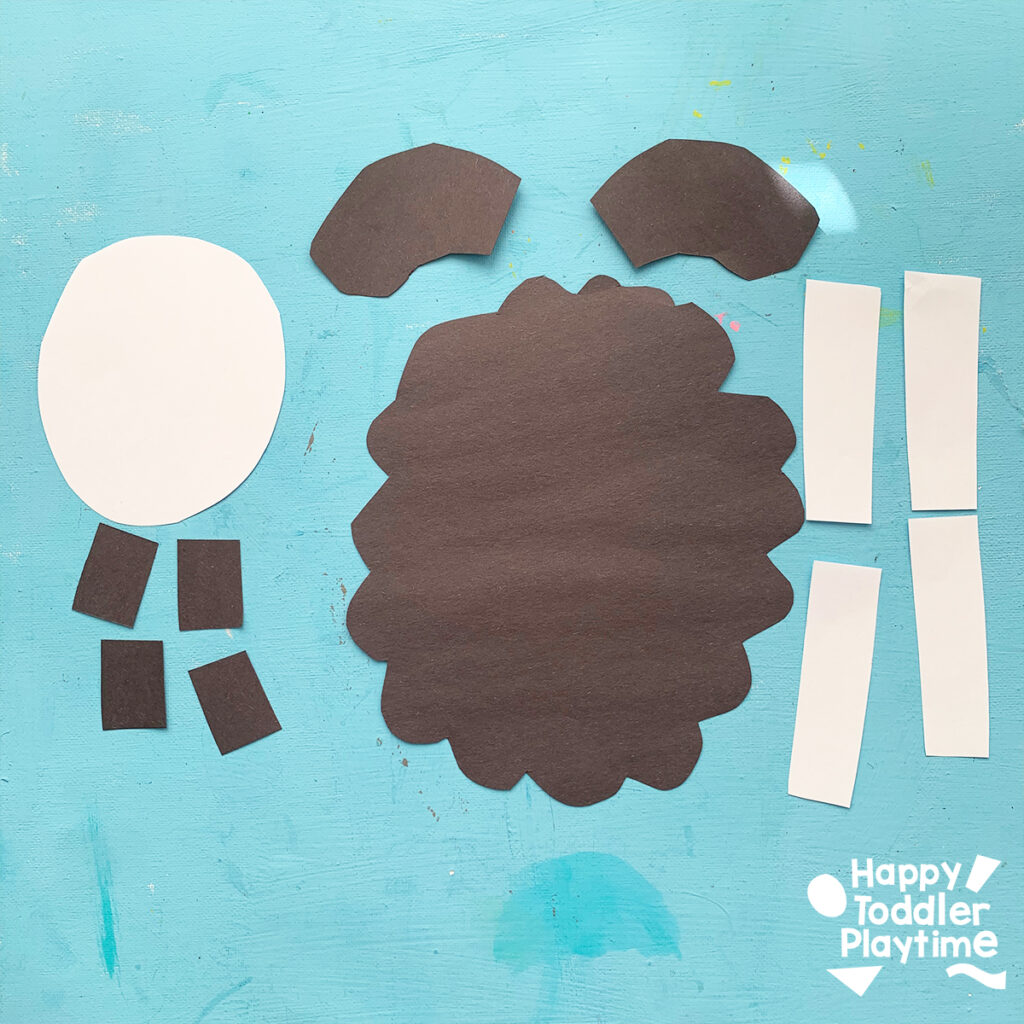
- Assembly: Assemble your sheep by gluing the white head, arms, and legs to the body. Add the black hooves too.

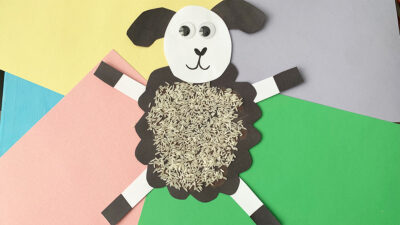
- Adding Texture: Apply glue generously over the body of your sheep cutout. Then, sprinkle white rice over the glue to cover the body completely. This step is especially fun for the kids as they get to play with the texture and enjoy the process of making their sheep fluffy.
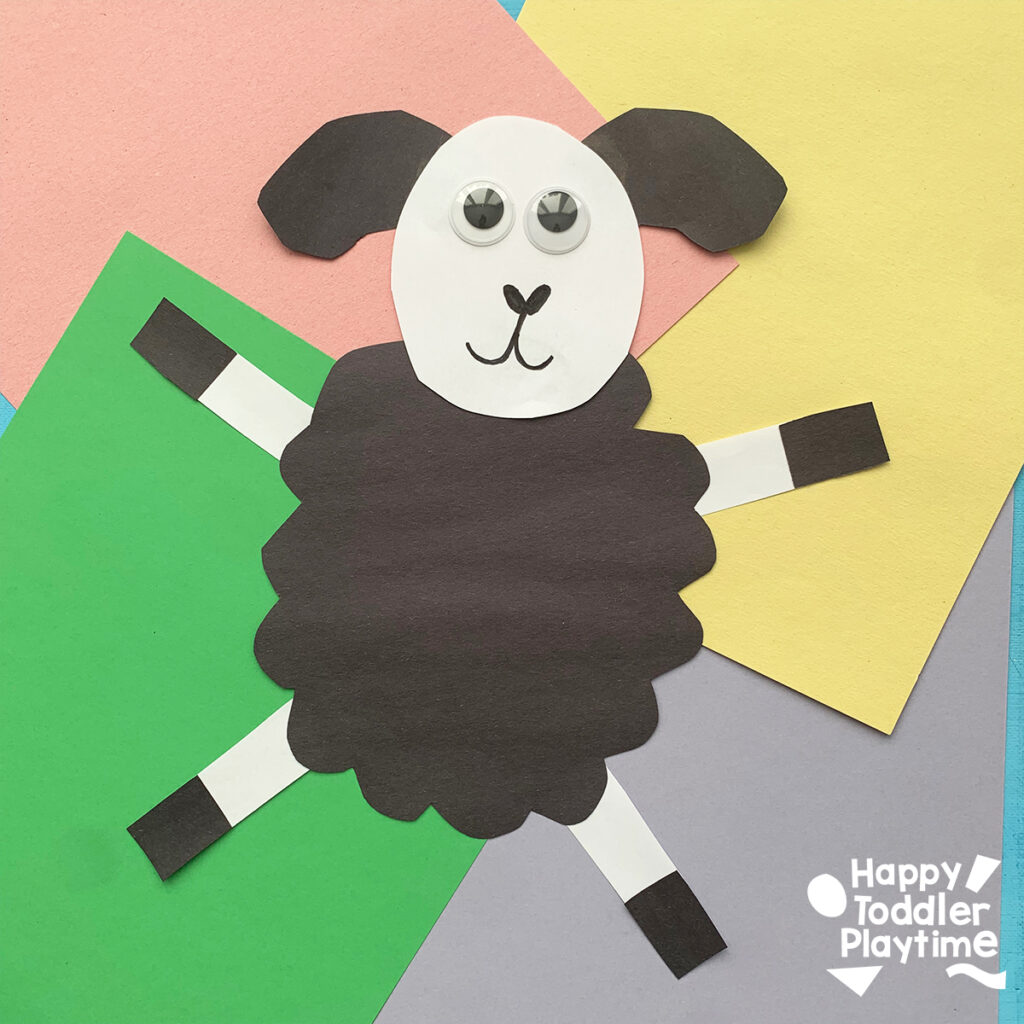
- Final Touches: No sheep would be complete without eyes to see. Glue the googly eyes to the sheep’s face. Now, your textured sheep craft is ready to be displayed proudly!

How They Played:
The creation of the sheep was only the beginning. Once the crafts were complete, the kids engaged in imaginative play, creating stories and scenarios for their sheep. They explored different textures, comparing the smoothness of the paper to the roughness of the rice, and practiced their scissor skills while cutting out the shapes. Watching them turn a simple craft into a world of adventure was a reminder of the power of imagination.
Tips for Success:
- Make sure the glue is spread evenly for the rice to stick properly.
- Allow sufficient drying time for the glue before moving on to the assembly step.
- Supervise younger children with scissors and guide them through the cutting process.
Skills Learned:
- Fine Motor Skills: Handling scissors, manipulating small rice grains, and applying glue refine fine motor control and hand-eye coordination.
- Creativity and Imagination: Choosing how to assemble and play with their sheep encourages creative thinking and imagination.
- Sensory Exploration: Feeling the different textures involved in this craft stimulates sensory development.
- Following Instructions: The step-by-step nature of the craft helps children practice listening and following directions.
This textured sheep craft is a perfect blend of learning, creativity, and fun. It’s a testament to the fact that with simple materials and a bit of imagination, the possibilities for play and education are endless. Happy crafting!
Materials
- Black, blue, and white construction paper
- Glue
- White rice
- Googly eyes
- Scissors
Instructions
- Prepare Your Shapes: Start by cutting out the sheep shapes from the construction paper. You'll need white paper for the head, arms, and legs; and black paper for the body, hooves, and eyes. Feel free to get creative with the sizes and shapes to make your sheep uniquely yours.
- Assembly: Assemble your sheep by gluing the white head, arms, and legs to the body. Add the black hooves and eyes to give your sheep character and personality.
- Adding Texture: Apply glue generously over the body of your sheep cutout. Then, sprinkle white rice over the glue to cover the body completely. This step is especially fun for the kids as they get to play with the texture and enjoy the process of making their sheep fluffy.
- Final Touches: No sheep would be complete without eyes to see. Glue the googly eyes to the sheep's face. Now, your textured sheep craft is ready to be displayed proudly!