If you’re searching for festive, hands-on play ideas that will keep your toddler engaged this holiday season, Christmas sensory bins are the BEST place to start. They’re simple to set up, fun to explore, and packed with learning opportunities—fine motor skills, language development, sorting, scooping, pretending… all wrapped up in holiday magic!
These sensory bins are all about the sights, textures, and colors of Christmas—think red and green pom poms, jingly bells, soft fake snow, glittery ornaments, cookie cutters, and mini trees. Most of the fillers are things you already have at home or can grab for a few dollars at the craft aisle or dollar store (because nobody needs expensive supplies in December).
Whether you need a quick distraction while you finish wrapping gifts or a themed activity for a holiday playdate, these Christmas sensory bins are guaranteed to hold your toddler’s attention longer than you expect—always a win!
So grab a bin, sprinkle in some holiday fun, and watch your toddler scoop, sort, shake, and explore their way into the Christmas spirit. These 18 ideas will help you make magical memories with your littlest elves this season!
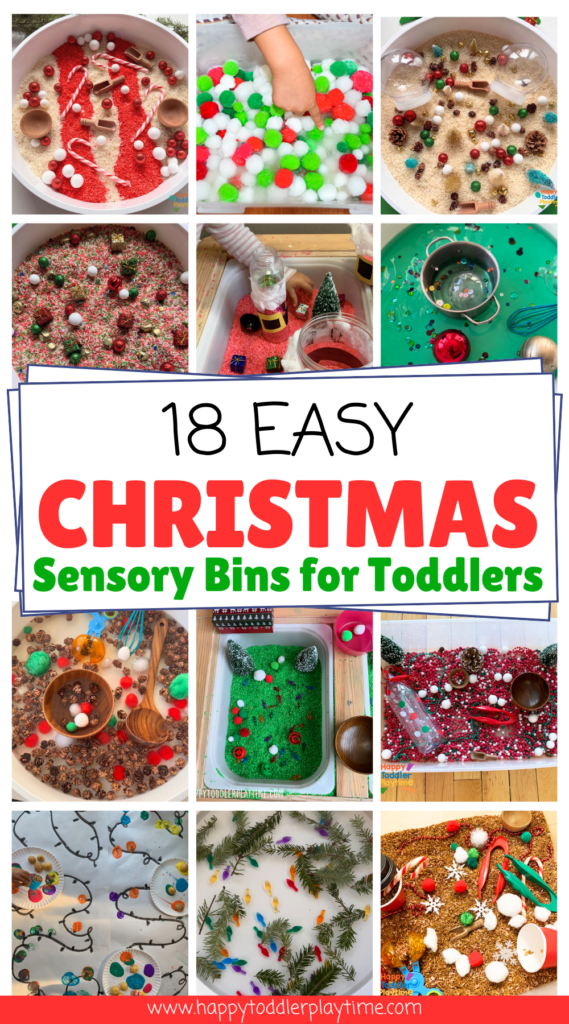
19 Simple Christmas Sensory Bins for Toddlers
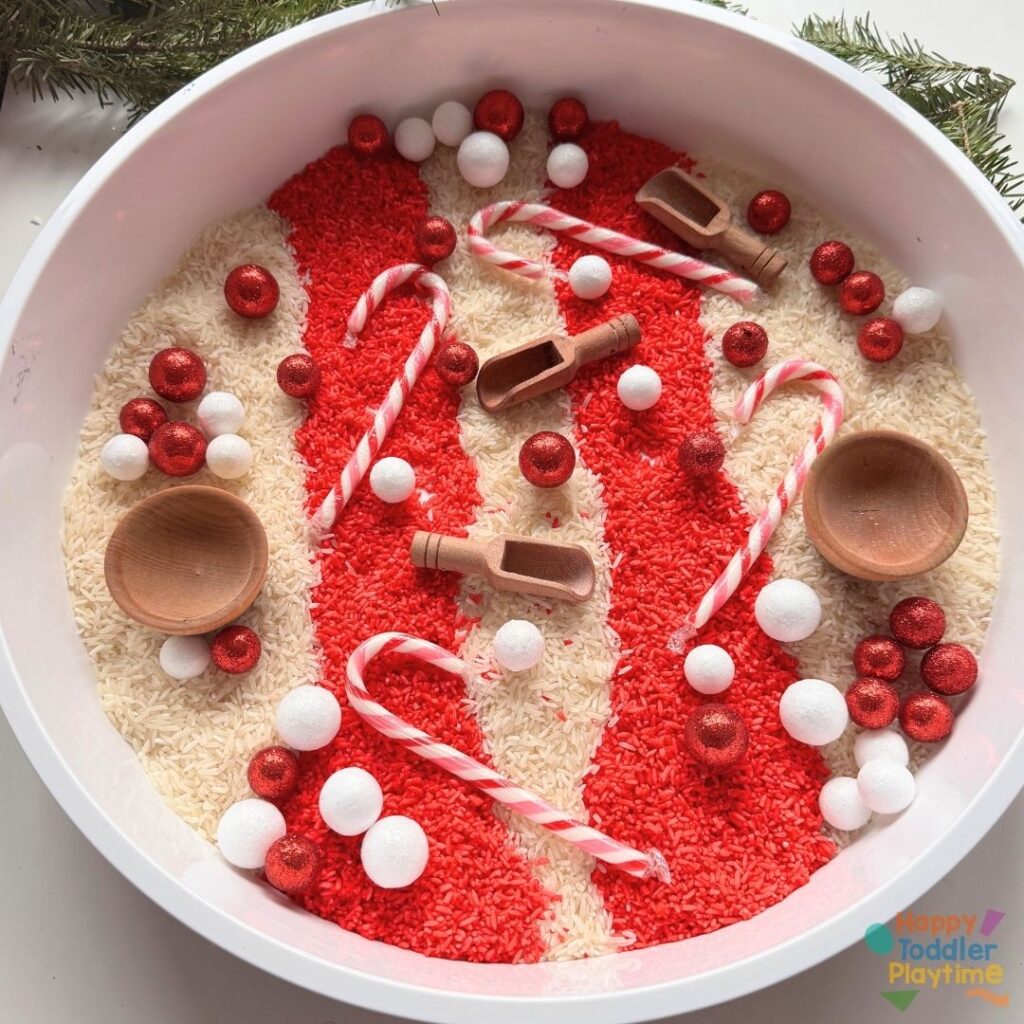
1. Candy Cane Sensory Bin
Materials You’ll Need:
- Red colored rice
- Regular white rice
- Sensory bin or shallow container
- Red and white Christmas foam balls
- Rigatoni pasta (painted with red and white stripes)
- Scoopers (measuring cups or spoons)
- Bowls
- Candy canes (optional)
- Peppermint swirl candy or decorations (optional)
How to Set Up the Candy Cane Sensory Bin
- Prepare the Rice: Dye half of the rice red by placing it in a ziplock bag with a few drops of red food coloring and a teaspoon of vinegar or rubbing alcohol. Seal the bag and shake until the rice is evenly coated. Spread it out on parchment paper to dry completely. Leave the other half of the rice white. Find the complete recipe here.
- Paint the Rigatoni: Use red and white paint to create candy cane stripes on the rigatoni pasta. Let the paint dry completely before adding the pasta to the sensory bin.
- Set Up the Sensory Bin: Pour the red and white rice into the sensory bin, alternating layers or mixing them together for a striped effect. Add the painted rigatoni pasta, foam balls, candy canes, and any peppermint swirl decorations.
- Add Scoopers and Bowls
How to Play: Encourage your kids to explore the sensory bin by scooping, pouring, and sorting the different materials.
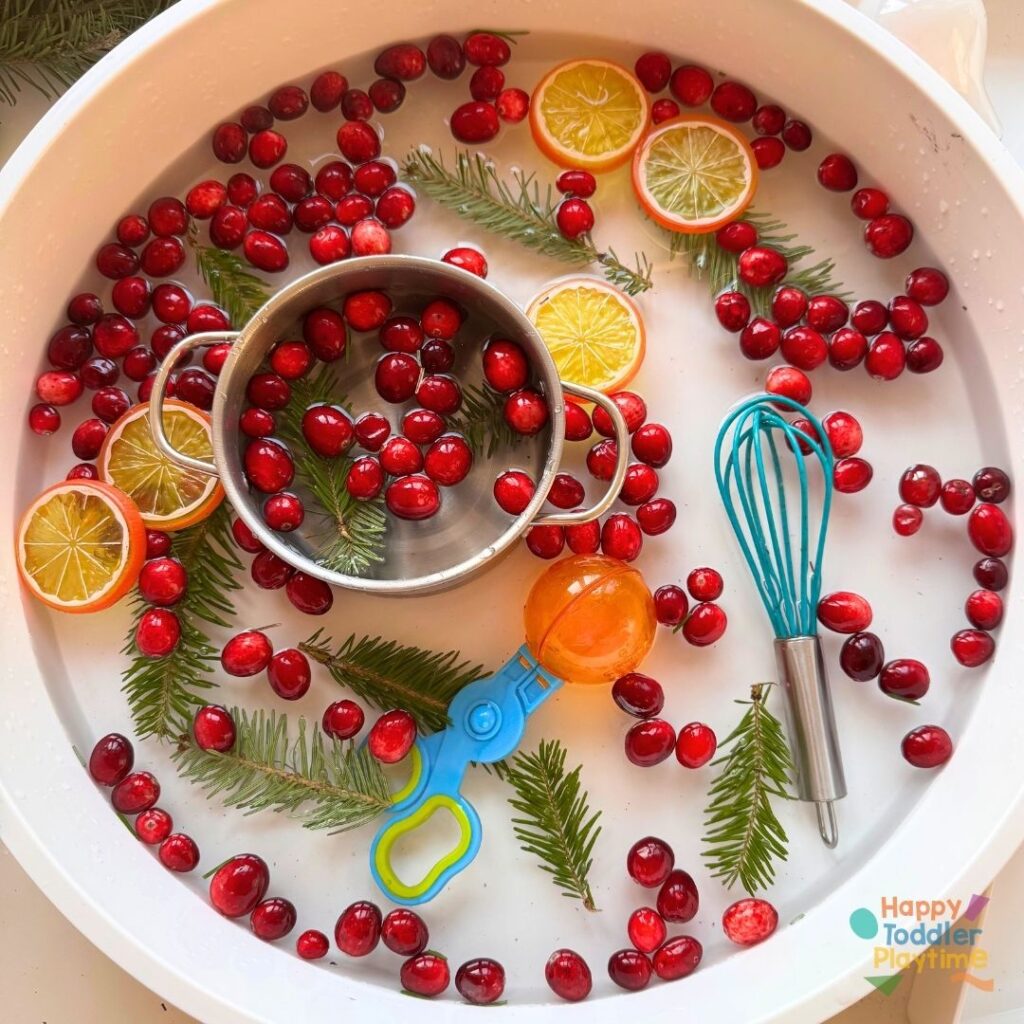
2. Cranberry Orange Christmas Sensory Bin
Materials You’ll Need:
- A sensory bin or shallow container
- Fresh cranberries
- Orange slices (real or fake)
- Pine sprigs
- Water
- Bowls, an ice cube tray, or a toy pot
- Strainer
- Scoopers and spoons
How to Set Up the Cranberry Orange Sensory Bin
- Prepare the Sensory Bin: Fill your sensory bin with a few inches of water. Add the cranberries, orange slices, and pine sprigs to the bin, spreading them out for easy access. The cranberries will float, creating a fun and dynamic element for kids to explore.
- Add Tools for Play: Place a variety of tools like bowls, an ice cube tray, a toy pot, a strainer, and scoops nearby.
- Set the Scene: Invite your child to explore the materials. They can scoop the floating cranberries, strain out the pine sprigs, or use the orange slices as pretend ingredients for a “holiday soup.” Encourage them to use their imagination and experiment with the different tools.
How My Kids Played: My kids immediately started scooping the cranberries and pretending they were cooking a Christmas feast. They loved “stirring” their pot with the pine sprigs and adding orange slices to their imaginary recipes.
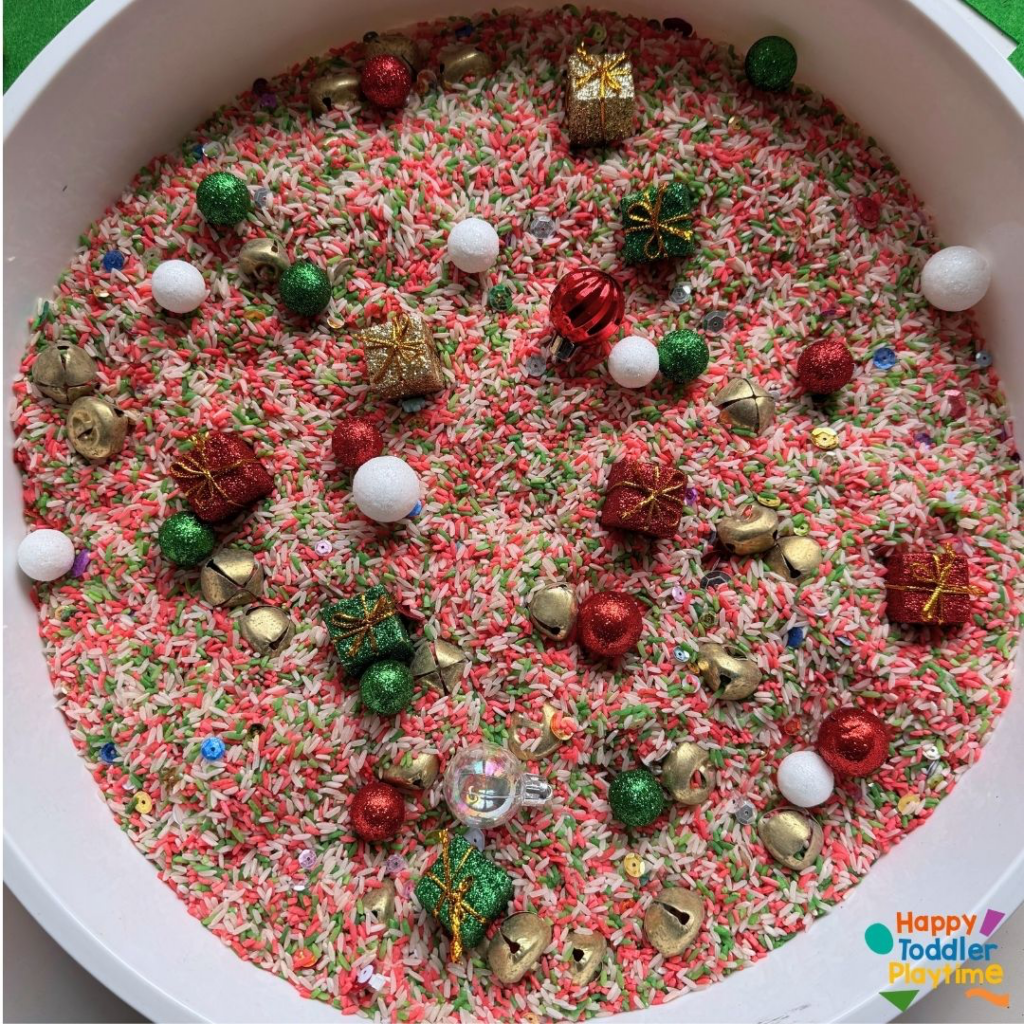
3. Christmas Sensory Bin
Materials You’ll Need:
- Red, green, and white dyed rice
- Sparkly red, green, and white foam balls
- Jingle bells
- Mini presents
- Mini wreaths
- Brush Christmas tree
- Scoopers (measuring cups, spoons, or tongs)
- Small bowls or buckets
How to Make a Christmas Sensory Bin
- Dye the Rice: Find the full recipe for easily making colored rice here. To make the colorful rice, divide uncooked rice into two separate bags or bowls. Add a few drops of red food coloring to one and green to another. Add a teaspoon of vinegar or rubbing alcohol to each bag, seal, and shake until the rice is evenly coated. Spread the rice on parchment paper to dry completely.
- Add the Rice: Pour the red, green, and white rice into the bin. You can layer the colors for a striped look or mix them all together for a festive blend.
- Add the Accessories: Scatter the sparkly foam balls, jingle bells, mini presents, mini wreaths, and a brush Christmas tree throughout the bin. Place scoopers and small bowls or buckets nearby for play.
- Set It Up: Invite your child to explore the bin, encouraging them to scoop, pour, sort, and discover all the fun items. You can even challenge them to count the jingle bells, group the foam balls by color, or make a little “scene” with the mini wreaths and tree.
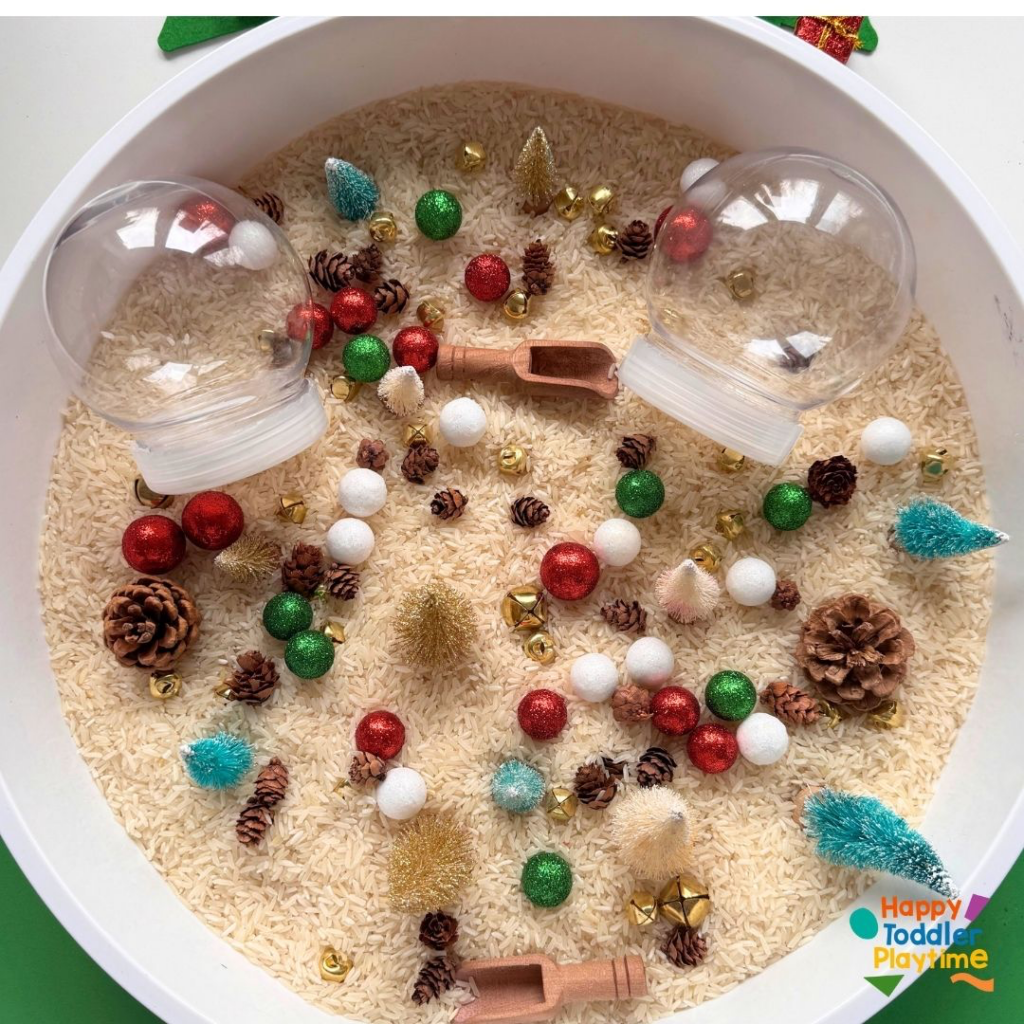
4. Snow Globe Sensory Bin
Materials You’ll Need:
- A sensory bin or shallow container
- White rice (uncooked)
- Small brush trees
- Mini pine cones
- Jingle bells
- Foam balls
- Scoopers (measuring cups or small spoons work great)
- DIY plastic snow globes
How to Set Up the Snow Globe Sensory Bin
- Prepare the Sensory Base: Pour white rice into your sensory bin to create a snowy base. Spread it out evenly to cover the bottom of the bin.
- Add the Snow Globe Elements: Scatter the small brush trees, mini pine cones, jingle bells, and foam balls throughout the rice. These items represent all the fun details that go into a snow globe.
- Include Tools and Accessories: Place scoops, spoons, and the DIY plastic snow globes in the bin. These tools will help kids fill and create their snow globes.
- Invite Kids to Play: Set the bin up on a flat surface and encourage your kids to explore the materials. Show them how to scoop the rice and add the accessories into the snow globes to design their own winter scenes.
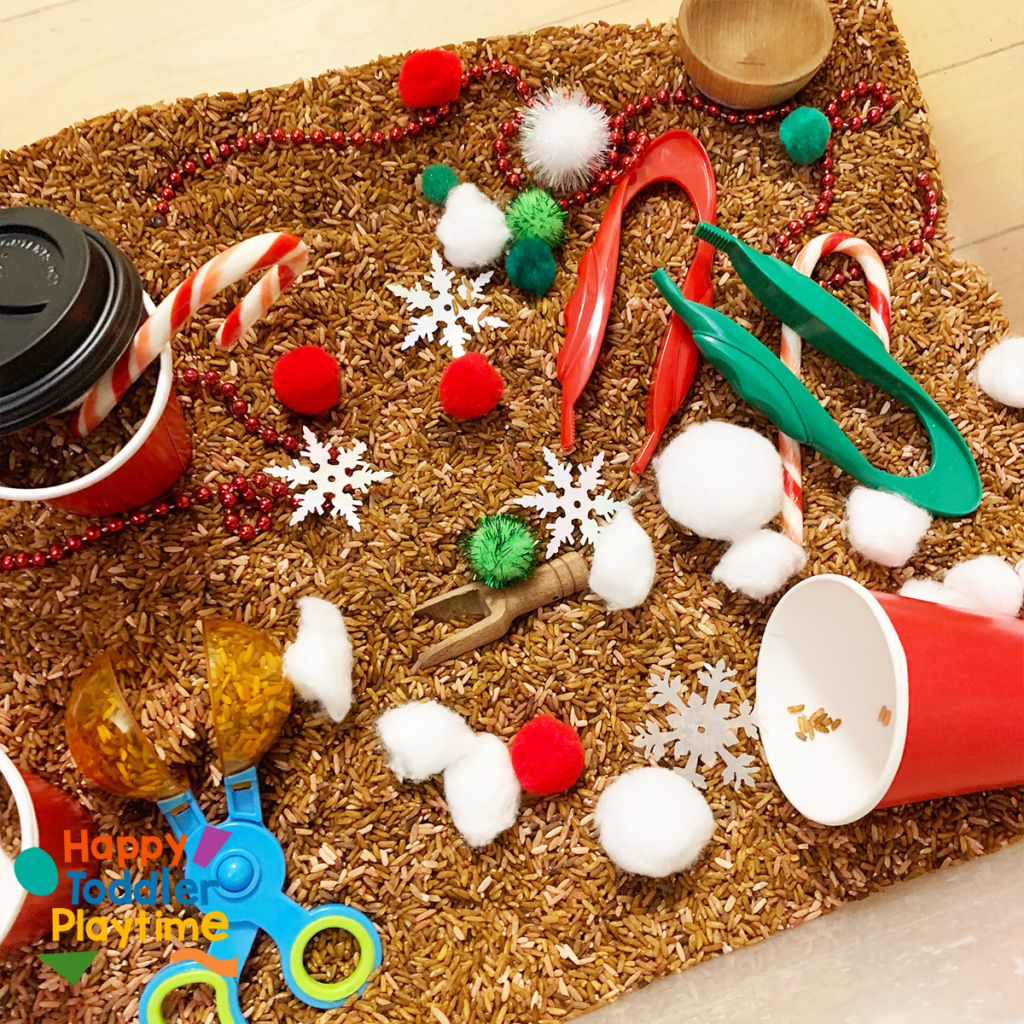
5. Hot Chocolate Rice Sensory Bin
Supplies for Colored Rice
- 1 Cup of White Rice
- 1/2 tsp White Vinegar
- Several Drops of Brown Gel Food Coloring
- Large Ziploc Bags
- Parchment Paper
- Baking Sheets or Tupperware containers
How to Make Colored Rice
- Combine the rice, white vinegar and food coloring in a Ziploc bag.
- Seal it carefully and mix the contents throughly.
- Repeat for each color.
- Lay a sheet of parchment paper on a baking sheet or line a Tupperware container.
- Spread the colored rice out on the parchment paper and allow it to dry overnight.
How to Make a Hot Chocolate Rice Sensory Bin
- Add the brown rice to the sensory bin.
- Add white pom poms, cotton balls and/or foam balls.
- Add paper cups, tongs, scoopers and spoons.
- Add candy canes (if you have them).
- Add red pom poms and jingle bells.
- Add snowflakes.
- Invite your little one to play and enjoy!
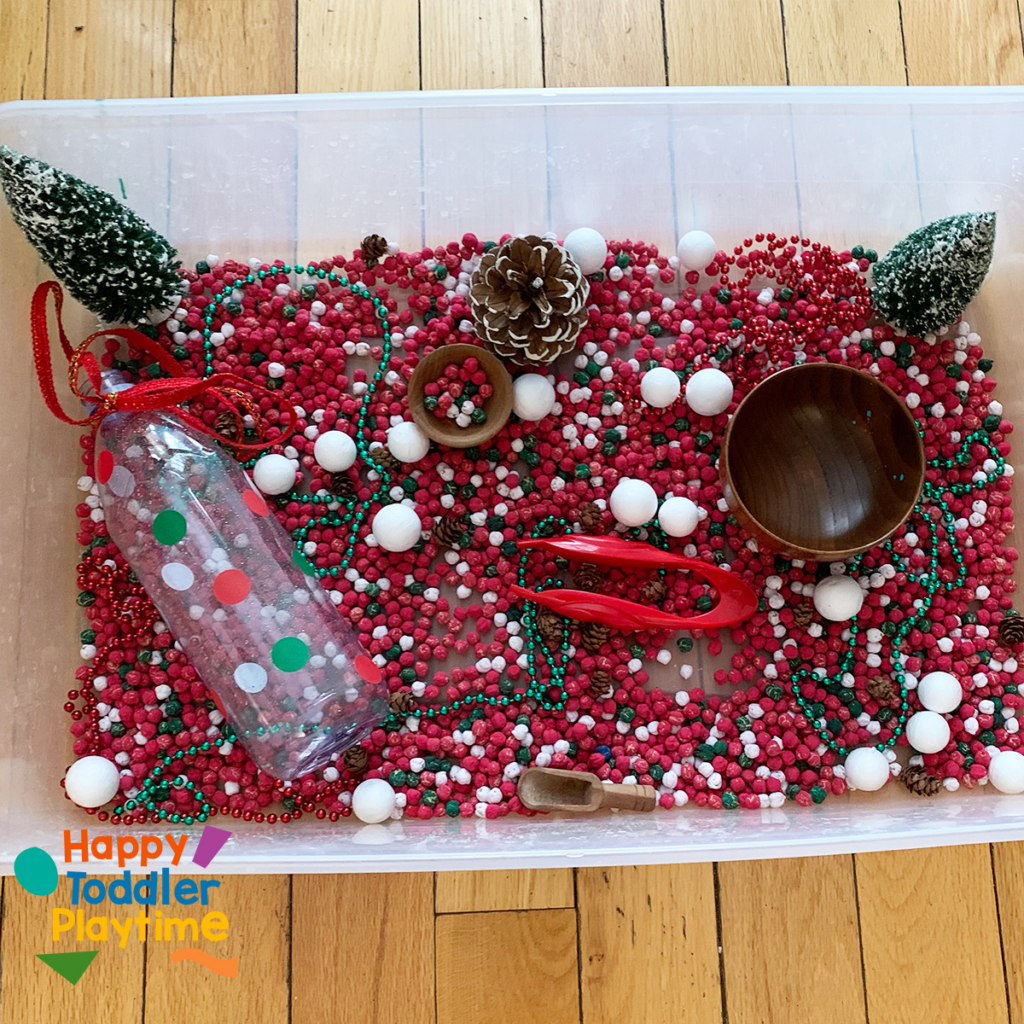
6. Christmas Chickpea Sensory Bin
How To Make A Christmas Chickpea Sensory Bin
How to Colour Chickpeas
- Use acrylic paint to dye your chickpeas. But if you don’t have acrylic paint you can use tempera paint or even food colouring however, if you use either it may transfer to your child’s hands during play. U
- Grab a bag of chickpeas and divide it into 3 portions and separate them into large ziplock bag.
- Add couple of squirts of red and green and white paint, into each bag respectively. Seal the bag and shake and massage until evenly disturbed.
- Open the bag and check the colour has been distributed evenly and add more paint as necessary.
- Once your chickpeas have the desired colour, open the bag and spread our your chickpeas on a sheet of parchment paper or plastic bag to dry. Let the chickpeas air dry for about 1 hour (it may take more time).
- Once they are dry they are ready to play with!
Set up the ChickPea Christmas Sensory Bin
- Grab your sensory bin and add your colure chickpeas. You can add each colour separately and invite your child to mix them up.
- Add wooden bowls in various sizes and scoopers and spoons.
- Add a bottle and decorate it with dot stickers or washi tape.
- Add some small white foam balls and green and red party necklaces.
- Add some winter tree decorations and pinecones, small and big.
- Invite your little one to play!
7. Santa Sensory Bin

Materials
- Sensory Bin or Sensory Table
- Red Coloured Rice (see recipe above)
- Mini presents
- Colourful bowls
- Scoopers or spoons
- Miniature Pine Trees
- Clear water bottle
- Clear Tape
- Cotton Balls
- Black and yellow construction paper
- glue and scissors
How to Set Up Santa Sensory Bin
- First make you Santa bellies: Cut out Santa belt from construction paper and glue to water bottle. Wrap clear tape around the top of the water with the sticky side out. Stick cotton balls on the tape.
- To set up this sensory bin, grab all your supplies. Add the green coloured rice and add Pom Poms, caps and lights. Also include colored bowls for sorting, tongs for fine motor practice and spoons.
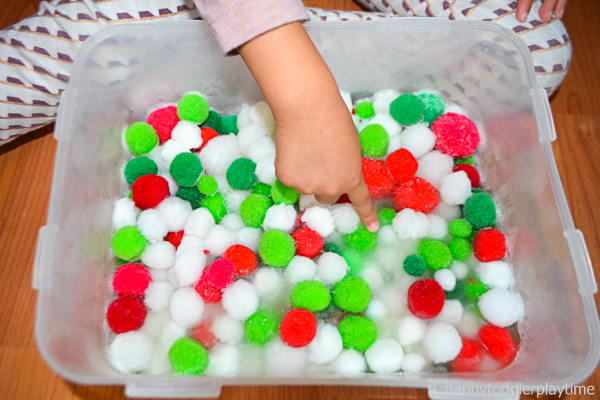
8. Frozen Pom Poms
Supplies
- Pom Poms
- A sensory bin or shallow container
- Ikea Trofast Toy Storage Box White, Medium
- Large plastic container
- Squeeze Bottle
- Paint Brush
- Colourful Bowls
- Towel
Set Up
Put your pom poms into a small sensory bin or plastic container that will fit into your freezer, add water and let them soak. I let mine soak for a few hours simple because I forgot about them but about 10-15 minutes should be enough. I did not completely cover the pom poms in water. The ones on the bottom were submerged but the ones on the top were not. I just made sure that they were all good and soaking wet before I put them into the freezer over night.
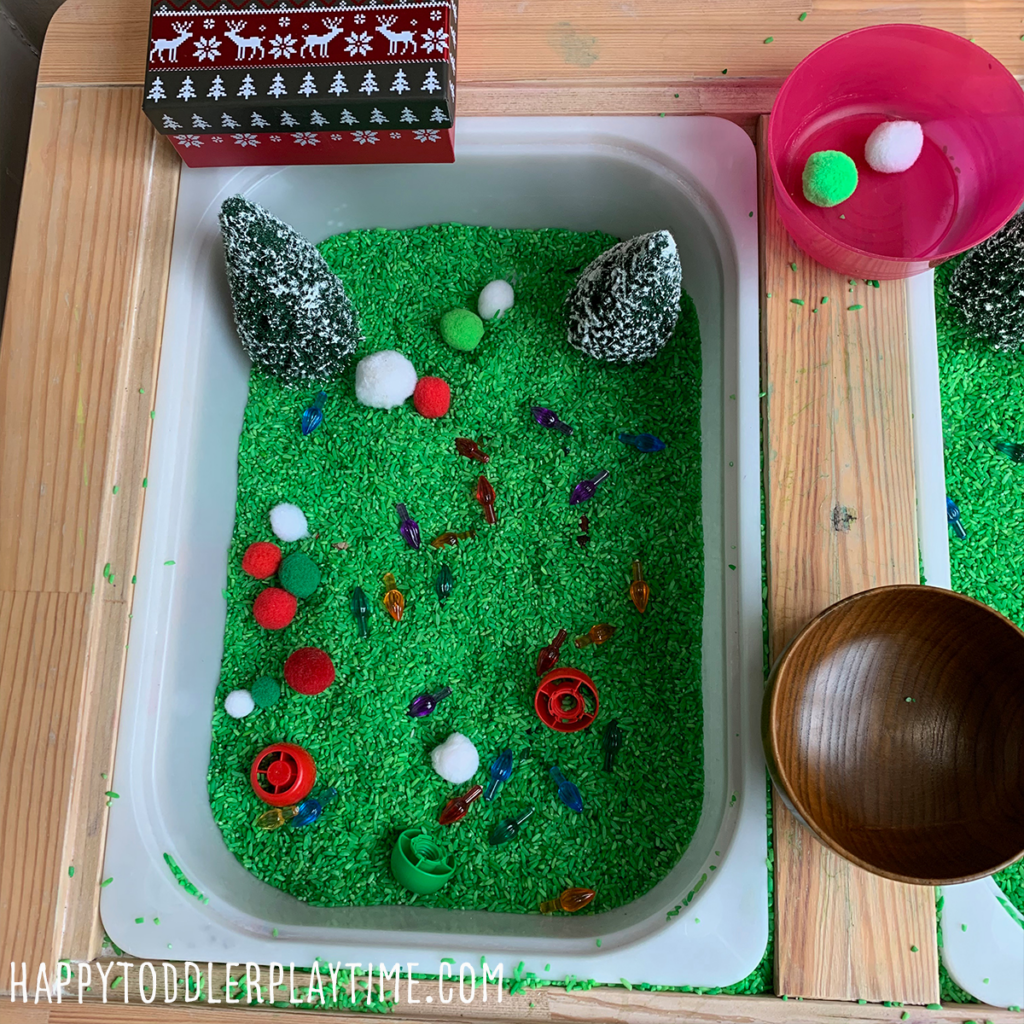
9. Christmas Tree Sensory Bin
Supplies
- Sensory Bin or Sensory Table
- Green Coloured Rice (see recipe above)
- Plastic Christmas Lights
- Red, green and white pom poms
- Red, green and white squeeze pouch caps
- Colourful bowls
- Tongs
- Miniature Pine Trees
How to Set Up Christmas Tree Sensory Bin
- To set up this sensory bin, grab all your supplies. Add the green coloured rice and add Pom Poms, caps and lights. Also include colored bowls for sorting, tongs for fine motor practice and spoons.
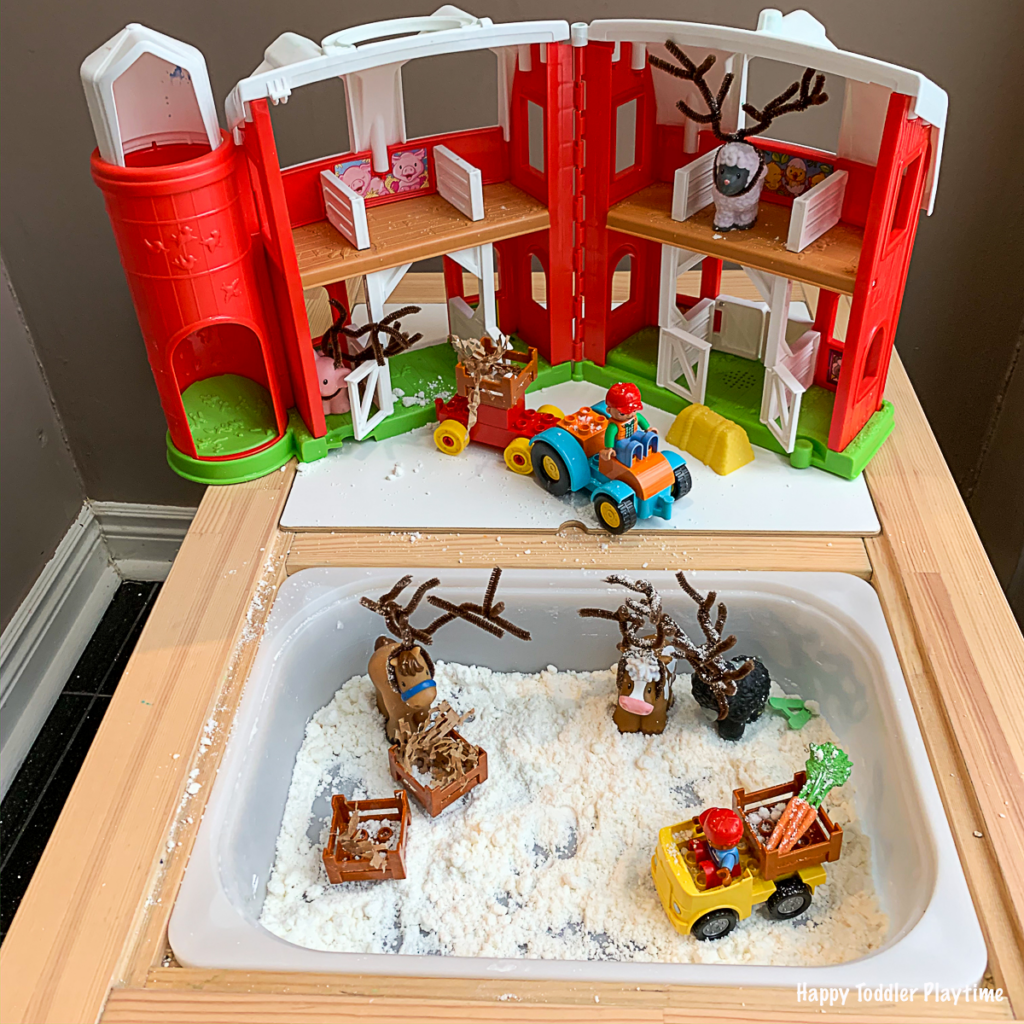
10. Reindeer Farm Sensory Bin
Supplies
- Toy Farm Animals
- Brown Pipe Cleaners
- Toy Barn
- 41 Qt, Clear Sensory Bin (Large) or a IKEA FLISAT Children’s Sensory Table
- Ikea Trofast Toy Storage Box White, Medium
- Farm Toys such as tractors and farmers
- Water
- Corn Starch
- Baking Soda
How to Set up Reindeer Farm Sensory Bin
- Find my easy two ingredient fake snow recipe here.
- Create Your Reindeers: To make the reindeer antlers use brown pipe cleaners. Twist a full size pipe cleaner around the head of the animal. Cut one pipe cleaner into four pieces and twist them around the first pipe cleaner. I used horses, cows and sheep for my reindeers.
- Setting up Your Reindeer Farm Sensory Bin: Put your fake snow in the sensory bin or sensory table and add your farm reindeer animals. Set out your toy barn either inside the sensory bin with the fake snow or on your sensory table. Add your other farm toys such as toy tractors and farmers.
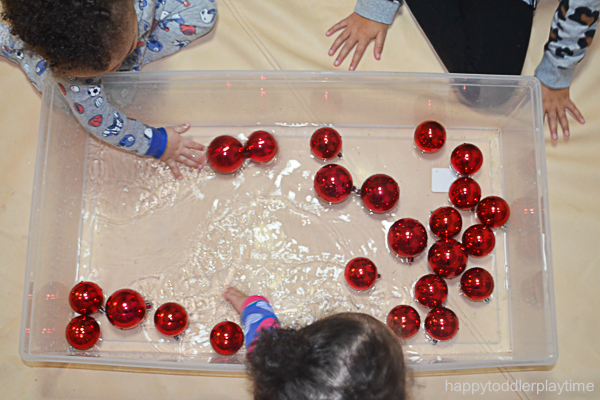
11. Simple Christmas Sensory Bin
Supplies
- 41 Qt, Clear Sensory Bin (Large)
- Shatterproof Christmas baubles
- Large Plastic tablecloth
How to Set Up this Simple Christmas Sensory Bin
- Grab you large sensory bin and fill it with about an inch of water.
- Next, I added about 10-15 shatterproof Christmas baubles. I used ones that did not have any glitter on them or anything that could come off in the water.
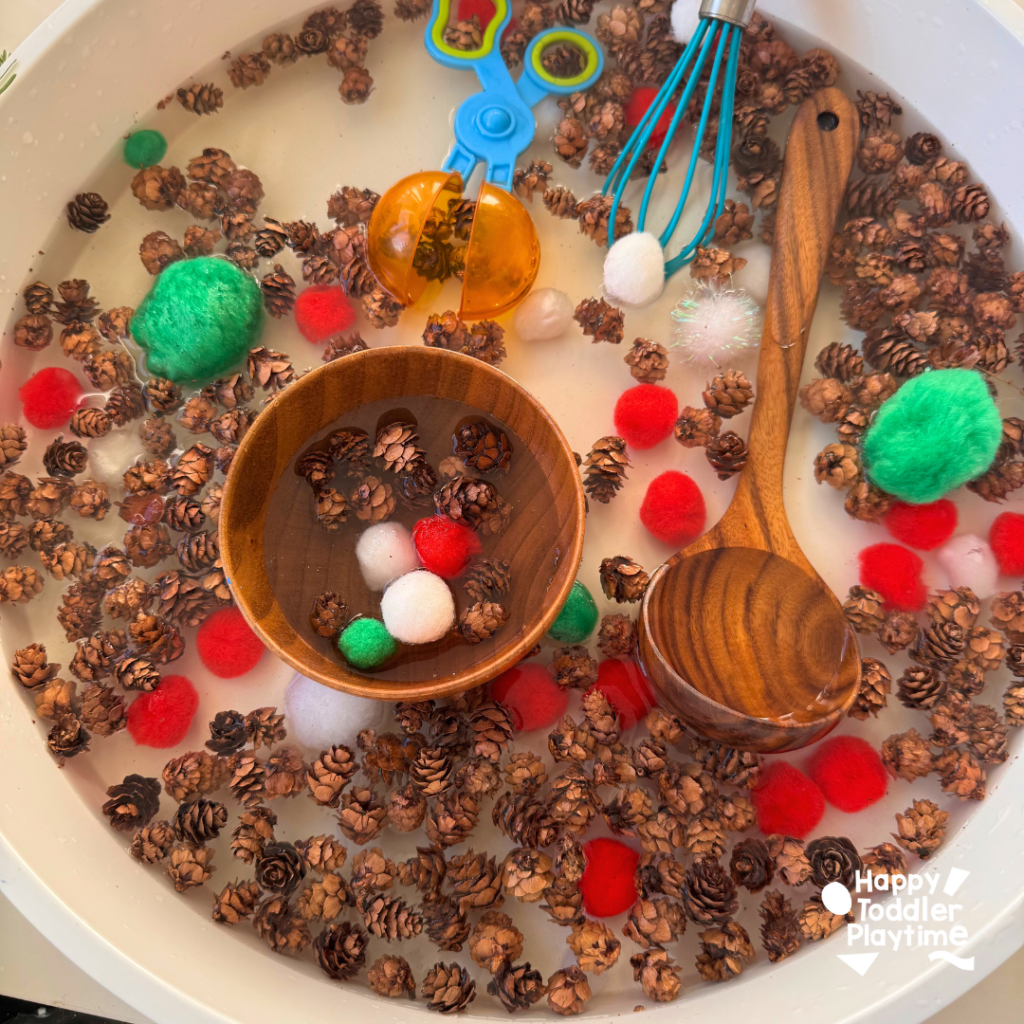
12. Pine Cone Sensory Bin
Materials
- Sensory bin or storage bin
- Mini pine cones
- Red, green, and white pom poms
- Water
- Scoops, ladles, or measuring cups
- Whisk
- Small bowls or containers
Safety reminder: Always supervise children with small parts and water.
Set Up Instructions
- Fill your bin with a shallow amount of water — just enough for scooping and pouring fun.
- Add the pine cones to the water and watch them float (they may sink as they soak up water — bonus science!).
- Sprinkle in pom poms for Christmas colors and visual appeal.
- Place scoops, bowls, and a whisk beside the bin to invite play.
- Optional: Add a drop of peppermint extract or a pinch of cinnamon for a seasonal scent.
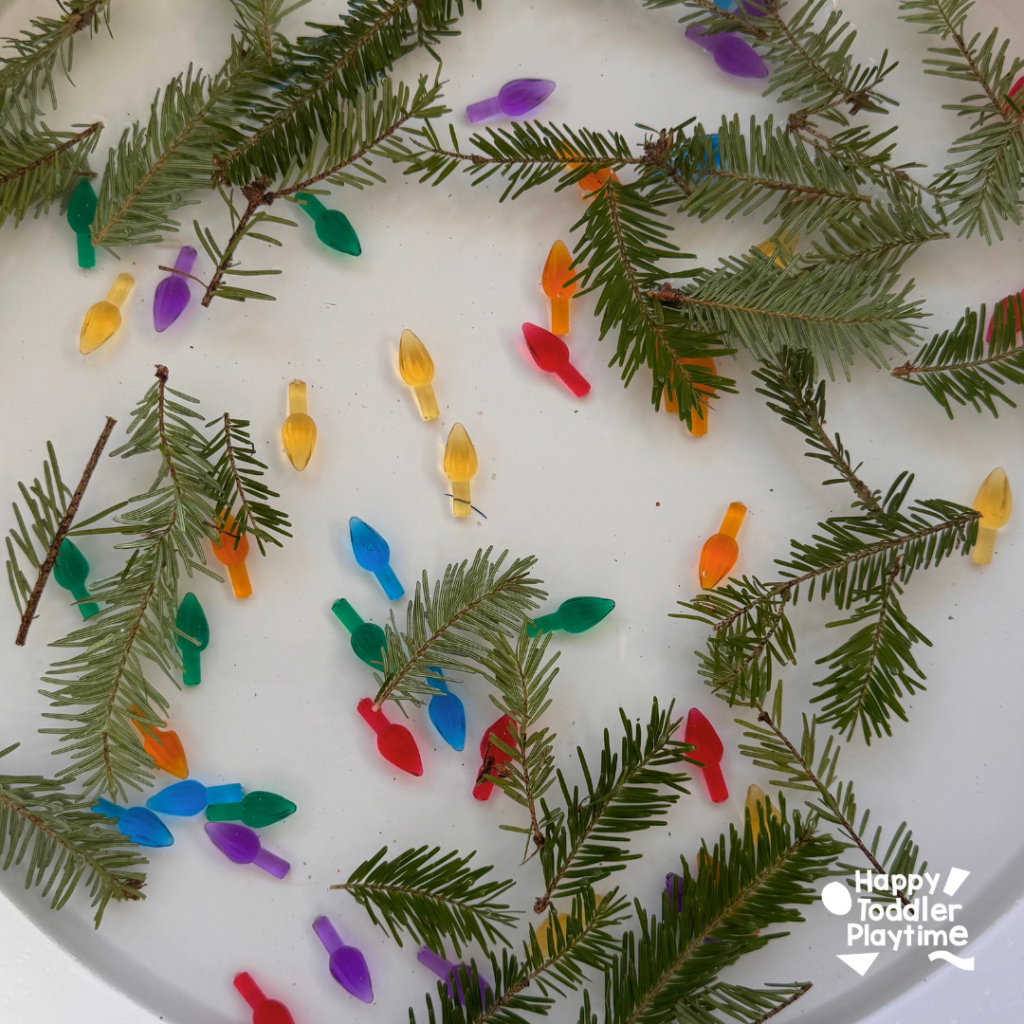
13. Christmas Tree Soup Sensory Bin
Materials
- Sensory bin or shallow storage bin
- Small clippings from a real Christmas tree (pine branches or needles)
- Plastic play Christmas lights or holiday-themed loose parts
- Water
- Scoops, ladles, small bowls, or cups
- Optional: tongs, cinnamon sticks, jingle bells, glitter confetti
Supervision Reminder: Always watch little ones around water and small pieces.
How to Set Up
- Fill the sensory bin with a shallow layer of water — just enough for scooping and pouring.
- Add pine branches or clippings. They will float at first and slowly sink as they absorb water, which kids love watching.
- Sprinkle in plastic Christmas lights and any other safe holiday loose parts.
- Set out scoops, bowls, and tongs to invite pretend cooking and transferring.
- Encourage your child to mix, scoop, and create their own “Christmas tree soup!”
14. Ornamant Soup Sensory Bin
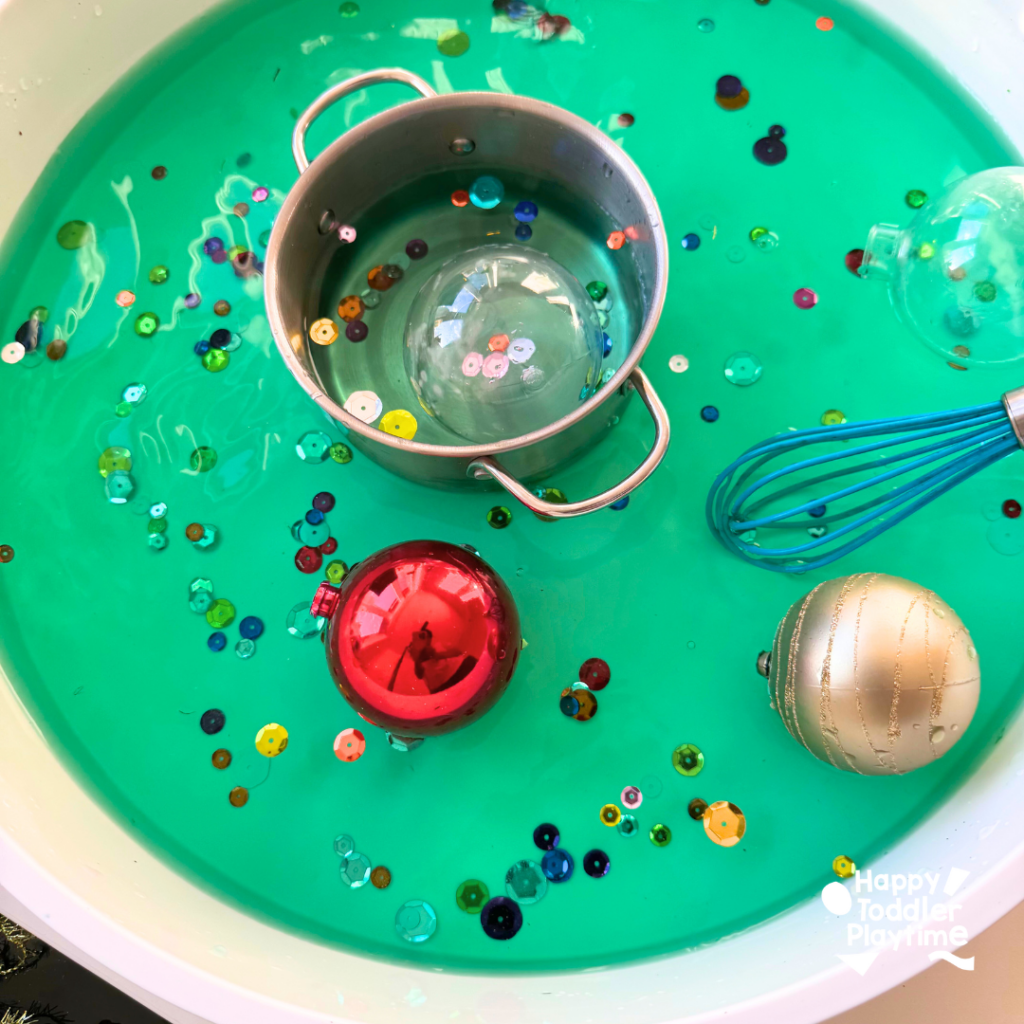
Materials:
- Sensory bin or large plastic container
- Clear plastic Christmas ornaments (shatterproof)
- Water
- Green food coloring
- Sequins or holiday confetti (optional)
- Scoops, ladles, measuring cups, bowls
Optional add-ins: jingle bells, ribbon bows, holiday pompoms, bottle brush trees
How to Set Up:
- Fill your sensory bin with a shallow layer of water.
- Add a small drop of green food coloring and mix to tint the water like festive “soup.”
- Sprinkle in sequins or confetti to give the water a sparkly Christmas look.
- Place the clear plastic ornaments into the bin — they will float for easy scooping and stirring.
- Set out scoops, spoons, and bowls to encourage pouring, transferring, and pretend play.
15. Snow Truck Sensory Bin
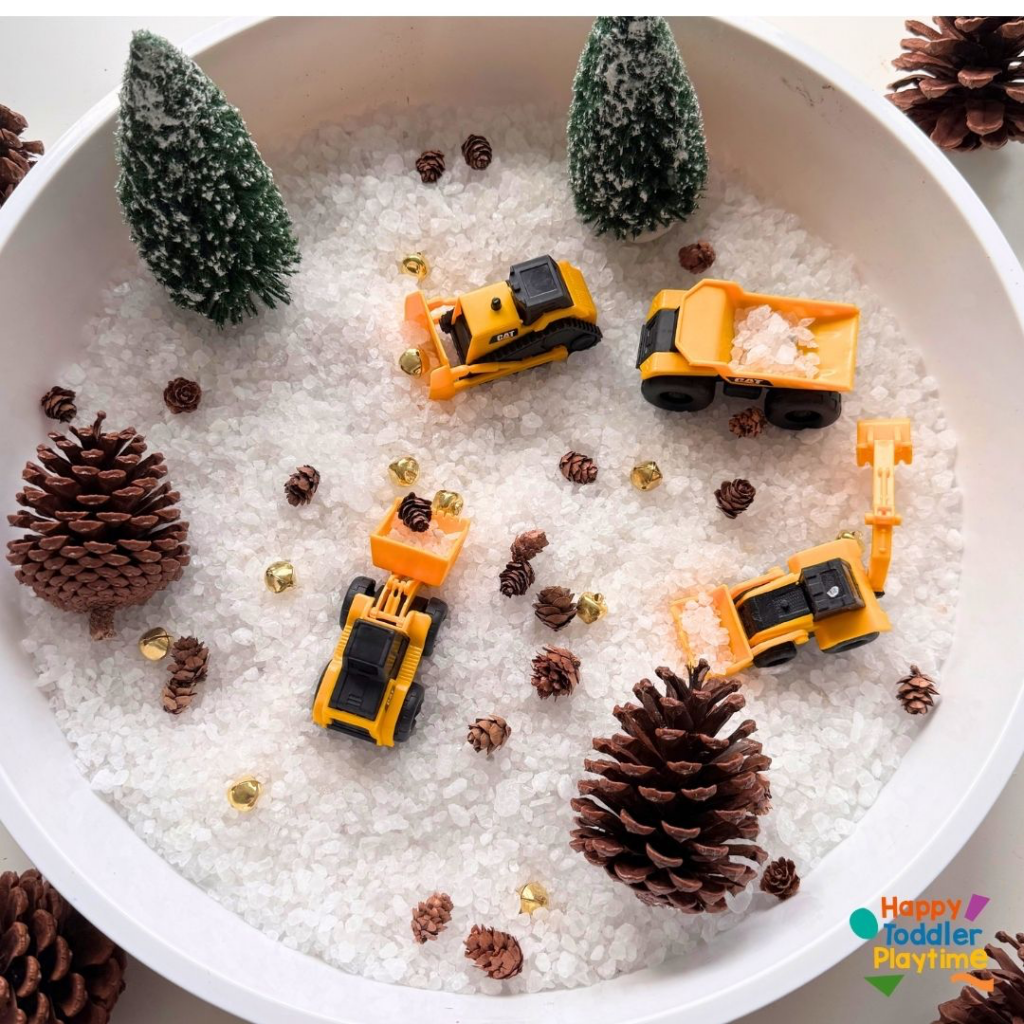
Materials You’ll Need:
- Rock salt (to create the “snow”)
- Toy trucks (dump trucks, loaders, or any construction vehicles)
- Bottle brush trees
- Pine cones (various sizes)
- Jingle bells
How to Set Up the Snow Trucks Sensory Bin:
- Prepare the Snow Base: Pour rock salt into a large sensory bin or shallow container. Spread it out evenly to create a snowy base. This will give the trucks a realistic surface to “drive” on.
- Add the Winter Details: Scatter bottle brush trees and pine cones throughout the bin to create a winter scene. Use a mix of large and small pine cones to add variety.
- Include Jingle Bells: Toss in a handful of jingle bells for an extra festive touch. These can act as “cargo” for the trucks to haul or add a fun auditory element as kids play.
- Add the Trucks: Place the toy trucks in the bin. Encourage your child to use the trucks to scoop, push, and transport the salt, bells, and pine cones.
- Set the Scene: Invite your child to play and explore. You can suggest ideas like building a snowy road, delivering pine cones to a “forest,” or loading the jingle bells into a truck for delivery.
16. Christmas Baking Sensory Bin
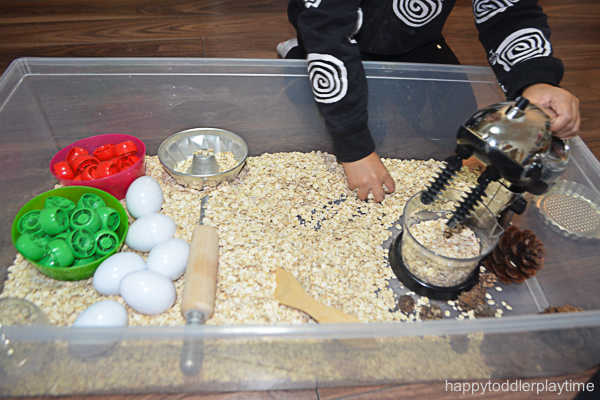
Materials
- Oats (as the sensory base)
- Toy baking tools (measuring cups, spoons, mini muffin tray, cookie cutters)
- Mini pine cones
- Red and white squeeze-bottle caps
- Small bowls or containers
How to Set Up:
- Pour a generous layer of oats into your sensory bin.
- Add toy baking tools around the edges to invite scooping, measuring, and pouring.
- Sprinkle in mini pine cones and red + white bottle caps as “holiday ingredients.”
- Encourage your child to bake Christmas cookies, muffins, and pretend treats.
Ready for festive pretend kitchen play!
17. I-Spy Christmas Sensory Bin

Materials:
- Sensory bin
- Frozen or dried green peas (as the base)
- Small Christmas items: mini ornaments, jingle bells, bows, small pine cones, tiny candy canes, buttons, etc.
- Small scoop or tongs (optional)
How to Set Up & Play:
- Pour green peas into the sensory bin to create a festive background.
- Hide Christmas items throughout the bin, making some easy to find and others tucked deeper inside.
- Give kids a picture checklist or simple verbal prompts (“Can you find the red bow?”).
- Kids search, scoop, and sort the items they find — boosting fine motor + observation skills!
18. Christmas Tubes Sensory Bin
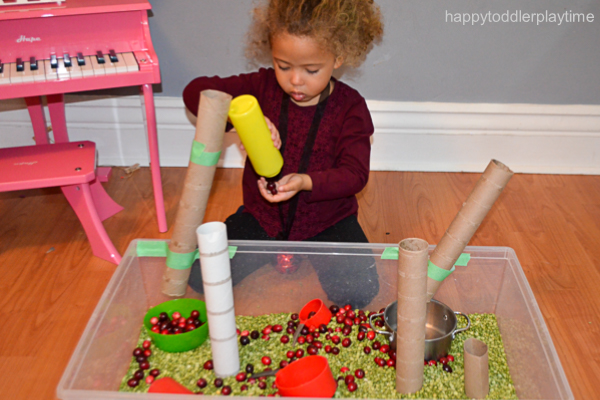
Materials:
- Sensory bin
- Green peas (as the sensory base)
- Fresh cranberries
- Scoops, spoons, and small cups
- Toilet paper rolls
- Tape
How to Set Up & Play:
- Fill your sensory bin with green peas.
- Add cranberries throughout the bin for a Christmas color pop.
- Tape toilet paper rolls upright to the inside edges of the bin to create fun drop-tubes.
- Invite kids to scoop peas and cranberries, then drop them through the tubes and watch them pour out the bottom.
- Encourage sorting, transferring, and counting for playful fine motor learning!
Play2Learn Toddler & Preschool Programs for Curious Toddlers
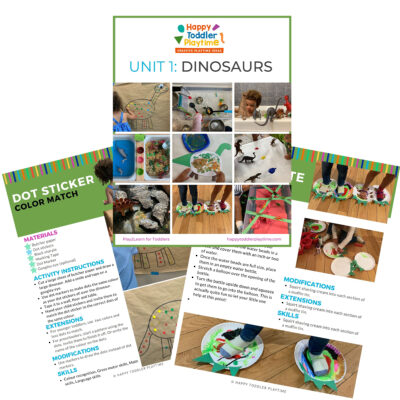
There is no limit to your toddler’s energy and curiosity. That energy and curiosity although a joy can be challenging at times. Their interest in just about everything around them is what makes them great learners. One and two year olds can soak up so much just from their senses!
But as a teacher or parent that thirst for learning can be exhausting. That is why I created this toddler and preschooler program. To help you get the most out of this time with your curious toddler without having to come up with creative ways to play and interact with them.
Play2Learn for Toddlers includes 20 Units for toddlers. Each 2-week toddler unit has 20 super easy to set up and engaging activities for toddlers 18 months to 3 years.
Play2Learn Preschool which includes 20 Units for preschoolers. Each 2-week preschoolers unit has 20 unique and easy to set up and engaging activities for preschoolers 3 years to 5 years. That’s over 800 learning activities for your toddler and preschooler at your fingertips! So many ideas you and your child will never be bored again!
These toddler and preschool lesson plans and activities will definitely keep you and your toddler and preschooler busy playing and learning!
Click here for more information: Play2Learn
Book: Exciting Sensory Bins for Curious Kids
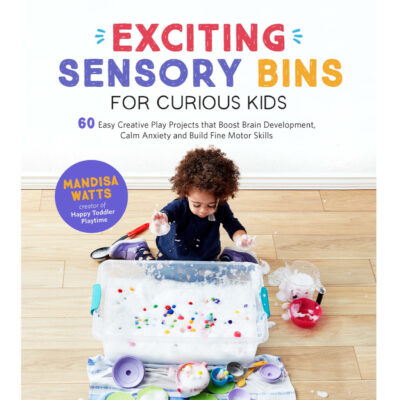
Did you know I wrote a book of sensory bins? Click here for more information Exciting Sensory Bin for Curious Kids. Or grab your copy at Amazon.
Boring afternoons are made exciting with awesome animal-based bins, like Salty Shark Bay or Yarn Farm. Pretend play bins like Birthday Cake Sensory Play or Bubble Tea Party encourage creativity and imagination. And your kids will have so much fun they won’t even know they’re getting smarter with STEAM (science, technology, engineering, art and math) activities like Sink or Float Soup, Magnetic Letter Hunt or Ice Cream Scoop and Count.
Designed for toddlers 18 months and up.
Book: Super STEAM Activity Book for Kids
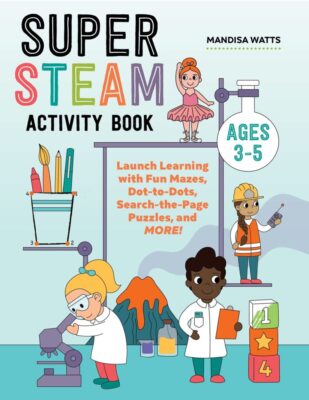
Learning all about science, technology, engineering, art, and math sets kids up for scholastic success―and it can be so much fun! Watch kids enjoy building STEAM skills as they color friendly fish, help water find its way to tree roots, solve math problems with mazes, and more.
Find out more and grab your copy here.
Designed for preschoolers 3 years old and up.
Book: Big Book of Riddles for Kids
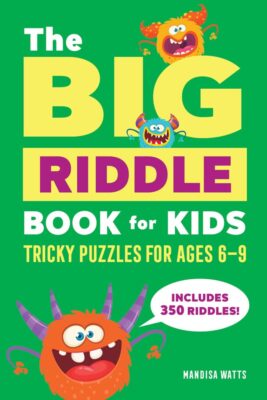
Riddle me this: What’s an exciting way to practice critical thinking while having a blast? The Big Riddle Book for Kids, of course! From hilarious puns to tough brain teasers, kids can build problem-solving skills with hundreds of riddles tha. t show them how to think outside the box.
- 350 riddles for kids—Have hours of fun with riddles, puns and jokes, and math and logic puzzles that’ll get their wheels turning!
- Level up their skills—Riddles get trickier as kids progress through the book, challenging them as they get better at solving puzzles!
- Double-check their work—Kids can check their answers in the back of the book with a handy answer key.
Help children expand their minds while having fun with this puzzle book for kids!
Designed for kids ages 6 years old and up.
TV Show: Curious Crafting
I’m so excited to share my crafting TV show Curious Crafting which launched in July 2022 on TVOkids and TVOkids YouTube! Season 2 aired in August 2023! My show was also nominated in 2023 for Best Live Action Preschool Series by the Youth Media Alliance Awards of Excellence.
Curious Crafting Season 1 is also now airing in Australia on ABC! Watch it here!
Set in the ultimate crafting space, Curious Crafting is a short form pre-school age series about the joy of making crafts. I lead a rotating cast of adorable little preschoolers (including my own) making magic out of common household objects.
In each episode we transform recycled items into magical crafts like a milk carton school bus, paper bag puppet or cotton pad turtle. The crafters learn and laugh their way through each activity while demonstrating what their young imaginations can create.
Curious Crafting shares the adventure and joy of making art with takeaway lessons for creating crafts at home.
This show designed for toddlers and preschoolers 2.5 years old and up.