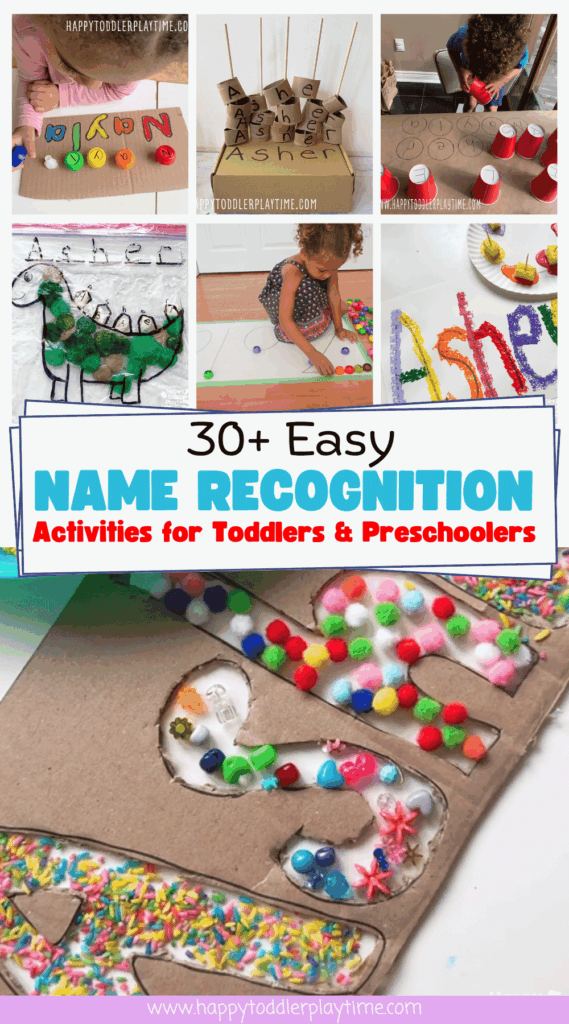

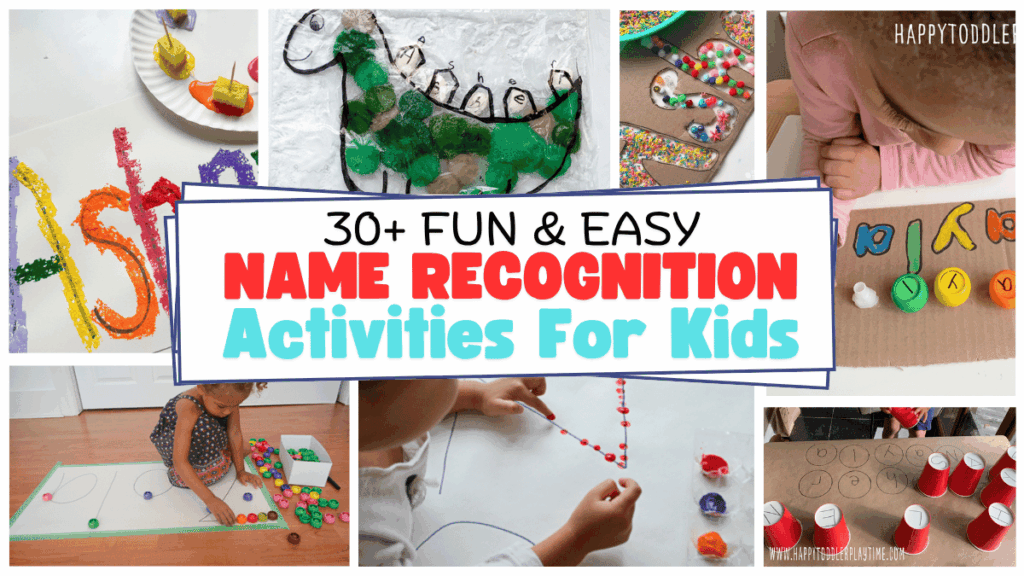
Looking for fun, hands-on name recognition activities for your toddler, preschooler or kindergartener to naturally learn their name before starting preschool or kindergarten? Check out these more than 30 name recognition activities, crafts and ideas your child will enjoy!
One of the very first steps in early literacy—and one of the most exciting milestones for preschoolers—is learning to recognize their own name. For many kids, their name is the very first word they ever read or write. And honestly? That makes sense. Their name is theirs. It’s personal, familiar, and loaded with meaning, even before they understand what a letter is.
So when should you start working on name recognition? Honestly, earlier than you think—but in a very playful way. As early as age two, toddlers begin noticing letters, especially if their name is visible in their environment. Around age three, most preschoolers are developmentally ready to start recognizing the individual letters in their name, and by four or five, many are eager to learn how to write it.
But here’s the thing: the best way to teach your child their name is not through tracing sheets or flashcards. What really helps preschoolers connect with letters and language is hands-on, meaningful, real-world exposure. That’s where name recognition activities come in.
These activities are designed to give preschoolers and kindergartners repeated, playful exposure to the letters in their name—using materials they can touch, build with, paint on, and explore. They build fine motor skills, support letter-sound awareness, and help kids understand that letters come together to make words. Better still, these kinds of experiences lay a solid foundation for later reading and writing skills in kindergarten and beyond.
Name Recognition Activities
In this post, you’ll find a giant list of engaging name recognition activities and crafts that combine fun with foundational learning. Whether you’re just starting to introduce your toddler to the letters in their name or helping your pre-K child get ready to write it independently, these hands-on ideas are developmentally appropriate, easy to set up, and incredibly effective.
You’ll find activities that use blocks, stickers, sensory bins, art, and movement—because no two kids learn in the same way, and variety keeps it fun.
WANT MORE…100+ Fine Motor Activities & Crafts for Toddlers and Preschoolers
Tips: For younger toddlers, drawing dots for them to trace the letters of their name can be very helpful. Older preschooler and kindergarteners might enjoy writing the letters themselves.
1. Name Sticky Board
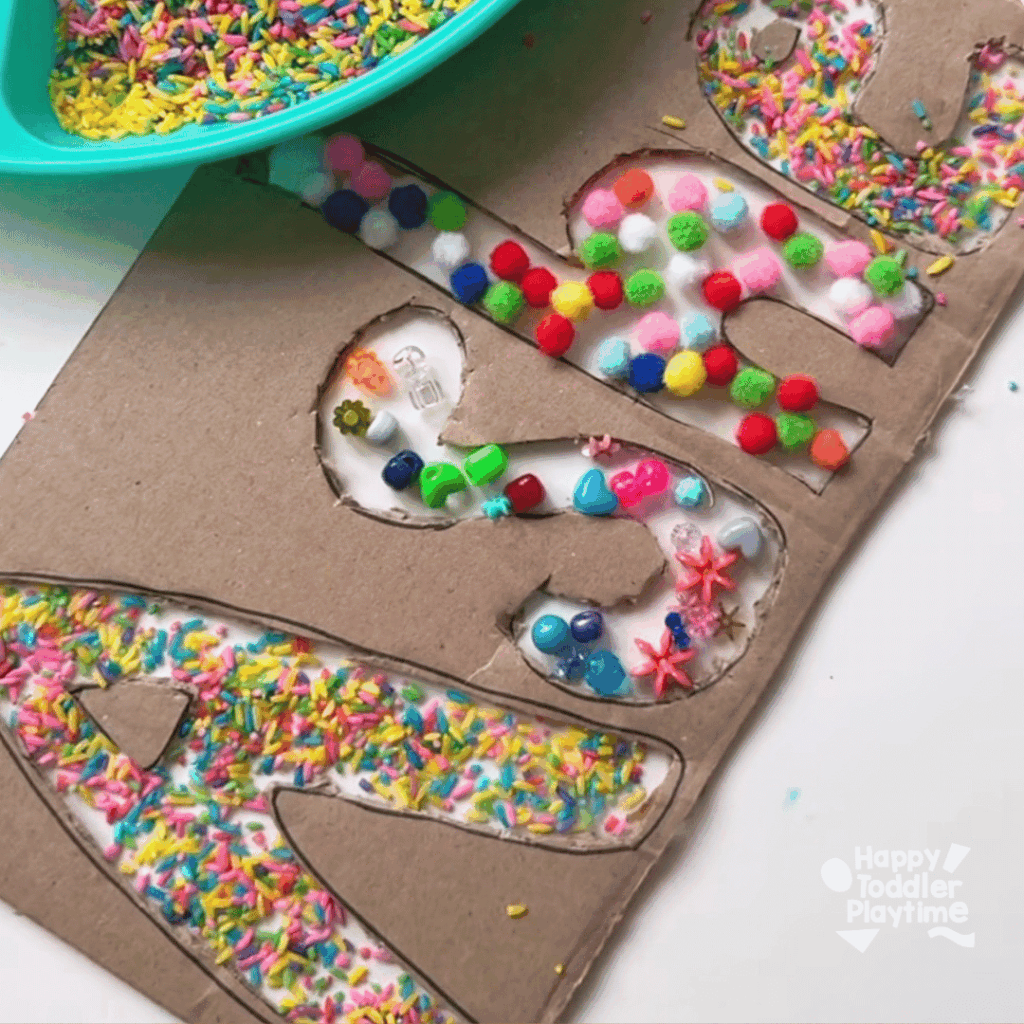
This cardboard name recognition activity is the perfect name craft for any toddler or preschooler learning their name. Part learning and part crafting it can be modified base on any craft supply you have.
Materials
- Cardboard
- Box cutters
- Packing tape or contact paper
- Craft supplies (tissue paper, pony beads, Pom Poms, colored rice)
How To Make It
Draw large block letters on a piece of cardboard. Carefully cut out the inside of each letter to create an open letter shape. Cover the back of the cardboard with clear contact paper, sticky side facing up through the letter openings.
Set out colorful rice, pom-poms, beads, and other small craft materials in a divided tray or small bowls. Invite your child to fill each letter by pressing the different materials onto the sticky contact paper.
Try using a different material for each letter, or let kids mix and match to create their own colorful designs. When finished, display the letters or use them for simple alphabet and letter-recognition practice.
2. Mega Blok Names
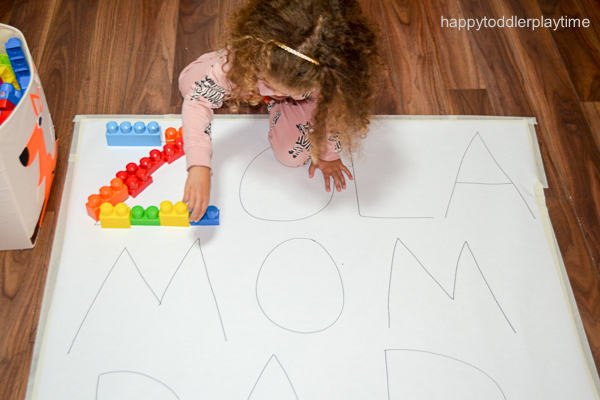
Kids use large building blocks to spell out their names, practicing letter recognition as they stack and play. It’s a hands-on way to combine construction fun with early literacy.
Materials
- Large sheet of paper
- Painter’s tape
- Marker
- MEGA BLOKS
How To Make It
Tape paper to the floor or table. Write out your child’s name in large letters on the paper. Invite your child to trace the letters with the MEGA BLOKS
3. Fingerprint Name
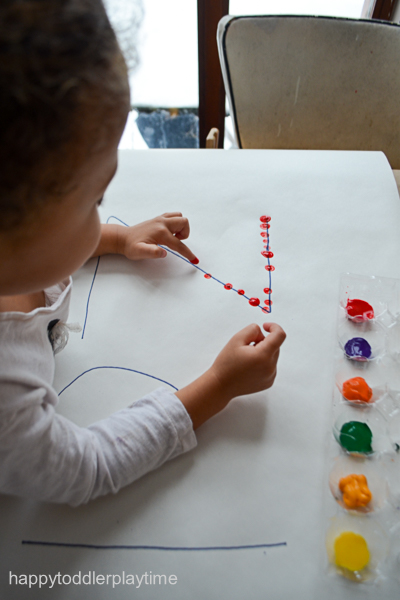
Children dip their fingers in paint or ink pads and press fingerprints along the letters of their names. This activity makes learning personal while boosting fine motor skills.
Materials
- Washable kid’s finger paint
- Egg carton
- Kraft Paper
- Marker
How To Make It
Pour the finger paints into egg carton. On the kraft paper write your child’s name using the marker. Next show your toddler or preschooler how to dip their finger into the paint and use it to make fingerprint along each letter of their name.
4. Name Unwrap
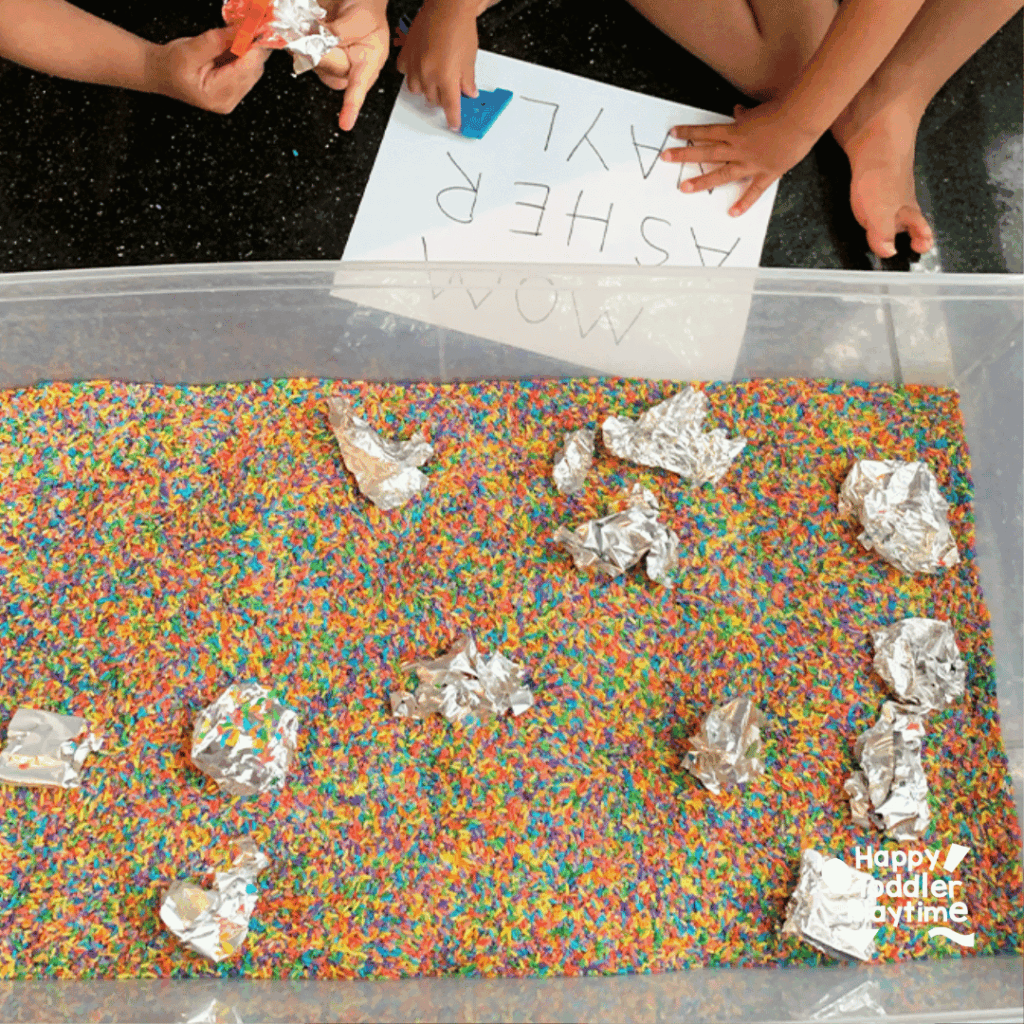
Let your child unwrap and match their name with this easy to set up unwrap your name sensory bin activity!
Materials
- Sensory Bin
- Colored rice
- Magnetic letters
- Aluminum foil
- Paper and markers
How to Make It
Place colored rice in a sensory bin. Wrap magnetic letters (make sure some of the letters match your child’s name) in aluminum foil and place with in the rice. On a sheet of paper write your child’s name. Invite your child to unwrap the letters and match them correct letters to spell their name.
5. Name Bags
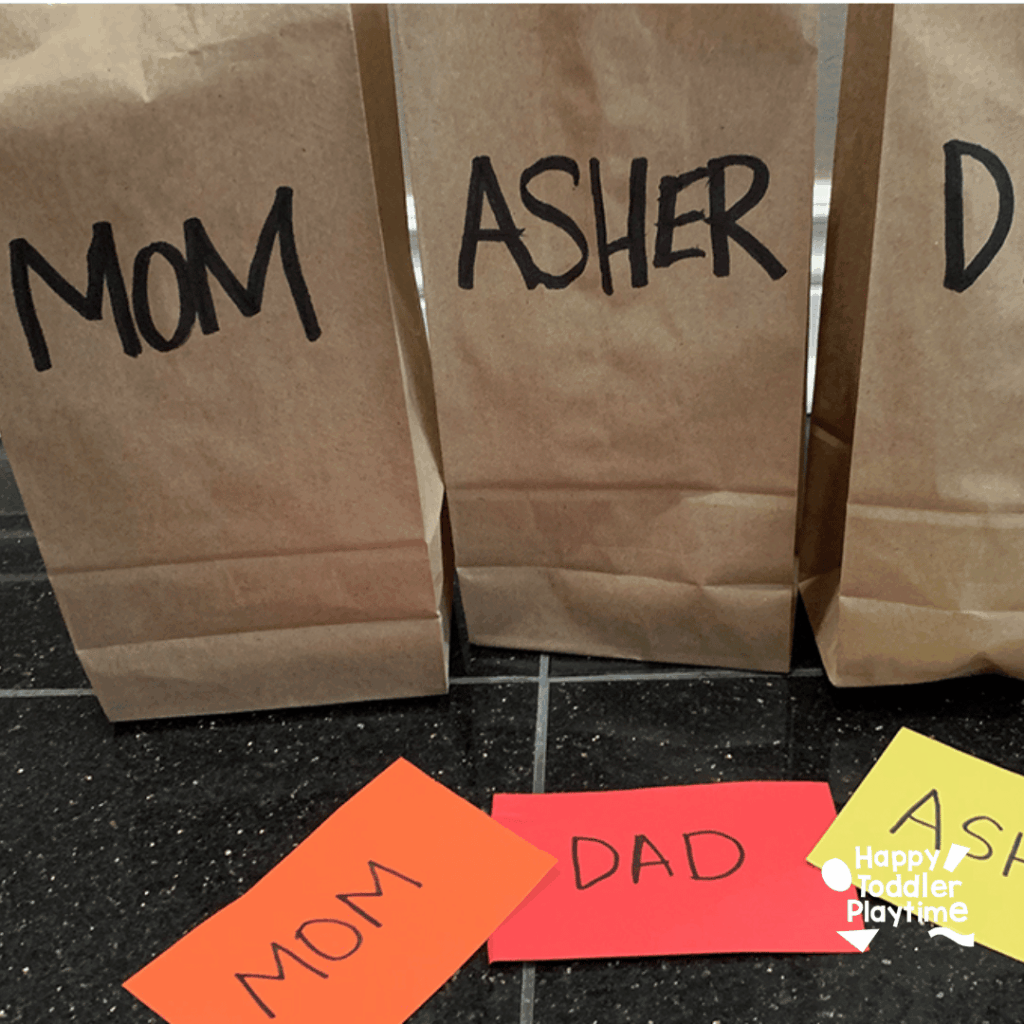
These paper bag names are another engaging way to use what you already have at home to help your child recognize the letters in their name.
Materials
- Paper bags
- Construction paper
- Scissors
- Permanent marker
How to Make It
Write names on paper bags. Cut card from construction paper and write the corresponding names on them. Invite child to place the correct card in the corresponding bag.
5. Poke Your Name
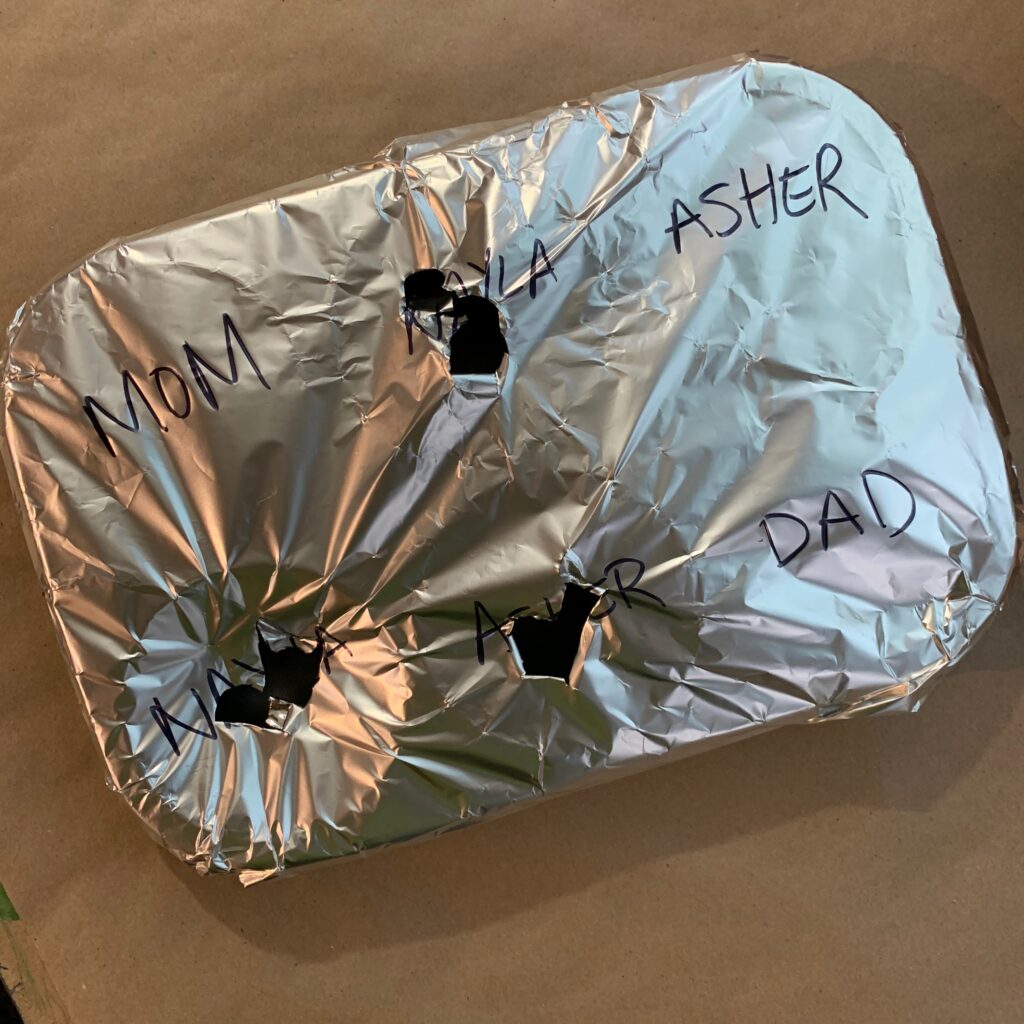
A combination of a simple materials and a fun sensory fine motor activity, this game is an excellent way to set the foundation for reading skills.
Materials
- Muffin tin
- Aluminum foil
- Permanent marker
How to Make It
Wrap a muffin tin in aluminum foil. Write your child’s name over the whole of a few spots on the muffin tin and a different name on the others. Call out a name and invite toddler or preschooler to poke the correct name.
6. Cap Names
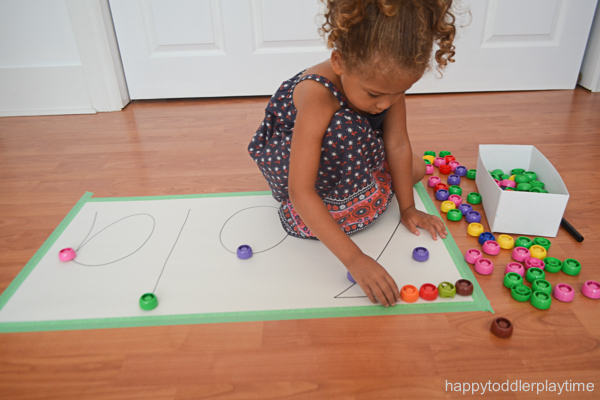
Using recycled bottle caps, kids match letters to spell out their names. It’s an eco-friendly and tactile way to reinforce letter sequencing.
Materials
- Squeeze pouch caps
- Paper
- Marker
- Tape
How To Make It
Write your child’s name out on a large sheet of paper using a marker. Place the caps in a bowl and invite your child to trace their names with the caps.
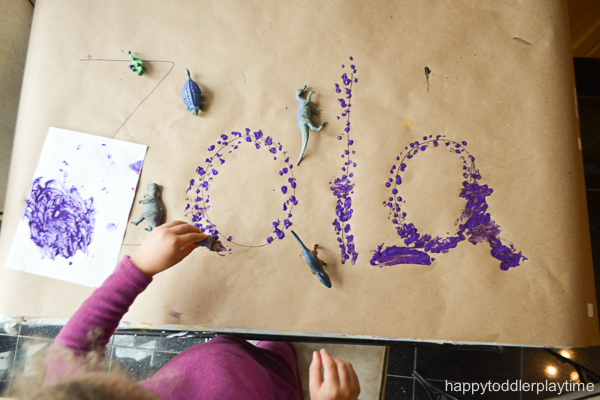
7. Dinosaur Name Printing
Kids stamp out their names using dinosaur-themed letter stamps. It’s a roar-some way to combine imaginative play with literacy learning.
Materials
How To Make It
On the kraft paper write your child’s name using the marker. Next show your toddler or preschooler how to dip the toy dinosaur into the paint and use it to make dinosaur foot prints along each letter of their name.
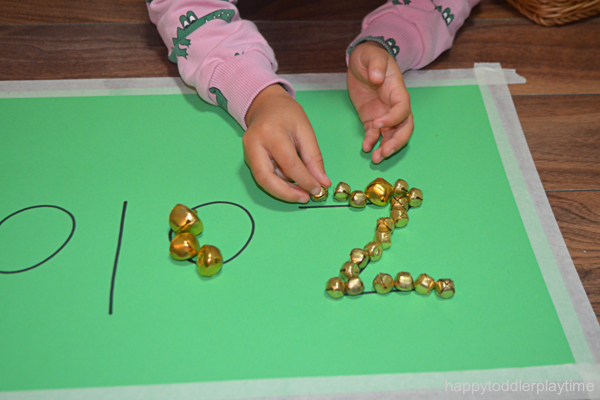
8. Jingle Bell Names
Thread jingle bells labeled with letters onto a pipe cleaner or string to form names. The jingling sound adds a fun sensory element to the activity.
Materials
- Christmas Jingle Bells
- Paper
- Black Sharpie
- Learning Resources Jumbo Tweezers
How To Make It
Once you have written out their name, show them how to place a jingle bells on the letter to trace it. I gave my happy four year old a pair of Learning Resources Jumbo Tweezers
to use to pick up the jingle bells. She used it for a few but them switched to using just her hands.
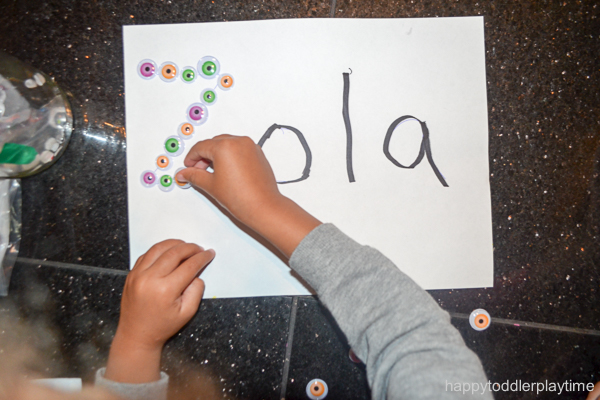
9. Googley Eye Names
Trace a child’s name and let them decorate the letters with googly eyes. The silly look keeps them engaged while practicing recognition.
Materials
- Halloween Googly Eyes
- Paper
- Marker
How To Make It
Write your child’s name on a piece of paper. Place one googly at the point where your little one will start placing eyes on each letter. This is to show them where to start as if they were writing. It will also give them an idea which direction they will place the eyes.
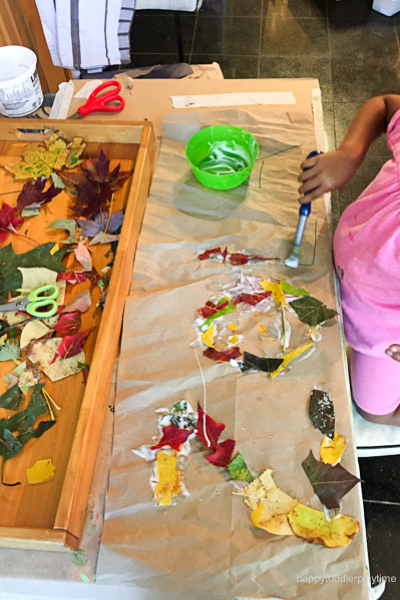
10. Leaf Name Activity
Write letters on paper leaves and invite kids to arrange them in order to spell their names. This seasonal activity is great for fall and adds a nature-inspired twist.
Materials
- Leaves
- Washable Glue
- Black Sharpie
- Kraft Butcher Paper
How To Make It
Gather the leaf pieces into a pile and bring out your glue and large pieces of butcher paper. Write your child’s name in large letters on a piece of butcher paper using a black sharpie. Then have them glue the leaf pieces along each letter of their name.
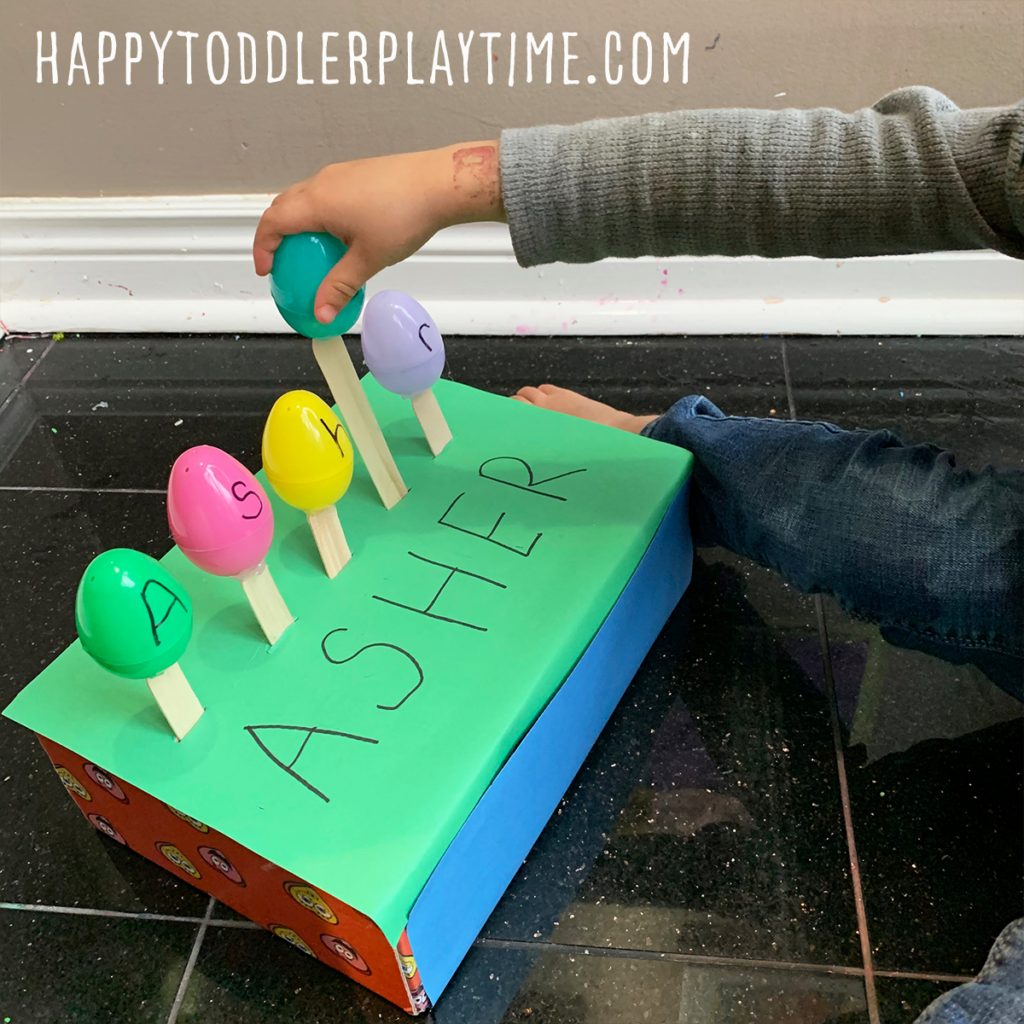
11. Easter Egg Name Activity
This letters plastic Easter eggs activity and let toddlers and preschoolers practice spelling their names. It’s a holiday-inspired activity that works year-round.
Materials
- Plastic Easter Eggs
- Hot glue gun
- Craft sticks
- Cardboard box
- Scissors or box cutter
- Black Sharpie
How To Make It
Grab your plastic Easter eggs, hot glue gun and craft sticks. Attach the craft sticks to the bottom of the Easter egg using the hot glue. Hold it in place for several minutes to ensure that it stays and to allow the glue to dry. Repeat the previous step for every letter in your child’s name.
Take a black sharpie and write each letter of your child’s name on each egg. Grab a cardboard box and write out the letters of your child’s name.
Take a pair of scissors or box cutters and cut a slit just above each letter. Make the slit large enough for them to be able to put the craft stick through without issue.
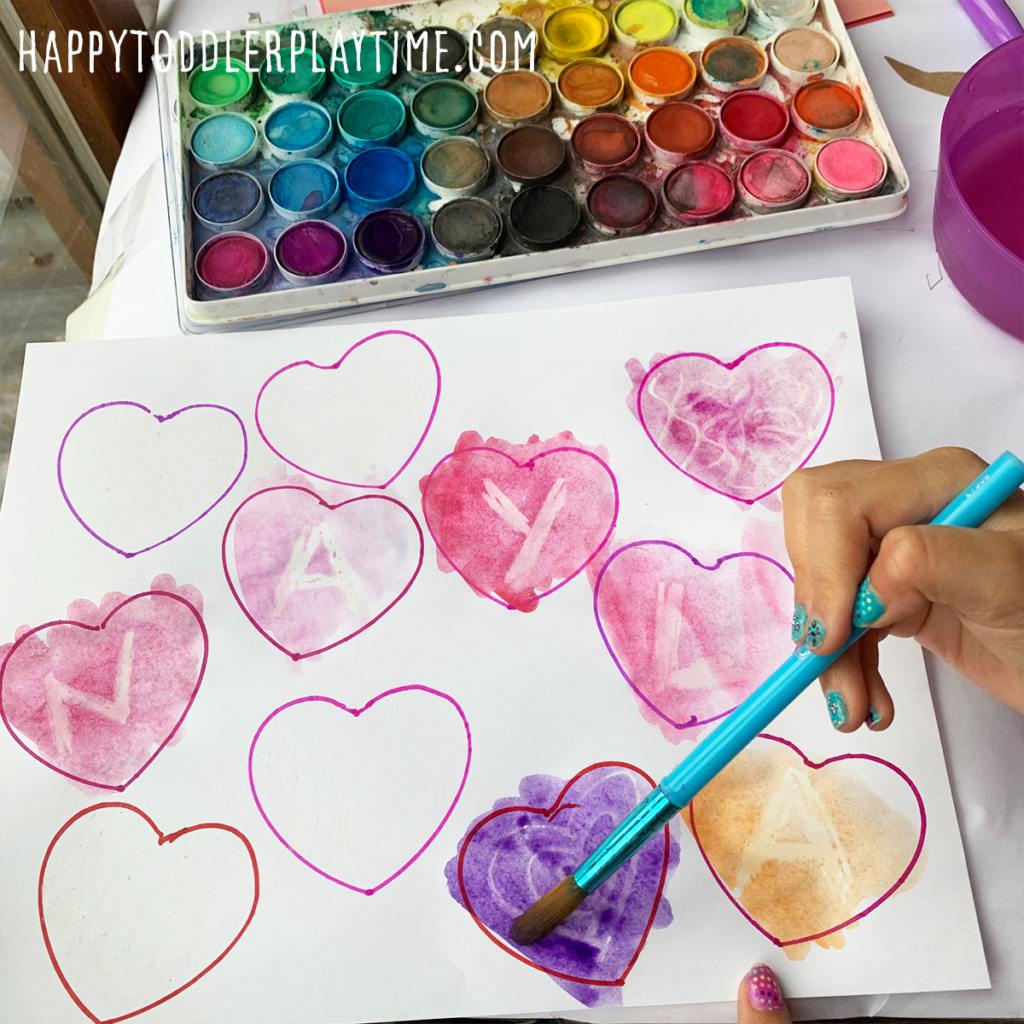
12. Crayon Resist Name Activity
Write names in white crayon and let kids paint over with watercolor to reveal the letters. The magical reveal makes literacy feel exciting.
Materials
- White printer paper
- White crayon
- Water colours or coloured water mad with water and food colouring
- Paint brush
- Red, Purple and pink sharpies
How To Make It
Grab a sheet a white paper, sharpies in red, pink and purple and a white crayon. On the white paper draw several hearts in different colours using the sharpies. Then take your white crayon and write the letters of your child’s name in hearts. Write one letter per heart. Create designs and patterns in the remaining hearts.
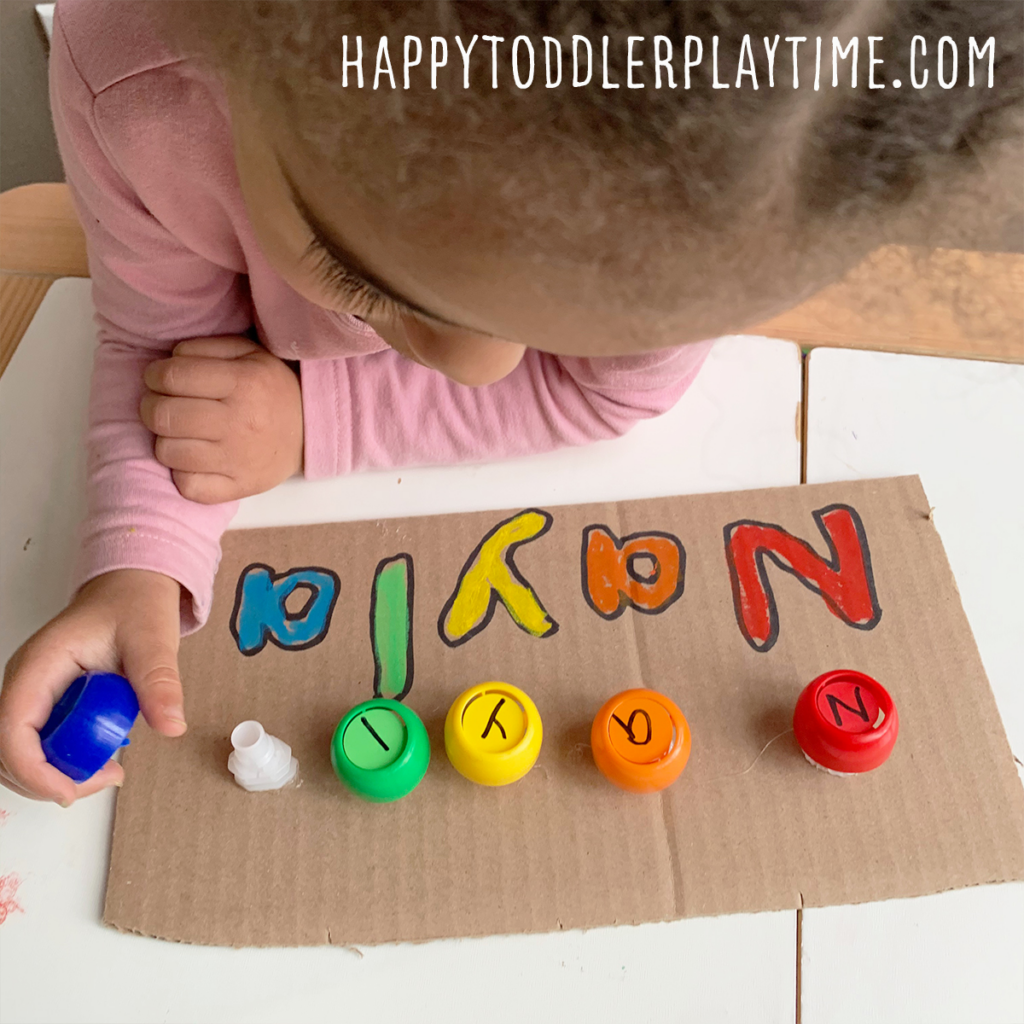
13. DIY Twist-Off Your Name Board
Attach bottle caps with letters to a board and let kids twist them off and match them to their name. The hands-on motion builds fine motor strength while reinforcing literacy.
Materials
- Squeeze pouch caps
- Squeeze pouch spout
- Scissors
- Cardboard
- Hot Glue Gun
- Paint Sticks
- Black Sharpie
- Dot Stickers
How To Make It
Cut the twist on/off spouts from the pouches using a sturdy pair of kitchen scissors. You want to make sure they are strong as some spouts can be thick and difficult to cut (depending on the brand of pouch you buy) so please be careful! You could also use box cutters but I found scissors to be easier.
Once you have 6 or 7 spouts, use a hot glue gun to glue them to a piece of cardboard. You want to make sure that you use a fair amount of glue so that they stay in place when your toddler or preschooler is using them.
Below each spout, write out each letter of your child’s name.
Take dot stickers and write each letter on your child’s name on one dot sticker. Attach the stickers to the center of the squeeze pouch caps. Finally twist the caps on top the spouts.
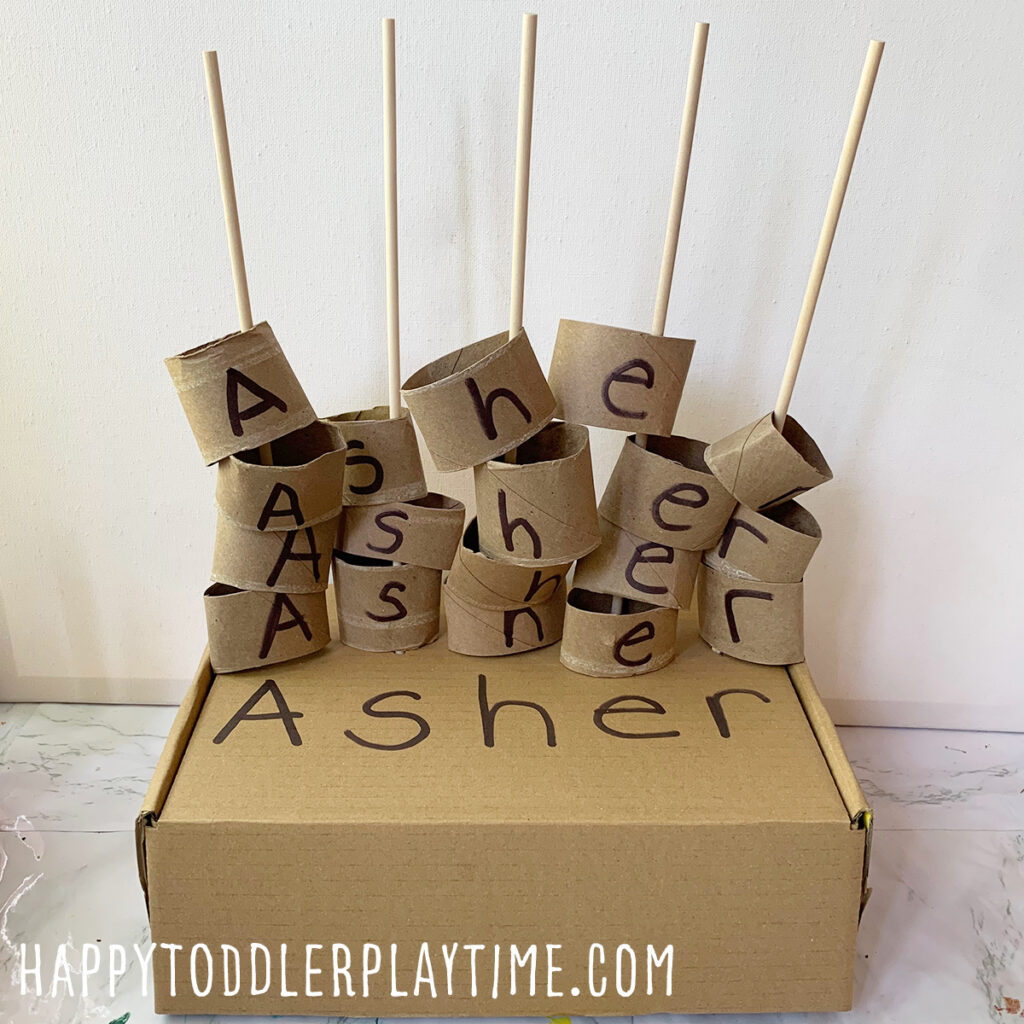
14. TP Name Sort Activity
Use toilet paper rolls labeled with letters and invite kids to sort them in the right order. This recycling-friendly activity is both fun and educational.
Materials
- toilet paper or paper towel rolls
- scissors
- small box
- sharpie
- bamboo sticks or popsicle sticks
How To Make It
Grab your paper towel or toilet paper rolls and start to write the letters of your child’s name down the tube. Take a pair of scissors and cut the tube under each letter creating rings with one letter on them. Make about 6 or 7 rings for each letter of your child’s name.
Next, grab a small box and take a pair of scissors and punch the same number of small holes as their are letters in your child’s name. For instance, if your child has 5 letters in their name make 5 tiny holes in a line in the box. Stick bamboo sticks or popsicle sticks (make the holes bigger if using popsicle sticks) into the holes.
On the box just beneath the sticks write out each letter of your child’s name.
Invite your child to sort the letter rings on to the sticks according to the letter of their name in written on front! Ask your child to identify each letter and the letter sound.
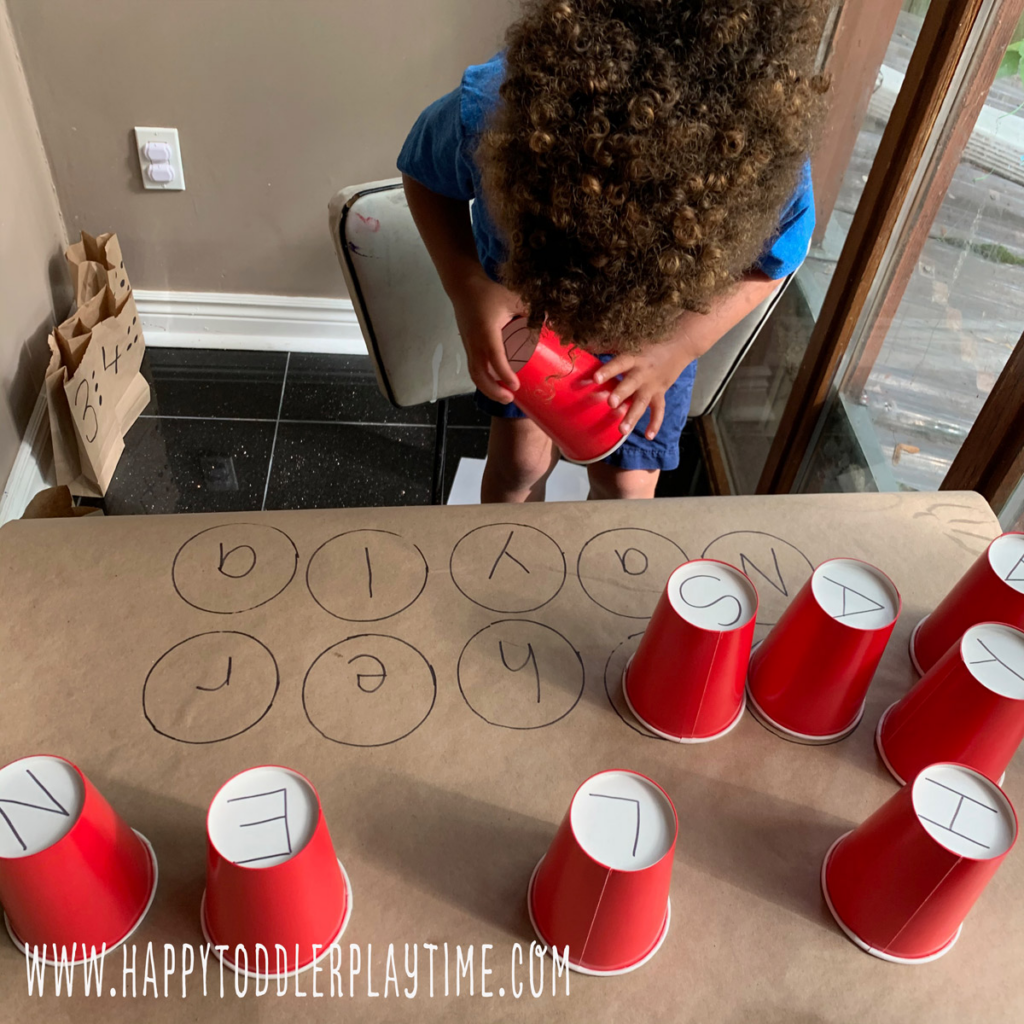
15. Paper Cup Names
Write one letter of a name on each paper cup and stack them in order. Kids can build, knock down, and rebuild while practicing recognition.
Materials
- Paper Cups
- Black Sharpie
- Butcher Paper
How To Make It
Turn cups upside down and write the letters of your child’s name on the bottom of each cup. Trace the top of the cups on the sheet of paper to create circles. Then write the letters of your child’s name in the circle. Invite your toddler or preschooler to match the cups letters to the circles on the paper.
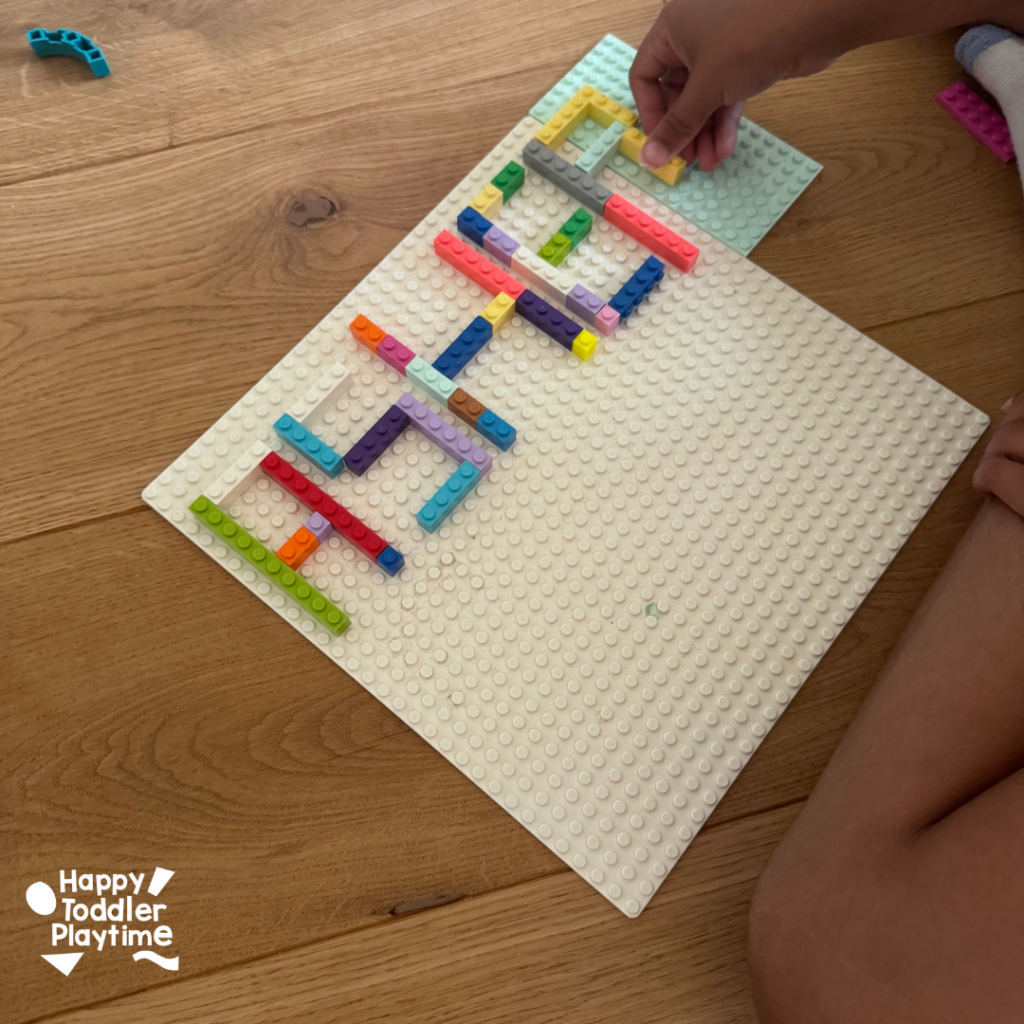
16. LEGO Name Activity
Kids build their names on a LEGO baseplate using bricks as letters. It’s a hands-on way to combine building fun with early literacy.
Materials
- LEGO bricks (any size or color)
- LEGO baseplate (optional, but helpful)
- Pencil and paper
How To Make It
Start by writing your child’s name on a sheet of paper in all capital letters. Depending on their age they can do this step on their own. This makes it easier to build since capital letters are mostly made from straight lines. Look at each letter and break it down into only horizontal and vertical lines. For example, the letter “A” would look more like a square “U” with a bar across. You’re going for a “blocky” version of each letter that can be recreated using LEGO bricks.
Before building, help your child visualize each letter using simple boxes and lines. This step helps them problem-solve and plan ahead. Use LEGO bricks to build each letter of the name directly onto the baseplate. You can use bricks of any size or color—rainbow names are especially fun! Try to keep the letters the same height, and leave a one-brick gap between each letter.
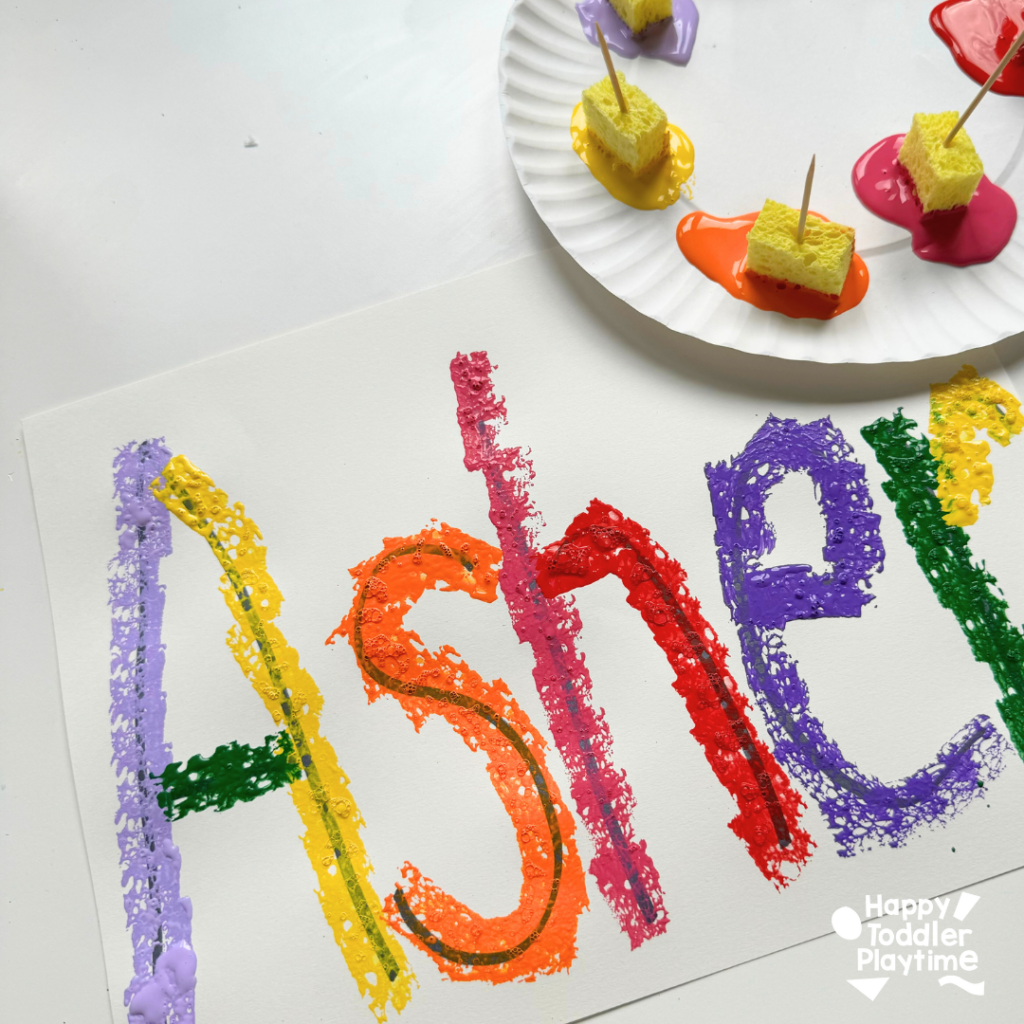
17. Sponge Painted Name Activity
Write a child’s name and have them dab over it with sponge-painted colors. The textured painting keeps kids engaged while reinforcing letter learning.
Materials
- White cardstock or construction paper
- Sponges
- Toothpicks
- Washable paint in multiple colors
- Scissors
- Marker
- Paper plate or paint tray
- Tape (to hold paper in place while painting)
How To Make It
Start by writing your child’s name in large letters across the top or middle of the paper.
Cut your sponge into small chunks. To make it easier for them to stamp with the sponges stick toothpicks into the sponges to create mini handles. Add blobs of paint to your paper plate or tray. Tape the cardstock to the table to keep it from sliding around during the sponge action.
Let your child dip the sponge into the paint and gently use it to trace.
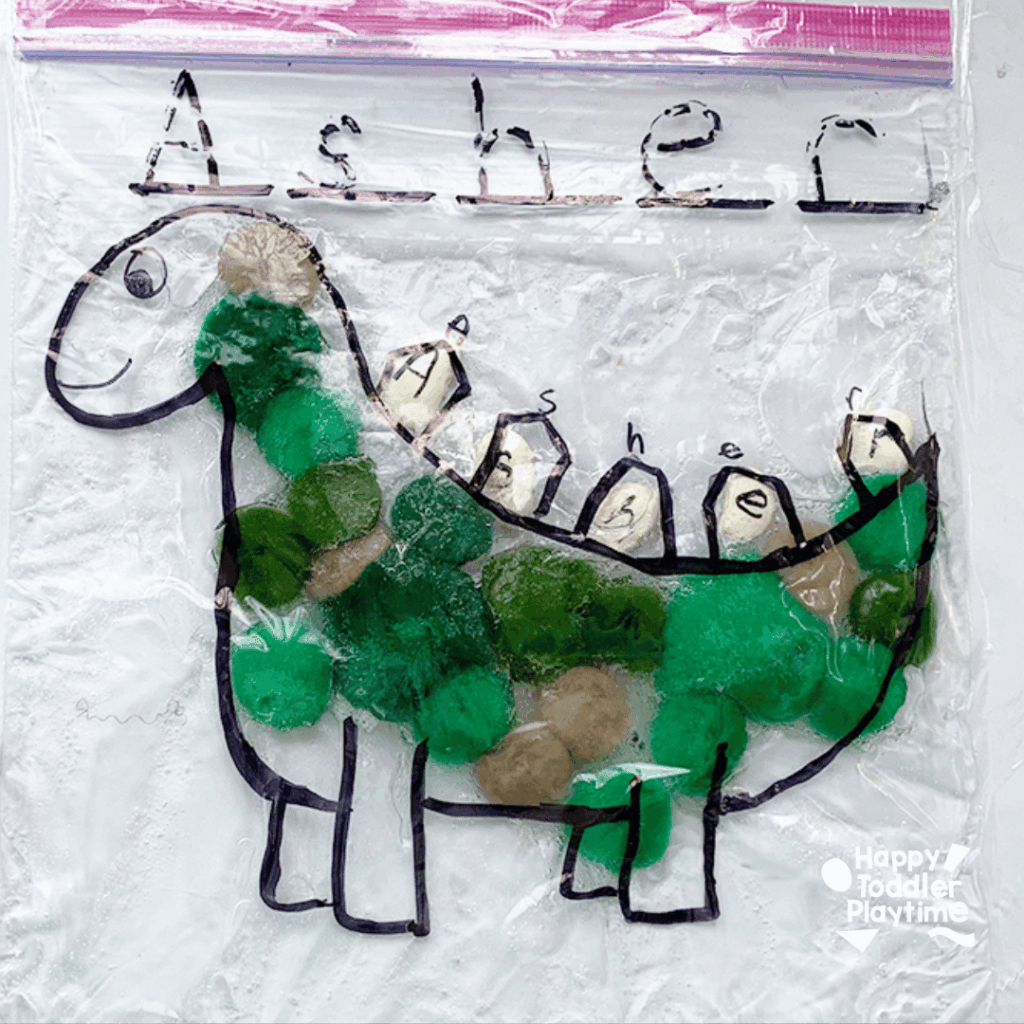
18. Dinosaur Sensory Bag
Slip Pom Poms and letter beans into a sensory bag filled with gel or water beads. Kids press and squish to uncover the letters of their names.
Materials
- Gallon or large size Ziplock bag
- Permanent marker
- Alcohol (for cleaning the bag surface)
- Hair gel
- Green pom poms
- Lima beans
- Clear nail polish (to coat the beans)
- Dry erase marker
How To Make It
Draw outline of a dinosaur with spines on its back the same number as the letters of your child’s name. Draw lines above the dinosaur for each letter of your child’s name.
Take lima beans and write a letter of your child’s name on each. Once labeled, coat each bean with clear nail polish to waterproof them when placed in the water. Fill bag with Pom Poms and water and lima bean letters into the bag. Seal the bag with clear packing tape and further secure it to a table or window with masking tape.
19. Cotton Ball Names
Outline a child’s name and have them glue cotton balls along each letter. It’s a simple craft that builds recognition and fine motor strength.
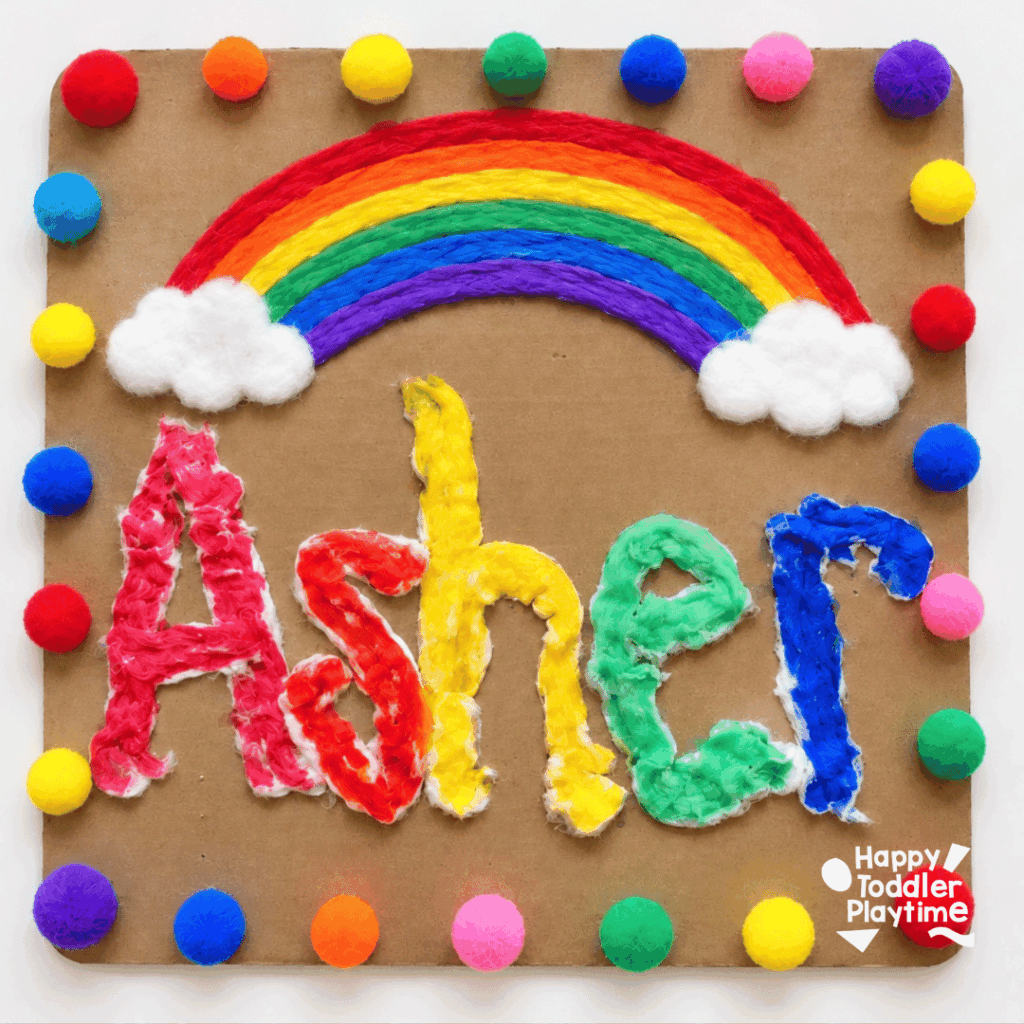
Materials
- Cardboard
- Sharpie
- Scissors
- Pencil
- Cotton Balls
- Glue
- Eye Droppers
- Food Colouring
- Bowls or glasses
- Water
How To Make It
Grab a piece of cardboard. Use a marker or sharpie to write your little ones name out in large letters. Place your cotton balls into a bowl. Next invite your toddler or preschooler to use glue to glue the cotton balls down along each letter. Have them trace each letter with the cotton balls.
Grab six bowls or glasses and fill them half way with water. Add a few drops of different food colouring into each container. We did all the colours of the rainbow from red to purple. Invite your child to using the eye droppers to colour the cotton balls or snowballs and create a colourful name!
20. Pom Pom Name Sensory Bag
Grab a bag of marshmallows and some construction paper for this sweet activity for name practice.
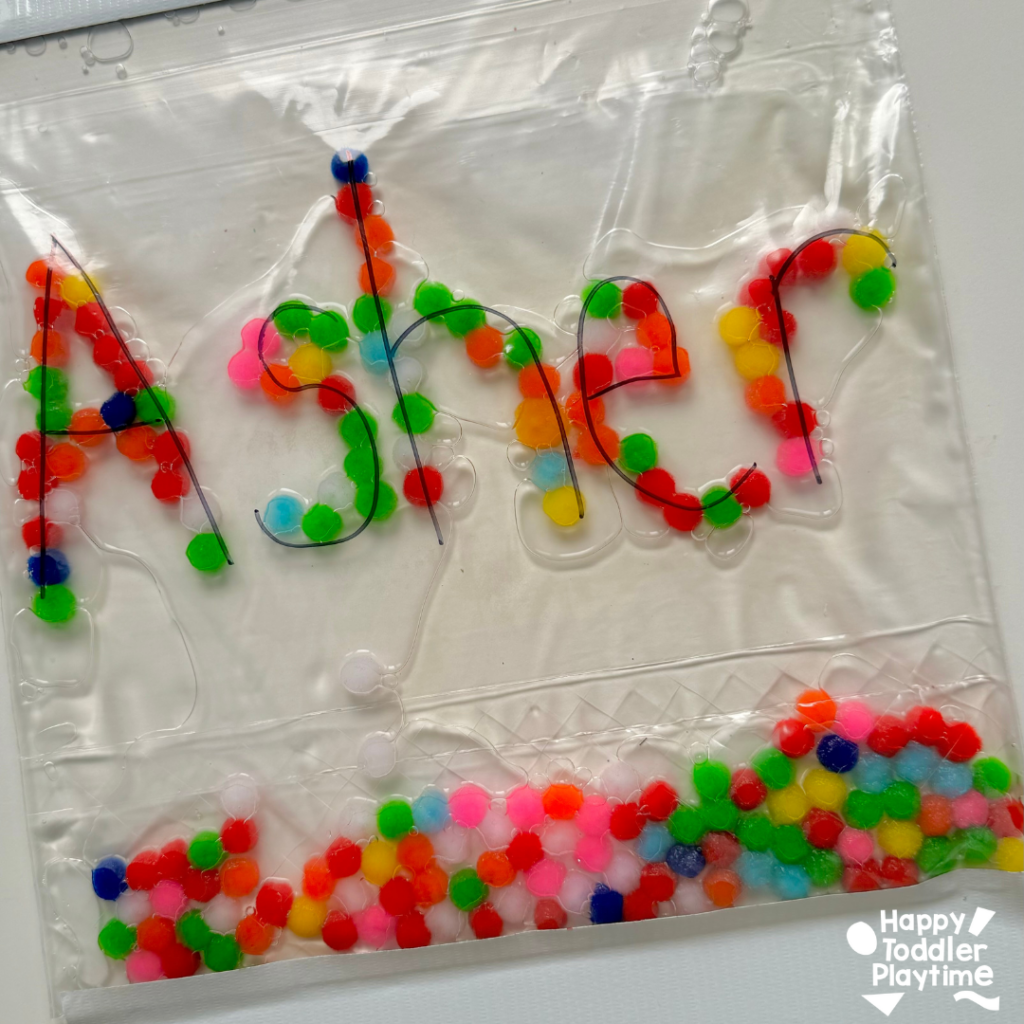
Materials
- 1 gallon-size ziplock bag
- mini pom poms
- permanent marker
- Water or clear hair gel
- Clear packing tape
How To Make It
Using a permanent marker, write your child’s name in big letters on the outside of the bag. Add a small handful of mini pom poms to the bag. Pour in about 1/4 to 1/2 cup of water or clear hair gel.
Press out as much air as you can and zip the bag shut. Tape the bag down to a table, window, or wall—or just let your child squish it on the floor. Invite them to push the pom poms around until they cover all the letters of their name.
21. Cloud Raindrop Name Craft
Write your child’s name on a cloud and invite them match the raindrops underneath it.
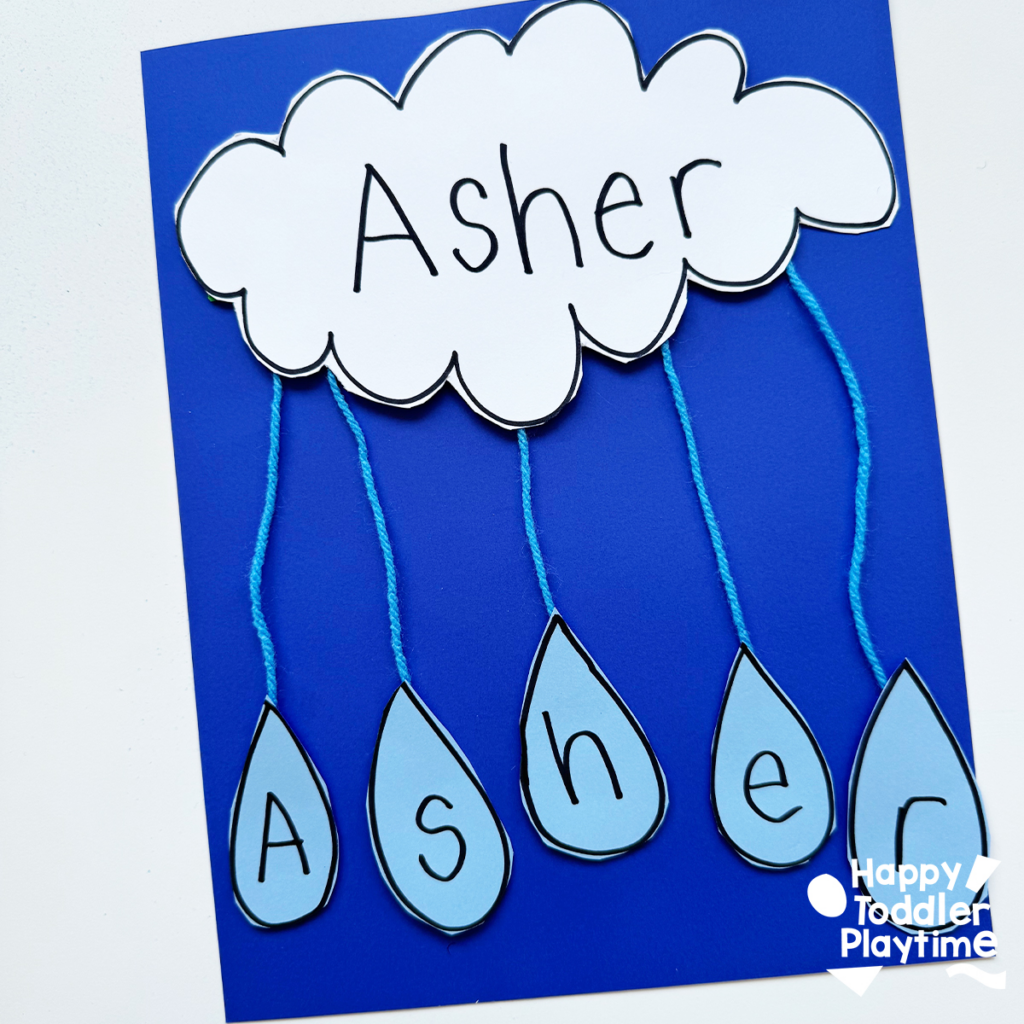
Materials
- Construction paper
- String
- Glue or tape
- Marker
How To Make It
Use marker to trace and cut out a cloud on white paper. Write the name of your child on the cloud. Trace and cut out raindrops on blue paper. Inside each raindrop write the letters of your child’s name.
On the back of the cloud, cut out and tape down pieces the string the same number as the letters in your child’s name. Glue it onto another sheet of paper. Invite child to glue the rain drops in the correct order to the string under the cloud.
22. Caterpillar Name Craft
Are you a fan of the hungry caterpillar? Combine this name recognition craft with the book to further build literacy connections.
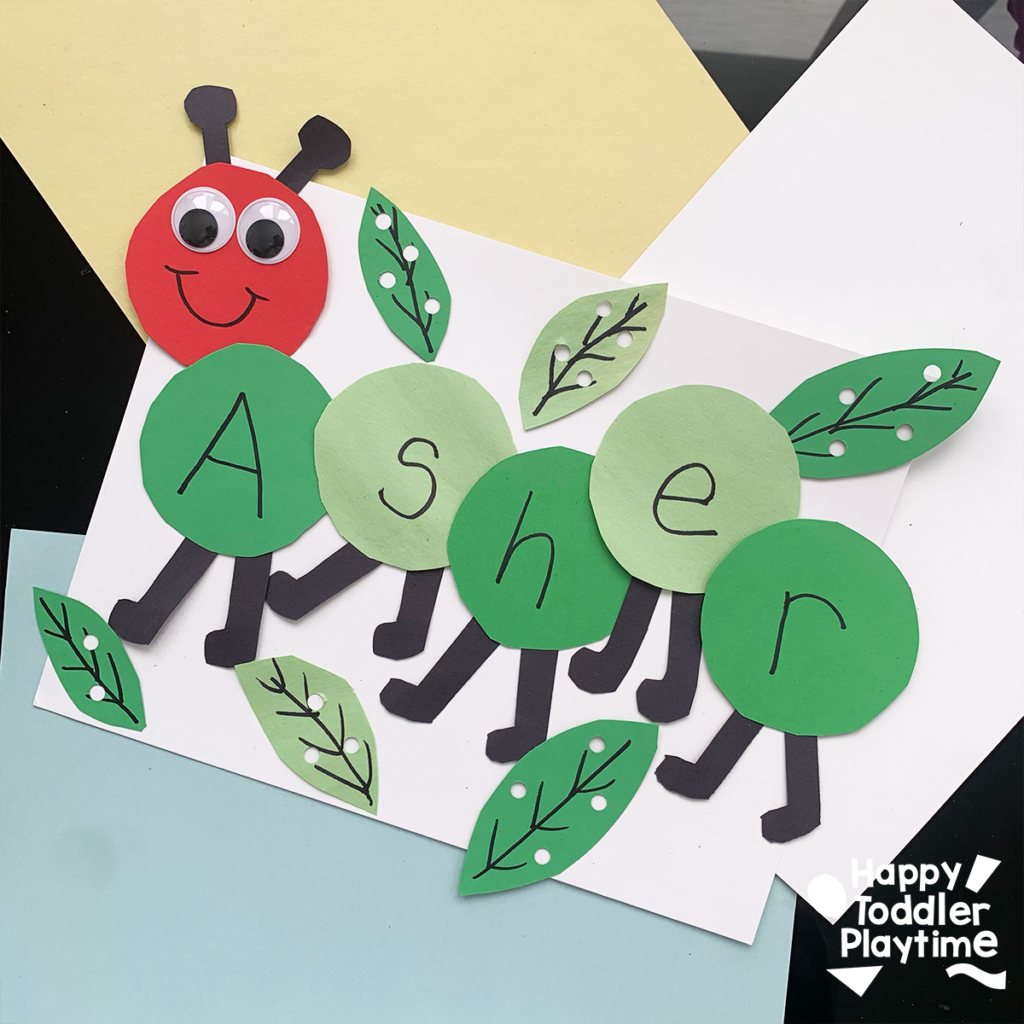
Materials
- Red, green (light and dark), black and white construction paper
- Scissors
- Glue
- Single hole punch
- Google eyes
How To Make It
Cut out one red circle and enough green circles to match the letters in your child’s name. Cut out some leaves from green leaves, legs and antennae from black paper.
Write one letter of their name on each of the green circles. Glue the red circle for the head and then the green circles in the correct order to spell their name.
Glue or draw a face to the red circle, glue on the feet and antennae. Use a hole punch to punch holes in the leaves. Glue them around the caterpillar craft.
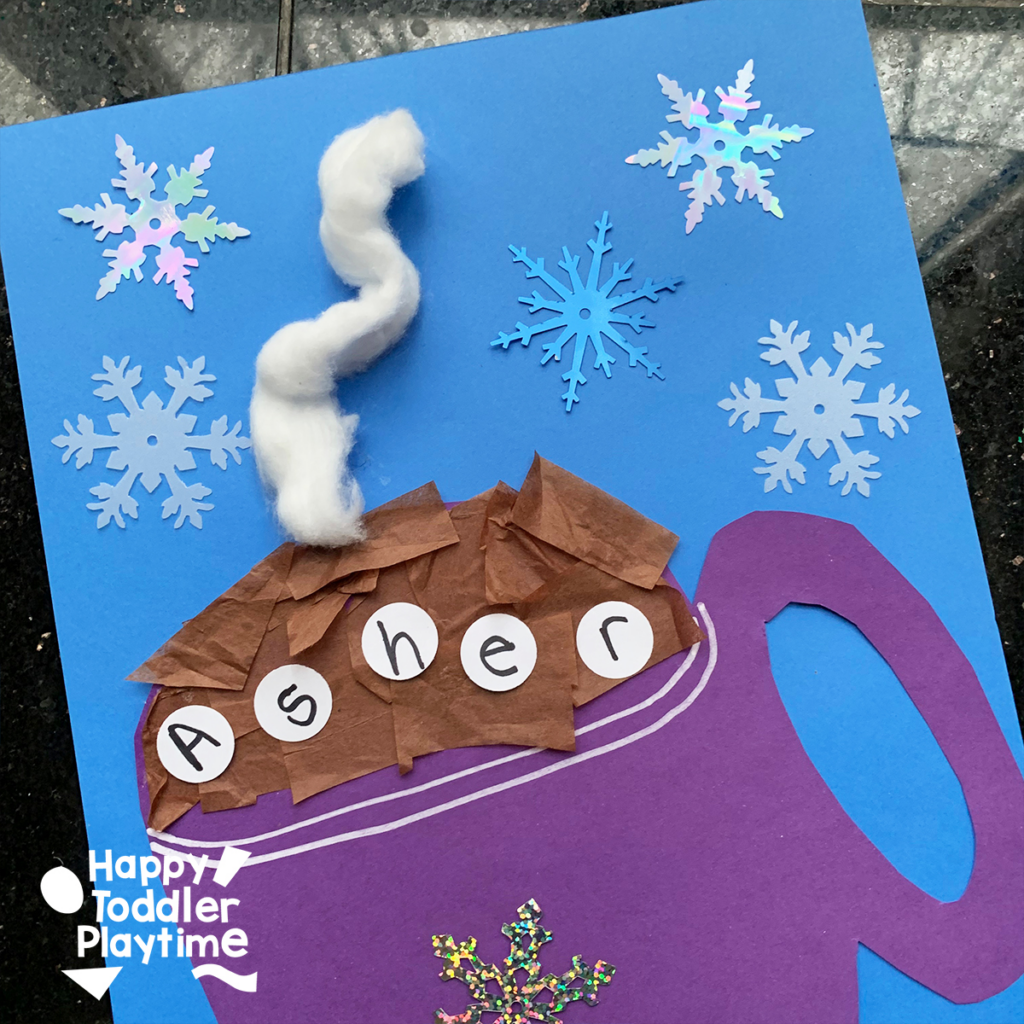
23. Hot Chocolate Name Craft
Make a hot chocolate craft with your toddler or preschooler and let them practice learning the letters of their name at the same time!
Materials
- Blue, white and another colour of your choice construction paper
- Brown tissue paper
- Glue
- Cotton ball
- Scissors
- Snowflakes
- White pencil crayon
How To Make It
Cut out the shape of a mug from a sheet of construction paper. Cut brown tissue paper into small squares and invite your little one to fill their empty mug with hot chocolate by gluing the tissue paper to the top part of the mug.
For the marshmallows, cut out the number circles that corresponds to your child’s name and write the letters of their name on each circle. Invite them to glue them down as marshmallows on top of the brown tissue paper. Take a cotton ball and if you can unwrap it to create the steam coming off the cup of hot chocolate. Glue it down above the cup.
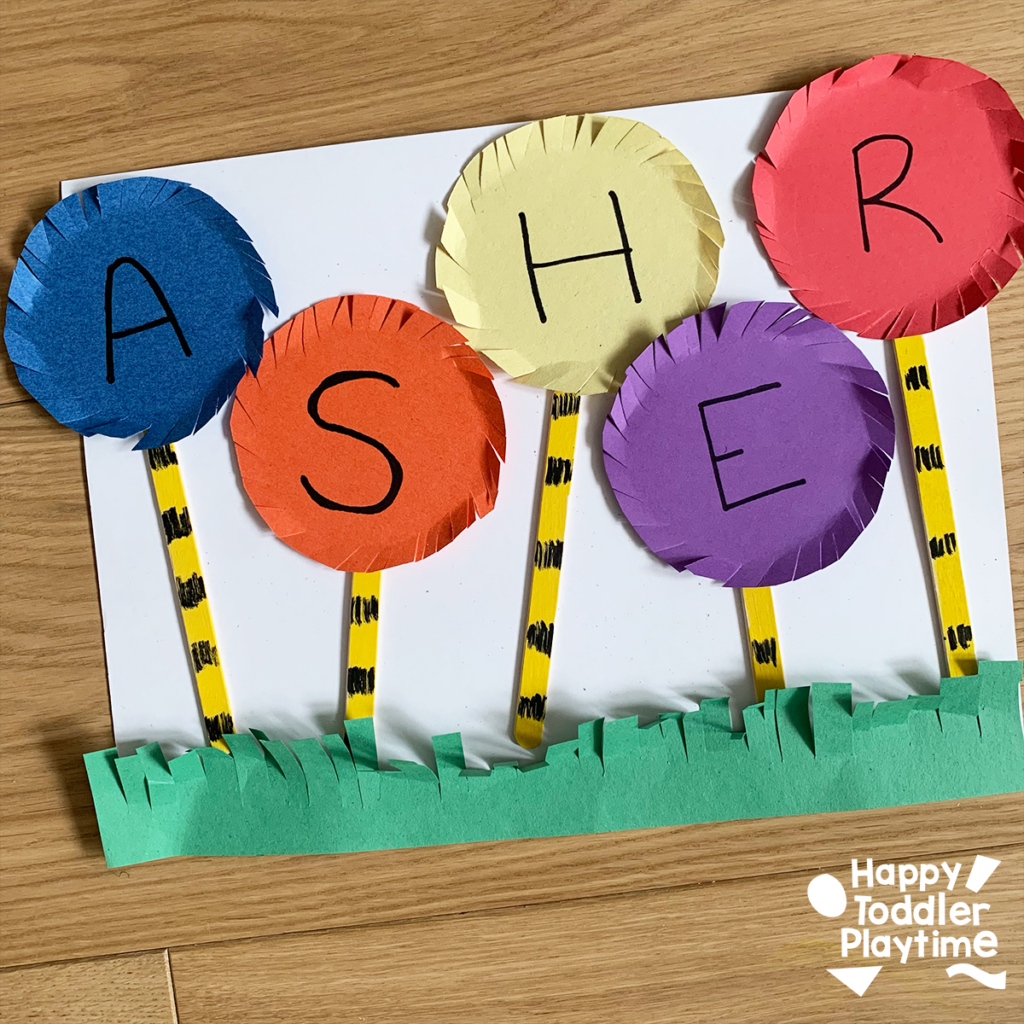
24. Trufulla Tree Name Craft
Bring the whimsical world of Truffula Trees to life with this colorful name craft—a playful, hands-on way for children to practice name recognition while creating a cheerful keepsake.
Materials
- Colored construction paper
- Craft sticks
- Black and yellow markers
- White cardstock
- Glue
How To Make It
Trace the bottom of a paper cup or bowl and cut out as many circles in different colored construction paper as there are letters in your child’s name. Make small slits around the edges of each circle to mimic the fluffy appearance of Truffula tree tops. Bend the edges slightly for extra texture.
On each circle, write a letter from your child’s name. Color the craft sticks with yellow markers. Then, use the black marker to draw line markings similar to the trunks of the Truffula trees in the book.
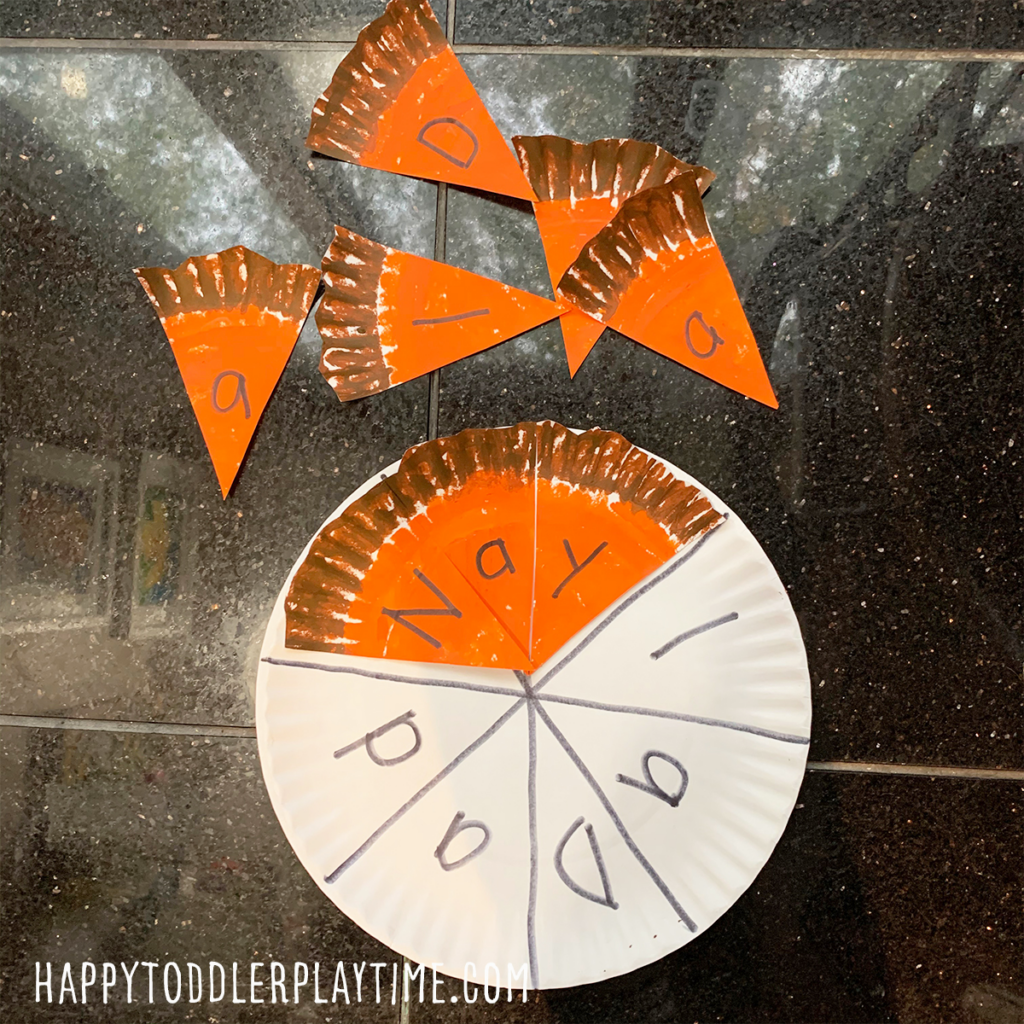
25. Pumpkin Pie Name Recognition Activity
Create “pumpkin pie slices” with letters written on them and invite kids to put the slices together to spell their names. It’s a festive fall activity that looks as fun as it is to play.
Materials
- White Paper Plates
- Paint Sticks
- Black Sharpie
- Scissors
- Pencil
- Ruler
How To Make It
Grab your white paper plates and use your paint sticks to colour the inside of the plate orange and the outside edge of the plate brown. Take a pair of scissors and cut cloud like edge. This will create the edge of your pumpkin pie.
Next, use a ruler (or fold your plate in half to create lines to cut along) and pencil draw lines to cut along. Cut your pie into 8 slices. If your child’s names has more letters divide your pie even smaller.
Write your child’s name on each slice of pie. Take another white paper plate and divide the plate into 8 equal slices using a black sharpie. NOTE: you are not cutting this second plate.
Write the letters of your child’s name in each section of the second plate. If you child has less than 8 letters, you can leave them blank, add a shape for them to match or another letter or if there is room another name such as mom or dad.
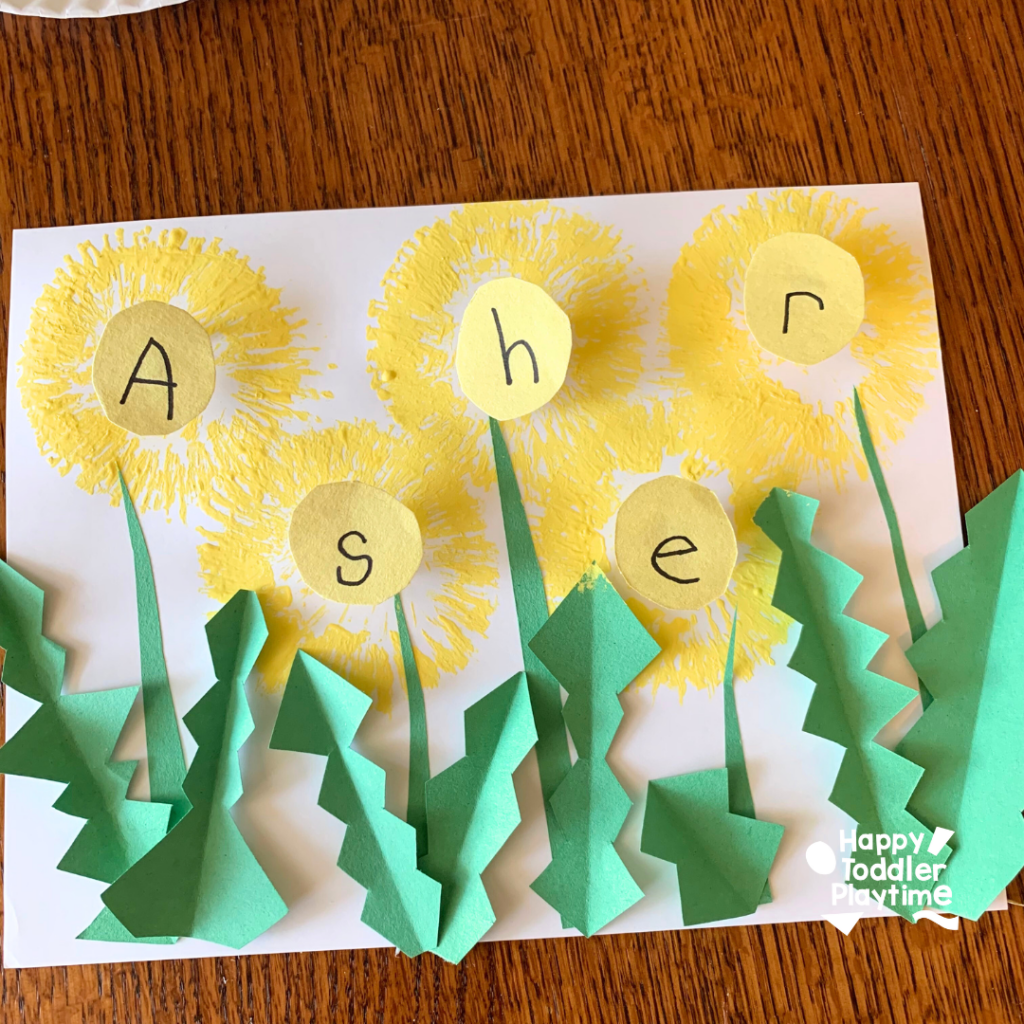
26. Dandelion Name Craft
This 3D flower name craft is a great way for toddlers and preschoolers to practice their names. For younger kids, cut out the different parts of the flowers but for older kids silly trace them out and they can practice cutting them out on their own.
Materials
- White cardstock (for the background)
- Green and yellow construction paper
- Toilet paper tube
- Yellow paint
- Paper plate (for paint)
- Glue stick or school glue
- Scissors
- Pencil or marker
How To Make It
Grab an empty toilet paper tube. On one end, make small vertical cuts about 1 inch deep all the way around. Gently fold the strips outward to make a sunburst shape. This will be your flower stamper.
Pour yellow paint onto a paper plate. Dip your toilet paper tube stamper into the yellow paint and stamp onto the white cardstock. Make one dandelion flower for each letter in your child’s name. Let dry.
Cut a thin strip of green construction paper to make a stem. Glue it down beneath the row of dandelions. Next, cut out two jagged, dandelion-style leaves. Fold each leaf in half lengthwise for dimension. Glue just the folded crease onto the paper, so the leaves pop up from the background.
Cut small yellow circles (about the size of a toilet paper tube) from yellow construction paper—one for each letter of your child’s name. Write one letter on each circle.
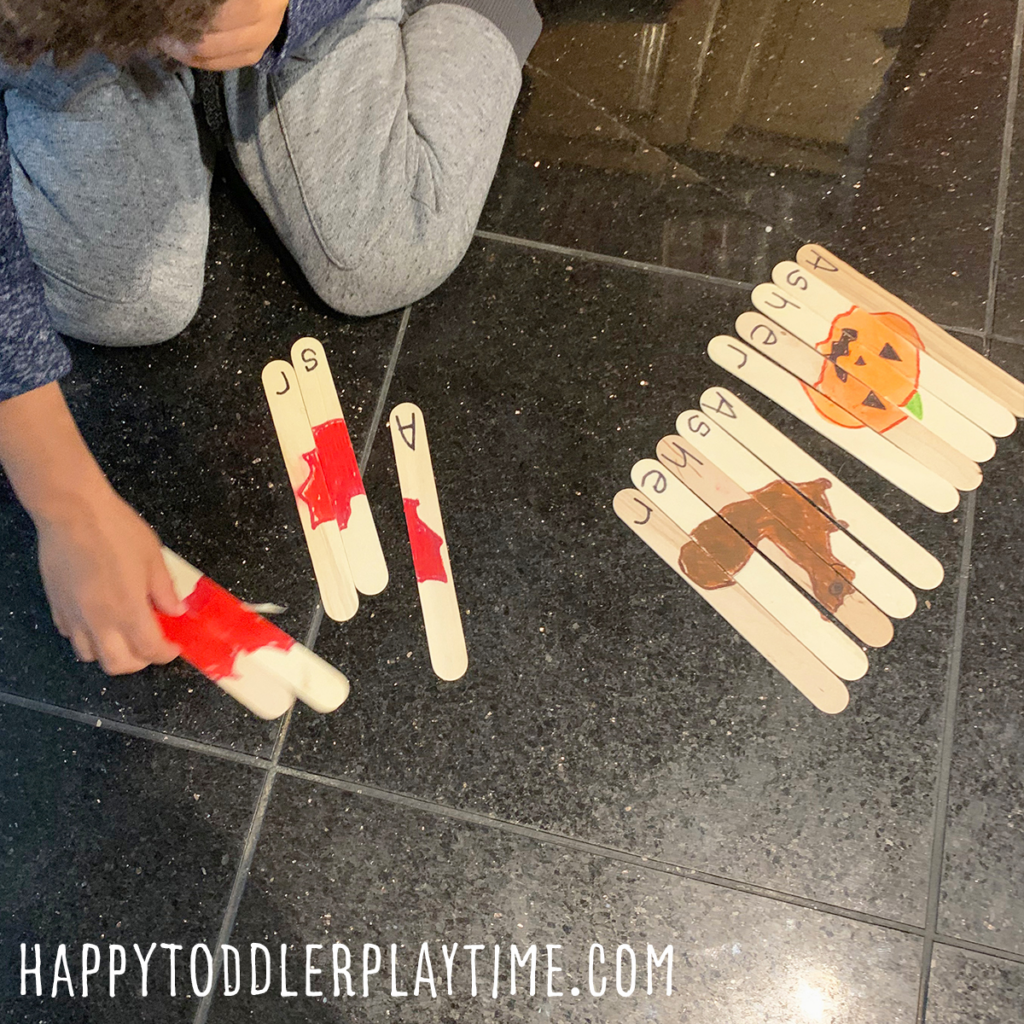
27. Craft Stick Name Puzzles
Craft stick name puzzles is a simple way to help your preschooler practice learning their name this Fall. Super easy to create and a great way to keep them busy learning!
Materials
- Craft sticks
- Sharpies
- Paint Sticks
- Painters Tape
- Fall themed cookie cutters
How To Make It
Grab your craft sticks. You’ll need one for every letter of your child’s name. Line up your craft sticks and place a piece of painters tape on the the back of the sticks to keep them in place while your draw. Turn over the craft sticks and grab your fall themed cookie cutters.
Trace the shapes on your craft sticks. Outline the pictures in a black sharpie or in any colour. Fill in the rest of the shape using paint sticks.
Remove the tape from the back of the craft sticks when your little one is ready to complete the puzzles. Invite them to spell their name by putting the letters in order to reveal the picture!
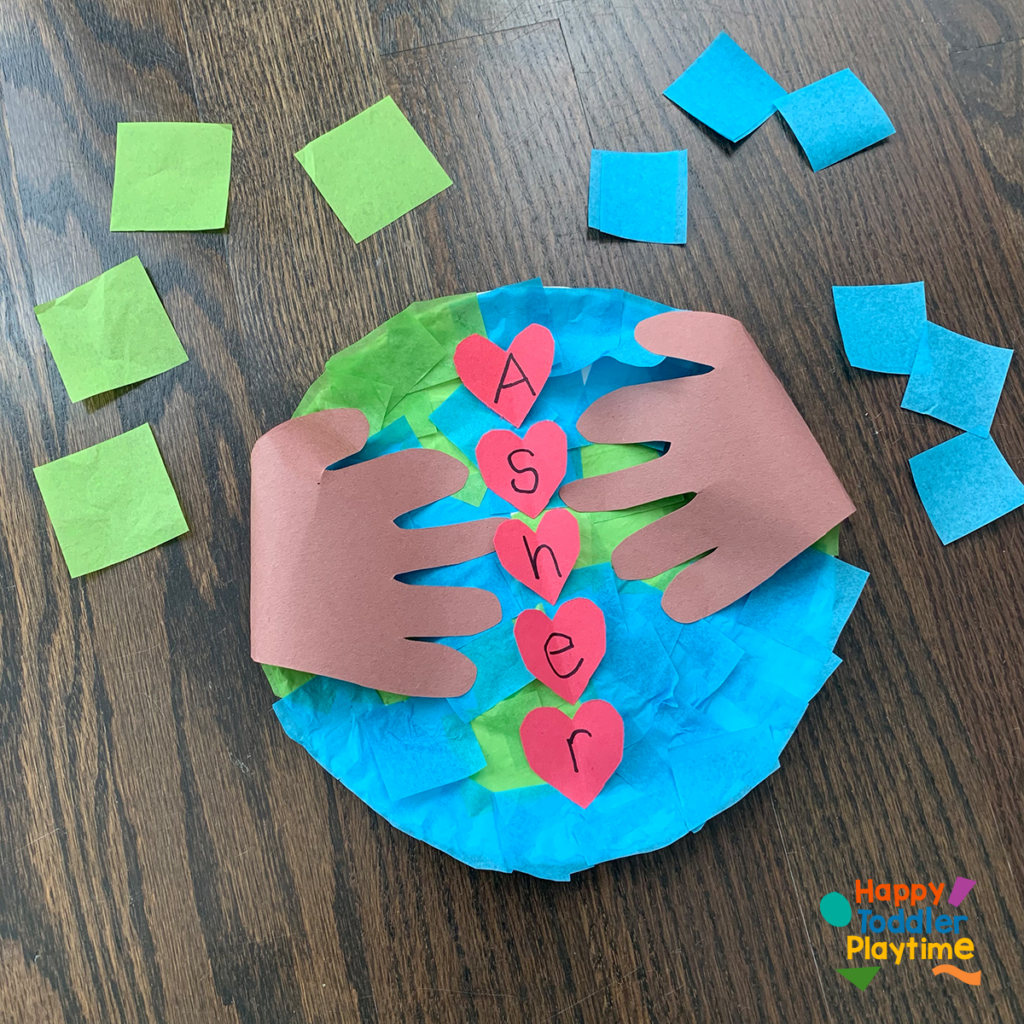
28. Earth Day Name Craft
Sometimes it’s the easiest of craft materials that can create the most powerful tactile experience for kids. Paper plate and tissue paper are always a go-to!
Materials
- Paper plate
- Green and blue tissue paper
- Glue
- Double side tape
- Red construction paper
- Skin tone construction paper
- Scissors
How To Make It
- Cut green and blue tissue paper in squares. Apply glue to the entire surface of the paper plate. Place the green and blue tissue paper pieces onto the glue, overlapping them to create a mosaic-style pattern.
- Once the entire plate is covered in tissue paper, allow it to dry completely.
- While the plate is drying, cut out small hearts shape from red construction paper. Write each letter of your name in the center of each heart using a marker or pen.
- Trace and cut out two hand shapes from skin tone construction paper. These will be used to hold the paper plate.
- Use glue or double sided tape to secure the hearts with your name onto the center of the plate, down the middle.
- Your Earth Day name craft is complete! Display it proudly as a reminder to care for our planet and to celebrate Earth Day.
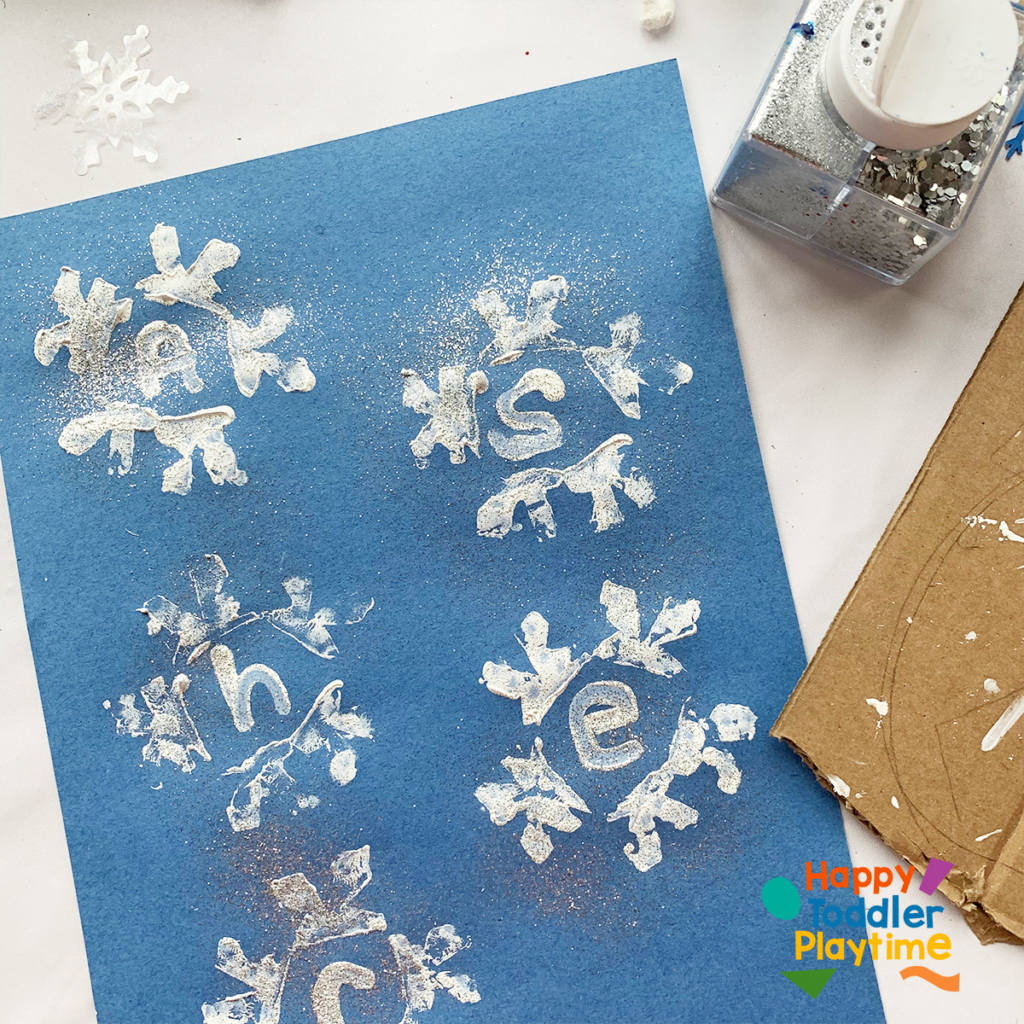
29. Snowflakes Name Craft
This craft is perfect for winter – and makes a cute art piece to put on the fridge for daily practice.
Materials
- Blue Construction paper
- White paper
- Cardboard or toilet paper tube
- SCissors
- Q-tip
- Silver glitter
How To Make It
Make five slits about 1 inch long along the top of a toilet paper tube. Fold down each tab. Cut out a ‘V’ shape in the middle of each tab. Then cut out another ‘V’ along each side of each tab. Pour of some white paint on a paper plate or piece of cardboard.
Wither use a paint brush to paint the bottom of the toilet paper tabs or press it into the paint ensuring that all the tabs are fully covered in paint.
Print the tub on a sheet of blue construction paper by pressing it down and using either a q-tip or a clean finger on each tab. Carefully pick it up and repeat until more paint is need.
Write one letter of their name in centre of each snowflake using a pencil. Invite your child to the trace the letters using a q-tip dipped into white paint.
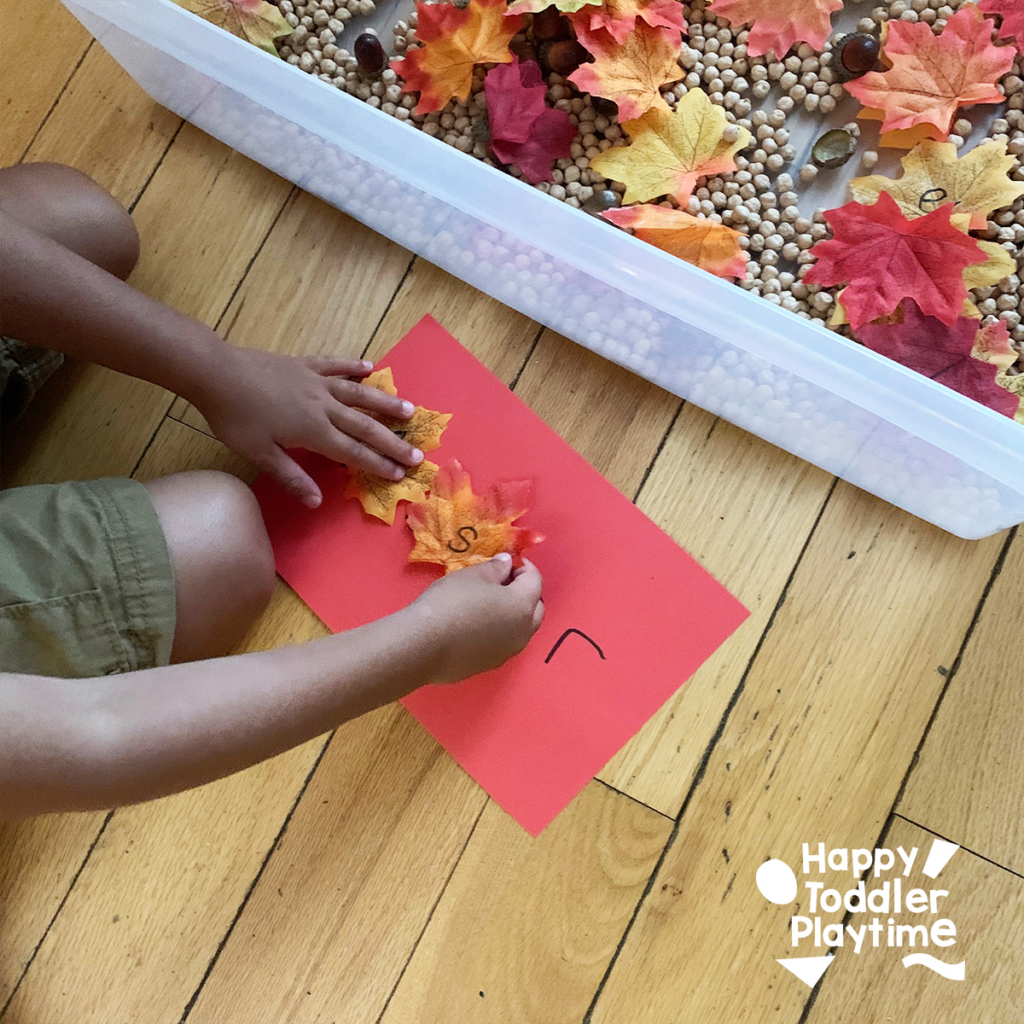
30. Leaf Names Sensory Bin
This craft is perfect for when the leaves start to change colors. Create a simple fall sensory bin with leaves (real or artificial to practice name recognition.
Materials
- Leaves
- Sensory Bin or Large Container
- Dried Chickpeas
- Acorns
- Sheet of paper
How To Make It
Fill the sensory bin with dried chickpeas. They not only add a tactile dimension but they’re also great for burying leaves and uncovering hidden treasures.
Add the acorns and the lettered leaves into the mix. Some can be half-buried, and others can be on top, just waiting to be discovered.
Finally, write your child’s name on a sheet of paper or construction paper in large letters. This is where they will match the
31. Feather Poke
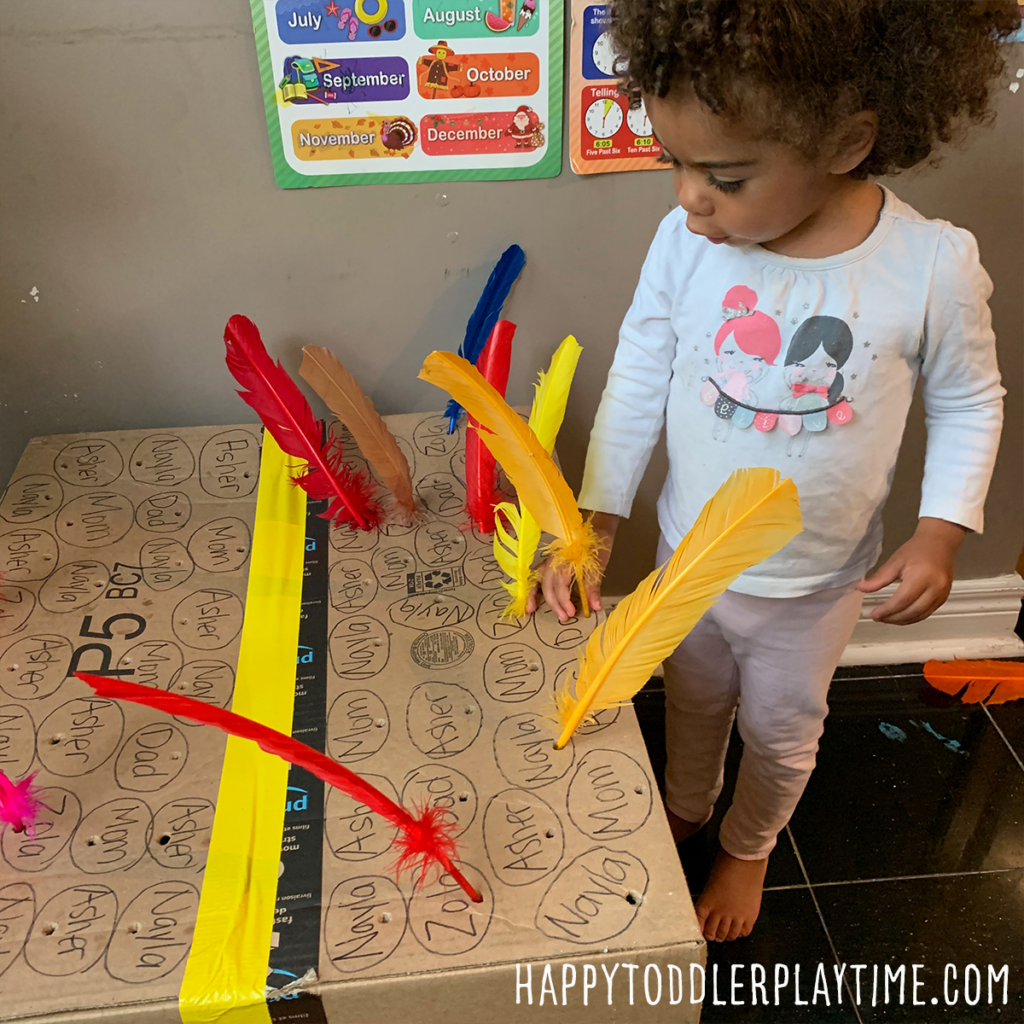
Feather name poke is a fun and easy name recognition to do with your toddler or preschooler!. It’s an exciting activity to do during Thanksgiving or any time of the year.
Materials
- Large Cardboard Box
- Black Sharpie
- Feathers
How To Make It
To set this easy name recognition activity up, simple take your black sharpie and write your toddler’s or preschooler’s name all over the box, along with other names of members of your family, such as Mom, Dad, and a siblings name. Draw a circle around each name.
Then take a pen and poke a hole under the name (but still inside the circle around the name). You want to make a hold big enough to fit the bottom of a feather but not too big that they fall right through.
Invite your toddler or preschooler to find their name and poke a feather through the hole under it.
Play2Learn Toddler & Preschool Programs for Curious Toddlers
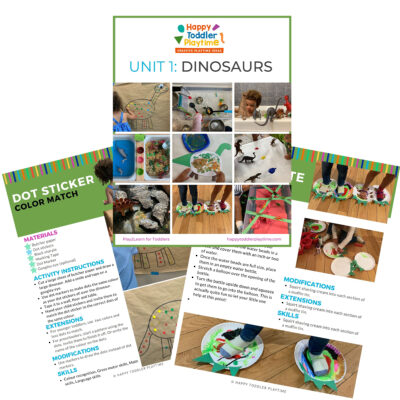
There is no limit to your toddler’s energy and curiosity. That energy and curiosity although a joy can be challenging at times. Their interest in just about everything around them is what makes them great learners. One and two year olds can soak up so much just from their senses!
But as a teacher or parent that thirst for learning can be exhausting. That is why I created this toddler and preschooler program. To help you get the most out of this time with your curious toddler without having to come up with creative ways to play and interact with them.
Play2Learn for Toddlers includes 20 Units for toddlers. Each 2-week toddler unit has 20 super easy to set up and engaging activities for toddlers 18 months to 3 years.
Play2Learn Preschool which includes 20 Units for preschoolers. Each 2-week preschoolers unit has 20 unique and easy to set up and engaging activities for preschoolers 3 years to 5 years. That’s over 800 learning activities for your toddler and preschooler at your fingertips! So many ideas you and your child will never be bored again!
These toddler and preschool lesson plans and activities will definitely keep you and your toddler and preschooler busy playing and learning!
Click here for more information: Play2Learn
Book: Exciting Sensory Bins for Curious Kids
Did you know I wrote a book of sensory bins? Click here for more information Exciting Sensory Bin for Curious Kids. Or grab your copy at Amazon.
Boring afternoons are made exciting with awesome animal-based bins, like Salty Shark Bay or Yarn Farm. Pretend play bins like Birthday Cake Sensory Play or Bubble Tea Party encourage creativity and imagination. And your kids will have so much fun they won’t even know they’re getting smarter with STEAM (science, technology, engineering, art and math) activities like Sink or Float Soup, Magnetic Letter Hunt or Ice Cream Scoop and Count.
Designed for toddlers 18 months and up.
Book: Super STEAM Activity Book for Kids
Learning all about science, technology, engineering, art, and math sets kids up for scholastic success―and it can be so much fun! Watch kids enjoy building STEAM skills as they color friendly fish, help water find its way to tree roots, solve math problems with mazes, and more.
Find out more and grab your copy here.
Designed for preschoolers 3 years old and up.
Book: Big Book of Riddles for Kids
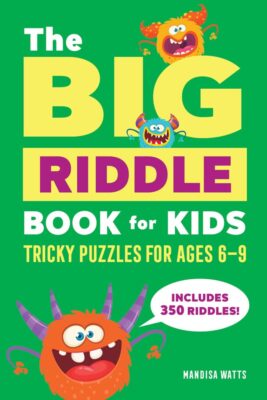
Riddle me this: What’s an exciting way to practice critical thinking while having a blast? The Big Riddle Book for Kids, of course! From hilarious puns to tough brain teasers, kids can build problem-solving skills with hundreds of riddles tha. t show them how to think outside the box.
- 350 riddles for kids—Have hours of fun with riddles, puns and jokes, and math and logic puzzles that’ll get their wheels turning!
- Level up their skills—Riddles get trickier as kids progress through the book, challenging them as they get better at solving puzzles!
- Double-check their work—Kids can check their answers in the back of the book with a handy answer key.
Help children expand their minds while having fun with this puzzle book for kids!
Designed for kids ages 6 years old and up.
TV Show: Curious Crafting
I’m so excited to share my crafting TV show Curious Crafting which launched in July 2022 on TVOkids and TVOkids YouTube! Season 2 aired in August 2023! My show was also nominated in 2023 for Best Live Action Preschool Series by the Youth Media Alliance Awards of Excellence.
Curious Crafting Season 1 is also now airing in Australia on ABC! Watch it here!
Set in the ultimate crafting space, Curious Crafting is a short form pre-school age series about the joy of making crafts. I lead a rotating cast of adorable little preschoolers (including my own) making magic out of common household objects.
In each episode we transform recycled items into magical crafts like a milk carton school bus, paper bag puppet or cotton pad turtle. The crafters learn and laugh their way through each activity while demonstrating what their young imaginations can create.
Curious Crafting shares the adventure and joy of making art with takeaway lessons for creating crafts at home.
This show designed for toddlers and preschoolers 2.5 years old and up.