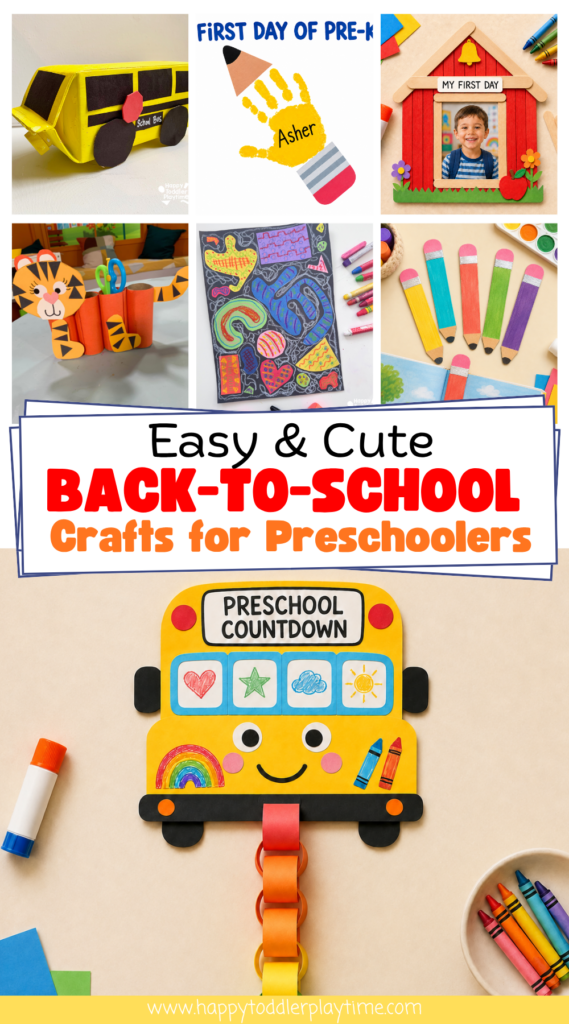

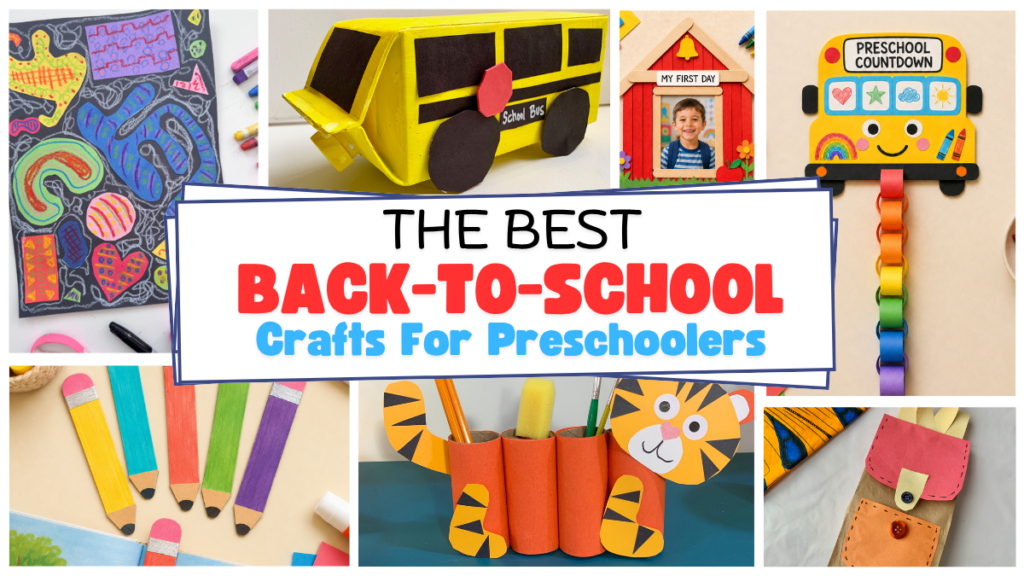
Get your kids excited for the first day of school with these fun and creative back to school crafts. From fun school buses to pencil crafts to creative abstract art and more.
Fun Back to School Crafts for Kids
We’ve been keeping busy this summer with fun crafts and summer science. Although the hazy lazy days of summer are almost done, the fun doesn’t need to end! To help keep the creative juices flowing and hopefully get you and your little one all geared up for a great school year, Ive put together this list of easy and fun back to school crafts for kids.
You’ll find school bus crafts, lots of fun and colourful apple crafts, a few countdown crafts, school supplies crafts and more. All great ways to get them thinking about the first day of school in a positive light!
Easy Back-to-School Activities & Crafts for Kids
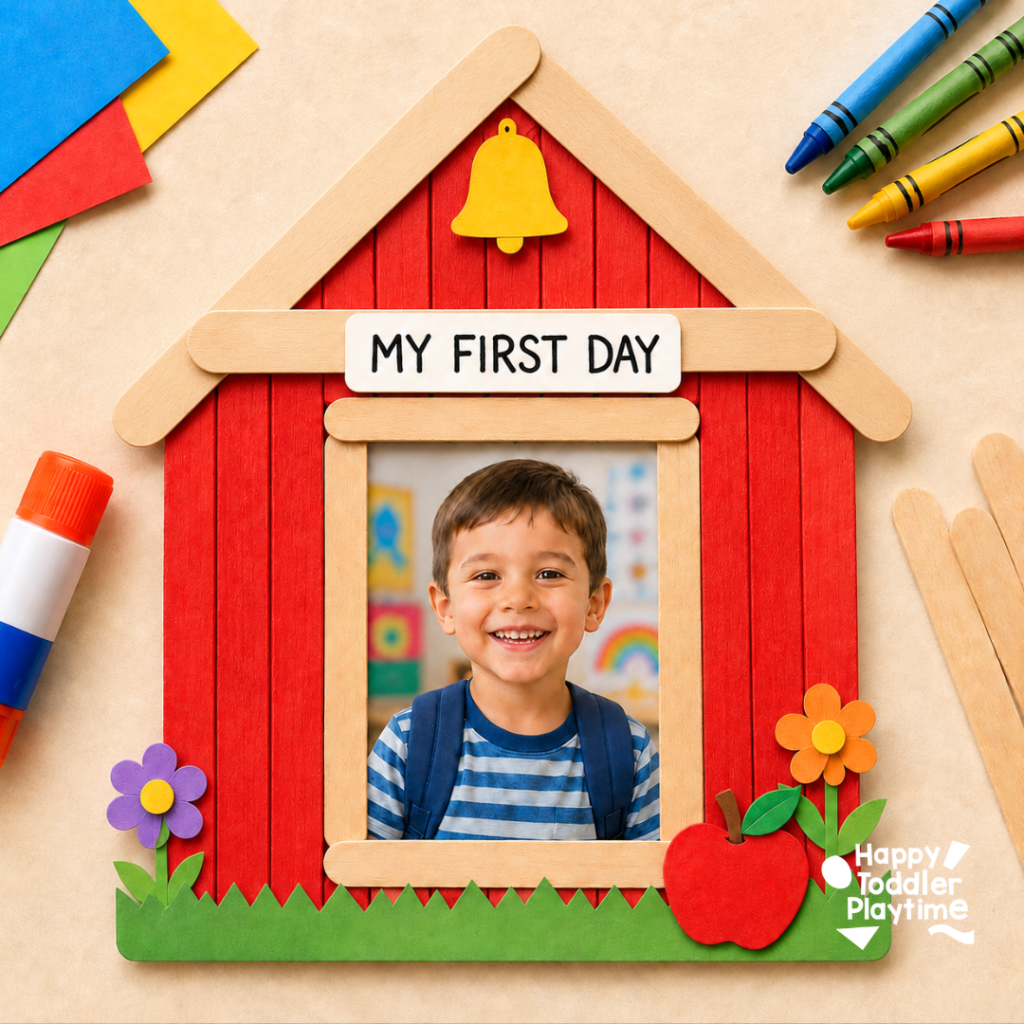
1. Popsicle-Stick Schoolhouse Picture Frame
Celebrate the first day of school with this colorful keepsake frame! Preschoolers can help paint and decorate the schoolhouse, then add a favorite school photo.
Materials
- Jumbo popsicle sticks
- Red washable paint and paintbrush
- Child-safe glue
- Printed photo
- Yellow craft foam
- Red, green, orange, purple, and yellow construction paper
- Black marker
- Scissors
- White cardstock
How to Make It
- Paint several popsicle sticks red and let them dry.
- Line the red sticks side by side to create the schoolhouse. Secure them together with another craft stick glue across the back.
- Use four natural sticks to make the picture frame in the center.
- Add two diagonal sticks for the roof and one horizontal stick across the front. Cut the red craft sticks underneath to create a triangle shape.
- Cut out a yellow foam bell and glue it inside the roof.
- Write “MY FIRST DAY” on white cardstock and attach it above the photo.
- Decorate the bottom with paper grass, flowers, and an apple.
- Attach the photo behind the frame opening and allow everything to dry.
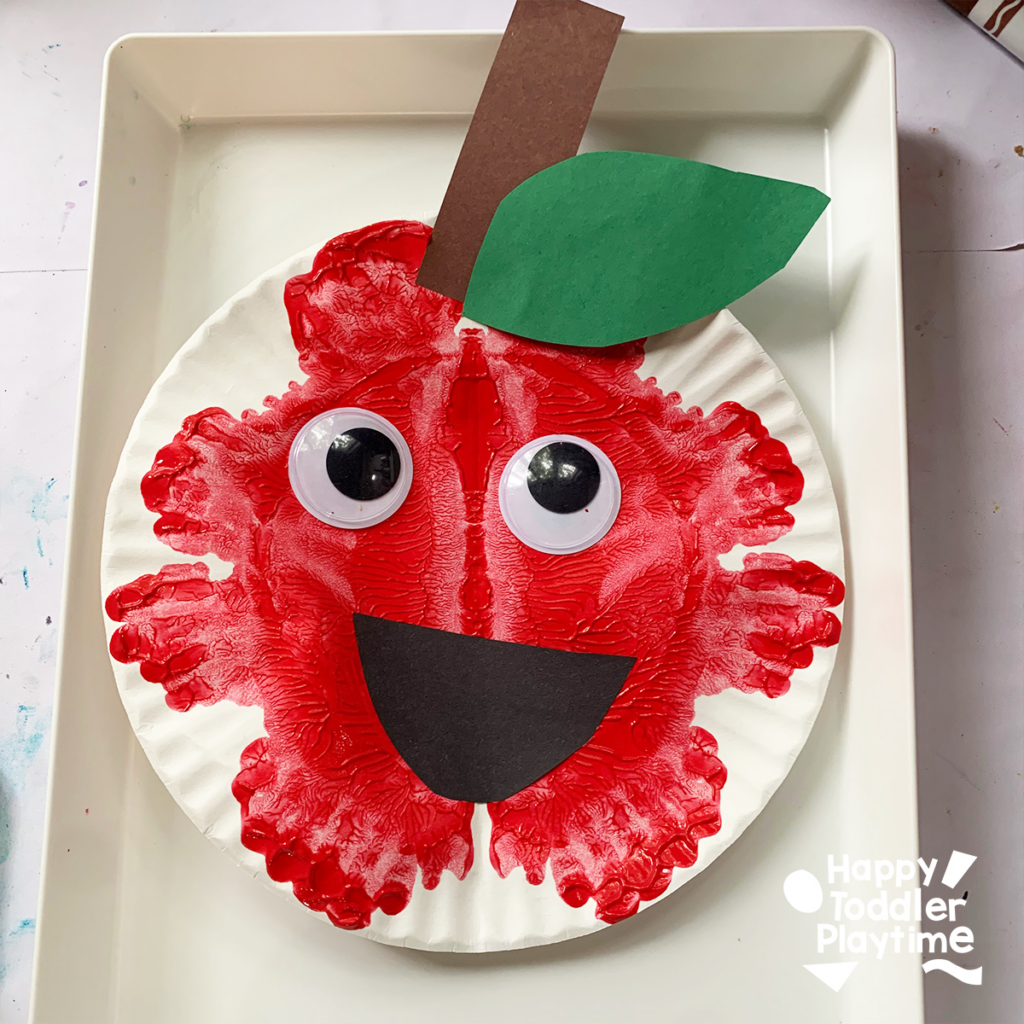
2. Paint Splat Apple Craft
A super cute and simple apple craft using a paper plate and red paint. Perfect for preschoolers during back-to-school season.
Materials
- Paper plates
- Red, green, or yellow paint
- Black construction paper (for that beaming smile!)
- Green and brown construction paper (for the stem and leaf)
- Googly eyes
- Glue
How to Make It
- Splat Time: Take your paper plate and fold it in half and light crease the center. Open it up again and put some red paint all over one side of the paper plate.
- Fold the plate in half again and invite your little one to use their fingers to move the paint inside the paint all over. Place something on the table just in case some of the paint oozes out of the paper plate.
- Open the plate up and check out the cool symmetrical shape that they made.
- Cut out a smile for the apple from black construction paper. Glue it on to the pumpkin, along with the googley eyes.
- Cut out a stem and a leaf and glue the, to the top of the apple.
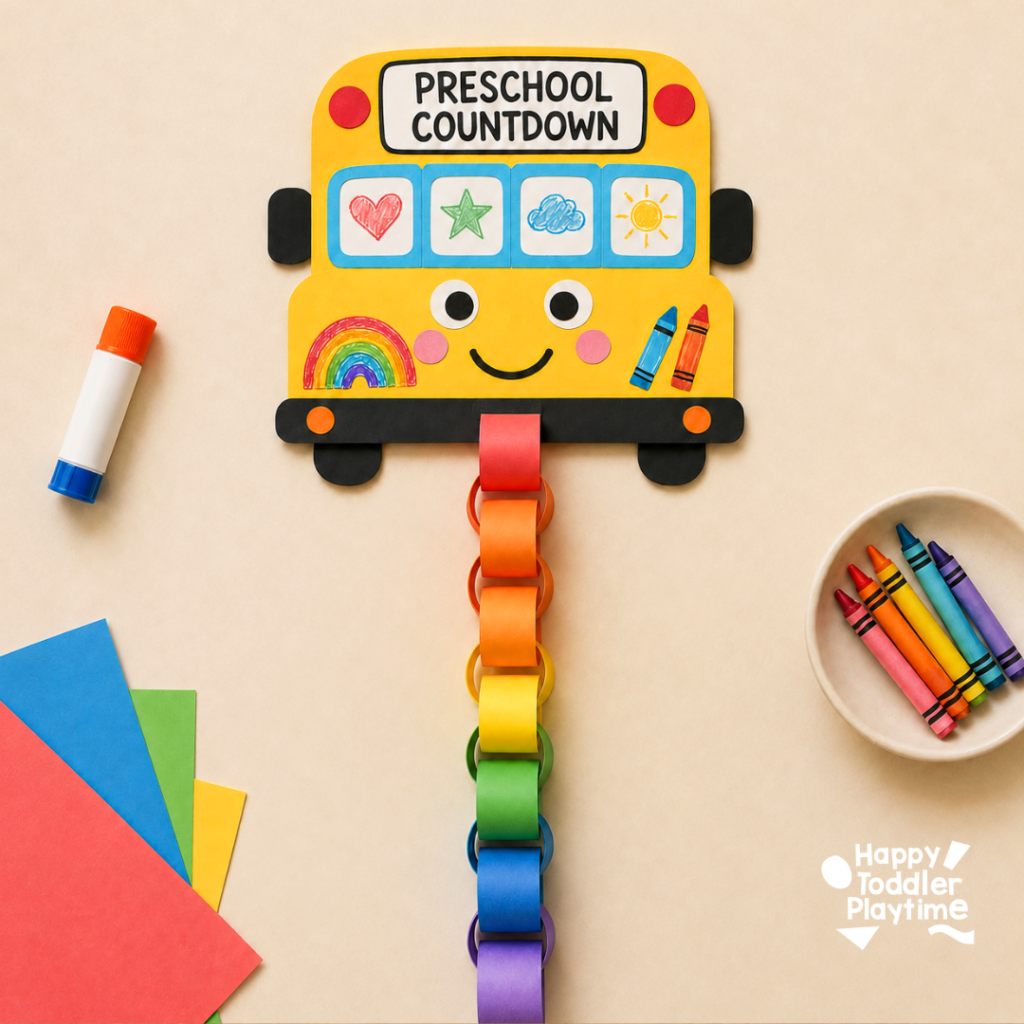
3. Preschool Countdown Paper Chain
Make the wait for preschool extra exciting! Children can remove one colorful paper link each day until their first day arrives.
Materials
- Yellow, black, white, blue, and rainbow-colored construction paper
- Child-safe scissors
- Glue stick or tape
- Crayons or markers
- Pencil
How to Create
- Cut a large school-bus shape from yellow paper. Add paper windows, wheels, bumper, lights, and a happy face and cheeks.
- Write “PRESCHOOL COUNTDOWN” at the top and decorate the bus with colorful drawings.
- Cut several equal-sized strips from rainbow-colored paper.
- Form the first strip into a loop and glue or tape the ends together.
- Thread each new strip through the previous loop, then secure it to build the chain.
- Attach the completed chain beneath the bus.
- Remove one link each day as preschool gets closer!
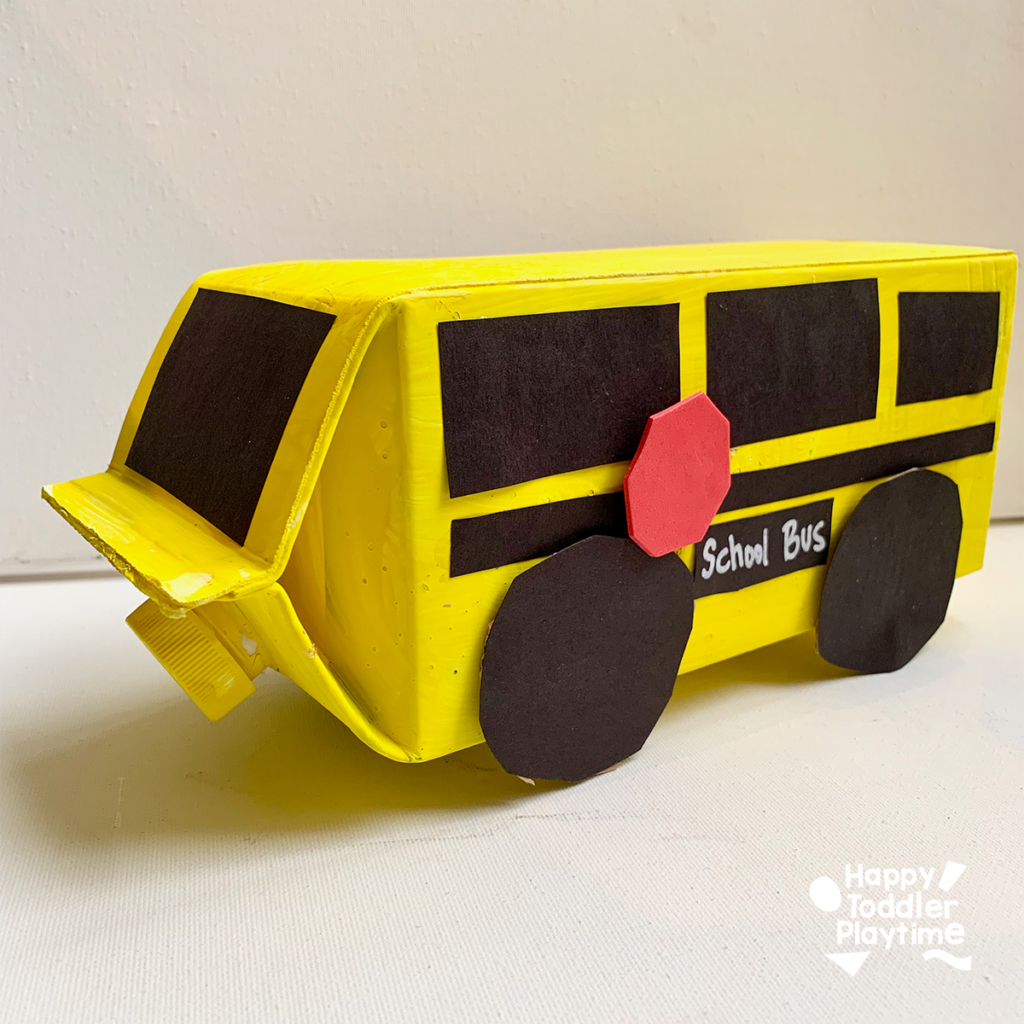
4. Milk Carton School Bus
Milk Carton School Bus Craft is an adorable craft to create anytime of the year or at the start of a new school year. Find the full instruction below and here.
Materials
- Milk carton
- White spray paint
- Yellow acrylic Paint
- Paint brush
- Black construction paper
- Scissors
- Glue
- Cardboard
How to Make a Milk Carton School Bus
- To prepare for this craft you will need to do a few things before doing it with your kids. Save your milk carton, clean it out and then spray paint it with white spray paint. Alternatively, you can also paint it with primer. You want cover the writing on the carton enough so that when your little one paint over it with the yellow paint and the writing does not come through.
- Paint the milk carton with yellow acrylic paint. Cover the entire milk carton including the cap and the top and bottom. Set it aside to dry. If you little one is a bit impatient with the drying process whip out the hair drier and help the drying process by blowing it on low heat.
- While your craft dries you can also have your child cut out the windows, doors, stripes and stop sign for the bus out of black construction paper. For toddlers cut these items out for them. For preschoolers, draw the outline of a few shapes for them to cut. Things such as square windows or rectangular doors. For older kids have them use a white chalk marker to write out School Bus on a small black square of construction paper.
- Next, cut out 4 circles for wheels out of the black construction paper. Also cut out 4 similar sized circles from cardboard. Glue the black circle wheels to the cardboard circles.
- Once your milk carton bus is dry, glue these items down on both sides of the bus. Don’t forget to glue on a windshield and a back door. Glue the cardboard circles to the bottom sides of the milk carton bus as the wheels.
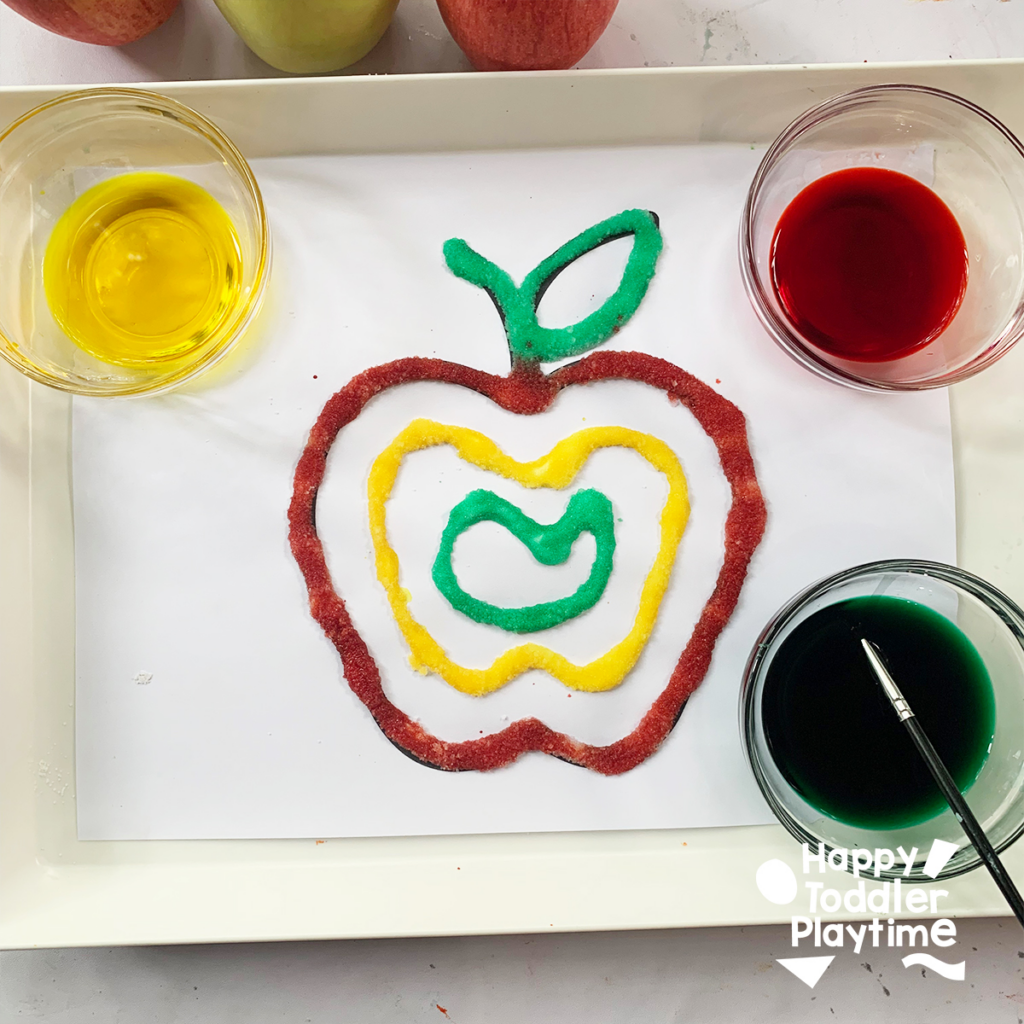
5. Salt Painted Apple Craft
Materials
- Free printable apple template (available on our blog here)
- Food coloring and water
- Small bowls
- A small paintbrush
- Salt
- Bottle of glue
- A tray to contain the mess
How to Make
- Start with the Basics: Begin by printing our adorable apple template.
- Glue Time: Place the apple template in a tray. Hand over the glue to your kiddos and let them trace the outline of the apple with it. It’s a great way to practice those fine motor skills. They can create a design inside the apple or on the outside. You can assist them by pencilling in a few lines for them depending on their age.
- Sprinkle the Salt: Ask them to sprinkle a generous amount of salt over the glue. Shake off the excess in the tray and you have a sparkling white apple ready for some color.
- Color Mixing: In small bowls mix red, yellow and green food coloring with water.
- Decorating: Using a small paint brush invite your child to dip the brush in the coloured water and then lightly touch the salt lines. As they brush the colors on, the color spread of colors seeping along the salt lines, creating a beautiful watercolor effect.
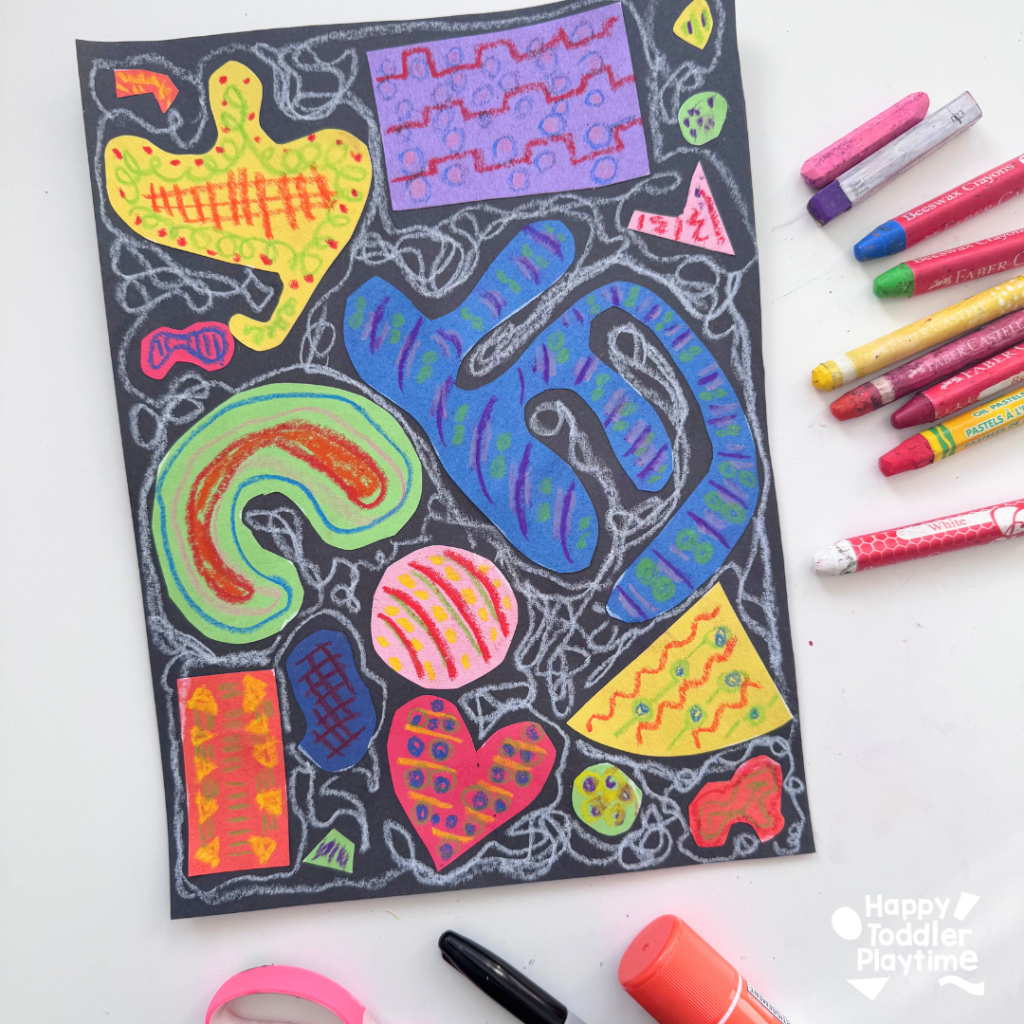
6. Reggie Laurent Inspired Abstract Art Project
Reggie Laurent inspired collages are a fun way to kick off the school year. These art project are perfect for kids aged 5 and up. You can use oil pastels or markers or paint or any craft supply you have. I love this project because it has it all from color recognition to mark making, shapes and patterns. Find the full instruction below and here.
Materials
- Construction paper in different colors
- Scissors
- Glue stick or school glue
- Crayons or oil pastels in various colors, including white
How to Make a Reggie Laurent Inspired Abstract Art Piece
- Start by cutting out various freeform shapes from different colors of construction paper You can cut out geometric shapes like, squares, rectangles, triangles, hearts and circles as well as organic shapes. Try wavy lines, ovals, squiggles, triangles, or completely random shapes—anything goes! Laurent’s work is known for its flow and movement, so don’t worry about being precise!
- Before gluing, play around with your arrangement on a piece of black cardstock. Try not to overlap the shapes, just like in Laurent’s paintings. Let kids decide how they want their composition to look—no wrong answers!
- Once happy with the placement, use a glue stick to attach the pieces to the background. Encourage kids to leave some space in between the shapes, just like in Laurent’s work.
- Use white oil pastels or crayons to draw different patterns such as dots, lines, and small accents around the shapes. Add extra pops of color and patterns to make the piece feel more dynamic.
- The final step is to use a white crayon or oil pastel and draw squiggles all around the blank black spaces between the shapes.
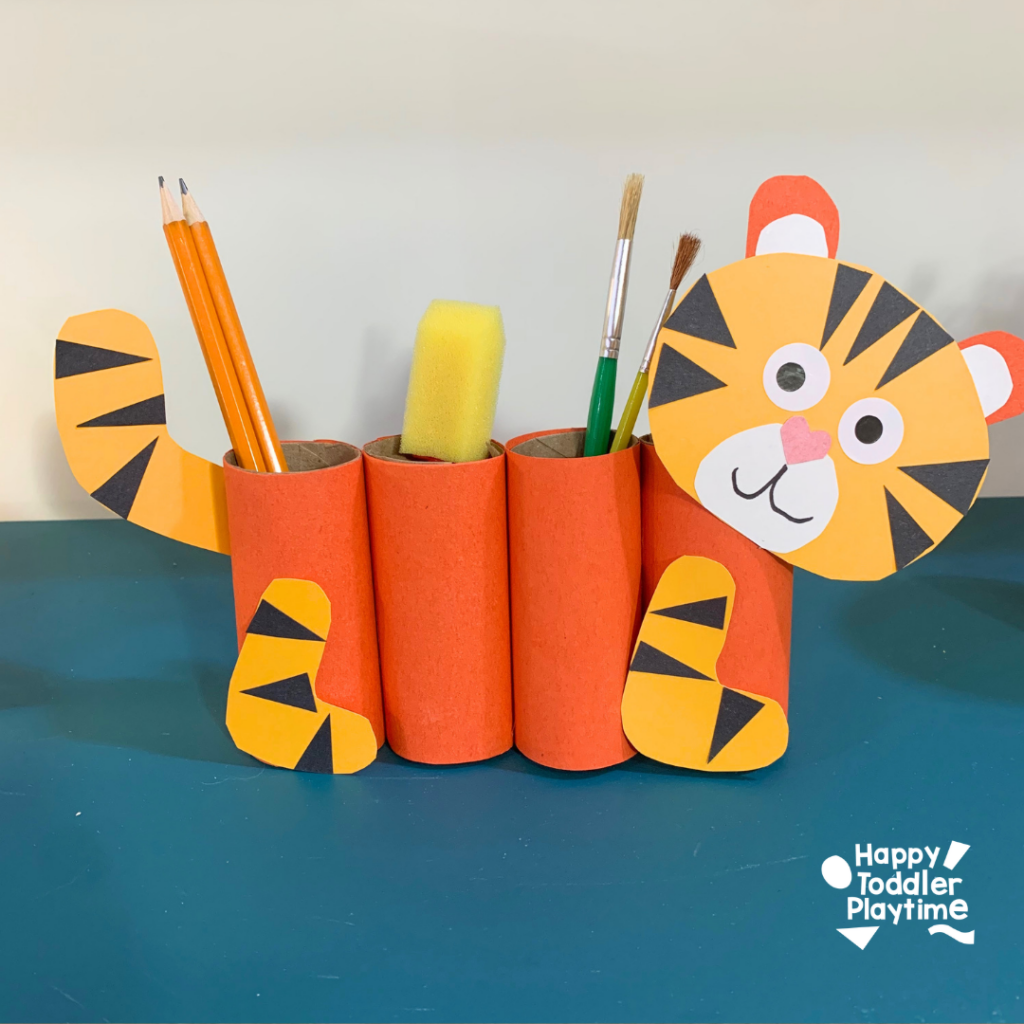
7. DIY Tiger Desk Organizer
This adorable Toilet Paper Roll Tiger Pencil Holder is a fun and easy recycled craft for kids. Once finished, kids can use their tiger to hold pencils, paintbrushes, markers, and other art supplies.
Materials
- 4 empty toilet paper rolls
- Orange construction paper
- Yellow or orange construction paper
- Black construction paper
- White construction paper
- Pink construction paper
- Glue
- Scissors
- Black marker
- Pencil
How to Make a Toilet Paper Roll Tiger Pencil Holder
- Cover the rolls. Wrap four toilet paper rolls with orange construction paper and glue the paper in place. Glue the rolls together side by side.
- Make the tiger’s head. Cut a large circle from yellow or orange paper. Cut out two ears and glue them to the head.
- Add the face. Cut out white circles for the eyes and muzzle. Add black pupils, a small pink nose, and draw the mouth with a black marker.
- Add the stripes. Cut several small triangles from black construction paper and glue them around the tiger’s face.
- Make the paws. Cut two paw shapes from yellow or orange paper. Add black paper stripes and glue one paw to each side of the pencil holder.
- Make the tail. Cut out a long, curved tail. Decorate it with black stripes and glue it to the back of the toilet paper rolls.
- Finish your tiger. Glue the tiger’s head to the front of one side of the pencil holder. Let everything dry, then fill the rolls with pencils, crayons, paintbrushes, or other craft supplies.
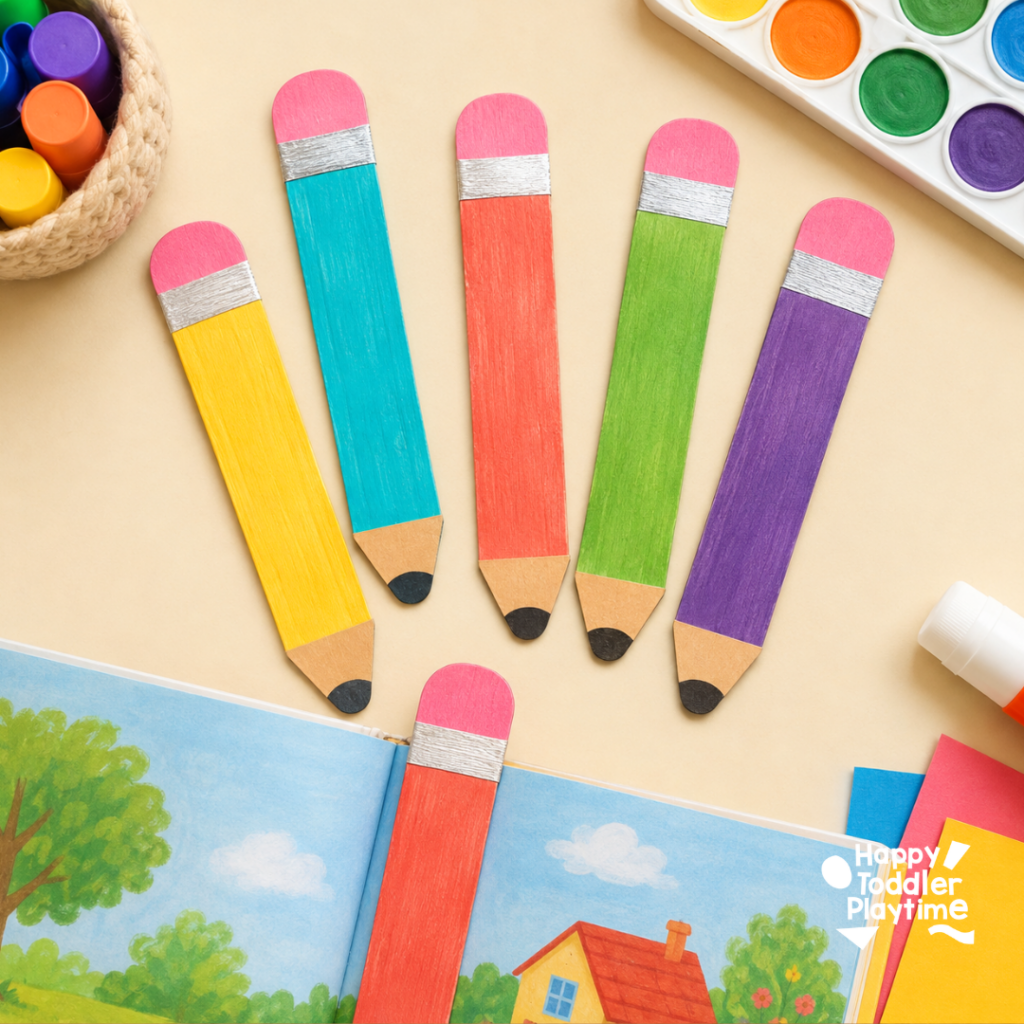
8. Craft-Stick Pencil Bookmarks
Make reading extra fun with these colorful pencil bookmarks! This simple back-to-school craft lets children choose their favorite colors and create a useful bookmark for story time.
Materials
- Jumbo wooden craft sticks
- Watercolor paint
- Paintbrushes
- Silver acrylic paint marker
- Scissors
How to Make Them
- Paint each craft stick a bright color and let it dry.
- Paint one end pink to create the eraser.
- Draw on a thin silver stripe beneath the eraser using a silver paint marker.
- Use scissors to cut the other end of the craft stick to form a pointed end.
- Leave the section blank and the use black paint or a black paint pen to draw on a rounded end for the graphite.
- Let everything dry before placing the bookmark inside a book.
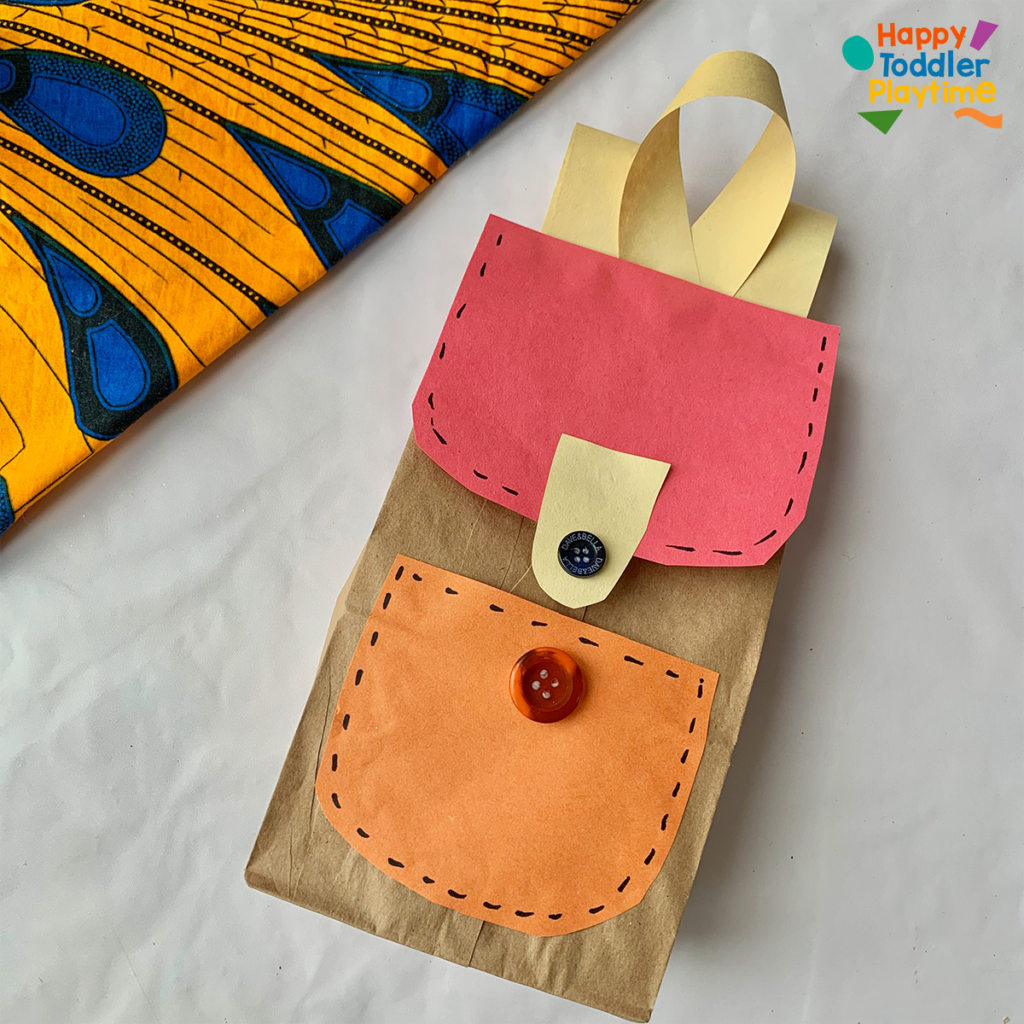
9. Paper Bag Backpack Craft
Make this cute back pack craft using a simple paper bag! A fun craft for preschoolers during back to school time.
Materials
- Paper bag
- Construction paper
- Glue
- Buttons
How to Make Paper Bag Backpack Craft
- Grab your supplies. Cut out a front pocket from colourful construction paper. Cut three long strips for shoulder straps and a handle as well as a tab. Also cut out a piece of construction paper to cover the back of the paper bag and the top flap of the backpack.
- Glue the pocket to the front of the paper bag. Add a button and stitching detail using a black marker or sharpie.
- Fold the top of the paper bag down about half way.
- On the back of the paper bag, glue on a piece of construction paper. Then glue on the shoulder straps and handle.
- Glue on the top flap and buckle. Add a button and stitching detail with a marker.
10. Handprint Pencil Craft
This adorable handprint pencil craft is a fun way to celebrate the first day of school! It makes a sweet keepsake for preschoolers and Pre-K kids, and that little handprint in the middle is something parents will love looking back on later.
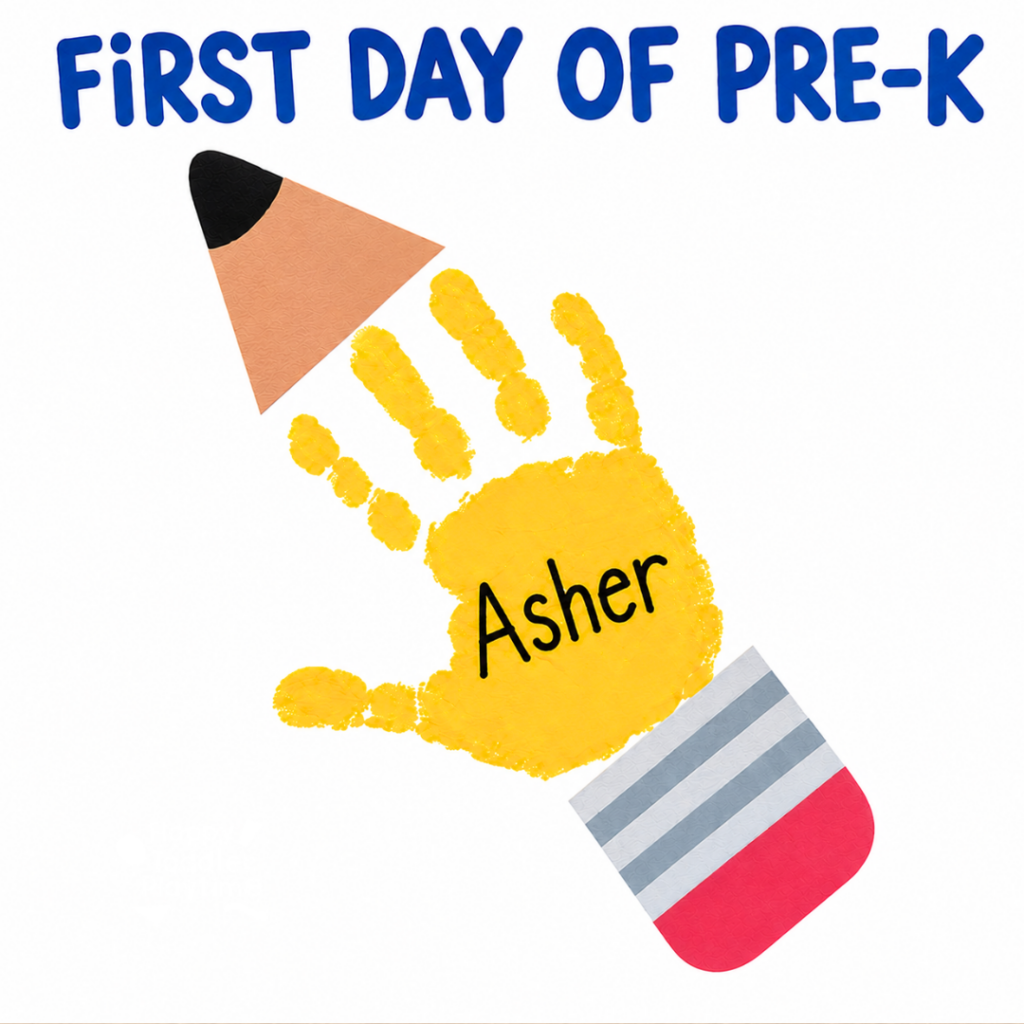
With the printable pencil templates, it’s also really easy to put together. Add your child’s name to the handprint and customize the heading for preschool, Pre-K, kindergarten, or whichever grade they’re starting.
Materials
- Handprint Pencil Craft printable templates
- White cardstock or construction paper
- Yellow washable paint
- Paintbrush
- Black marker
- Printer
How to Make a Handprint Pencil Craft
- Print the templates. Print the pencil tip, eraser, and “First Day of Pre-K” template onto cardstock.
- Make the handprint. Paint your child’s hand with yellow washable paint and carefully press it onto the center of the paper. Lift their hand straight up and let the paint dry completely.
- Add your child’s name. Once everything is dry, use a black marker to write your child’s name across the palm of the handprint.
- Finish your keepsake. Add the printable “FIRST DAY OF PRE-K” title at the top, and your handprint pencil is ready to display!
11. Fork Painted Apple Craft
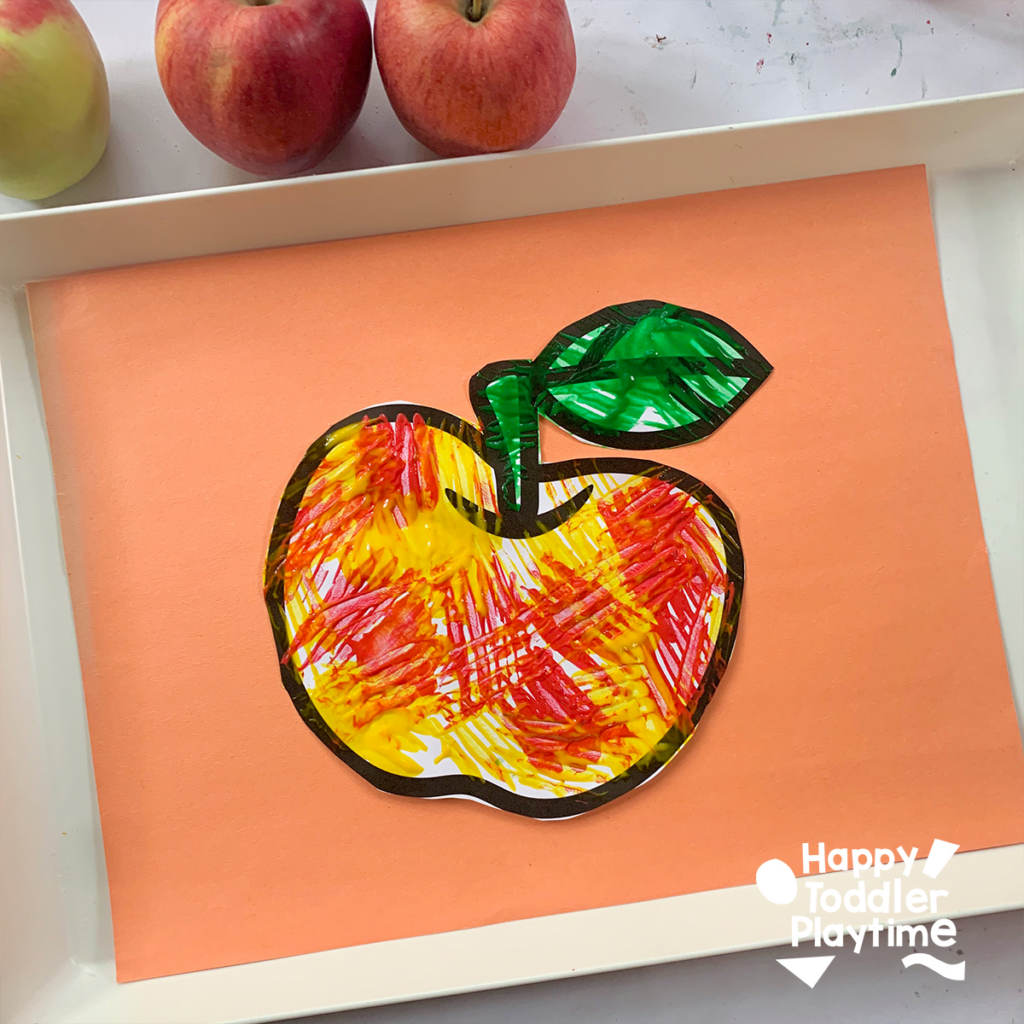
Materials
- Free printable apple template
- Washable kids paint (red, green, and yellow)
- Plastic forks
- A surface to work on (like a big piece of cardboard or a disposable tablecloth) to contain the mess
- Construction paper
- Glue
- Scissors
How to Make A Fork Painted Apple
- Pour a little green, red and yellow paint onto a palette or a disposable plate.
- Guide your child to dip the back of the fork into the paint and then press it onto the apple template.
- Let your apple dry. Once dry, use scissor to cut it out and glue it to a piece of construction paper.
12. Minecraft Pencil Holder Craft
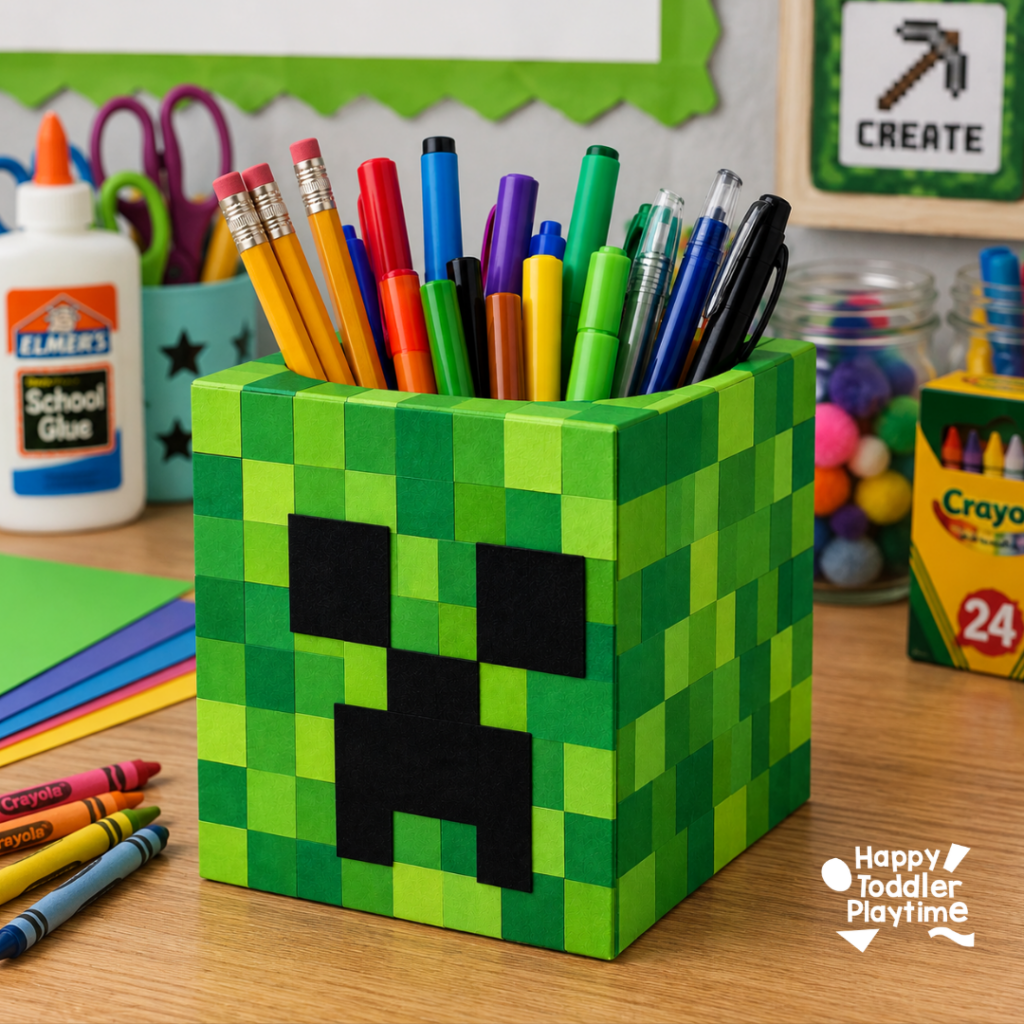
Have a Minecraft fan at home or in your classroom? Turn an empty cube tissue box into a fun Minecraft-inspired pencil holder that kids can actually use when they’re finished!
This recycled craft is a great back-to-school project for older preschoolers and elementary-aged kids. They’ll have fun creating the pixelated green design and Creeper face, and afterward, they’ll have a cool spot to keep pencils, markers, crayons, and other art supplies.
Materials
- Empty cube tissue box
- Green acrylic or tempera paint
- Paintbrush
- Green construction paper or cardstock in several shades
- Black construction paper or cardstock
- Scissors
- Glue
- Pencil
- Ruler
- Pencils, markers, or crayons to fill the finished holder
How to Make a Minecraft Pencil Holder
- Prepare the tissue box. Remove any remaining tissues and plastic from the opening of the box. Make sure the inside is clean and empty.
- Paint it green. Paint the outside of the tissue box green. Depending on the design of your box, you may need two coats to completely cover it. Let it dry.
- Make the pixels. Cut small squares from several different shades of green paper. They don’t need to be perfectly identical—the mix of greens is what gives the box its pixelated Minecraft look.
- Cover the box. Glue the green squares randomly around the outside of the tissue box. Mix up the light and dark shades as you go.
- Create the Creeper face. Cut two square eyes and the Creeper’s mouth shape from black construction paper.
- Add the face. Glue the black pieces onto the front of the tissue box to create the Creeper.
- Fill it up! Once all the glue is dry, add pencils, markers, crayons, or other school supplies through the opening at the top.
Play2Learn Toddler & Preschool Programs for Curious Toddlers
There is no limit to your toddler’s energy and curiosity. That energy and curiosity although a joy can be challenging at times. Their interest in just about everything around them is what makes them great learners. One and two year olds can soak up so much just from their senses!
But as a teacher or parent that thirst for learning can be exhausting. That is why I created this toddler and preschooler program. To help you get the most out of this time with your curious toddler without having to come up with creative ways to play and interact with them.
Play2Learn for Toddlers includes 20 Units for toddlers. Each 2-week toddler unit has 20 super easy to set up and engaging activities for toddlers 18 months to 3 years.
Play2Learn Preschool which includes 20 Units for preschoolers. Each 2-week preschoolers unit has 20 unique and easy to set up and engaging activities for preschoolers 3 years to 5 years. That’s over 800 learning activities for your toddler and preschooler at your fingertips! So many ideas you and your child will never be bored again!
These toddler and preschool lesson plans and activities will definitely keep you and your toddler and preschooler busy playing and learning!
Click here for more information: Play2Learn
Book: Exciting Sensory Bins for Curious Kids
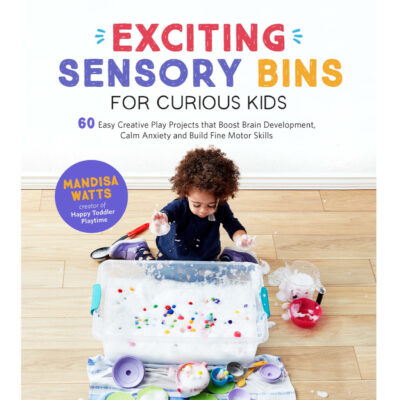
Did you know I wrote a book of sensory bins? Click here for more information Exciting Sensory Bin for Curious Kids. Or grab your copy at Amazon.
Boring afternoons are made exciting with awesome animal-based bins, like Salty Shark Bay or Yarn Farm. Pretend play bins like Birthday Cake Sensory Play or Bubble Tea Party encourage creativity and imagination. And your kids will have so much fun they won’t even know they’re getting smarter with STEAM (science, technology, engineering, art and math) activities like Sink or Float Soup, Magnetic Letter Hunt or Ice Cream Scoop and Count.
Designed for toddlers 18 months and up.
Book: Super STEAM Activity Book for Kids
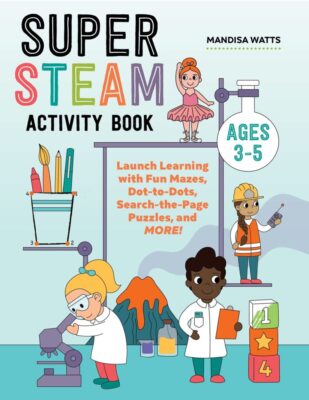
Learning all about science, technology, engineering, art, and math sets kids up for scholastic success―and it can be so much fun! Watch kids enjoy building STEAM skills as they color friendly fish, help water find its way to tree roots, solve math problems with mazes, and more.
Find out more and grab your copy here.
Designed for preschoolers 3 years old and up.
Book: Big Book of Riddles for Kids
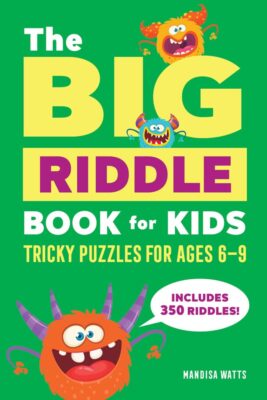
Riddle me this: What’s an exciting way to practice critical thinking while having a blast? The Big Riddle Book for Kids, of course! From hilarious puns to tough brain teasers, kids can build problem-solving skills with hundreds of riddles tha. t show them how to think outside the box.
- 350 riddles for kids—Have hours of fun with riddles, puns and jokes, and math and logic puzzles that’ll get their wheels turning!
- Level up their skills—Riddles get trickier as kids progress through the book, challenging them as they get better at solving puzzles!
- Double-check their work—Kids can check their answers in the back of the book with a handy answer key.
Help children expand their minds while having fun with this puzzle book for kids!
Designed for kids ages 6 years old and up.
TV Show: Curious Crafting
I’m so excited to share my crafting TV show Curious Crafting which launched in July 2022 on TVOkids and TVOkids YouTube! Season 2 aired in August 2023! My show was also nominated in 2023 for Best Live Action Preschool Series by the Youth Media Alliance Awards of Excellence.
Curious Crafting Season 1 is also now airing in Australia on ABC! Watch it here!
Set in the ultimate crafting space, Curious Crafting is a short form pre-school age series about the joy of making crafts. I lead a rotating cast of adorable little preschoolers (including my own) making magic out of common household objects.
In each episode we transform recycled items into magical crafts like a milk carton school bus, paper bag puppet or cotton pad turtle. The crafters learn and laugh their way through each activity while demonstrating what their young imaginations can create.
Curious Crafting shares the adventure and joy of making art with takeaway lessons for creating crafts at home.
This show designed for toddlers and preschoolers 2.5 years old and up.
WILL YOU TRY MAKING A BACK TO SCHOOL CRAFT WITH YOUR KIDS? PIN IT FOR LATER!