Ok, here is it! A huge list of the best craft ideas for kids Fun and easy craft ideas for kids that you can set up in minutes.
No special skills or materials required. You likely already have everything you need to start getting crafty with your little person or people.
Crafts for Kids
Even if you consider yourself a non crafty person, this list of simple and fun crafts will have you changing your tune! Use this list to spark yours and your child’s own creativity. Set them up with the materials they need to make these crafts their own!
We know a thing or two about crating. I am the host of the hit TV series Curious Crafting. Over the several seasons of the show we have made tons and tons of easy to recreate crafts for kids. Showing viewers step by step how they can make them with their kids at home. Curious Crafting has been views thousands of times online, in homes and in classrooms! In this post, I share pretty much all the crafts we made on the show.
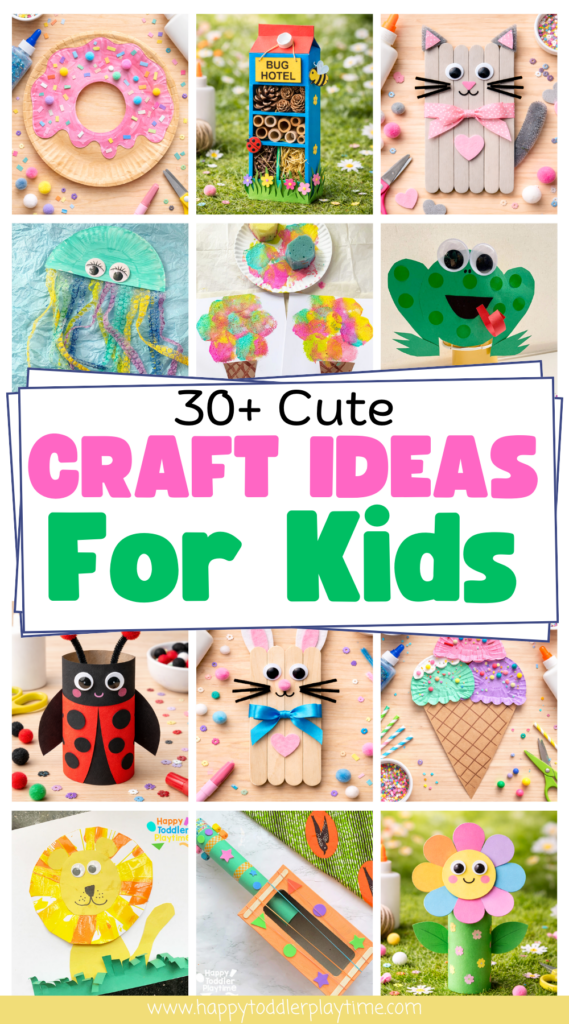
Craft Ideas for Kids
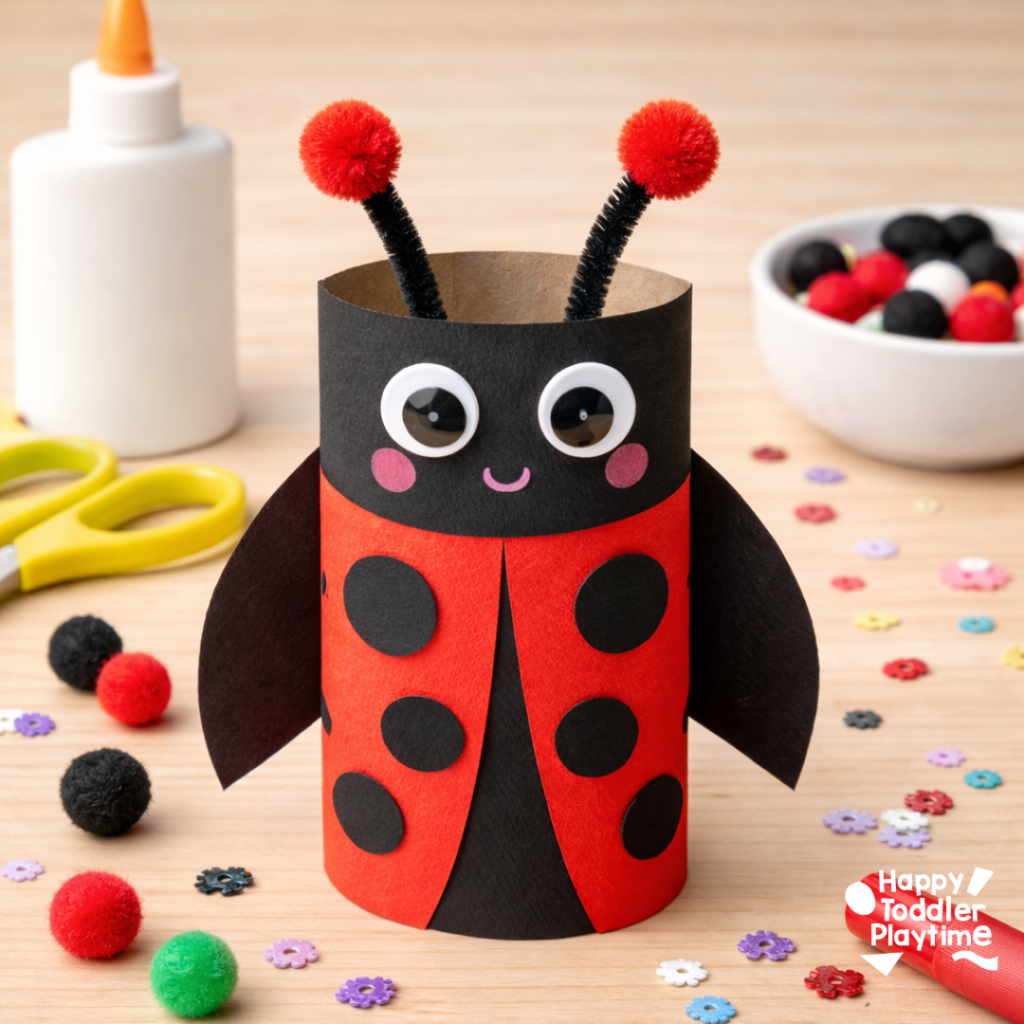
1. Cardboard Tube Ladybug Craft
Materials
- Cardboard tube
- Red and black and pink construction paper
- Black paper (for spots)
- 2 googly eyes
- 2 black pipe cleaners
- 2 red pom poms
- Glue
- Scissors
- Black marker
How to Make the Cardboard Tube Ladybug
- Wrap black paper around the cardboard tube and glue in place.
- Cut two red oval shapes and glue them to the front.
- Cut two black wing shapes and glue them to the sides.
- Cut black circle spots and glue them to the red.
- Attach googly eyes, pink cheeks and draw a smile with a pink paint marker.
- Glue pipe cleaners inside the top and add pom poms for antennae.
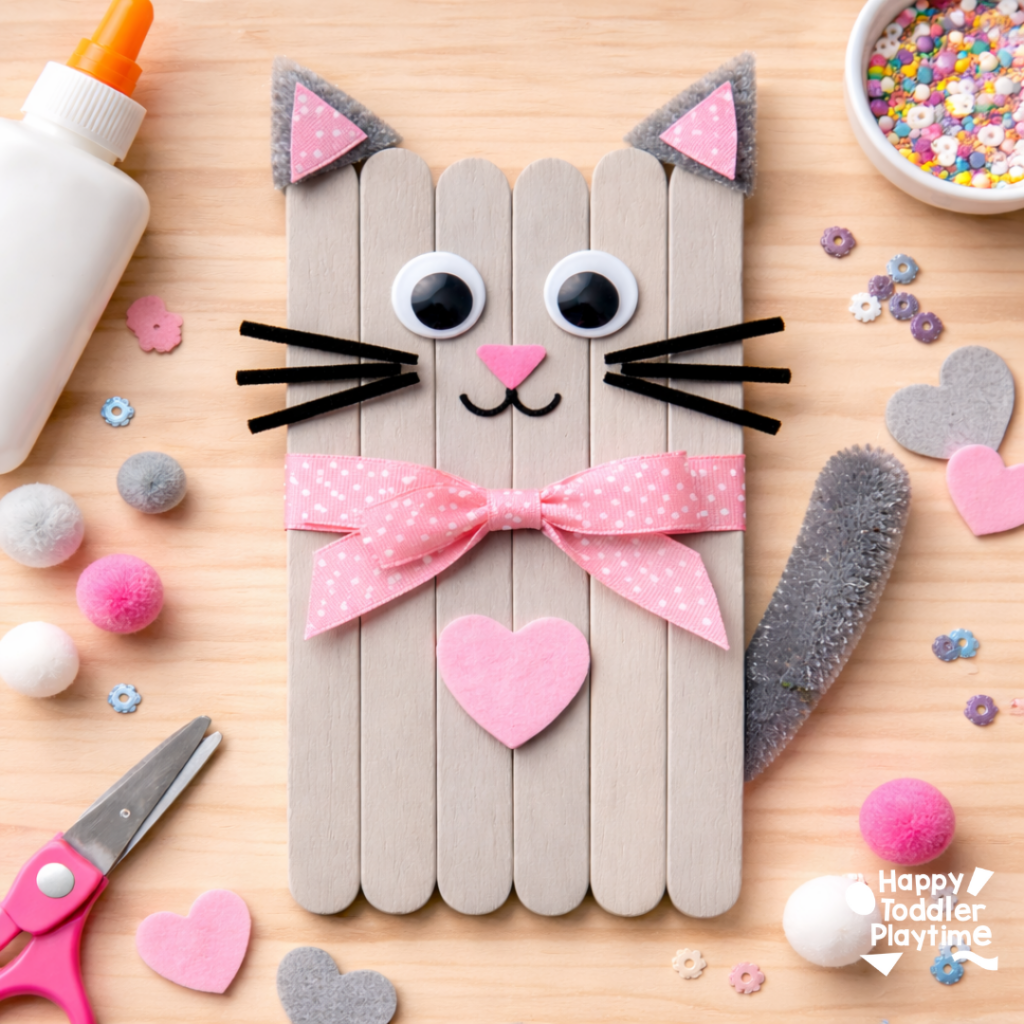
2. Popsicle Stick Kitten Craft
Materials
- Popsicle sticks
- Scissors
- Glue
- Googely eyes
- Grey and pink felt
- Black pipe cleaners
- Pink Ribbon
- Tape
Instructions
- Paint 6 popsicle sticks gray and set aside to dry.
- Cut out three small pink triangles from pink felt. Cut two slight larger grey triangles for the ears. Cut a heart from pink felt. Glue the inner ears the smaller pink triangle to the gray triangles.
- Tape the 6 popsicles sticks together.
- Glue on the ear to the top back of the popsicle sticks, Glue on the googley eyes, and pink triangle for nose.
- Cut a black pipe cleaner into 6 equal sizes and glue them to either side of the nose.
- Glue on the pink heart and a pink ribbon.
3. Paper Plate Donut Craft

Materials
- Two paper paltes
- Pink and light brown paint
- paint brush
- Construction paper
- Small pom poms
- Scissors
- Glue
Instructions
- Fold two paper plates in half and cut out circles from the middle.
- Paint one plates a light brown and the other one pink.
- Cut the pink plate to create icing.
- From different colored construction paper cut out small rectangles for sprinkles and glue them on the pink plate.
- Line up the middle circles and glue the pink plate to the top of the brown plate.
- Glue on mini Pom Pom to the pink icing plate.
4. Paper Plate Dinosaur Craft

Materials
- White paper plate
- Cardboard tube (for the legs)
- Green paint (light and dark shades)
- Google eyes
- Black marker
- Paint brushes
- Circle foam brush
- Scissors
- Glue
Instructions
- Paint the Paper Plate: Start by painting the paper plate with dark green paint. This will form the body of your dinosaur. Allow the paint to dry completely before proceeding to the next step.Prepare the body: Once the light green base is dry, cut the plate in half. Use one half for the body and on the other half trace the outline of a dinosaur neck and head and tail on the back of the plate. Use scissors to cut them out. Also cut out small triangles for the spines of the back of the dinosaur from what’s left of the half of paper plate.
- Prepare the Legs: Cut the cardboard tube into 2 equal parts. Make two slits one inch in the top of each half of the tube. You will slide the finised dinosaur craft down the slits to stand it up once you are done. Paint each tube with the same green paint used for the body. Allow them to dry.
- Add detail on the Dinosaur body: Use a circle foam brush to dab light green spots over the body to give your dinosaur texture and depth. This mimics the dinosaur’s skin and adds visual interest to your craft.
- Put the body together: Once all painted parts are dry, glue on the head, tail and spikes.
- Assemble the Dinosaur: Slide the legs to the underside of the paper plate. Make sure they are evenly spaced and strong enough to hold the plate upright if desired.
- Add Facial Features: Attach the google eyes to the face area of the plate. Use a black marker to draw a smiling mouth, nostrils, or any other facial features you like. This brings your dinosaur to life with personality and charm.
- Finishing Touches: tail or spikes, painting them to match the body and gluing them in place.
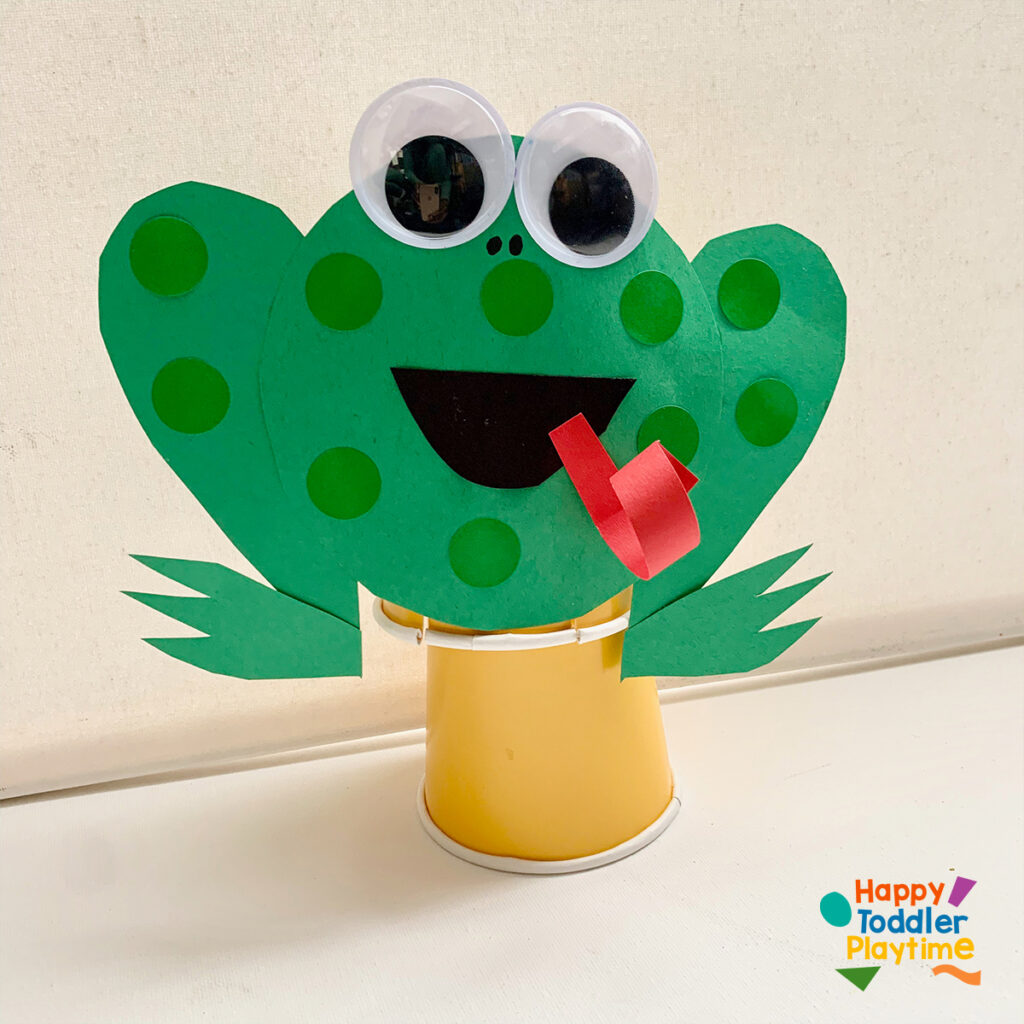
5. Jumping Frog
What better way to create memories with your kids than this super cute jumping frog craft for kids!
Materials
- Two paper cups
- Green, red and black construction paper
- Green dot stickers
- Glue
- Googley eyes
- Two elastic band
- Scissors
Instructions
- Use a CD or a bowl to trace and then cut out a circle out of green construction paper.
- Cut out a heart from the same green paper.
- Cut the heart in half and glue it to either side of the circle.
- Cut out webbed feet from green construction paper and glue them to the bottom of each heart half.
- From the black construction paper cut out a smile and glue it to the circle.
- Glue on two googley eyes.
- Cut out a long tongue from red construction paper. Curl it around a pencil and glue it to the mouth of the frog.
- Use a marker to add nostrils to the face.
- Use dot stickers or dot markers to add spots on the frog.
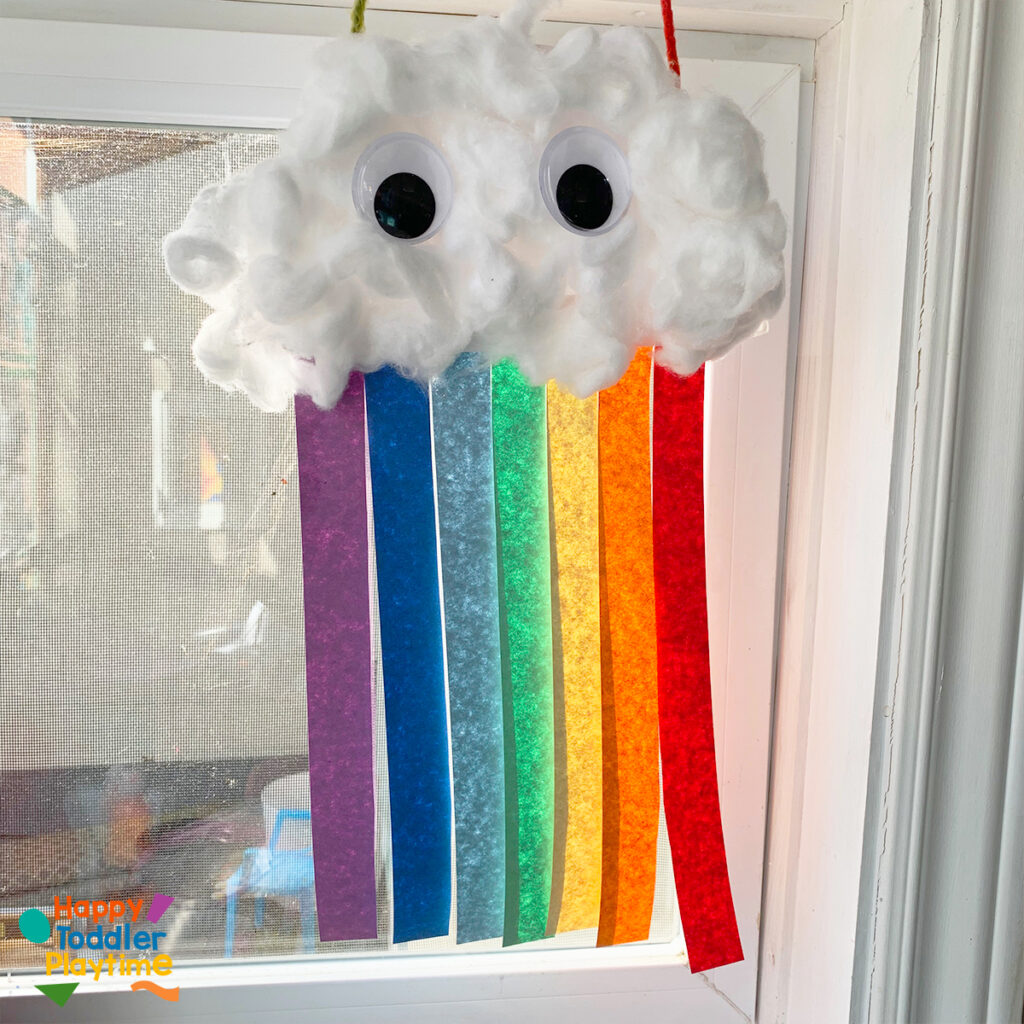
6. Paper Plate Cloud Rainbow Craft
Paper Plate Rainbow Craft is an adorable rainbow craft for toddlers and preschoolers! A fun colour matching and fine motor craft for Spring.
Materials
- Paper Plate
- Cotton balls
- Construction paper
- Googley eyes
- String or Yarn
- Tape
- Glue
Instructions
- Grab your supplies.
- Cut your paper plate in half.
- Cut out strips for the rainbow from red, orange, yellow, green, blue and purple construction paper.
- For toddlers use a marker to identify the order of the colours of the rainbow. Invite them to glue down each strip to the bottom of the paper plate.
- Turn the plate over and invite your child to squeeze glue all over the paper plate and then stick cotton balls in the glue. Cover the entire paper plate with cotton balls. I like to fluff out my cotton balls so they go further and they also look fluffier on the craft.
- Add googley eyes to the cotton ball.
- Turn the plate over and attach a piece of string or yarn using tape.
- Hang up cloudy rainbow craft in your child’s room!
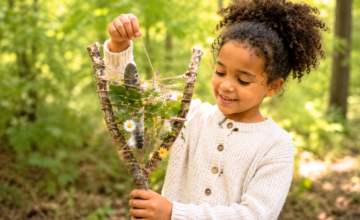
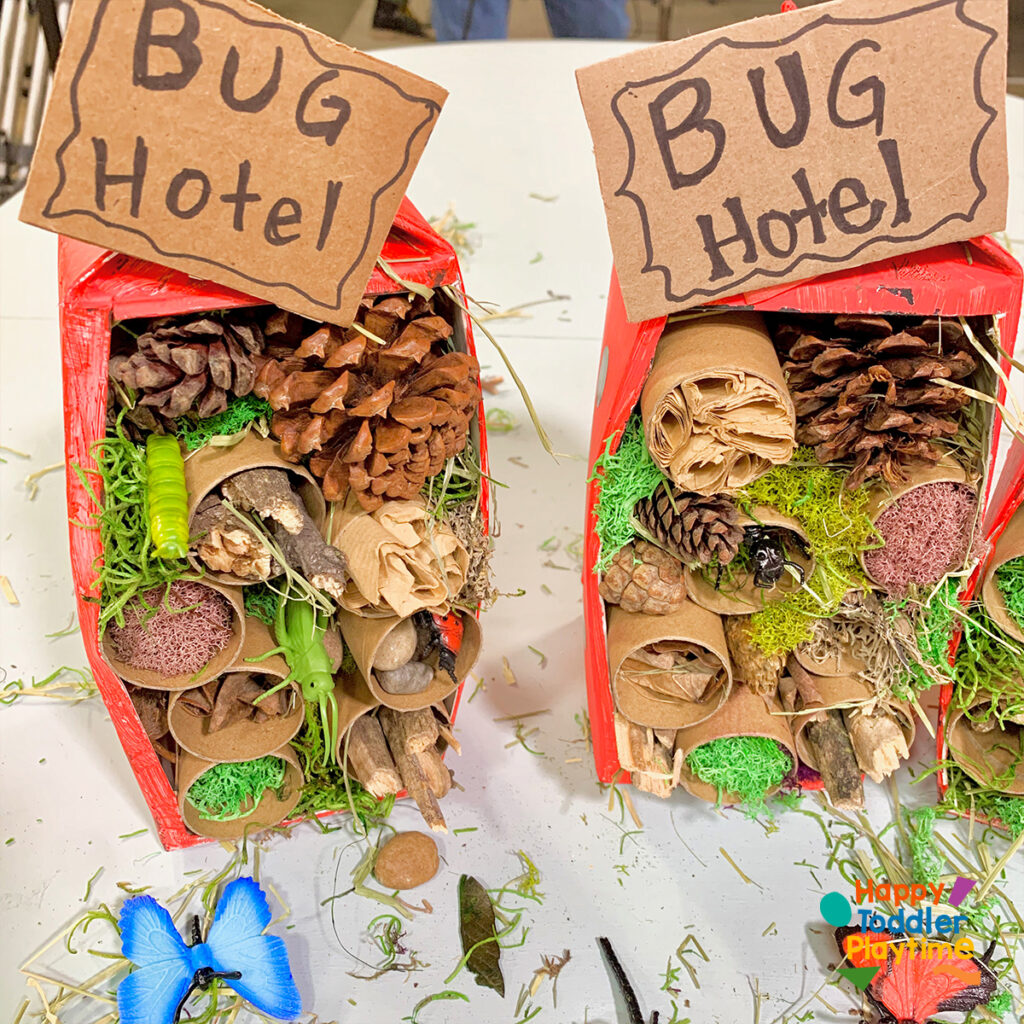
7. Bug Hotel Craft
A bug hotel is part garden craft and part winter home for insects! Create one today with this fun and easy bug hotel craft for kids!
Materials
- Toilet paper rolls
- Milk Carton
- Acrylic paint
- Large straws or rolled up piece of paper
- Moss
- Dried grass
- Pinecones
- Twigs
- Leaves
- Fishing net
- Stones
- Rolled paper
- Craft knife
- Black dot stickers
Instructions
- Cut a large opening on one side of the milk carton using a craft knife.
- Paint the outside of the milk carton red. Set aside to dry.
- Decorate with black dot stickers so that it looks like a ladybug.
- Seal the paint with water proof sealer, especially if you want to keep your bug hotel outside in an area where it can get wet.
- Grab and insert 7-8 toilet paper rolls into the milk carton.
- Start by adding some dried grass or moss around the sides of the rolls and in the back of the milk carton.
- Then start to fill each tube. Fill one with moss, another with sticks, another with rolled up pieces of paper. another with more moss, another with pine cones and another with cut paper straws. Fill another with twigs. Fill another with pebbles.
- Fill in the sides of the milk carton with rocks, dried grass, sticks and pine cones or moss.
- Make a sign out of cardboard reading BUG HOTEL!
- Place it outside and watch ants, ladybugs, spiders and maybe bees move in!
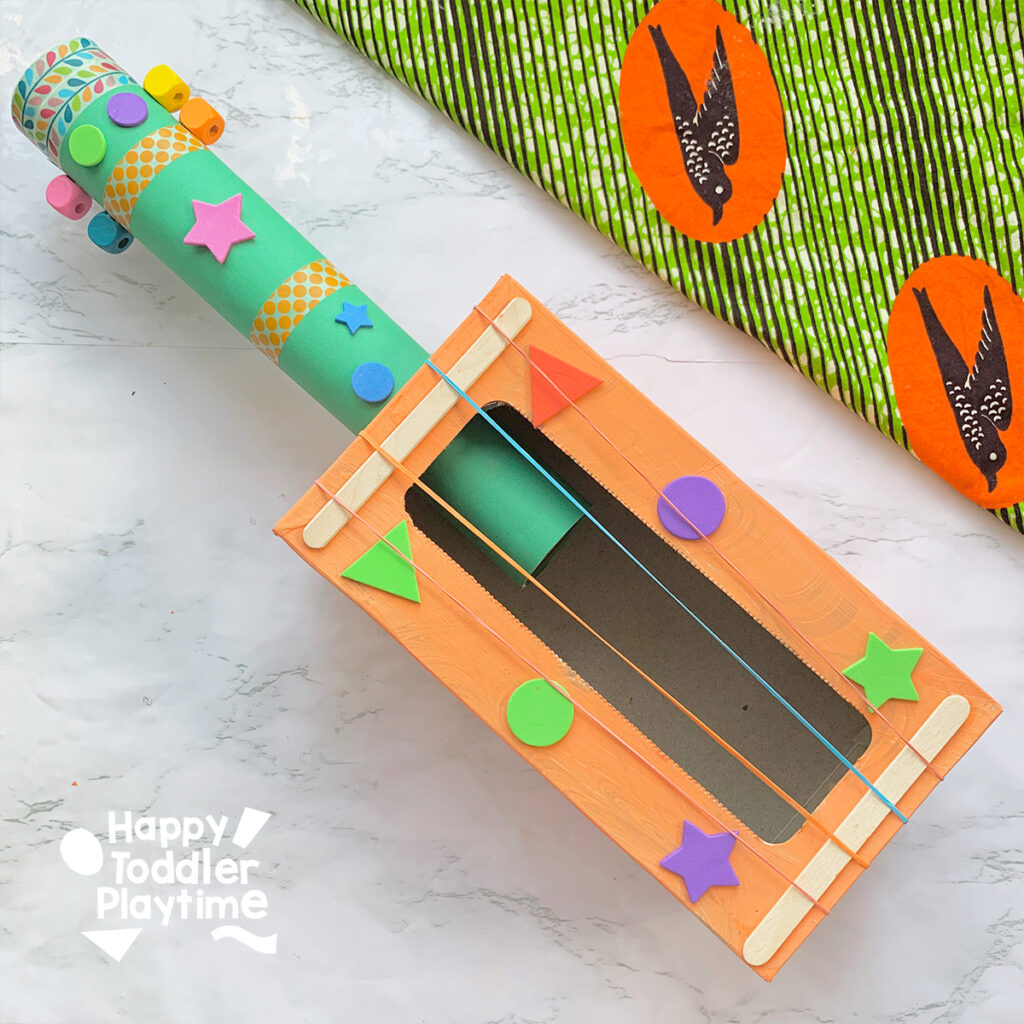
8. Cardboard Box Guitar
Materials
- Cardboard tissue box
- Cardboard tube
- Washable paint
- Construction paper
- Scissors
- Washi tape
- Craft Glue
- Foam stickers
- Wooden beads
- Elastic bands
Instructions
- Grab a tissue box. Paint it using a sponge brush. Set it aside to dry.
- Grab a cardboard tube. Measure and cut out a sheet of construction paper to cover the entire tube. Use glue to secure the construction paper to the tube.
- Decorate the cardboard tube with washi tape.
- Glue two wooden beads to the top part of the cardboard tube for the guitar’s tuning pegs.
- Glue two craft sticks on the top and bottom of the tissue box.
- Make a hole on one end of the cardboard box and fit the cardboard tube through it.
- Decorate the tissue box and tube with foam stickers.
- Wrap elastic bands around the tissue box for guitar strings.
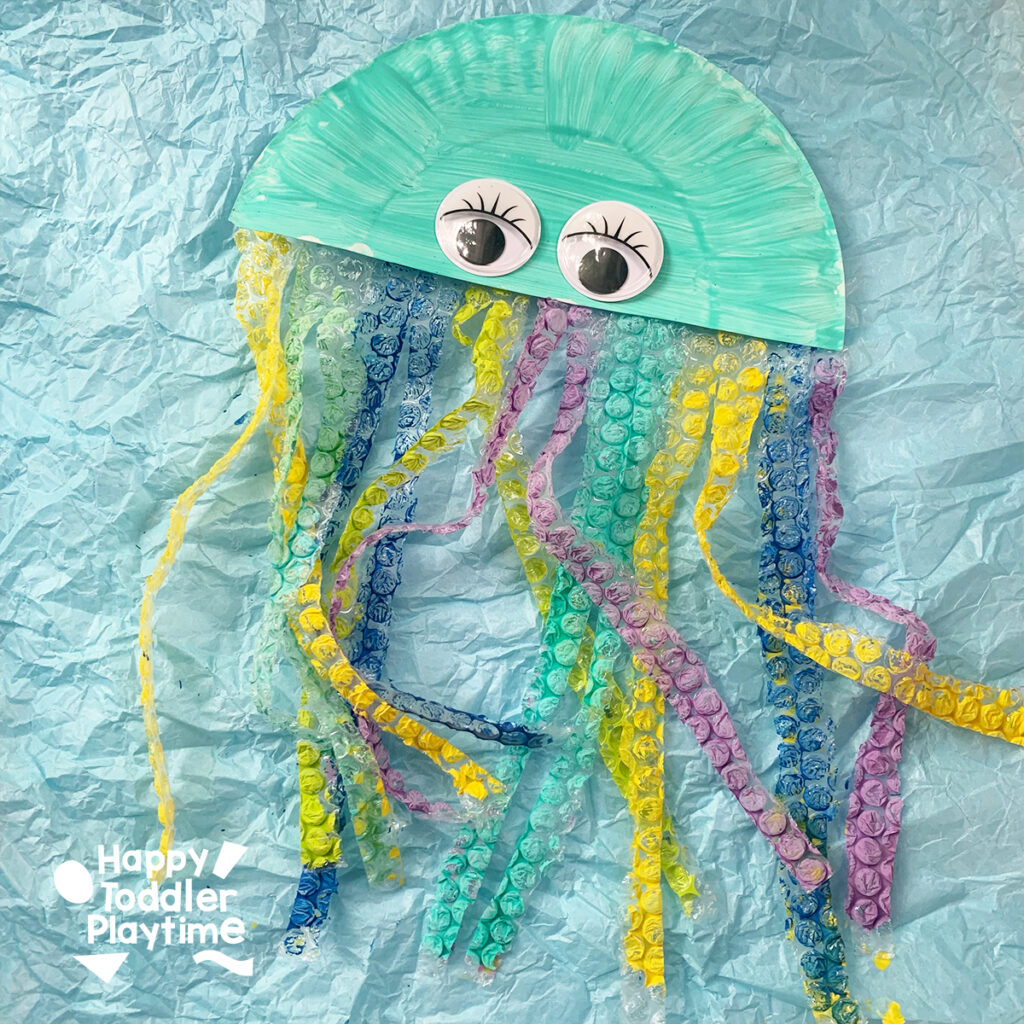
9. Bubble Wrap Jellyfish
Save that bubble wrap to make an adorable bubble wrap jellyfish craft! This easy craft is great for preschoolers and kindergarteners.
Materials
- Bubble wrap
- Paper Plate
- Acrylic paint
- Scissors
- Googley eyes
- Brushes or sponge brush
Instructions
- Cut a paper plate in half and paint it. I used a blue green colour. Set the paper plate aside to dry.
- Take a piece of bubble wrap, the same width as the paper plate and cut thin strips into the bottom, leaving the top intact.
- Use different coloured paints to paint each tentacle. (For toddlers: let them paint the bubble wrap all one color and let them use a sponge brush instead of a regular brush). Set it aside to dry.
- Once everything is dry glue the tentacles to the back of the paper plate. Cut off any extra bubble wrap that stick out from behind the paper plate head of the jellyfish.
- Glue googley eyes to the front of the plate just above the tentacles.
- Hang it up in a window!
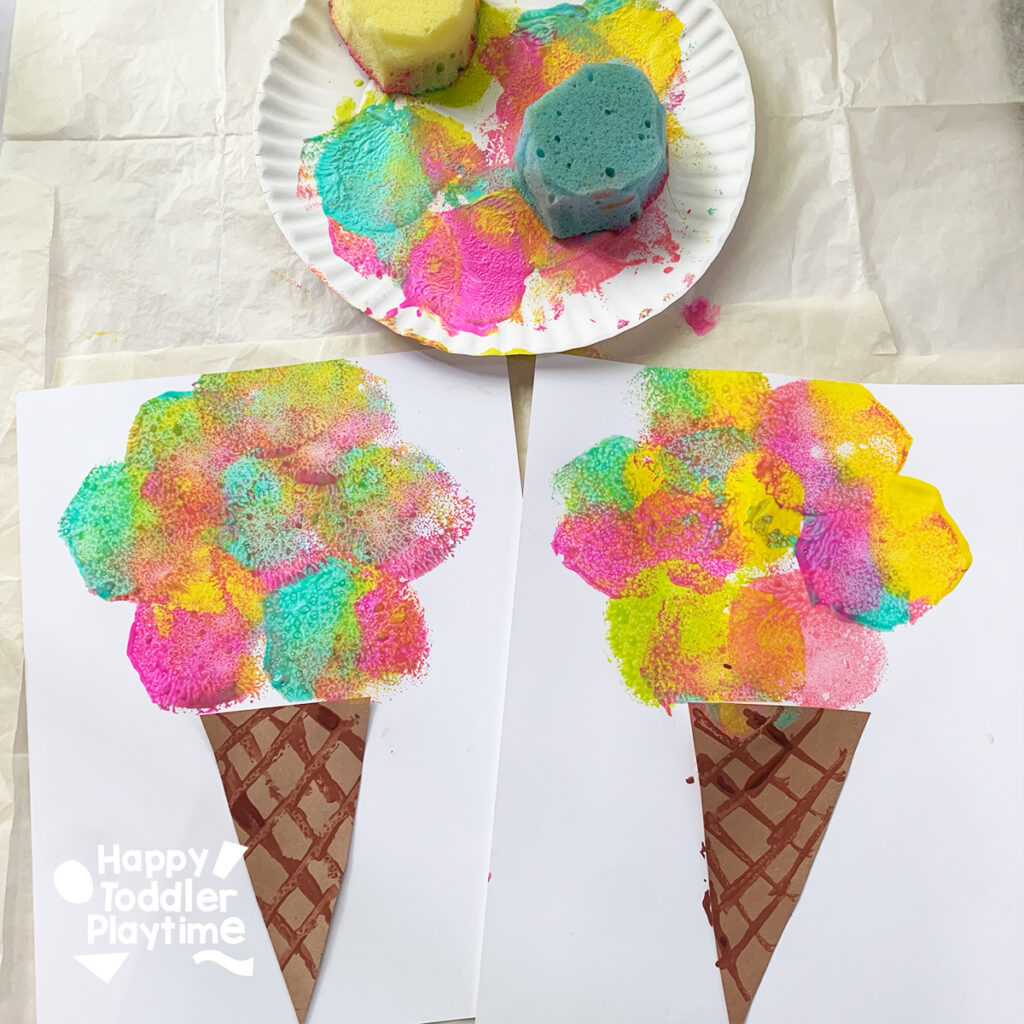
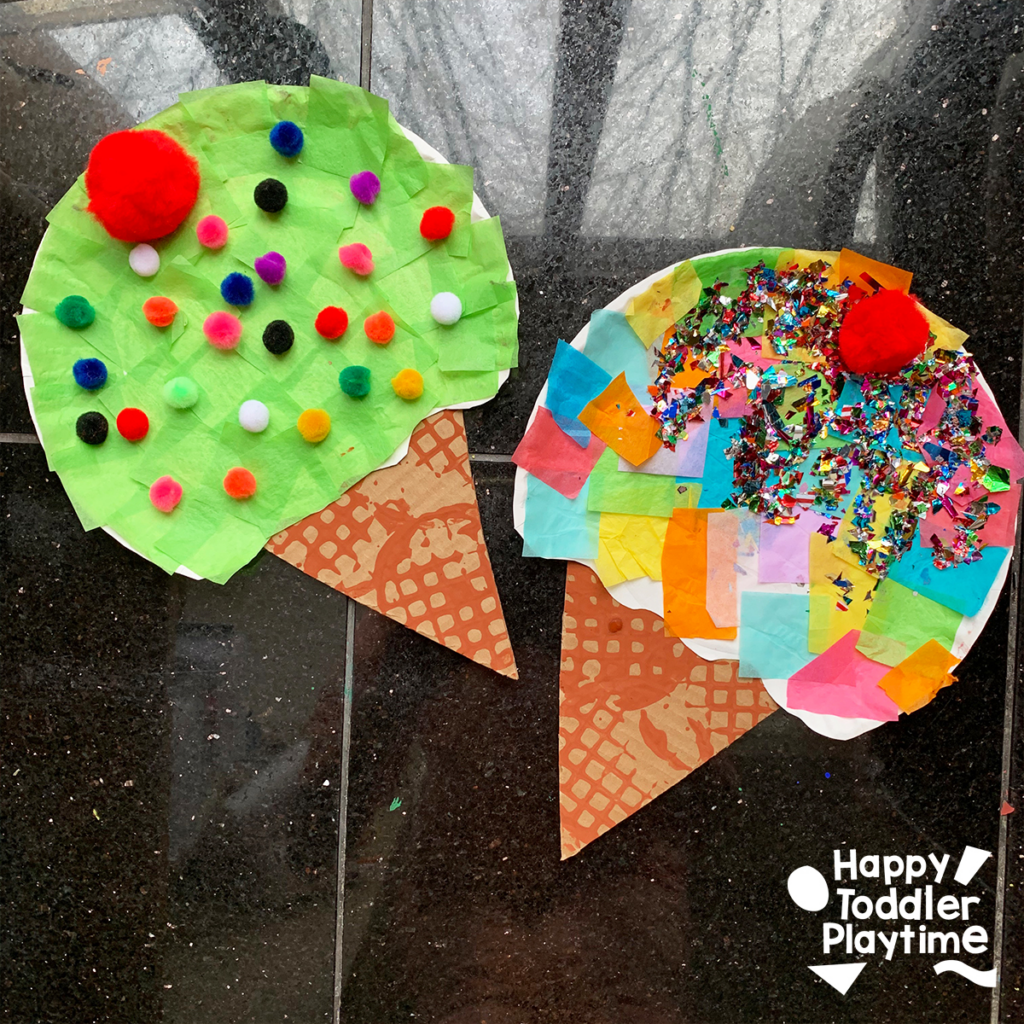
10. Sponge Painted Ice Cream
Create a colorful sponged painted ice cream cone craft with this easy summer craft for kids! A fun craft for kids of all ages!
Materials
- Sponges
- A cup for tracing
- Pen
- Scissors
- Paper Plate or something for the paint
- Washable Paint in various bright colors including brown
- Glue
- White Paper
- Brown construction paper
- Small piece of cardboard
Instructions
- Cut out a triangle cone shape from the brown construction paper.
- Pour a small amount of brown paint on to a paper plate and dip the edge of the small piece of cardboard into the paint and stamp it on the brown construction paper to make a grid pattern for the ice cream cone.
- Glue the cone to the bottom of the white sheet of paper.
- Grab 2-3 sponges and trace the top of the cup using a pen on the sponges to create a circle.
- Cut out the circles with a pair of scissors.
- Pour out a few different colours of paint on a paper plate.
- Take the sponge circles and stamp scoops of ice cream above the ice cream cone. Let your child mix the colours and stamp as much as they like. Use bright colours to make a colour ice cream cone!
11. Cardboard Tube Snake Craft

Materials
- Cardboard tube
- Scissors
- Paint
- Googly eyes
- Red construction paper
- Glue
- Paintbrushes or sponge brushes
Instructions
- Take your cardboard tube and paint the entire tube on the outside as well as the inside.
- Starting at one edge, cut in a spiral shape all the way down to create a long, twisty snake body. Leave a small section uncut at the top—this will be the snake’s head!
- Paint patterns on your snake such as stripes, spots, or funky patterns. Let kids experiment with colors—green and brown for a realistic look, or red and gold for Lunar New Year. Let the paint dry.
- Glue googly eyes onto the snake’s head. Cut out a small forked tongue from red construction paper and glue it underneath the head.
- Once everything is dry, pick up your snake by its head and watch it wiggle and slither! Kids can use their snake for pretend play, storytelling, or even a puppet show!
12. Paint Splat Puddle Craft

Materials
- White cardstock or watercolor paper
- Blue paint in various shades
- White paint
- Rain boots template (can be printed or hand-drawn)
- Watercolor paints
- Markers or crayons
- Scissors
- Glue
Instructions
- Prepare Your Paper: Start with a sheet of white cardstock or watercolor paper. This will be your canvas for the paint splat puddles. Fold your paper in half lightly to create a crease guide but do not make a sharp fold. Open it back up.
- Create Paint Splats: On one half of the paper, randomly splatter or drop various shades of blue. Mix in some white paint on top. The more random, the better! Fold the paper along the crease to press the two halves together. Gently pat the paper to spread the paint slightly, then unfold it to reveal your unique splat puddle design. Be careful not to squeeze too much as the paint may seep out the sides of the paper. Protect your surfaces with newspaper or complete this craft on a tray.
- Add the Rain boots: While your paint splats dry, color in your rain boots template using watercolors, markers, or crayons. Go as bright or as subtle as you like. Cut out the rain boots. Glue the rain boots onto the cardstock, positioning it as if they made a giant plate in the puddle.
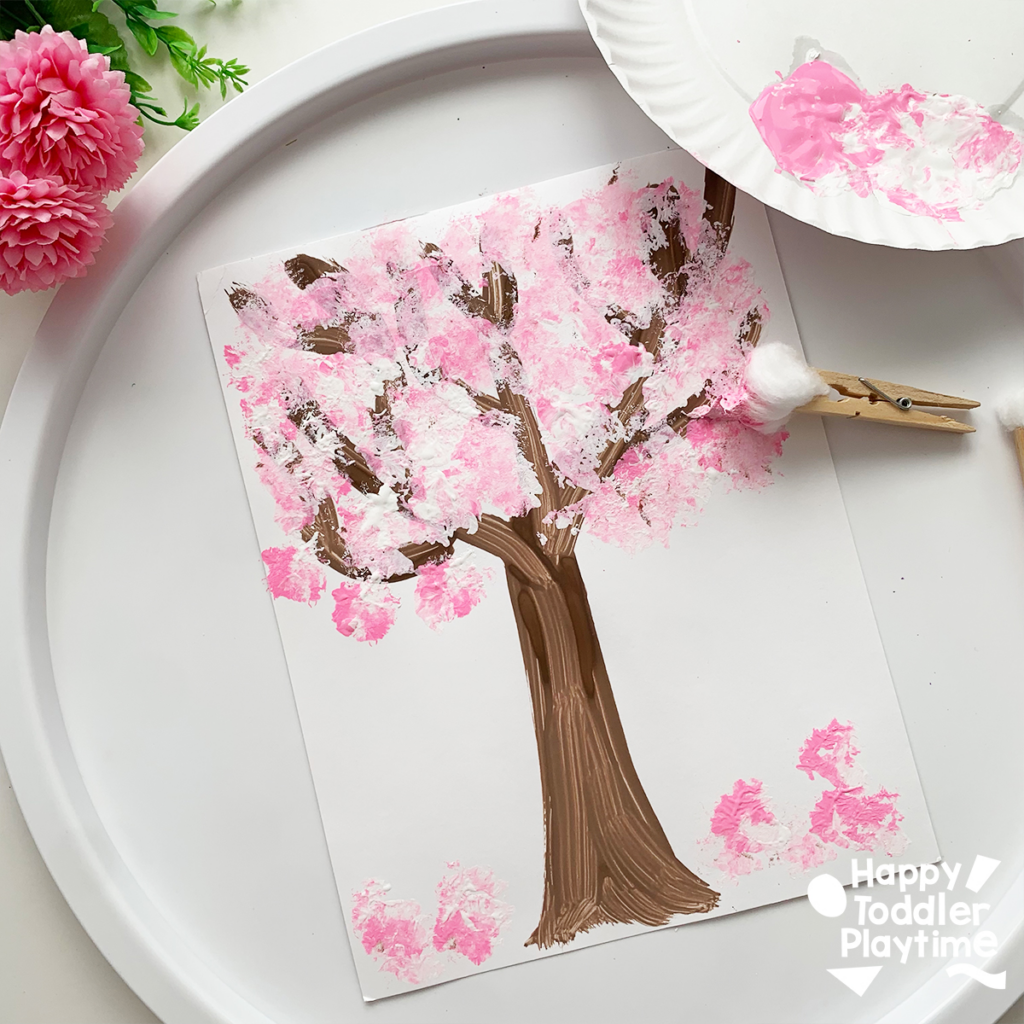
13. Cotton Ball Cherry Blossoms Craft
Materials
- White cardstock or printer paper
- Brown paint and paintbrush
- Paper plate
- Pink and white paint
- Clothespin
- Cotton balls
Instructions
- Paint the Branches: Start by painting brown branches on your white cardstock or printer paper. You can make them as simple or as intricate as you like. Allow the paint to dry completely.
- Prepare Your Paints: Pour some pink and white paint onto your paper plate, mixing parts of them slightly to get different shades of pink.
- Create Blossoms: Attach a cotton ball to a clothespin to use as a makeshift paintbrush. Dip it into the pink paint and gently press onto the branches to make cherry blossoms. Use different shades of pink and some white to add depth and make your blossoms look more realistic.
- Let It Dry: Once you’ve finished adding blossoms, set your artwork aside to dry completely.
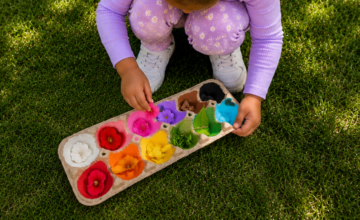
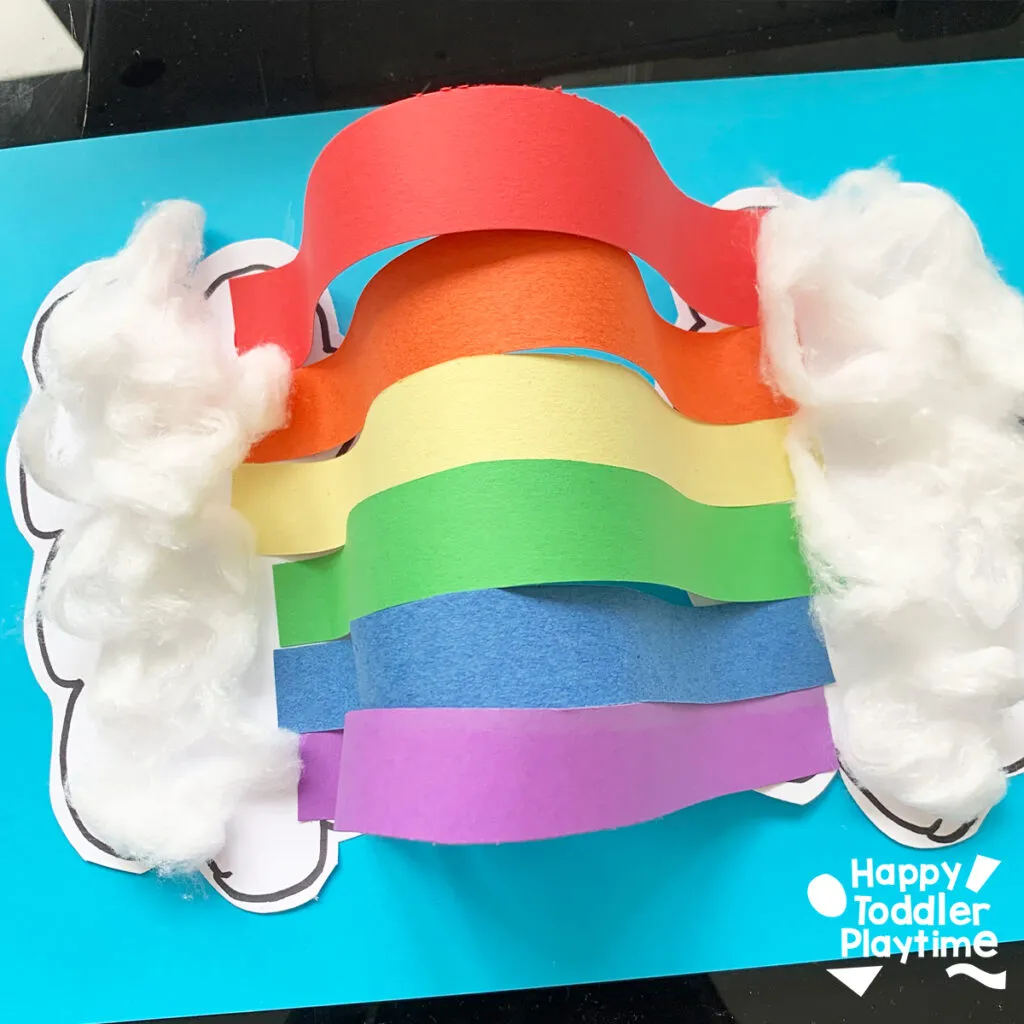
14. Rainbow Matching Activity
Materials
- Rainbow colors of construction paper (red, orange, yellow, green, blue, violet)
- Scissors
- Dot stickers in rainbow colors
- White cardstock
- Black marker
- Glue
- Cotton balls
- Light blue cardstock
- White construction paper
Instructions
- Prepare the Clouds: Cut out two large cloud shapes from white construction paper and outline them with a black marker for definition. These clouds should be large enough to span the width of the light blue cardstock, simulating the sky.
- Assemble the Sky: Glue the clouds onto either end of the light blue cardstock, creating the scene for your rainbow.
- Cut Rainbow Strips: From each color of construction paper, cut out one-inch strips that will serve as the arcs of your rainbow.
- Add Dot Stickers: Place dot stickers in the sequence of a rainbow (red, orange, yellow, green, blue, violet) on the edge of each cloud. These will act as guides for where to place each color strip.
- Create the Rainbow: Match the colored construction paper strip to the corresponding dot sticker on one cloud, stretch it across the blue cardstock, and then glue the other end to the matching sticker on the opposite cloud. Repeat this process with each color until your rainbow is complete.
- Fluffy Clouds: Take some cotton balls, fluff them out to create volume, and glue them around each cloud for a fluffy, realistic effect.
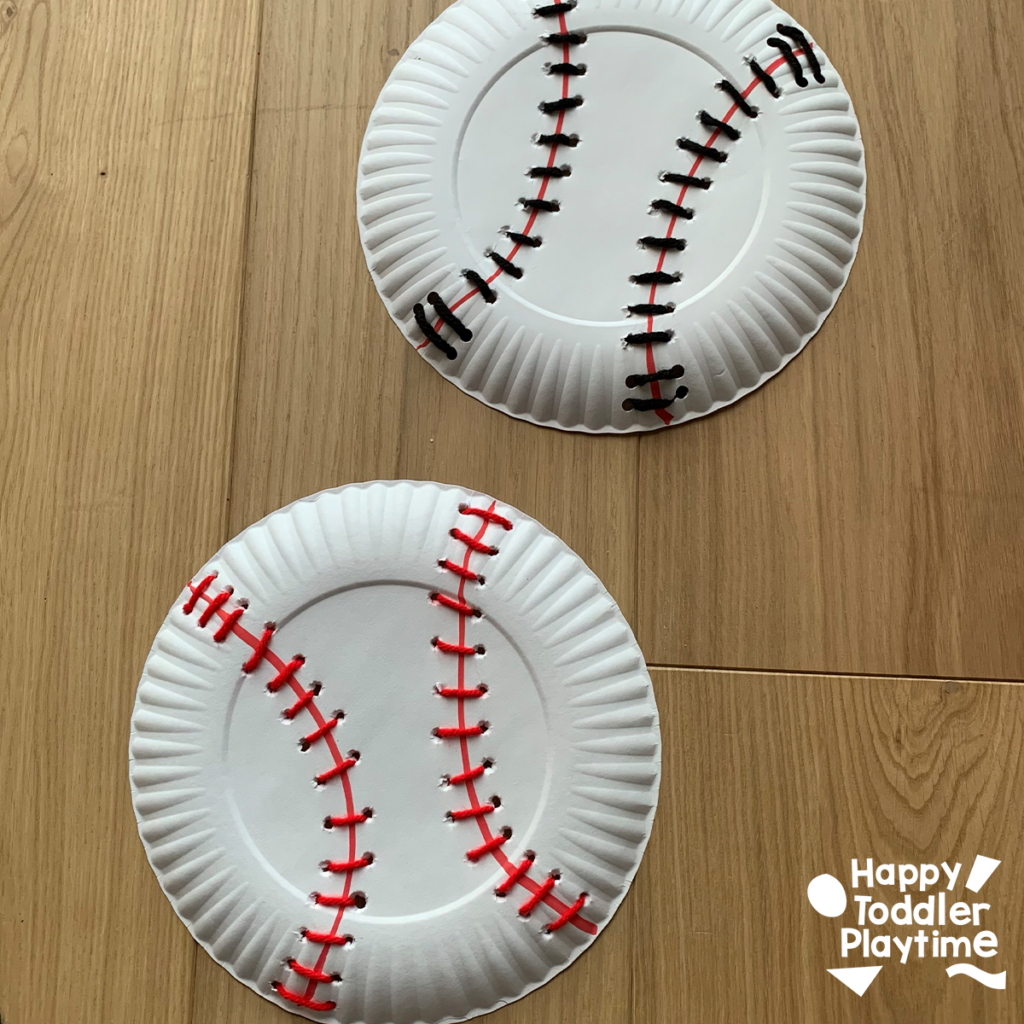
15. Paper Plate Baseball Lacing Craft
Materials
- Paper plate
- Pencil or sharp object to poke holes in the plate
- Cardboard box (to place under the plate while poking holes)
- Red marker
- Red yarn (about 2-3 feet)
- Embroidery needle
Instructions
- Draw the Seams:With the red marker, draw curved lines on the paper plate to resemble the seams of a baseball. You can look at a real baseball for reference or use a template.
- Prepare the Paper Plate:Place your paper plate on top of the cardboard box. This box will protect your surface as you poke holes in the plate.Using a pencil or another sharp object, carefully poke holes on either side of the curved lines. These holes should be evenly spaced and about 1/2 inch apart.
- Thread the Needle:Cut two lengths of red yarn about 1 foot long. Thread one end through the embroidery needle and tie a knot at the other end.
- Lace the “Baseball”:Start by pulling the needle and yarn up through one of the holes from the back of the plate, leaving the knot at the back.Lace the yarn across the plate and down through the opposite hole. Pull the yarn through, but not too tight.Continue this process, going back and forth across the plate and creating a laced pattern similar to that on a baseball.
- Finish the Craft:Once you’ve laced through all the holes, tie off the end of the yarn at the back of the plate.Trim any excess yarn.
16. Cardboard Rainbow Sunshine Craft
Materials
- Cardboard (large enough to cut a semi-circle shape)
- Yellow paint and paintbrush
- Construction paper in rainbow colors (red, orange, yellow, green, blue, and purple)
- Scissors
- Glue or tape
- Marker (black or any preferred color for drawing the face)
- Pink construction paper (for cheeks)
Instructions
- Create the Sunshine Base:
Start by cutting a large semi-circle shape from the cardboard. Paint it with a bright and sunny yellow color, covering the entire surface. This forms the base of your radiant sunshine! - Add the Rainbow Strips:
Attach construction paper strips in rainbow colors to the bottom back of the cardboard semi-circle. You can either curl them up using scissors for a whimsical effect or keep them straight for a more classic look. Secure the strips in place using glue or tape. - Glue on the Sunshine Rays:
Next, cut out small triangles in yellow and orange from construction paper to represent the sunshine rays. Glue these rays around the top of the sunshine base, radiating outwards like beams of warm sunlight. - Bring the Sunshine to Life:
Now, it’s time to give your sunshine its charming personality! Use a marker to draw a friendly face on the center of the sunshine. Let your creativity shine as you add a warm smile and bright eyes. For a touch of rosy charm, attach small pink construction paper circles as adorable cheeks.
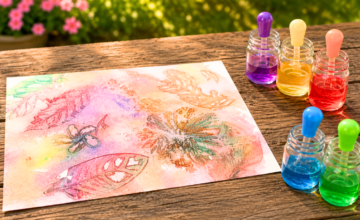
17. Cotton Pad Butterfly Craft

Materials
- Cardboard
- Glue
- Marker (for tracing the butterfly outline)
- Cotton pads
- Pom Poms (two large, medium, and smaller ones for the butterfly body)
- Bowls or cups
- Water
- Food coloring
- Eye droppers
Instructions
- Draw the Wings: Using a marker, trace the outline of butterfly wings onto your piece of cardboard. You can make the wings as elaborate or as simple as you like, but ensure they are symmetrical.
- Attach the Cotton Pads: Apply glue within the outlines of the wings and press cotton pads down into the glue. Arrange them so they completely fill the wing areas, touching or slightly overlapping for full coverage.
- Create the Butterfly Body: Starting at the center where the wings meet, glue down the Pom Poms for the butterfly’s body. Start with the largest Pom Pom and progress to the smallest to create a tapered effect that mimics a real butterfly’s body. Use a marker to make antenna.
- Color the Wings: Fill bowls with water and add different colors of food coloring to each. Using eye droppers, carefully drip colored water onto the cotton pads. Watch as the colors absorb and blend beautifully on the cotton, creating a stunning, colorful wing effect.
18. Paper Plate Ice Cream Craft
Materials:
- 1 paper plate
- Brown construction paper (for the cone)
- Paint or tissue paper (for “ice cream”)
- Scissors
- Glue
- Black marker
How to Make It:
- Cut the paper plate in half — this becomes your scoop.
- Let kids paint the plate (or glue crumpled tissue paper for texture).
- Cut a triangle from brown paper for the cone.
- Draw crisscross lines on the cone with a marker to make a waffle pattern.
- Glue the plate scoop on top of the cone.
- Add sprinkles with paint, dot markers, or even pom-poms.
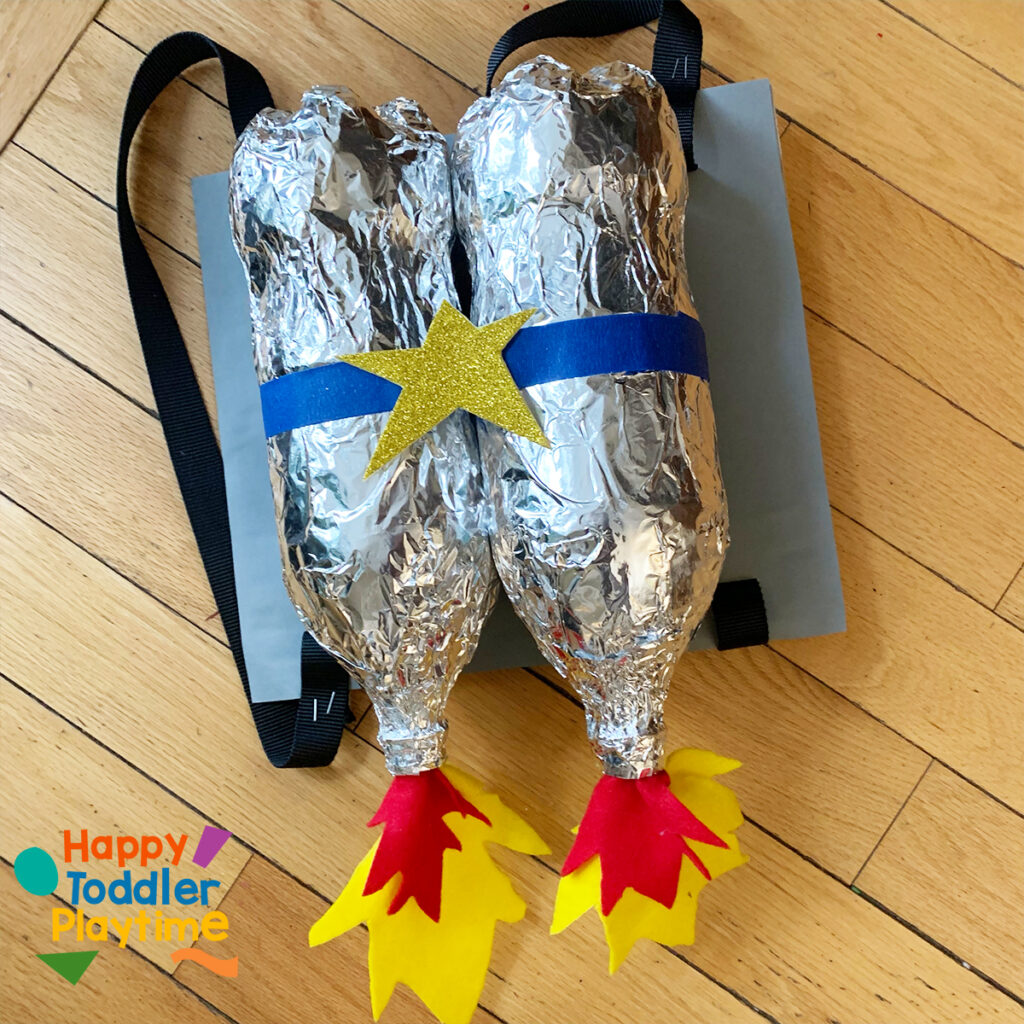
19. DIY Jet Pack
Craft this DIY Jet Pack with your kids and let their imagination take off! This easy to create up-cycled craft is a great activity for kids!
Materials
- White, green and yellow construction paper
- Scissors
- Salad spinner
- Yellow and orange washable paint
- Googley eyes
- Glue
Instructions
- Grab a sheet of white paper remove the basket of your salad spinner and use it to measure and cut out a circle from the white construction paper. Let your little one place the circle inside the salad spinner and add several drops of yellow and orange paint all around.
- Invite them to close the salad spinner and spin it as fast as they can. Then open it up to reveal to really cool art inside! The designs will be wild with all the colors mixing together. Set your circle aside to dry. Try making a few more!
- While you wait for the circle mane to dry, cut out an oval with the bottom cut off for the body of the lion out of yellow construction paper. Also cut out a tail, two ears and a circle for the head.
- Glue down the body of the lion, then the mane, then the head in the center of the mane. Add the tail and ears. Draw on the face with a black marker and add googley eyes.
- We also added some grass using green construction paper.
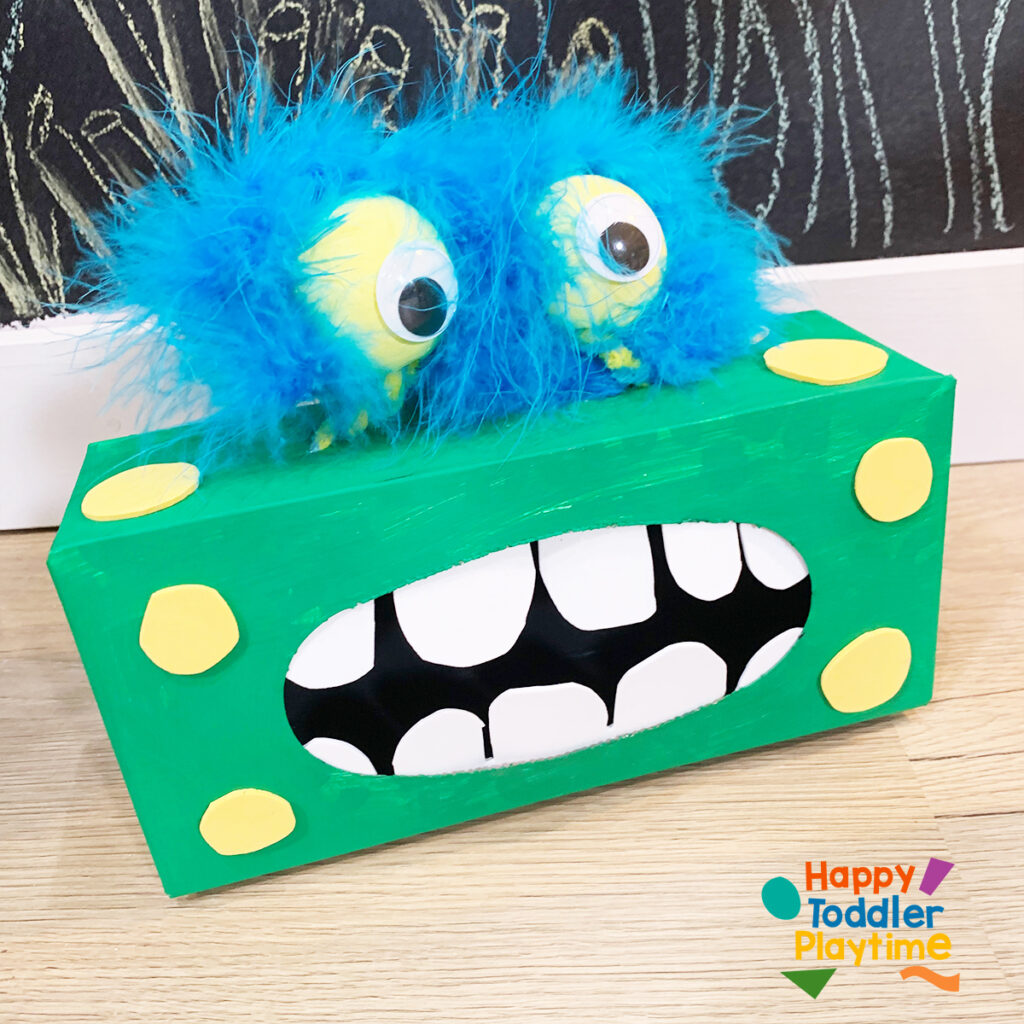
20. Tissue Box Monster
Your little monster will love creating this little tissue box monster craft using a tissue box and a few fun craft supplies!
Materials
- Tissue box
- Paint
- Paint brushes
- Foam shapes
- White foam sheet
- Scissors
- Double sided tape
- Two foam balls
- Googley eyes
- Feathers or feather boa
- Craft Glue or glue gun
- Piper Cleaners
- Bamboo stick for making a hole in the tissue box
Instructions
- Remove inner plastic film from the tissue box.
- Paint the tissue box with craft paint. Set it aside to dry.
- Paint two foam balls and set them aside to dry.
- Paint the inside of the box black.
- Cut of white teeth from white foam sheets and attach with doubled side tape or glue them on the inside of the tissue box opening.
- Decorate the tissue box with foam circles or Pom Poms. secure them with glue.
- Glue google eyes to the foam balls using a glue gun or craft glue. Add feather boas to the eyes using double side tape or a glue gun.
- Stick pipe cleaners through the bottom of each eye.
- Poke a hole on the top of the tissue box using a bamboo stick and slide the pipe cleaners through.
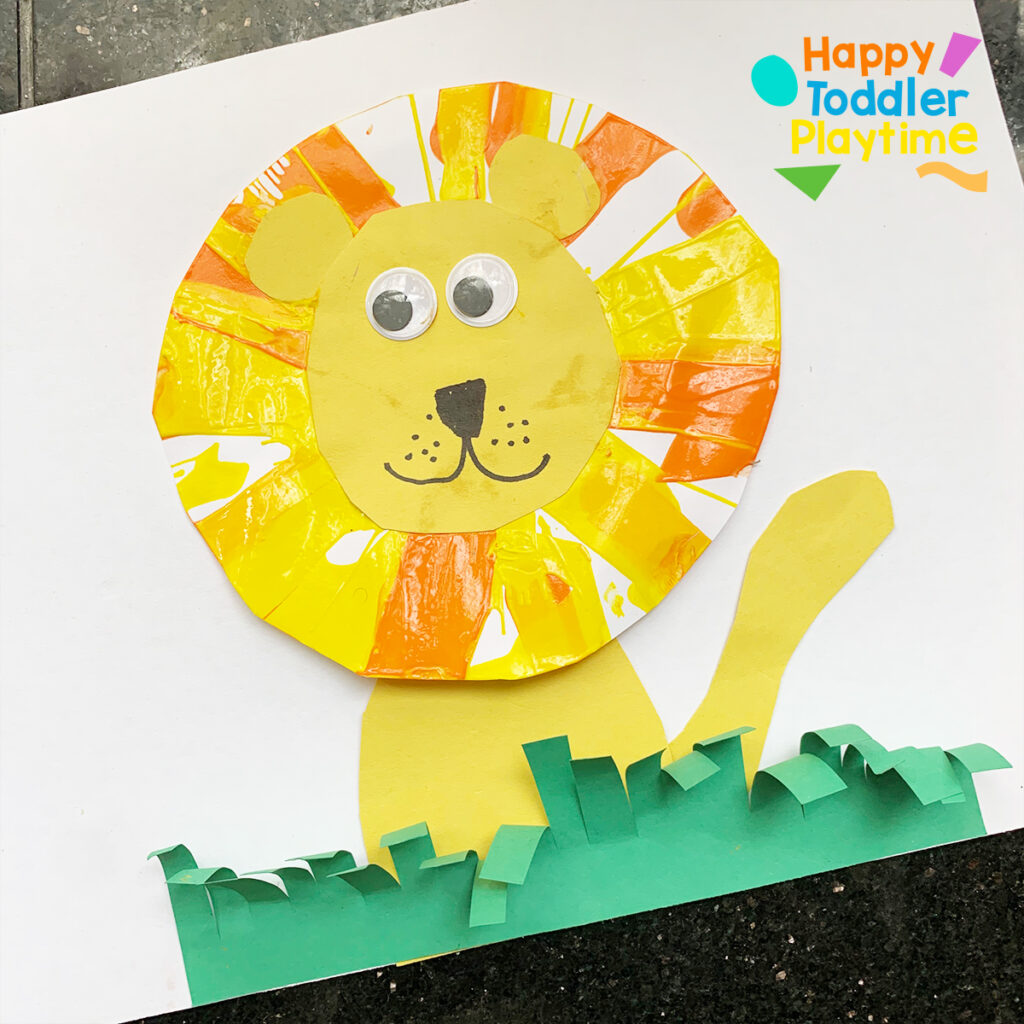
21. Salad Spinner Lion Craft
Salad Spinner Lion Craft is such a fun way to make a lion craft with your kids. Create unique manes for your lions using a salad spinner!
Materials
- White, green and yellow construction paper
- Scissors
- Salad spinner
- Yellow and orange washable paint
- Googley eyes
- Glue
Instructions
- Grab a sheet of white paper remove the basket of your salad spinner and use it to measure and cut out a circle from the white construction paper. Let your little one place the circle inside the salad spinner and add several drops of yellow and orange paint all around.
- Invite them to close the salad spinner and spin it as fast as they can. Then open it up to reveal to really cool art inside! The designs will be wild with all the colors mixing together. Set your circle aside to dry. Try making a few more!
- While you wait for the circle mane to dry, cut out an oval with the bottom cut off for the body of the lion out of yellow construction paper. Also cut out a tail, two ears and a circle for the head.
- Glue down the body of the lion, then the mane, then the head in the center of the mane. Add the tail and ears. Draw on the face with a black marker and add googley eyes.
- We also added some grass using green construction paper.
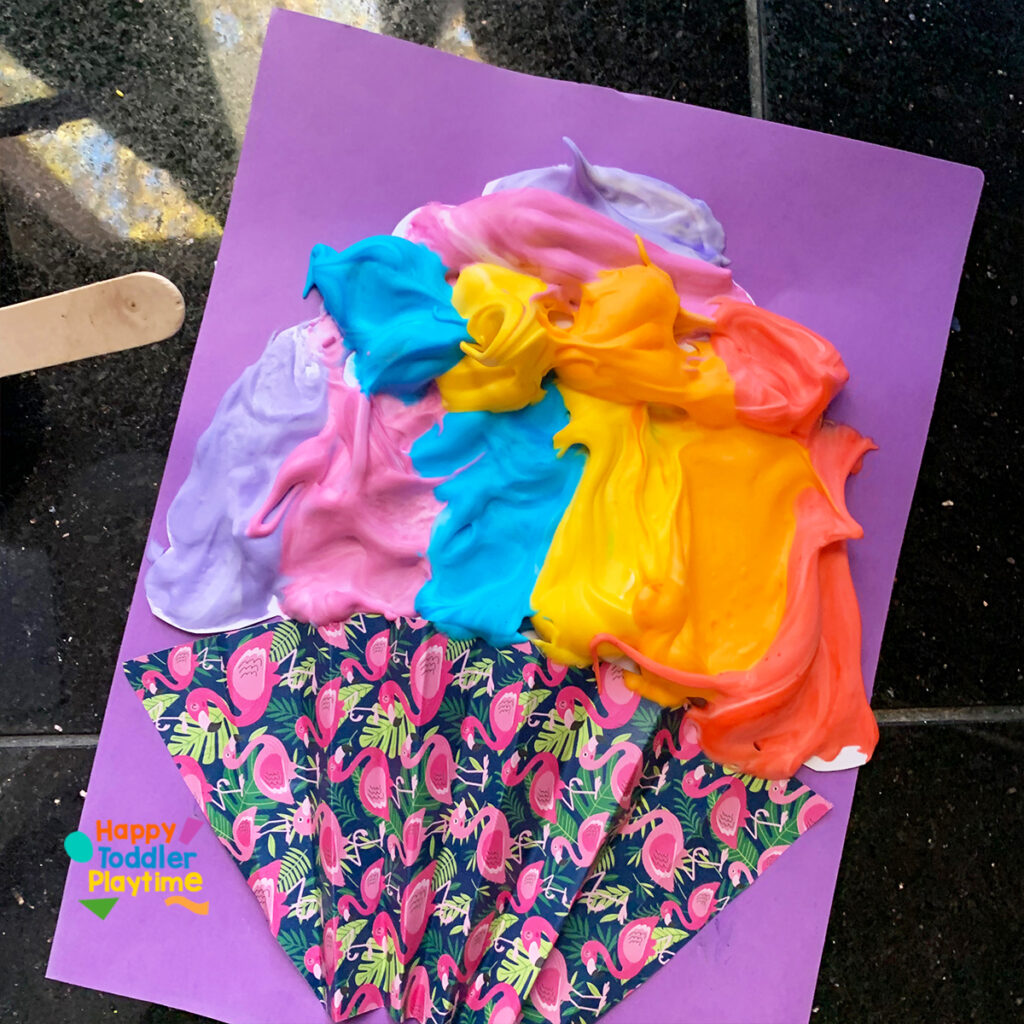
22. Puffy Paint Cupcake
Puffy Paint Cupcake is a cute and easy craft great for your toddlers and preschoolers. Create a cupcake using puffy paint!
Materials
- 1/4 white school glue
- 1/4 shaving cream
- Food colouring
- Colourful Paper with Designs
- Scissors
- Confetti
- Buttons
- Glitter Glue
- Small Pom Poms
- White cardstock
- Colourful Construction paper
Instructions
- Take a colourful sheet of paper (or just regular construction paper) and fold it like an accordion. Cut it into the shape of a cupcake liner. Glue it on the page.
- Before starting the craft I cut out the shape of the cupcake top. Then I had my kids glue that down on top of their cupcake liners.
- In a muffin tin or bowls, combine 1/4 white school glue, 1/4 shaving cream and a few drops of food colouring (various colours). I used craft sticks to mix it. Puffy paint resembles cloud or in this case icing but it doesn’t last for ever. Use the paint within 30 minutes. Once dry the paint will remain full for a few hours and then loose it thickness over time. It should feel dry to the touch.
- Use your puffy paint to cover the cupcake top. Decorate with sequins and a Pom Pom!
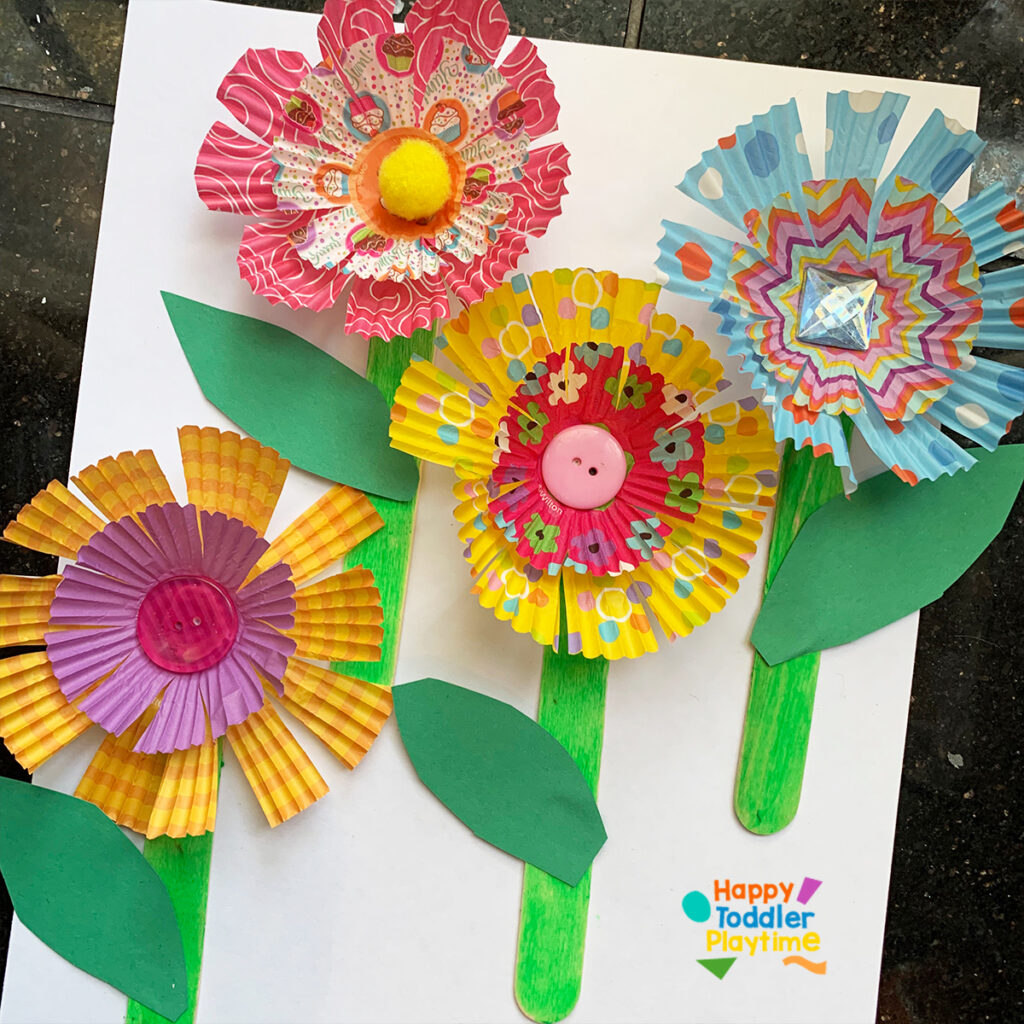
23. Cupcake Liner Flower Craft
Cupcake Liner Flowers is an beautiful craft for kids of all ages. These make a great gift for Mother’s Day or a fun craft during spring.
Materials
- Colourful cupcake liners
- Colourful mini cupcake liners
- Craft Sticks
- Green paint sticks
- Green construction paper
- Pom Poms
- Gems
- Buttons
- White cardstock
- Craft glue
Instructions
- Take a larger cupcake liner and flip it inside out so that the colourful design is on the inside. Cut slits along the sides of the cupcake liner to make it look like petals.
- Take a smaller cupcake liner and do the same. Glue the smaller cupcake liner in the center of the larger cupcake liner. Finished the flower with a gem, button or Pom Pom in the center.
- Take a craft stick and color it green with a paint stick. Trace the outline of leaves on green construction paper and let your little one cut them out.
- Glue the cupcake flower to the top of the green craft stick stem and the leaf to the side of the stem.
- Create several flowers and them arrange them on a sheet of white cardstock like a bouquet or like flower in a garden.
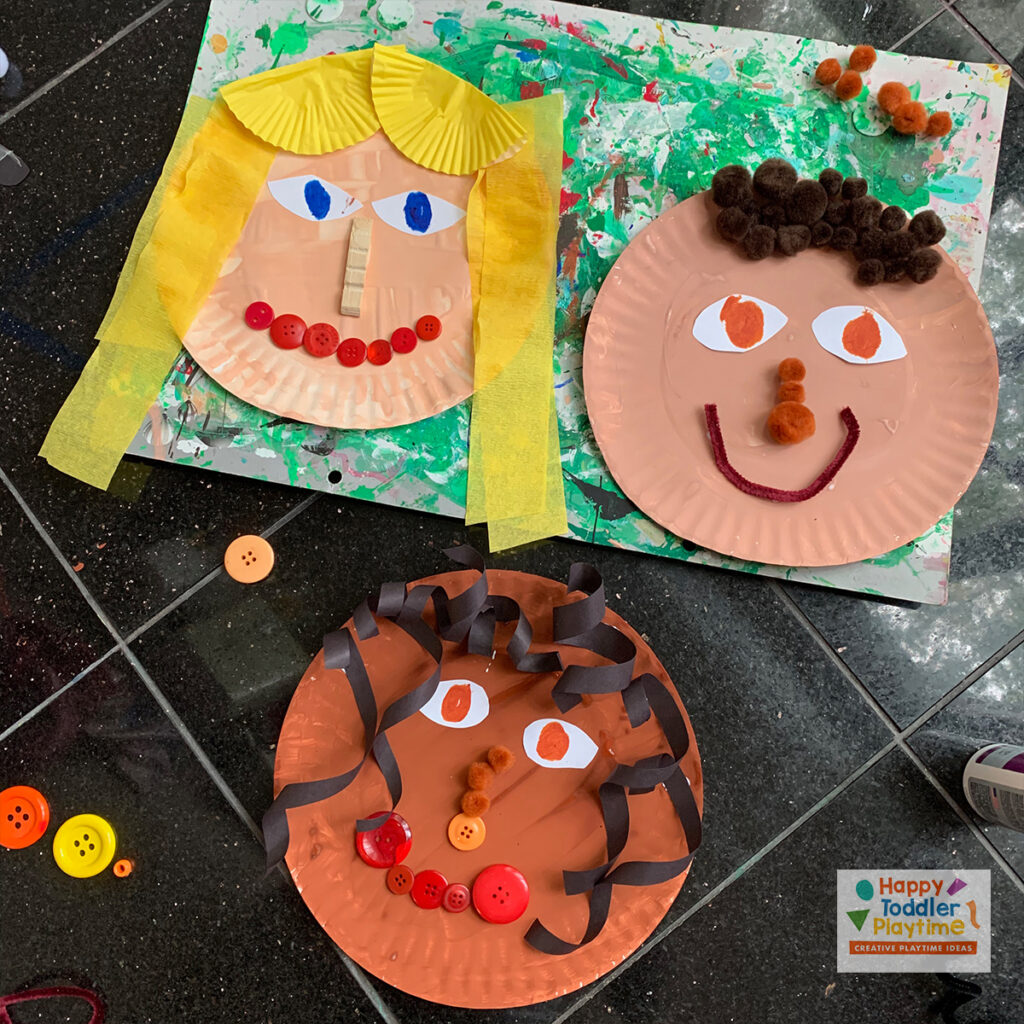
24. Paper Plate Self Portrait Craft
Create paper plate self portrait craft with your preschool for an easy way to talk about all the things that make us special and unique.
Materials
- Hand mirror
- White paper plates
- Brown, white, black and beige paint
- White Construction paper
- Paint sticks
- Buttons
- Pipe cleaners
- Pom poms
- Yarn
- Straws
- Crepe Paper
- Cupcake liners
- Scissors
- Craft Glue
Instructions
- Grab the paint and mix browns, white, black and beige to make the the closest colour to your skin tone. Paint the paper plate. Set it aside to dry.
- Out of white construction paper cut out eyes. Use paint sticks to colour in the eye colour.
- Choose pom poms, buttons, yarn, straw, crepe paper, construction paper to make their hair. Let the child choose the items they want to use as hair. They don’t need to choose items that accurately reflect their features. Glue them down on the paper plate. To make curly hair, I curled strips of paper around a pencil. For preschoolers, hold the pencil for them as they curl the paper around the pencil!
- Choose pom poms, buttons, yarn, straw, pipe cleaners to make their mouth. Glue them down on the paper plate.
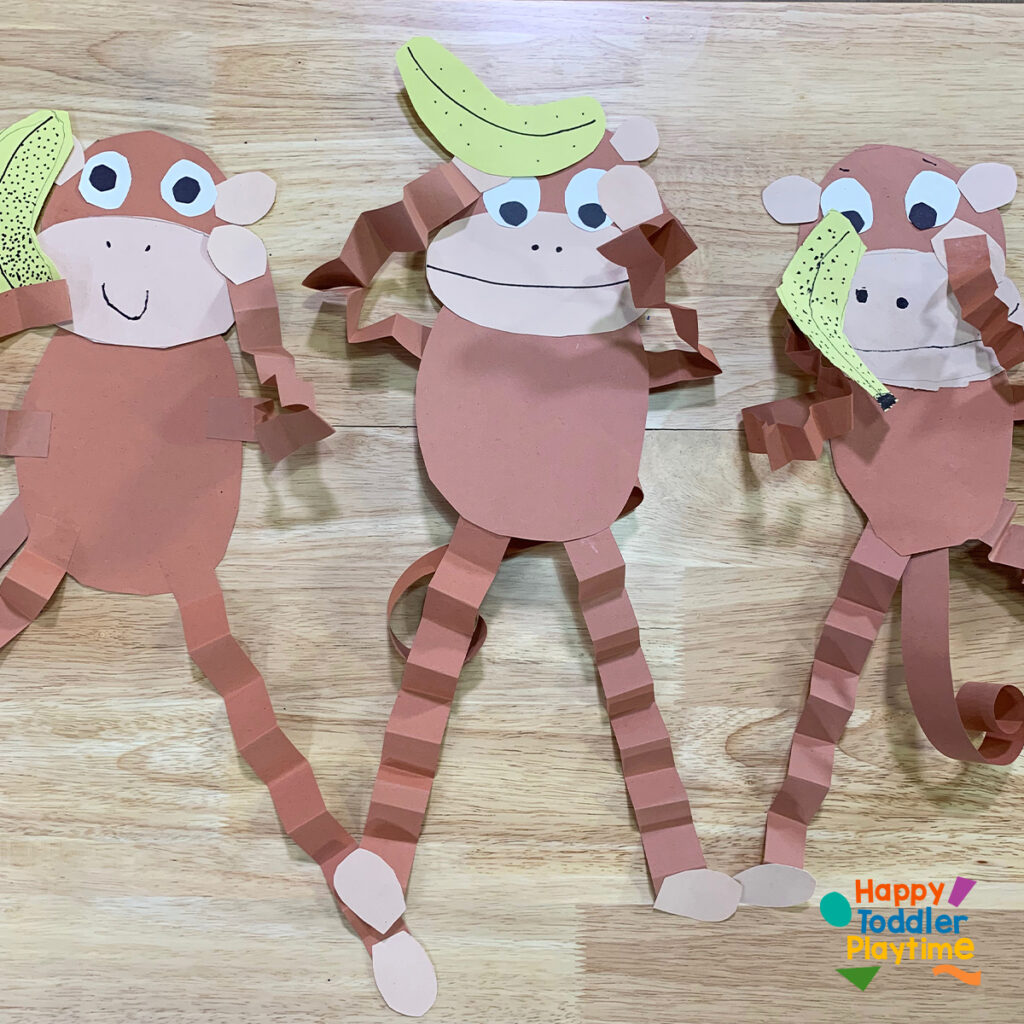
25. Paper Monkey Craft
Materials
- Brown construction paper
- Tan construction paper
- Yellow construction paper
- White and black construction paper
- Black marker
- Glue
- Scissors
Instructions
- Trace and cut out head, body and mouth of monkey from brown (for head anybody) and tan construction paper for the mouth.
- Cut out two hands, feet and ears from the tan construction paper.
- Trace and cut out a banana from yellow construction paper. Draw a line and dots using a marker on the banana.
- Glue the head to the body and mouth to the head.
- Cut out two white circles and two small black circles for the eyes and pupils. Glue them on to the head just above the mouth.
- Draw on two dots for the nostrils and a smile.
- Cut out 5 1 inch strips from brown construction paper.
- Fold 4 of the strips back and forth like an accordion. Glue on hands and feet to each string.
- Glue the arms and legs on to the back of the monkey.
- Wrap the last strip of brown construction paper around a pencil or marker to curl it slightly and glue it the the back of the monkey for the tail.
- Glue the banana to the monkey hands and glue the monkeys hands to close to its ears or eyes or ears.
Play2Learn Toddler & Preschool Programs for Curious Toddlers
There is no limit to your toddler’s energy and curiosity. That energy and curiosity although a joy can be challenging at times. Their interest in just about everything around them is what makes them great learners. One and two year olds can soak up so much just from their senses!
But as a teacher or parent that thirst for learning can be exhausting. That is why I created this toddler and preschooler program. To help you get the most out of this time with your curious toddler without having to come up with creative ways to play and interact with them.
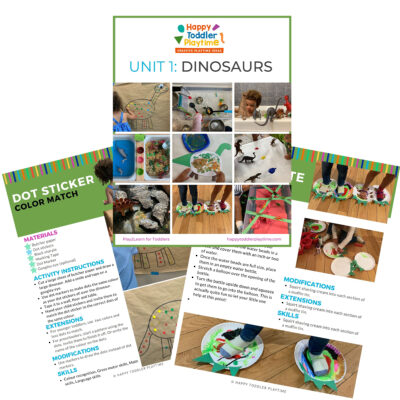
Play2Learn for Toddlers includes 20 Units for toddlers. Each 2-week toddler unit has 20 super easy to set up and engaging activities for toddlers 18 months to 3 years.
Play2Learn Preschool which includes 20 Units for preschoolers. Each 2-week preschoolers unit has 20 unique and easy to set up and engaging activities for preschoolers 3 years to 5 years. That’s over 800 learning activities for your toddler and preschooler at your fingertips! So many ideas you and your child will never be bored again!
These toddler and preschool lesson plans and activities will definitely keep you and your toddler and preschooler busy playing and learning!
Click here for more information: Play2Learn
Book: Exciting Sensory Bins for Curious Kids
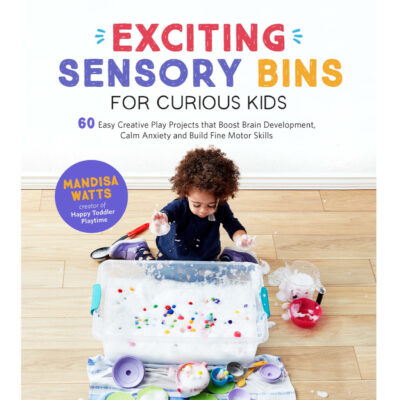
Did you know I wrote a book of sensory bins? Click here for more information Exciting Sensory Bin for Curious Kids. Or grab your copy at Amazon.
Boring afternoons are made exciting with awesome animal-based bins, like Salty Shark Bay or Yarn Farm. Pretend play bins like Birthday Cake Sensory Play or Bubble Tea Party encourage creativity and imagination. And your kids will have so much fun they won’t even know they’re getting smarter with STEAM (science, technology, engineering, art and math) activities like Sink or Float Soup, Magnetic Letter Hunt or Ice Cream Scoop and Count.
Designed for toddlers 18 months and up.
Book: Super STEAM Activity Book for Kids
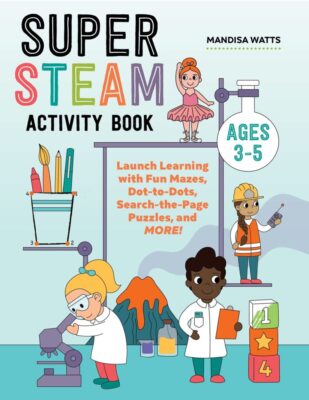
Learning all about science, technology, engineering, art, and math sets kids up for scholastic success―and it can be so much fun! Watch kids enjoy building STEAM skills as they color friendly fish, help water find its way to tree roots, solve math problems with mazes, and more.
Find out more and grab your copy here.
Designed for preschoolers 3 years old and up.
Book: Big Book of Riddles for Kids
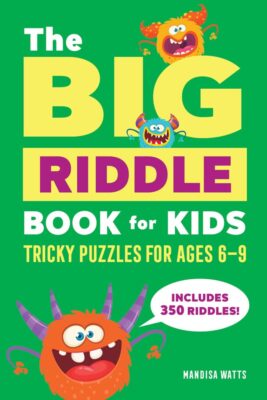
Riddle me this: What’s an exciting way to practice critical thinking while having a blast? The Big Riddle Book for Kids, of course! From hilarious puns to tough brain teasers, kids can build problem-solving skills with hundreds of riddles tha. t show them how to think outside the box.
- 350 riddles for kids—Have hours of fun with riddles, puns and jokes, and math and logic puzzles that’ll get their wheels turning!
- Level up their skills—Riddles get trickier as kids progress through the book, challenging them as they get better at solving puzzles!
- Double-check their work—Kids can check their answers in the back of the book with a handy answer key.
Help children expand their minds while having fun with this puzzle book for kids!
Designed for kids ages 6 years old and up.
TV Show: Curious Crafting
I’m so excited to share my crafting TV show Curious Crafting which launched in July 2022 on TVOkids and TVOkids YouTube! Season 2 aired in August 2023! My show was also nominated in 2023 for Best Live Action Preschool Series by the Youth Media Alliance Awards of Excellence.
Curious Crafting Season 1 is also now airing in Australia on ABC! Watch it here!
Set in the ultimate crafting space, Curious Crafting is a short form pre-school age series about the joy of making crafts. I lead a rotating cast of adorable little preschoolers (including my own) making magic out of common household objects.
In each episode we transform recycled items into magical crafts like a milk carton school bus, paper bag puppet or cotton pad turtle. The crafters learn and laugh their way through each activity while demonstrating what their young imaginations can create.
Curious Crafting shares the adventure and joy of making art with takeaway lessons for creating crafts at home.
This show designed for toddlers and preschoolers 2.5 years old and up.