Check out these cute and easy paper plate crafts for spring! Simple and creative ideas to create with your toddler, preschoolers and kindergartner.
Other than construction paper, paper plates are quite possibly the easiest crafting supply around. It’s sturdy build make it easier to cut than cardboard and paint. You can glue things to them, fold them, rock them, wear them and toss them!
This roundup of our best spring paper plate crafts for kids is always being updated! So you will always find something new and creative to make at school or at home wi toddlers, preschoolers and kindergarten aged children. There are even great ideas here for older kids as well!
You and your child will enjoy making all these easy and fun ideas! Many of which toddlers and preschoolers can make all on their own!
Looking for more paper plate crafts? Check out these amazing collections:
- 50+ Fun & Easy Paper Plate Crafts for Kids
- Fun Paper Plate Crafts for Summer
- Cute Paper Plate Crafts for Spring
- Easy Animal Paper Plate Crafts for Kids
Spring Paper Plate Crafts – Frequently Asked Questions
1. What are easy spring paper crafts for toddlers?
The best spring paper crafts for toddlers are simple and hands-on. Think paper flowers, butterflies, rainbows, and ladybugs (ideas all available below) made with cutting, gluing, and painting. Toddlers enjoy projects where they can tear paper, stamp shapes, and explore colors without needing perfect results.
2. What paper crafts are good for preschoolers?
Preschoolers love paper crafts that let them build and decorate. Activities like paper plate animals, tissue paper flowers, paper rain clouds, and simple folding crafts help them practice fine motor skills while creating something they’re proud of.
3. What supplies do I need for spring paper crafts?
Most spring paper crafts only require basic supplies you probably already have at home or in the classroom: basic white paper plate (the kids good for crafts but not good for eating), construction paper, glue, scissors, markers, paint, and paper plates. Adding items like tissue paper, cupcake liners, or recycled paper can make crafts even more fun.
4. Why are paper crafts good for toddlers and preschoolers?
Paper crafts help children strengthen fine motor skills, hand coordination, and creativity. Cutting, tearing, gluing, and arranging pieces of paper all support the early skills kids need for writing and drawing later on.
5. Can toddlers really do paper crafts?
Yes! The key is choosing simple projects and helping with any tricky steps like cutting. Toddlers can paint paper, glue shapes, or decorate crafts in their own way, which is exactly what makes the activity fun.
6. How do I keep paper crafts simple and fun?
Keep the setup easy and focus on the process rather than the final result. A few materials, plenty of space to explore, and letting kids make their own creative choices usually leads to the most joyful crafting time.
Fun & Easy Spring Paper Plate Crafts for Kids
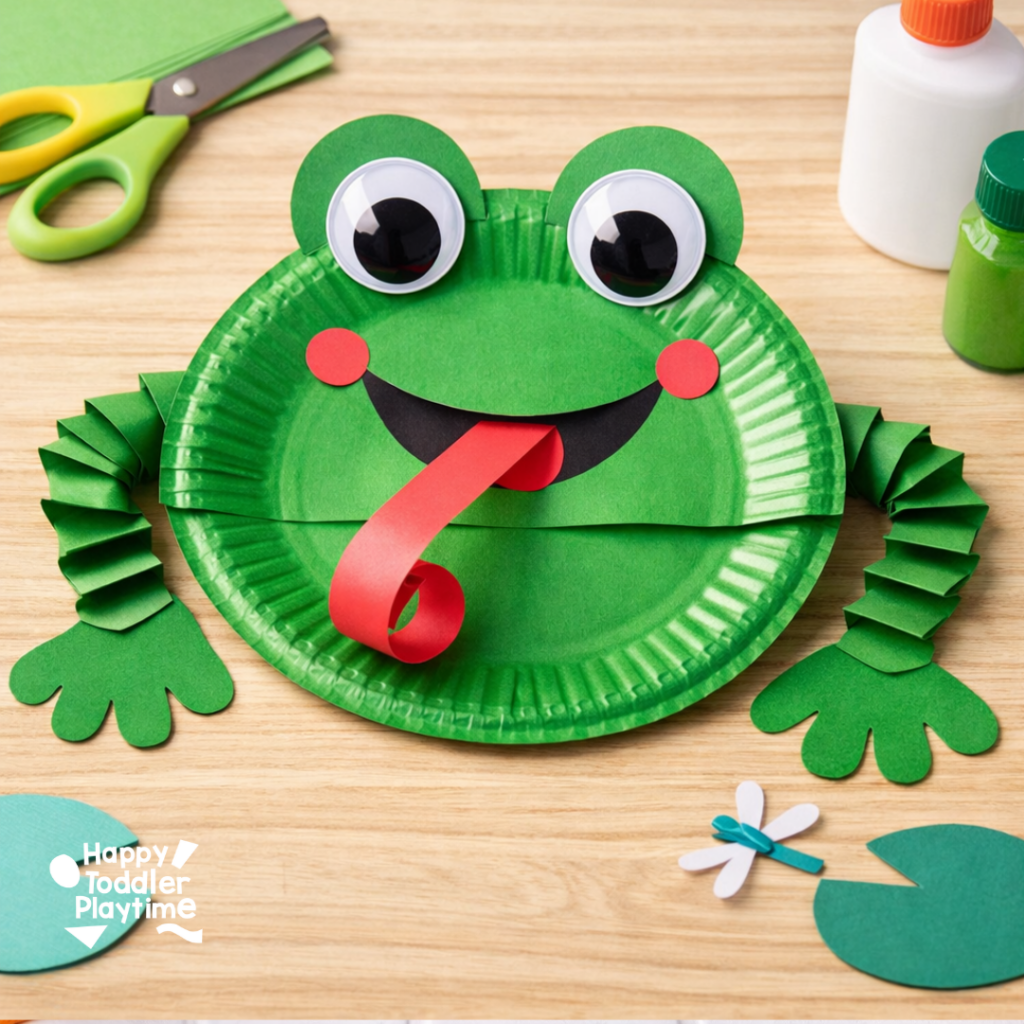
1. Paper Plate Frog Craft
This fun paper plate frog is a great spring craft for toddlers and preschoolers. Kids will love making the frog’s big eyes and curly tongue while practicing cutting, folding, and gluing.
Materials:
- 1 green paper plate
- Green construction paper
- Red construction paper (for tongue and cheeks)
- Black construction paper (for mouth)
- 2 large googly eyes
- Glue
- Scissors
- Green paint (optional if plate isn’t green)
How to Make:
- If your plate isn’t green, paint it green and let it dry.
- Cut the paper plate in half and glue one half to the other half.
- Cut two small green circles from construction paper and glue googly eyes on top. Attach them to the top of the plate.
- Cut a curved smile shape from black paper and glue it inside the fold.
- Cut a long strip of red paper and curl the end with scissors or your fingers. Glue it inside the mouth.
- Cut accordion strips from green paper for the legs and frog-shaped feet. Glue them to the sides of the plate.
- Glue small red circles on each side of the smile.
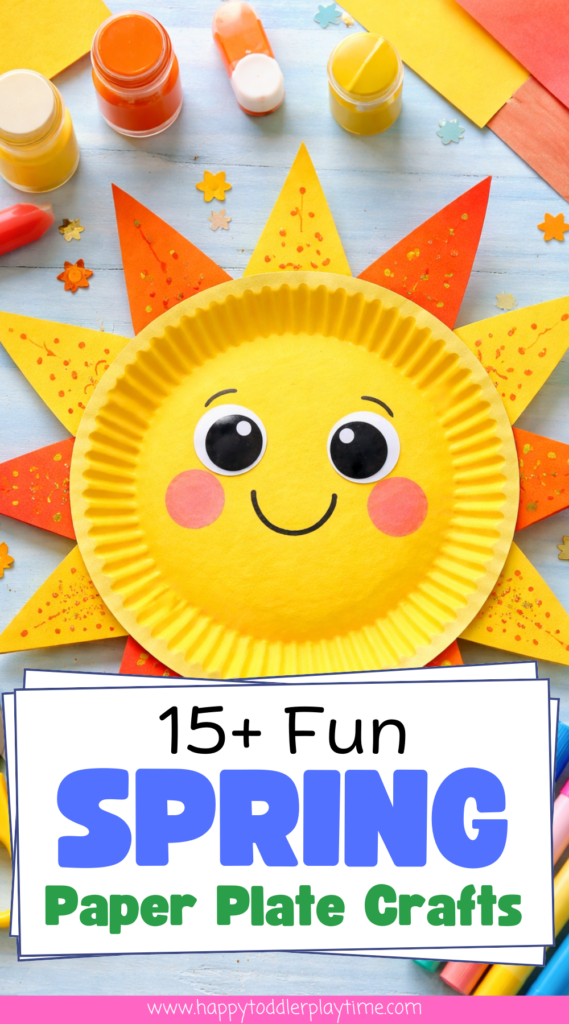
2. Paper Plate Sun Craft
This cheerful paper plate sun is a bright and simple craft that’s perfect for spring or summer. Kids will enjoy cutting the sun rays, decorating them, and adding a happy face.

Materials:
- 1 yellow paper plate
- Yellow and orange construction paper
- Googly eyes
- Pink or red paper (for cheeks)
- Black marker
- Glue
- Scissors
- Yellow or orange paint (optional)
- Glitter or stickers (optional)
- Ribbon or curling ribbon (optional for decoration)
How to Make:
- If your plate isn’t yellow, paint it yellow and let it dry.
- Cut triangle shapes from yellow and orange construction paper.
- Glue the triangles around the back edge of the paper plate so they stick out like sun rays. Use markers to make little dots on the rays.
- Glue googly eyes onto the center of the plate.
- Cut two small circles from pink or red paper and glue them under the eyes.
- Use a black marker to draw a happy smile.
- Add paint splatters, glitter, or stickers to the sun rays.
- Tape or glue curled ribbon to the bottom of the plate for extra sun “beams.”
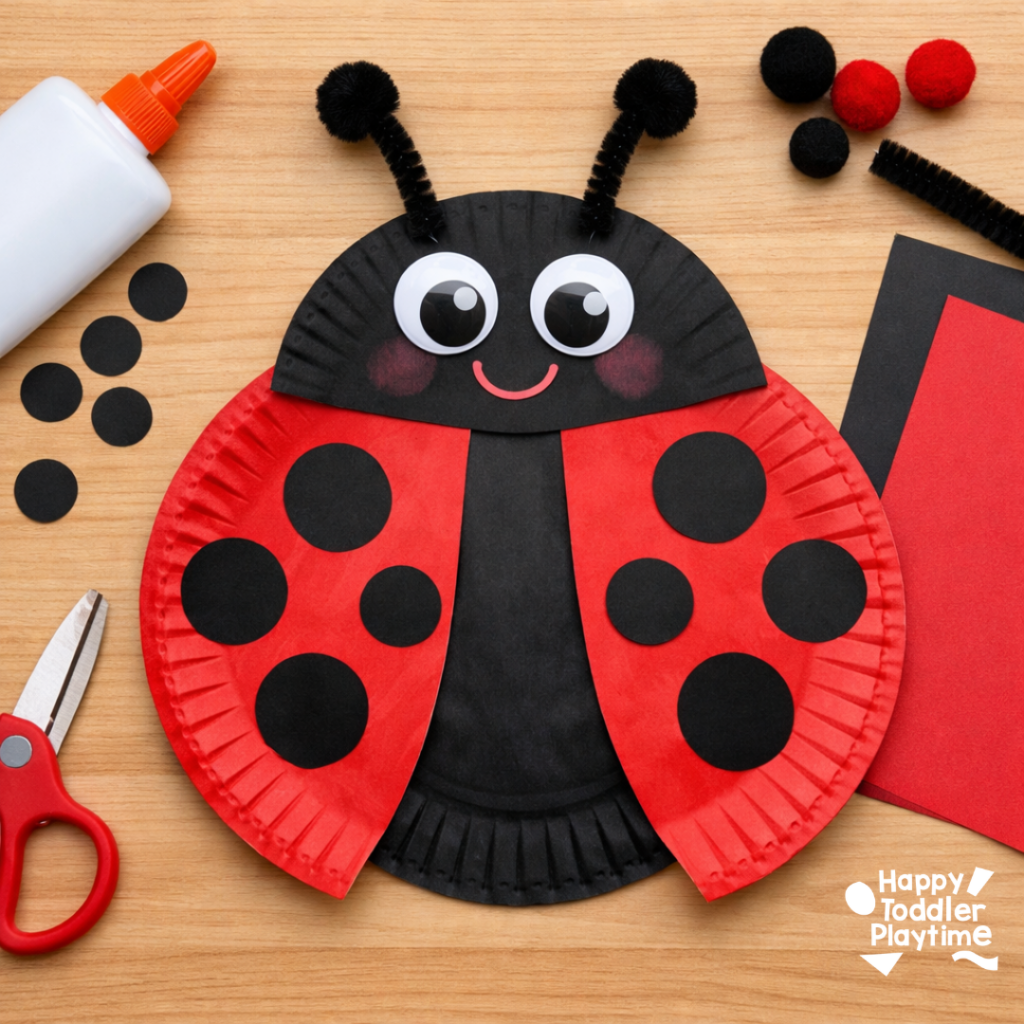
3. Paper Plate Ladybug Craft
This cute paper plate ladybug is a simple spring craft that toddlers and preschoolers will love. Kids can paint, glue, and decorate their ladybug while practicing fine motor skills.
Materials:
- 2 paper plates
- Red paint
- Black construction paper
- 2 googly eyes
- Black pipe cleaners
- Black pom poms
- Glue
- Scissors
- Black marker
Optional:
- Pink chalk or crayon (for cheeks)
How to Make:
- Paint one paper plate red and let it dry.
- Paint or cover the second paper plate with black paper to make the ladybug’s body.
- Cut the red plate in half to create two wings.
- Glue the two red wing pieces onto the black plate, leaving a small space in the middle for the body.
- Cut black circles from construction paper and glue them onto the wings.
- Cut a half circle from black paper and glue it to the top of the ladybug.
- Glue on googly eyes and draw a smile with a marker.
- Cut pipe cleaners, glue them behind the head, and add small pom poms to the ends.
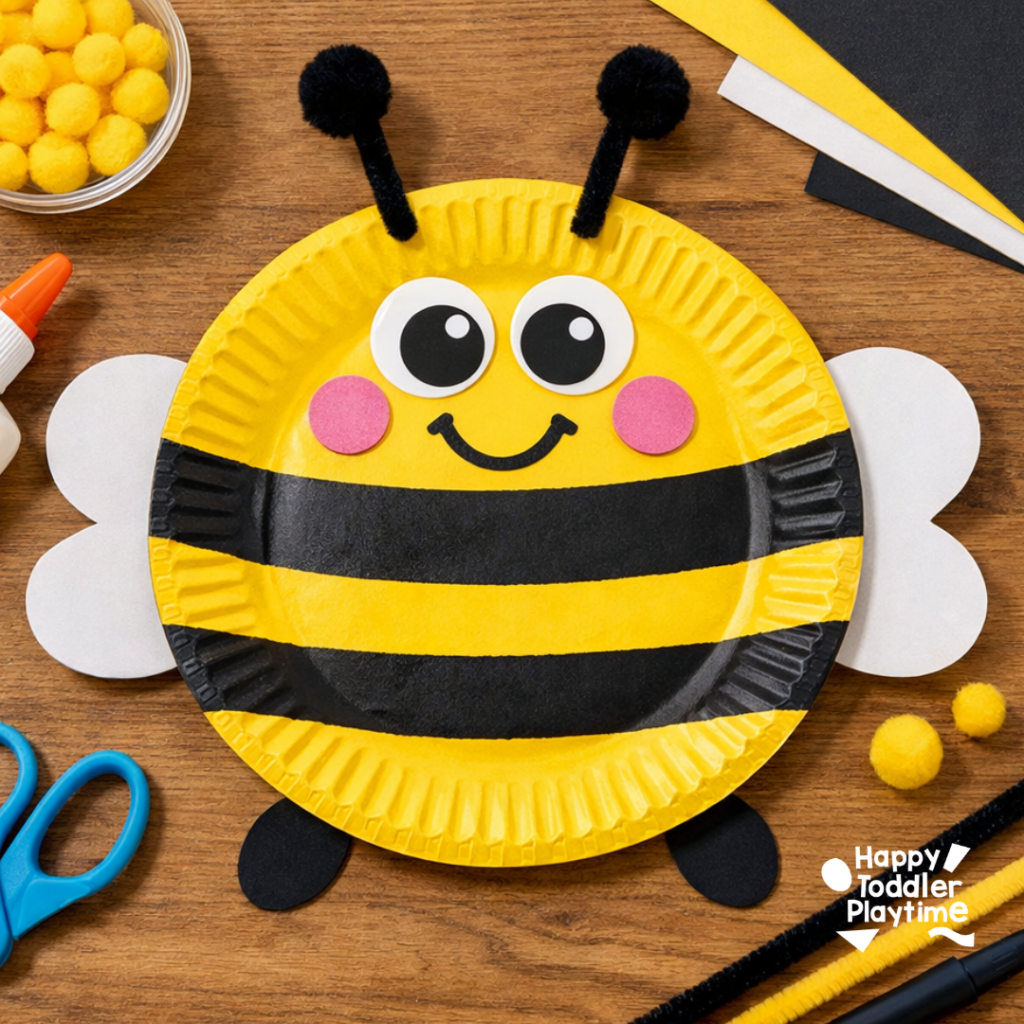
4. Paper Plate Bee Craft
This adorable paper plate bee is a fun and easy spring craft for toddlers and preschoolers. Kids will enjoy painting the plate, adding stripes, and giving their bee a cute face.
Materials:
- 1 paper plate
- Yellow paint
- Black construction paper
- White construction paper (for wings)
- 2 googly eyes
- Black pipe cleaners
- Black marker
- Pink paper (for cheeks)
- Glue
- Scissors
Optional:
- Yellow pom poms for decoration
How to Make:
- Paint the paper plate yellow and let it dry completely.
- Cut strips of black construction paper and glue them across the plate to create the bee’s stripes.
- Cut two wing shapes from white construction paper and glue them behind the sides of the plate.
- Glue googly eyes onto the top of the plate. Draw a smile with a black marker.
- Cut small pink circles from paper and glue them under the eyes.
- Cut two small pieces of pipe cleaner and glue them to the top of the plate.
- Cut two small oval shapes from black paper and glue them to the bottom of the plate.
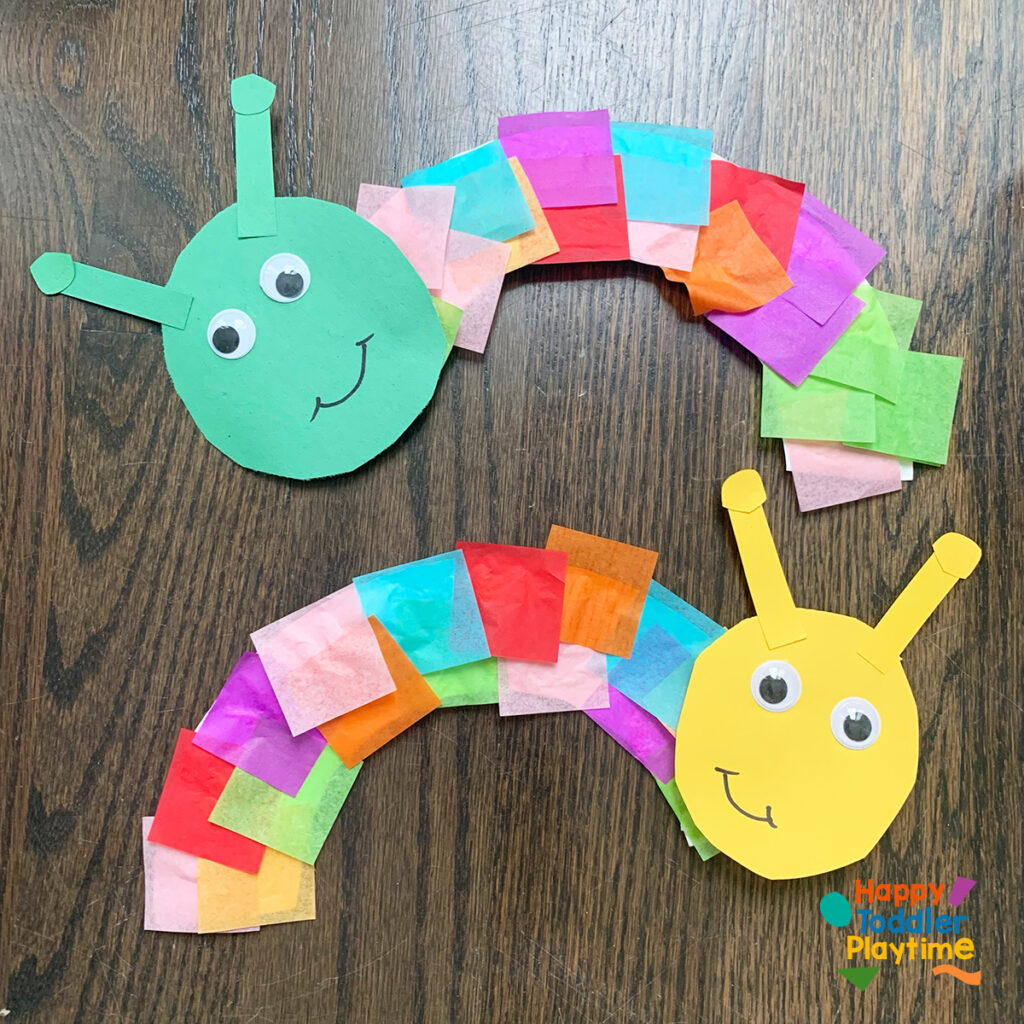
5. Plate Caterpillar Craft
This paper plate caterpillar craft is so much fun to make with kids! If you need caterpillar craft ideas, this one is a great spring craft!
Materials:
- Paper plate
- Tissue paper
- Scissors
- Glue
- Googley eyes
- Sharpie
How To Make:
- Fold and cut a paper plate in half.
- Cut out the edge of the paper plate.
- Grab your tissue paper in different colours and cut it into squares.
- Invite your little one to glue the squares to paper plate edge.
- Cut out a circle from construction paper as well as two small circles and two long rectangles for the antenna.
- Glue these together and then glue the head on to the caterpillar body.
- Glue on googley eyes and draw a smile on the caterpillar’s head.
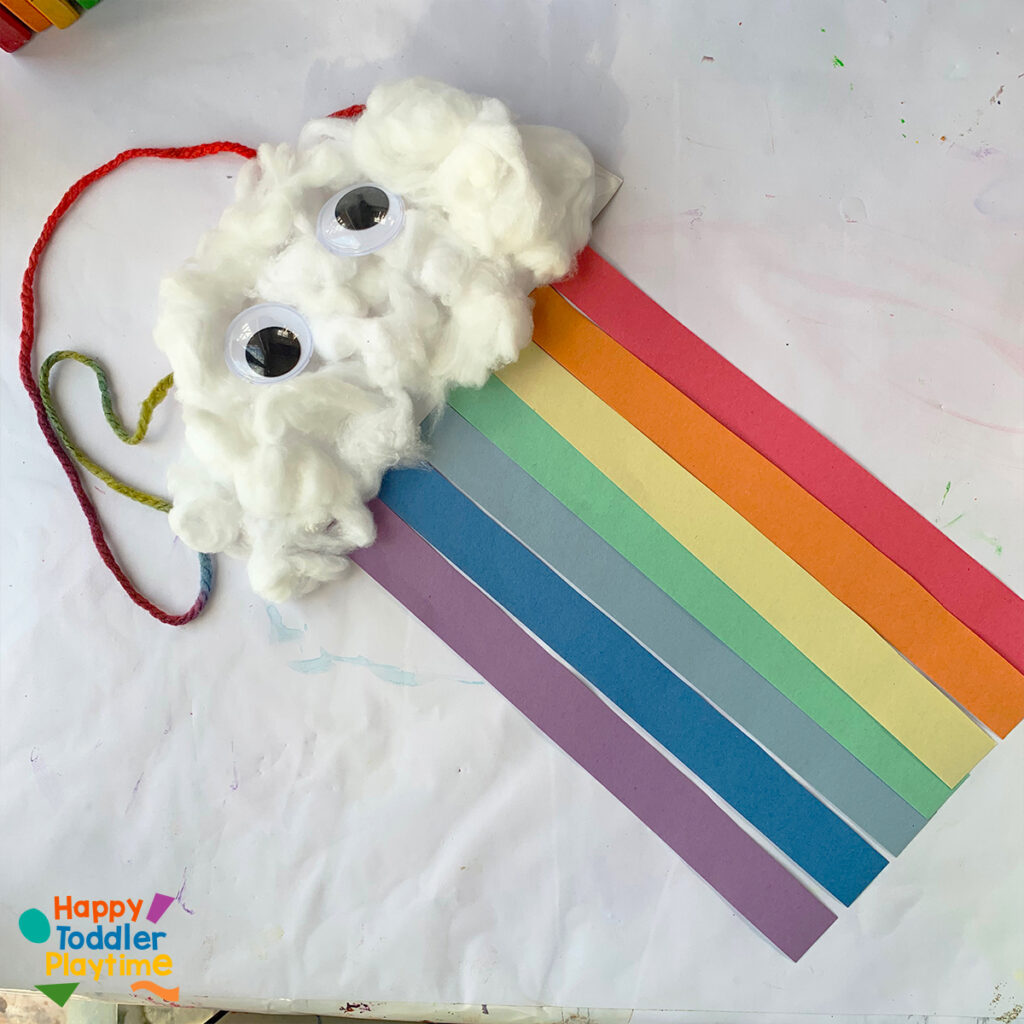
6. Paper Plate Cloud Rainbow Craft
Paper Plate Rainbow Craft is an adorable rainbow craft for toddlers and preschoolers! A fun colour matching and fine motor craft for Spring!
Materials:
- Paper Plate
- Cotton balls
- Construction paper
- Googley eyes
- String or Yarn
- Tape
- Glue
How To Make:
- Grab your supplies.
- Cut your paper plate in half.
- Cut out strips for the rainbow from red, orange, yellow, green, blue and purple construction paper.
- For toddlers use a marker to identify the order of the colours of the rainbow. Invite them to glue down each strip to the bottom of the paper plate.
- Turn the plate over and invite your child to squeeze glue all over the paper plate and then stick cotton balls in the glue. Cover the entire paper plate with cotton balls. I like to fluff out my cotton balls so they go further and they also look fluffier on the craft.
- Add googley eyes to the cotton ball.
- Turn the plate over and attach a piece of string or yarn using tape.
- Hang up cloudy rainbow craft in your child’s room!
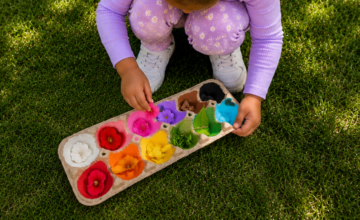
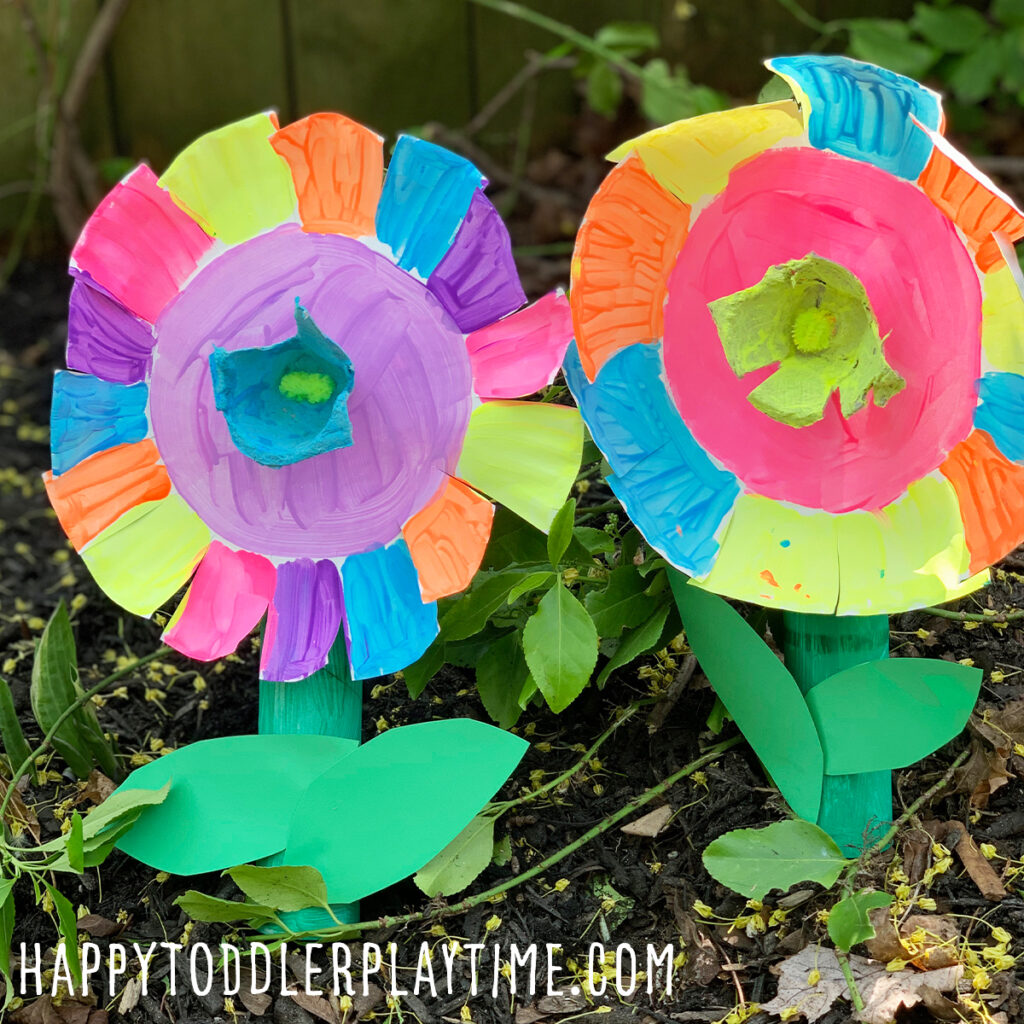
7. Spinning Paper Plate Flower Craft
Spinning Paper Plate Flower Craft is an easy craft for toddlers and preschoolers. Create a paper plate flower that spins when you turn it!
Materials:
- White Paper Plate
- Cardboard Tube
- Washable Paint and brushes
- Scissors
- Egg carton
- Pipe Cleaner
- Craft Stick
- Green Construction Paper
- Glue
- Toothpick
- Pencil
How To Make:
- Grab your white paper plate, paint it as desired.
- Grab your cardboard tube and paint it green. Paint your craft stick green as well.
- Cut out one section from an egg carton. Paint it as desired.
- Let all your flower parts dry. Once dry its time to assemble the flower.
- Using the toothpick poke a hole in the center of the paper plate. Make the hole slightly larger using a pencil.
- Use the toothpick to poke a hole in the center of the cardboard tube about about a few inches from the top. Make it larger using the pencil.
- Use the toothpick to poke a hole in the egg carton and widen it slightly using the pencil.
- Cut a pipe cleaner in half and fold it. Twist the holder ended so that the head is too big to fit through the holes you have made.
- Slide the pipe cleaner through the egg carton, then paper plate, then cardboard tube. Once both ends are through the cardboard tube spread them out.
- Test out your spinning flower. If it doesn’t turn easily, loosen your pipe cleaner.
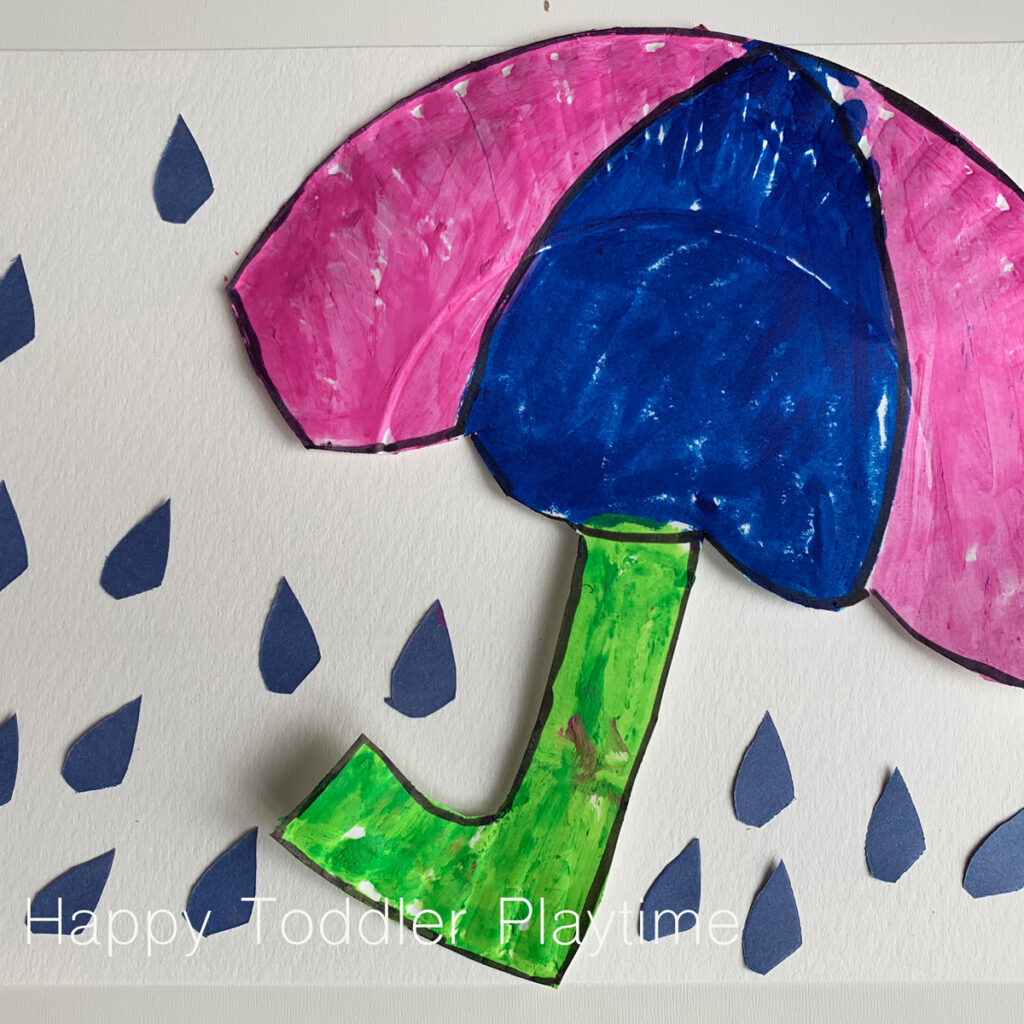
8. Paper Plate Umbrella Craft
Paper plate umbrella craft is simple toddler craft for spring! It’s a great way to entertain toddlers or preschoolers indoors on a rainy day!
Materials:
- Paper Plate
- Pencil
- Scissors
- Paint Sticks
- Black Sharpie
- Washable School Glue
- Blue Construction Paper
- White Paper
How To Make:
- Draw the outline of an umbrella on the paper plate. Use the picture as a guide. You will
- Use the scissors to cut the paper plate umbrella along the penciled outline. This is to be done by an adult.
- Use the paint sticks to decorate the umbrella. If you don’t have paint sticks you can use markers or regular paint. Let your little one decorate their umbrella however they choose!
- Once the umbrella has dried, outline the umbrella using the black sharpie.
- Cut out raindrops from the blue construction paper. Again this should be done by an adult.
- Glue the paper plate umbrella down on the white paper.
- Glue the raindrops down on the white paper around and above the umbrella.
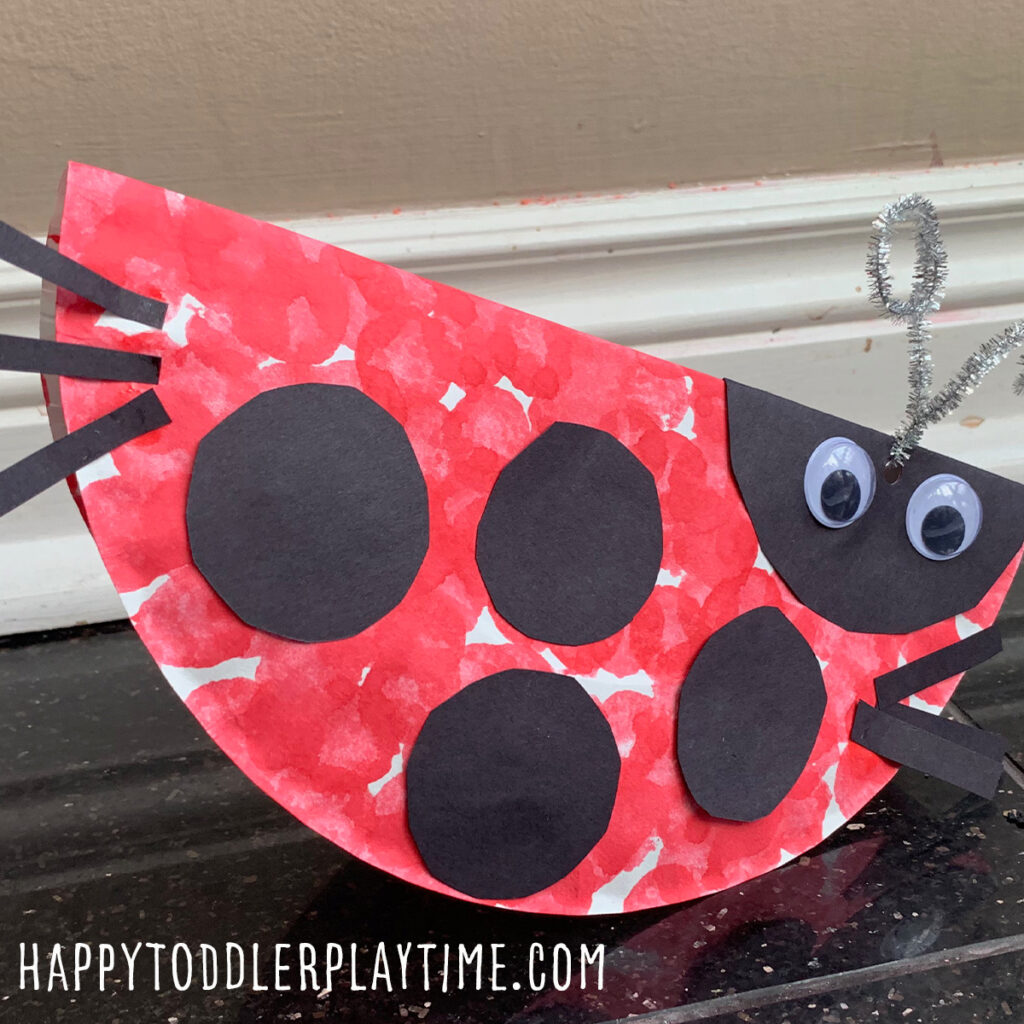
9. Rocking Ladybug Craft
Rocking Ladybug Craft is an adorable paper plate craft to do this Spring Day. Create these beautiful ladybug that rocks using dot makers!
Materials:
- Grab your white paper plate and red dot marker and invite your toddler to cover the enter underside of the white paper plate with red dots! It doesn’t matter if they cover the entire plate just let them have fun and dot away! Set it aside to dry.
- Cut out a large circle and several smaller circles out of black construction paper.
- Once your paper plate is dry, fold it in half. Glue the large black circle to one end of the folded plate.
- Attach the googley eyes on the black head using glue.
- Glue the smaller black dots all over the ladybug.
- Use a single hole punch to make a hole in the head of the ladybug. Push a pipe cleaner through the hole and twist it around to create antenna.
- I glued six legs to the ladybug high enough so that it can still rock but I would recommend skipping this part. The lady bugs rocks better without the legs!
How To Make:
- White Paper Plate
- Red Dot Marker
- Googley eyes
- Black construction paper
- Pipe Cleaner
- Scissors
- Glue
- Single Hole Punch
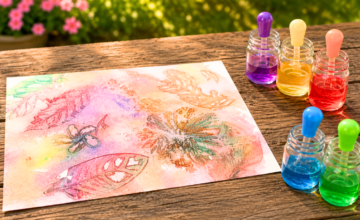
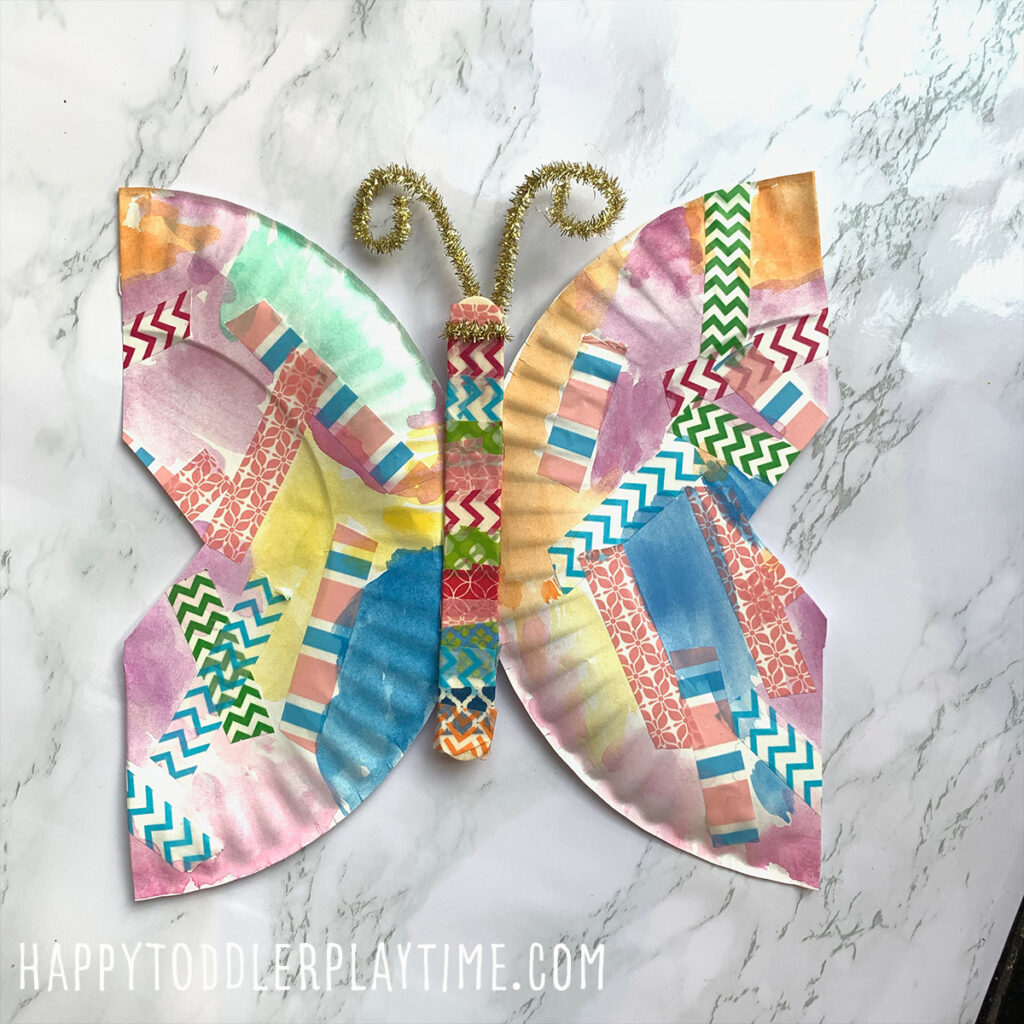
10. Washi Tape & Watercolours Butterfly Craft
Washi Tape Butterfly is a beautiful spring craft for kids. It uses my favorite crafting supplies: washi tape and watercolors!
Materials:
- Colourful Washi tape
- White paper plate
- Watercolor Paint Set and brush
- Bowl
- Water
- Brushes
- Wooden Craft Sticks
- Pipe Cleaner
- Hot Glue Gun
How To Make:
- Cut short pieces of colourful washi tape and stick them to a table. Let help your toddler or preschooler place the washi tape on their white paper plate.
- Invite your toddler or preschooler to cover their white paper plate with the washi tape.
- Use watercolour paints and brushes to fill in all the white spaces.
- While the paper plate dries, grab a craft stick colourful washi tape and stick them to a table again. Invite your child wrap them around the craft stick until it is covered.
- Once the plate is dry fold it in half and cut the plate in half. Then cut out triangles in the center of the straight edge of the plate to create the butterfly wings.
- Take a pipe cleaner and twist it around the top of the craft stick to create antennas.
- Use a hot glue gun to glue the paper plate wings to either side of
11. Paper Plate Baseball Lacing Craft

Materials:
- Paper plate
- Pencil or sharp object to poke holes in the plate
- Cardboard box (to place under the plate while poking holes)
- Red marker
- Red yarn (about 2-3 feet)
- Embroidery needle
How To Make:
- With the red marker, draw curved lines on the paper plate to resemble the seams of a baseball.
- Place your paper plate on top of the cardboard box. Using a pencil or another sharp object, carefully poke holes on either side of the curved lines. These holes should be evenly spaced and about 1/2 inch apart.
- Cut two lengths of red yarn about 1 foot long. Thread one end through the embroidery needle and tie a knot at the other end.
- Start by pulling the needle and yarn up through one of the holes from the back of the plate, leaving the knot at the back. Lace the yarn across the plate and down through the opposite hole. Pull the yarn through, but not too tight.
- Once you’ve laced through all the holes, tie off the end of the yarn at the back of the plate.
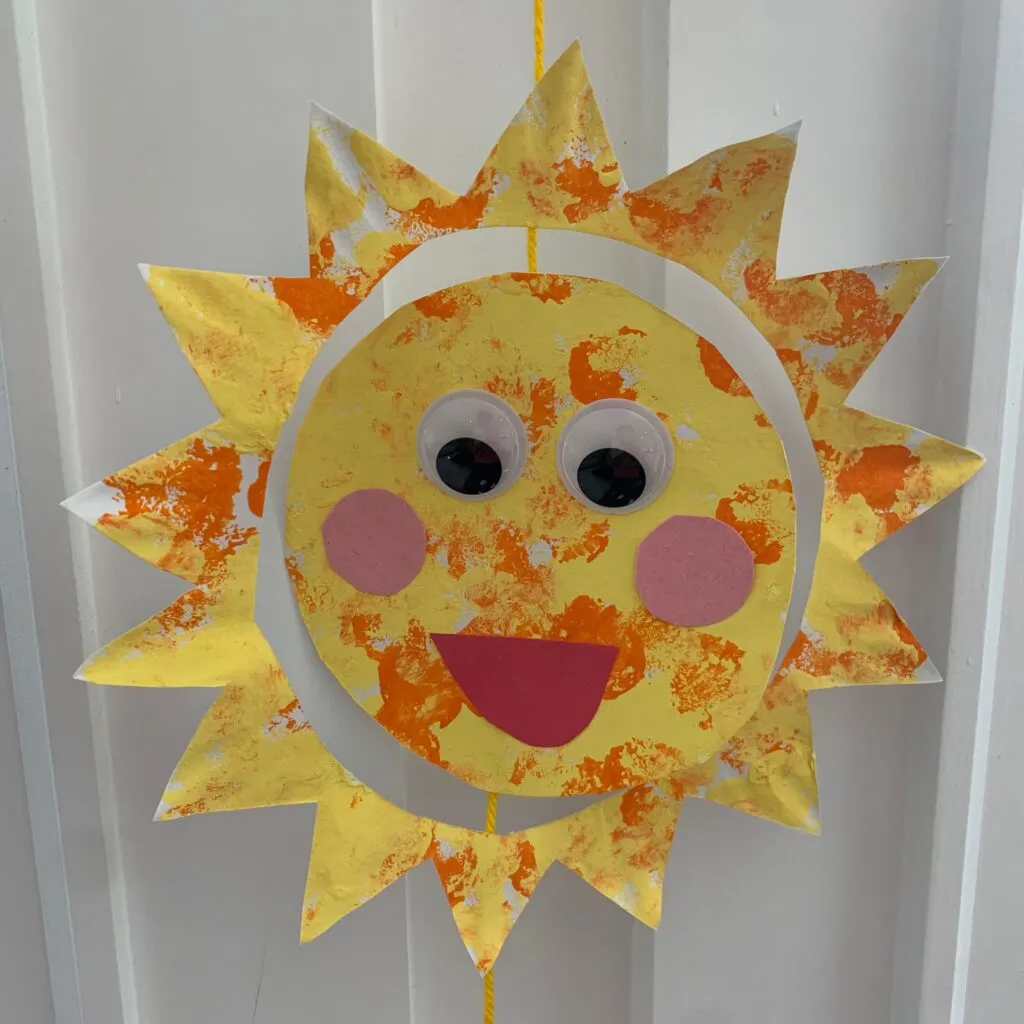
12. Paper Plate Sunshine Craft
Bring the warmth and brightness of the sun right into your home with a delightful Paper Plate Sunshine Craft!
Materials:
- Paper plate
- Yellow and orange acrylic paint (non-toxic for safe crafting)
- Pom poms (various sizes)
- Clothespins
- Craft glue
- Scissors
- String or yarn
- Googly eyes
- Construction paper for facial features
- Tape
How To Make:
- Dip different-sized pom poms with clothespins attached into yellow and orange paint, then use them as stamps to create a vibrant and textured sun design on the paper plate. Let the paint dry completely before proceeding.
- Fold the paper plate in half and cut out the center circle of the paper plate. Fold the center circle in half and cut around the circle to make it slightly smaller. Take the outer circle and fold it in half and cut out triangles.
- Glue googly eyes and a smiley face using construction paper onto the center of the paper plate.
- Reassemble the sun by placing the sun rays (outer circle) around the inner circle (the face) with the painted side facing downward on a table. Cut a piece of yarn or string and lay it across the plates, in the middle. Using a piece of tape, secure the strings to the top of the rays and to the center paper plate and another piece of tape on bottom of the sun rays. Make sure to leave enough string at the top to hang the sun to showcase your wonderful craft!
13. Pop-Up Paper Plate Sheep Craft
Spring is in the air and that also means Easter time is almost upon us! Craft this adorable and easy pop-up paper plate sheep craft for kids. It’s a wonderful craft to make for spring, Easter, or during a farm unit!

Materials:
- Black construction paper
- Google eyes
- Glue
- Double sided tape
- Scissors
- Black Marker
- Paper Plate
- Cotton Balls
How To Make:
- Cut out a sheep head and two ears from black construction paper. Glue the ears to the sides. Add some googles and draw a mouth.
- Cut out 4 legs from black construction paper. Glue them to the bottom of the paper plate.
- Cut a 1 inch strip from the black construction paper roll into into a loop. Use double sided tape or glue to secure the loop. Glue or tape the loop the back upper part of the sheep’s head. Set it aside.
- Once the plate is covered, glue the head of the sheep by the loop to the one side of the paper.
- And before you know if you have turned you paper plate into a cute pop-up sheep craft!
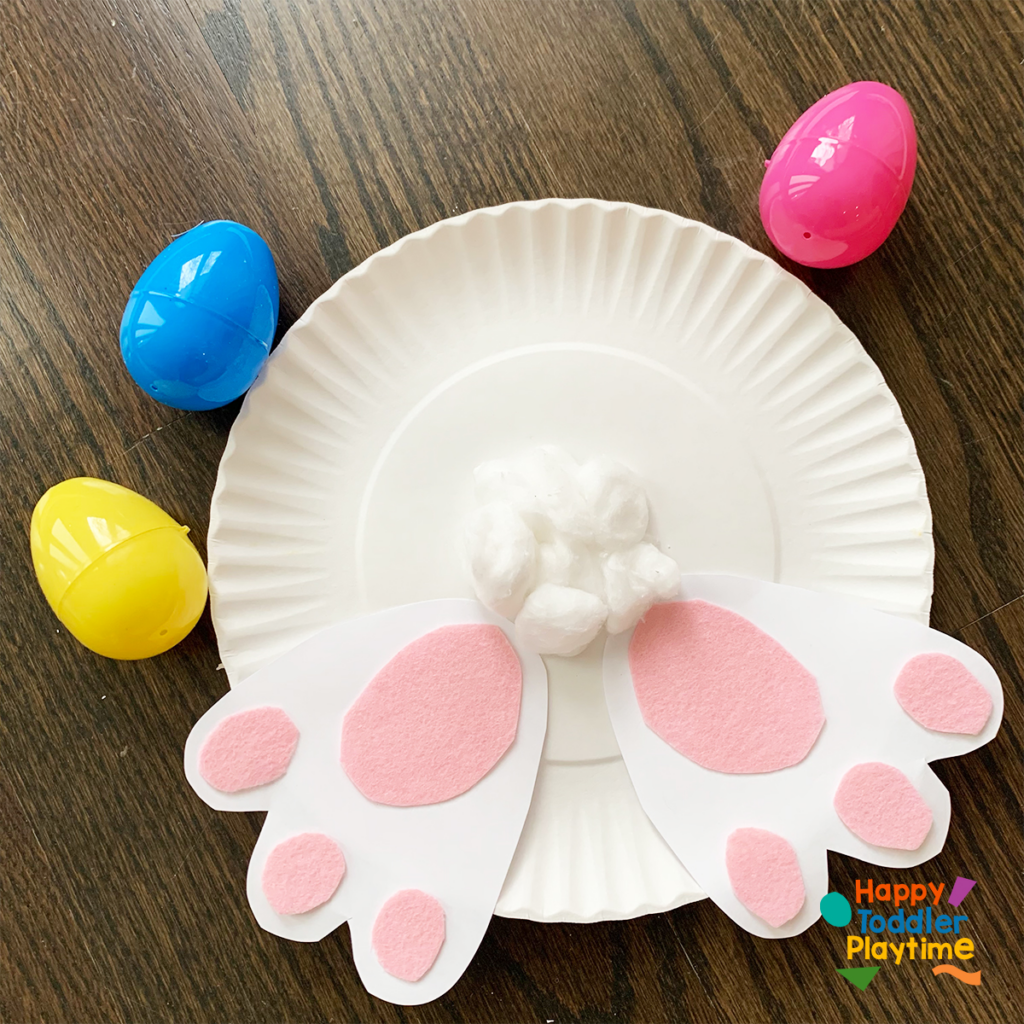
14. Paper Plate Easter Bunny Butt Craft
If you’re looking for a simple craft for your little one that’ll exercise those fine motor muscles, check out this Paper Plate Easter Bunny Craft.
Materials:
- White paper plate
- White construciton paper
- Pink felt
- Glue
- Glue
- Scissors
- Cotton balls
How To Make:
- Cut out two large bunny feet from white construction paper. From the felt paper cut out four pink pads for the bunny’s feet (one big one and 3 smaller ones).
- Glue the pads tot he bunny’s feet and glue these to the paper plate.
- Take some cotton balls and start to fluffy them out a little bit. Put some glue on the middle of the paper plate and sticky the cotton balls in the glue to create the bunny’s tail.
15. Rocking Paper Plate Easter Bunny Craft
Hooray, it is Easter crafts for kids time! Today’s super duper cute craft is a rocking paper plate Easter Bunny Craft! Nothing is as adorable for Easter than an adorable bunny craft!
Materials:
- Paper plate
- Blue or pink construction paper
- Google eyes
- Glue
- Scissors
- Craft knife
- Black marker
How To Make:
- Fold the paper plate in half. Use a craft knife to a hole larger enough to fit a pair of scissor in. Cut one half of the middle of the paper plate. Fold it up.
- Cut out ears and feet from white construction paper. Cut out inner ears and foot pads in blue construction paper. Also cut out a heart for the nose from the blue construction paper.
- Glue the inner ears to the larger ears and the foot pads to the feet.
- Glue the ears and feet to the front of the rocking paper plate. Add googley eyes.
- Use a sharpie or black marker to draw whiskers and a smile. And before you know it you have an adorable bunny that will rock! Stand it up and take it for a rock!
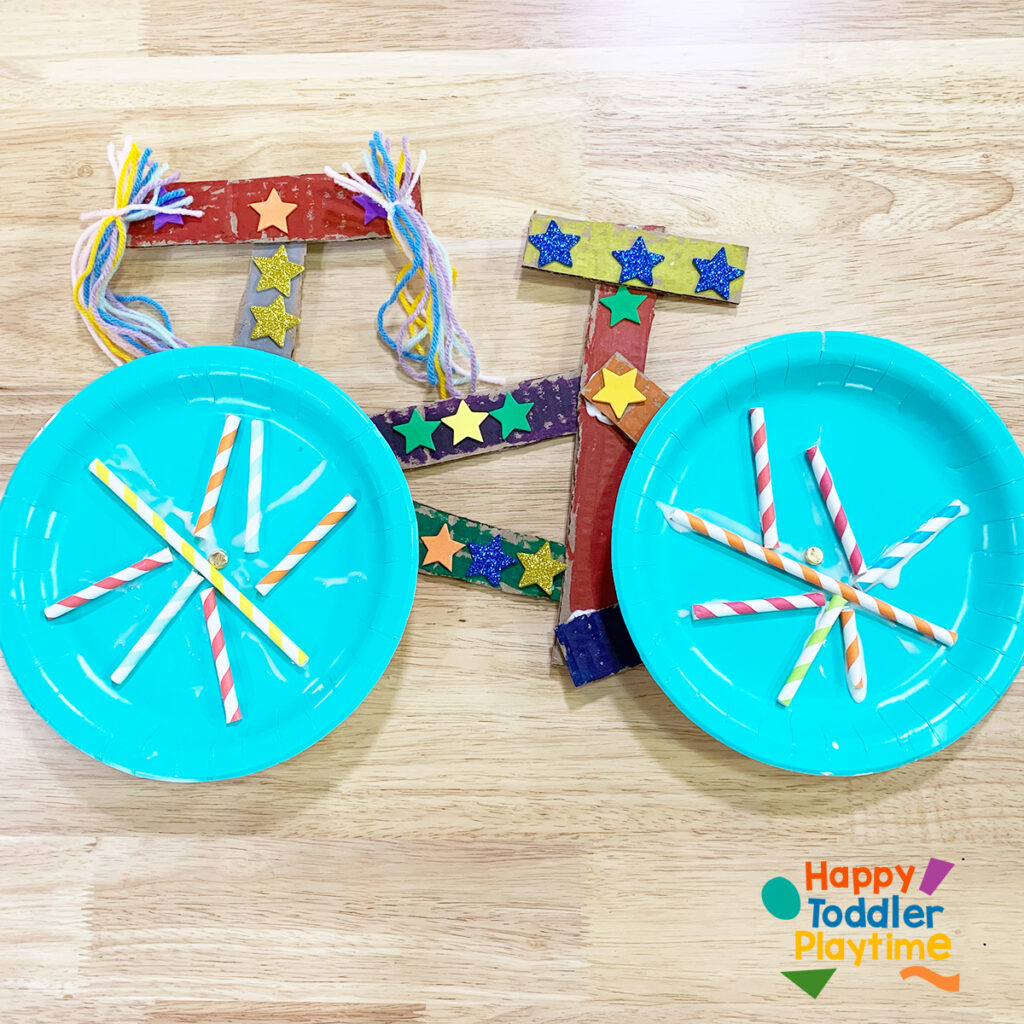
16. Cardboard Bicycle Craft
Cardboard bicycle craft is a fun and easy craft for preschoolers. Create your very own bicycle craft you can take for a spin!
Materials:
- Cardbaord
- paper plates
- paper straws
- scissors
- star stickers
- yarn
- glue
- paint sticks
How To Make:
- Cut four cardboard strips about 10 cm long, cut one cardboard strip about 7 cm long and cut three cardboard strips about 5 cm long.
- Glue one 5 cm strip to the top of one 10 cm strip in a T shape. Repeat this step for another set.
- Glue two 10 cm strips together in a V shape (or less than symbol). Repeat this step with the last two 7 cm strips in a greater than symbols.
- Decorate the strips using paint sticks.
- Assemble the bicycle by gluing the larger V to the middle of one T. Glue the open part of the V to the second T. Glue the smaller V or greater than symbol to the second T.
- Grab 2 paper plates and poke a hole in the middle using scissors and insert a brad.
- Poke a hole in the front T and the back section of the bicycle and attach the wheels.
- Decorate the wheels but glueing on paper straws for the wheel spokes.
- Add some flair! Use stickers to decorate your bicycle or add tassels!
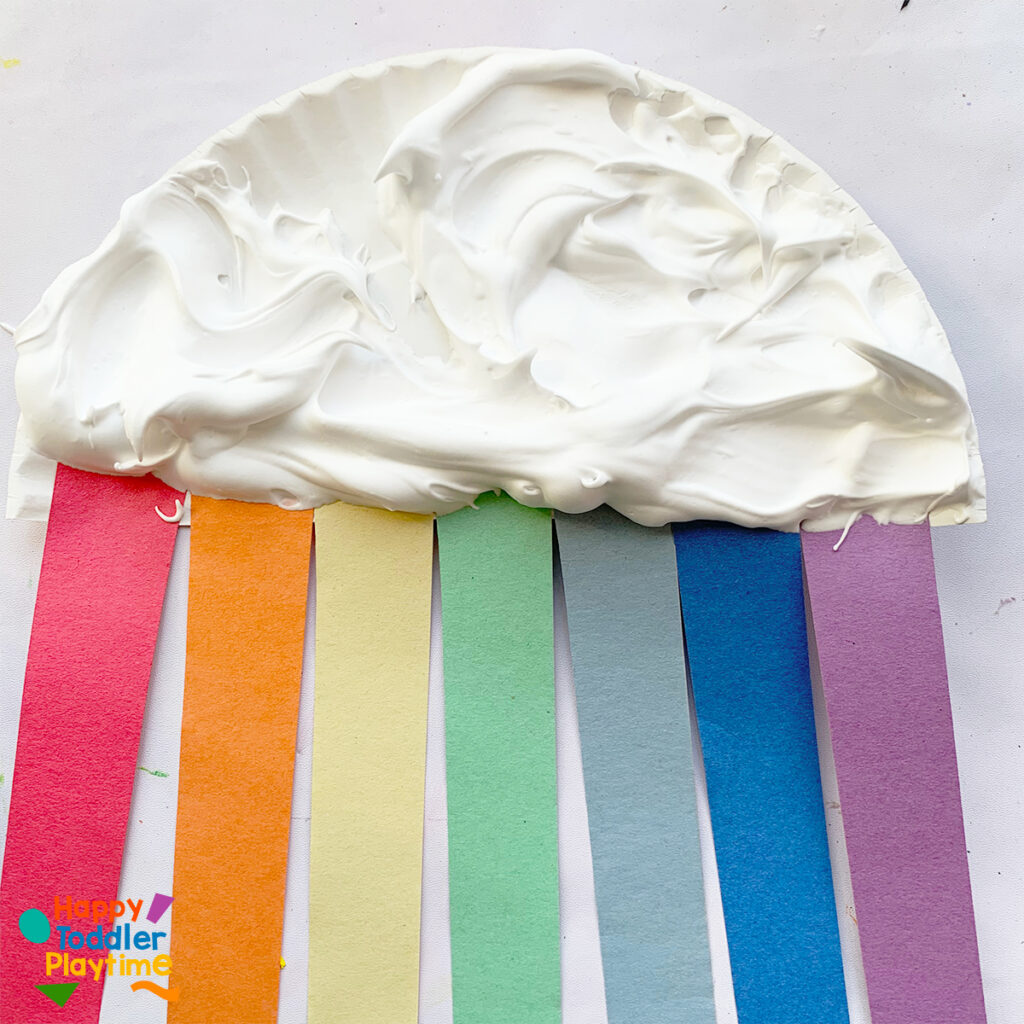
17. Puffy Paint Rainbow Craft
Puffy Paint Rainbow Craft is a fun and easy spring rainbow craft for toddlers and preschoolers! Make a fluffy looking cloud with puffy paint!
Materials:
- 1/2 cup white school glue
- 1/2 cup shaving cream (add a little more shaving creaming to increase the puffiness of the paint)
- Bowl
- Paint brush
- Paper plate
- Scissors
- Construction paper
- Glue
How To Make:
- Grab your supplies.
- Cut a paper plate in half. Cut a strip from the construction paper in all the colours of the rainbow.
- Glue the to the back of the paper plate.
- Make the puffy paint. In a bowl, combine the white school glue and shaving cream I used a craft stick to mix it. Puffy paint resembles cloud but it doesn’t last for ever. Use the paint within 30 minutes. Once dry the paint will remain full for a few hours and then loose it thickness over time. Once dry it should feel dry to the touch.
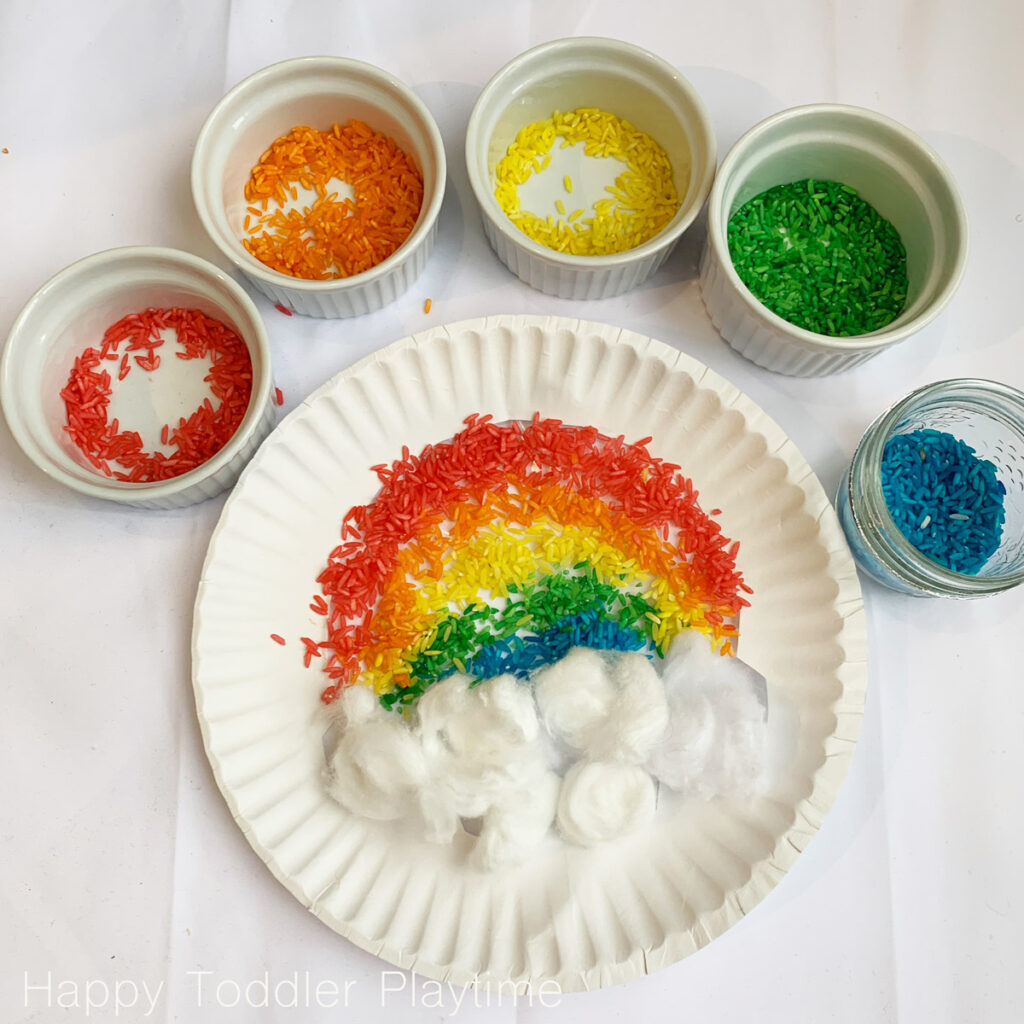
18. Sun Catcher Craft
This rainbow sun catcher craft is a wonder contact paper craft for kids of all ages! Create textured rainbow art that is beautiful for St. Patrick’s Day or Spring!
Materials:
- Fold your paper plate in half and cut out a rainbow shape. See the picture below for a guide.
- Cut out a square from the contact paper. The square should be large enough to cover the entire shamrock on the paper plate.
- Peel the back off the contact paper and stick it the the underside of the paper plate with the sticky side facing up.
- Have your child pour coloured rice on the sticky paper to create the rainbow either starting with red or purple. Make sure that they pour enough to cover all the sticky paper.
- Once you have completed the rainbow, press the rice down firmly onto the contact paper with your hand. This will help the rice stick to the contact paper.
- Shake off the remaining rice back into your bowl.
- Use a hole punch to make a hole at the top of the paper plate.
- Tie a piece of ribbon through the hole and hang up your paper plate rice rainbow sun catcher!
How To Make:
- Contact Paper
- Coloured rice (see instruction below)
- IKEA colour bowls
- Paper plate
- Scissors
- Pencil
- Cotton balls
- Single hole punch
- Ribbon
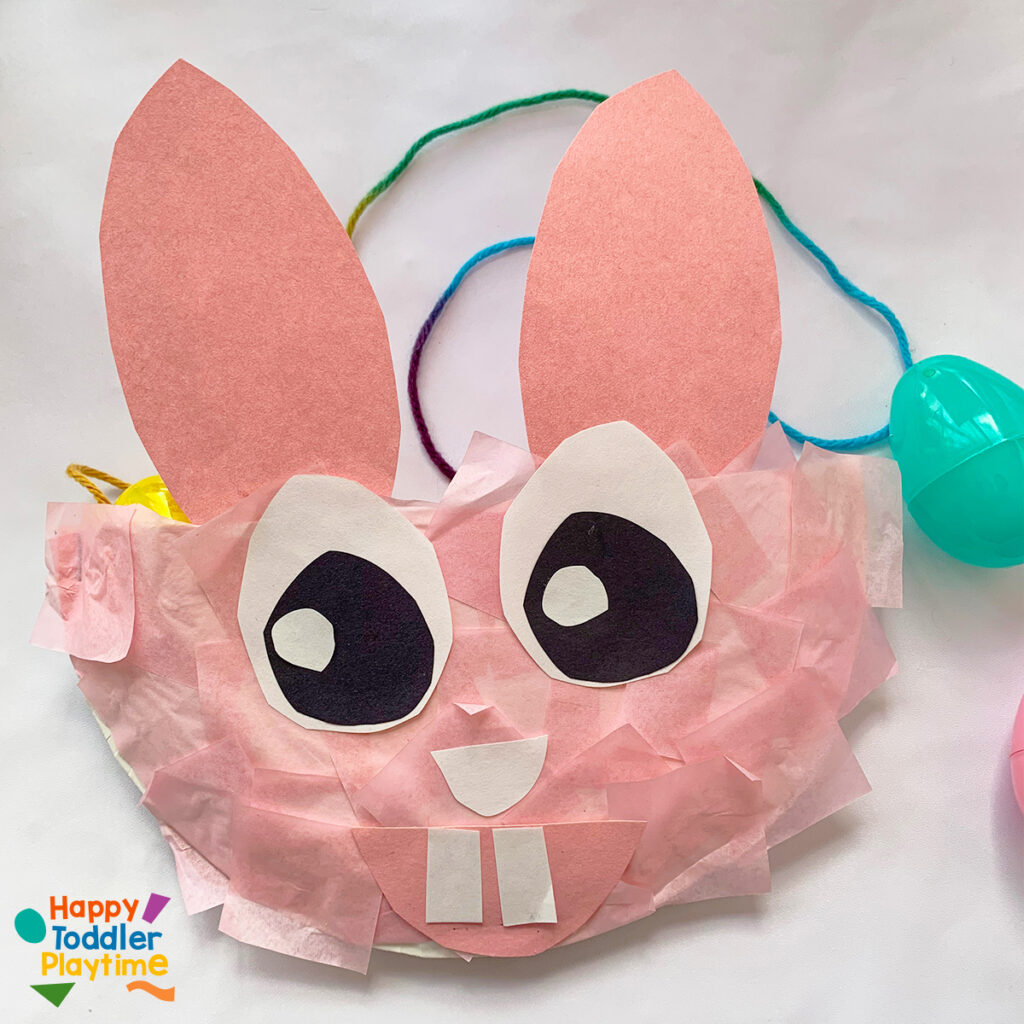
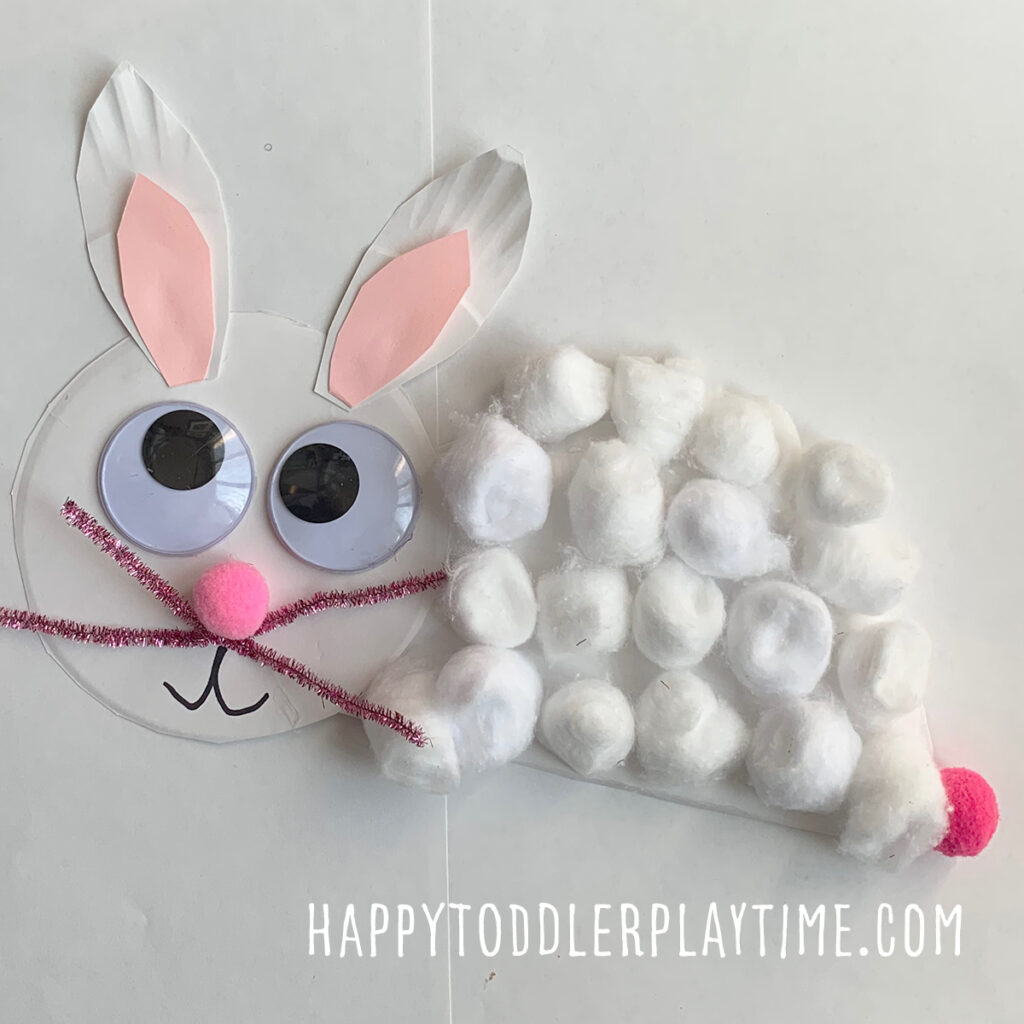
19. Bunny Paper Plate Pouch Craft
Easter Bunny Paper Plate Pouch Craft is a fun and easy craft for toddlers and preschoolers to create this Easter! Using a paper plate!
Materials:
- Pink Tissue Paper
- Paper Plate
- Pink, black and white Construction Paper
- Scissor
- Glue
How To Make:
- Grab your supplies.
- Cut a paper plate in half.
- Take a stapler and staple the two half together along the curved edge keeping the flat part open.
- Cover one half of the paper plate with pink tissue paper by gluing it down using a glue stick.
- Out of the pink construction paper cut: bunny ears and a mouth. Out the white construction paper cut two bunny teeth, large circles for the bunny eyes and two small circles and a nose. Finally, out of the black construction paper cut out two circles to fit into the wye eye circles.
- Glue on the bunny ears on the inside of the bunny head. Glue the eyes together and glue them under the ears.
- Next glue the nose under the eyes and bunny teeth and mouth.
- Take a piece of yarn or string and tape each end to the inside of the bunny pouch to create a purse.
- Use it to collect Easter eggs at Easter time!
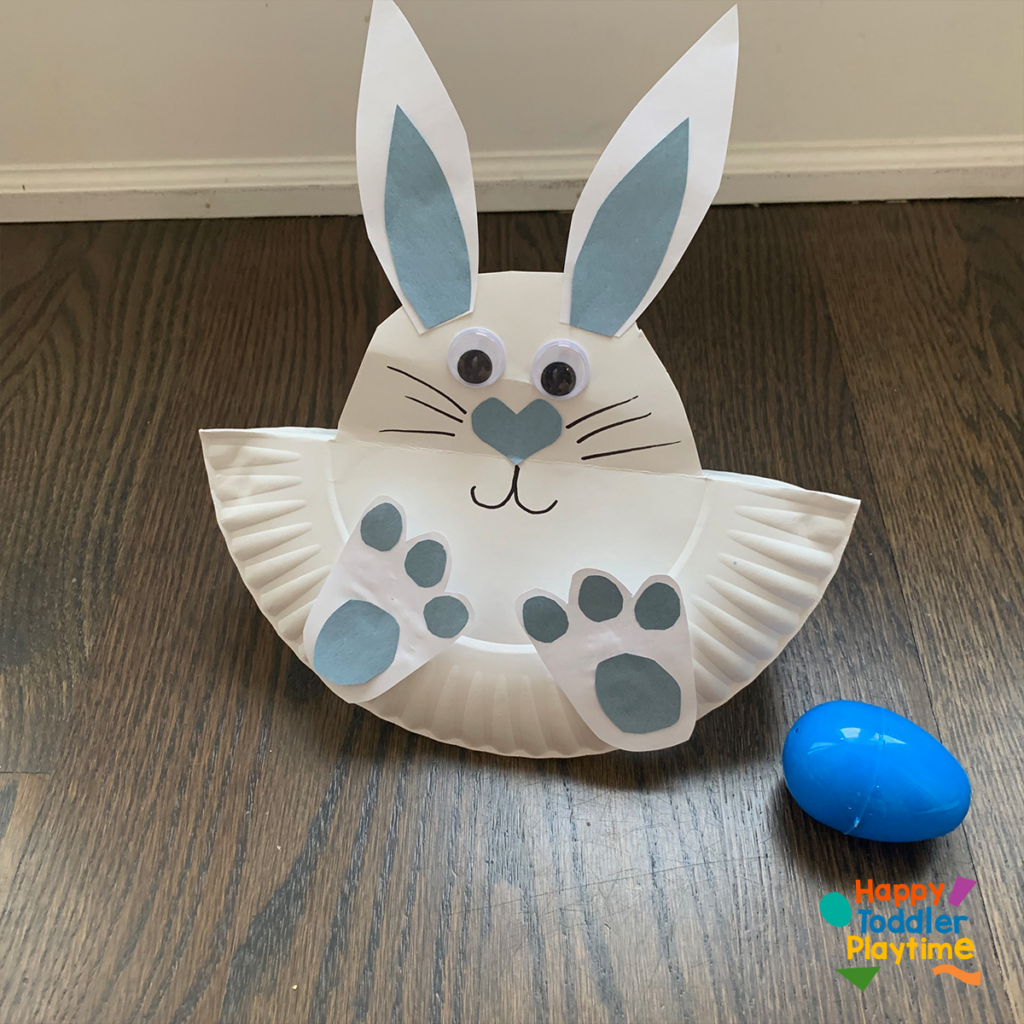
20. Paper Plate Easter Bunny Craft
Paper Plate Easter Bunny Craft for Kids is a fun and easy craft for toddlers & preschoolers. This cute Bunny craft is a great way for Easter!
Materials:
- 2 white paper plates
- Cotton balls
- Glue
- Scissors
- Pink Construction Paper
- Pink pom poms
- Googley Eyes
- Pink Pipe cleaners
- Glue Gun
- Black sharpie
How To Make:
- Grab two white paper plates. Fold and cut one plate in half. Cut out a circle out of the second plate. Cut out two long bunny ears from the other half plate. Take your pink construction paper and cut out the inner ear. Glue these to the larger white paper plate ears. Attached the bunny ears to the head of your bunny!
- Glue the circle to the half plate. This will become the head and body of the Easter Bunny.
- Invite your little one to glue fluffy cotton balls all over the body of the bunny (If they glue them on the head that’s ok too!). Add a pink Pom Pom bunny tail to the behind of the bunny.
- Attach google eyes to the head of the Easter Bunny. Glue a small pink pom pom as a nose below the eyes.
Activity Overview
- Age Suitability: This craft is good for toddlers aged children 3 years old and up with adult assistance.
- Mess Level: The mess level for these crafts varies from low to medium.
- Difficulty to Create: Low.
- Skills Developed: Language development, shape recognition, color recognition, hand-eye coordination, fine motor skills, imaginative play, creativity.
Play2Learn Toddler & Preschool Programs for Curious Toddlers
There is no limit to your toddler’s energy and curiosity. That energy and curiosity although a joy can be challenging at times. Their interest in just about everything around them is what makes them great learners. One and two year olds can soak up so much just from their senses!
But as a teacher or parent that thirst for learning can be exhausting. That is why I created this toddler and preschooler program. To help you get the most out of this time with your curious toddler without having to come up with creative ways to play and interact with them.
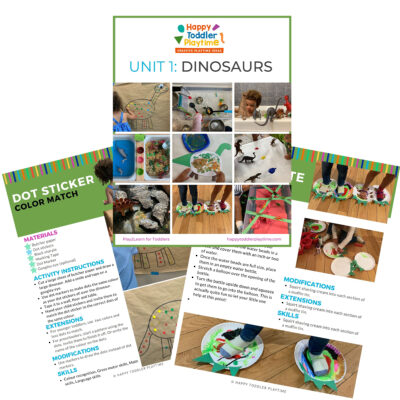
Play2Learn for Toddlers includes 20 Units for toddlers. Each 2-week toddler unit has 20 super easy to set up and engaging activities for toddlers 18 months to 3 years.
Play2Learn Preschool which includes 20 Units for preschoolers. Each 2-week preschoolers unit has 20 unique and easy to set up and engaging activities for preschoolers 3 years to 5 years. That’s over 800 learning activities for your toddler and preschooler at your fingertips! So many ideas you and your child will never be bored again!
These toddler and preschool lesson plans and activities will definitely keep you and your toddler and preschooler busy playing and learning!
Click here for more information: Play2Learn
Book: Exciting Sensory Bins for Curious Kids
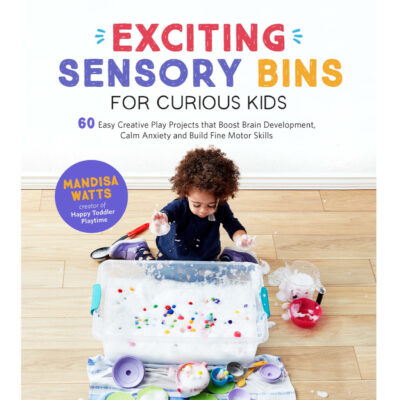
Did you know I wrote a book of sensory bins? Click here for more information Exciting Sensory Bin for Curious Kids. Or grab your copy at Amazon.
Boring afternoons are made exciting with awesome animal-based bins, like Salty Shark Bay or Yarn Farm. Pretend play bins like Birthday Cake Sensory Play or Bubble Tea Party encourage creativity and imagination. And your kids will have so much fun they won’t even know they’re getting smarter with STEAM (science, technology, engineering, art and math) activities like Sink or Float Soup, Magnetic Letter Hunt or Ice Cream Scoop and Count.
Designed for toddlers 18 months and up.
Book: Super STEAM Activity Book for Kids
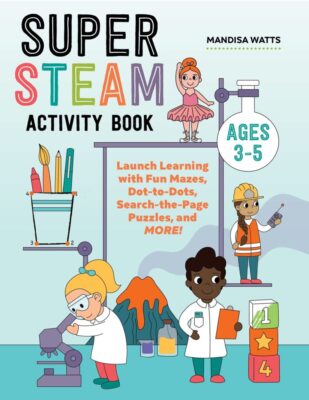
Learning all about science, technology, engineering, art, and math sets kids up for scholastic success―and it can be so much fun! Watch kids enjoy building STEAM skills as they color friendly fish, help water find its way to tree roots, solve math problems with mazes, and more.
Find out more and grab your copy here.
Designed for preschoolers 3 years old and up.
Book: Big Book of Riddles for Kids
Riddle me this: What’s an exciting way to practice critical thinking while having a blast? The Big Riddle Book for Kids, of course! From hilarious puns to tough brain teasers, kids can build problem-solving skills with hundreds of riddles tha. t show them how to think outside the box.
- 350 riddles for kids—Have hours of fun with riddles, puns and jokes, and math and logic puzzles that’ll get their wheels turning!
- Level up their skills—Riddles get trickier as kids progress through the book, challenging them as they get better at solving puzzles!
- Double-check their work—Kids can check their answers in the back of the book with a handy answer key.
Help children expand their minds while having fun with this puzzle book for kids!
Designed for kids ages 6 years old and up.
TV Show: Curious Crafting
I’m so excited to share my crafting TV show Curious Crafting which launched in July 2022 on TVOkids and TVOkids YouTube! Season 2 aired in August 2023! My show was also nominated in 2023 for Best Live Action Preschool Series by the Youth Media Alliance Awards of Excellence.
Curious Crafting Season 1 is also now airing in Australia on ABC! Watch it here!
Set in the ultimate crafting space, Curious Crafting is a short form pre-school age series about the joy of making crafts. I lead a rotating cast of adorable little preschoolers (including my own) making magic out of common household objects.
In each episode we transform recycled items into magical crafts like a milk carton school bus, paper bag puppet or cotton pad turtle. The crafters learn and laugh their way through each activity while demonstrating what their young imaginations can create.
Curious Crafting shares the adventure and joy of making art with takeaway lessons for creating crafts at home.
This show designed for toddlers and preschoolers 2.5 years old and up.