Check out these February crafts perfect for toddlers and preschoolers. February is one of those months that feels short but packed with fun. Between Valentine’s Day, Groundhog Day, and Black History Month, there are so many reasons to celebrate, craft, and explore with your little ones. And honestly, when the weather is cold and we’re spending more time indoors, crafting becomes our go-to activity.
My kids absolutely love heading outside when there’s fresh snow—we’re all about skiing trips or just rolling around and making snow angels. But on those icy days when staying warm inside is the only option, we break out the art supplies and get creative. There’s just something cozy about spending an afternoon gluing, painting, and crafting together. Plus, crafts are a sneaky way to keep toddlers and preschoolers learning while they play.
Why You’ll Love These February Crafts
- Low-prep and fun: Most of these crafts use materials you probably already have at home.
- Seasonally inspired: Perfect for snowy days, Valentine’s fun, and celebrating special February holidays.
- Skill-building: From scissor skills to color recognition, these crafts sneak in important developmental practice.
- Keeps kids busy: Because we all need a few extra minutes of quiet during those long winter afternoons.

February Crafts for Toddlers & Preschoolers
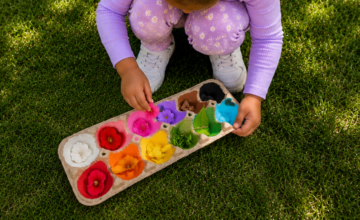
Valentine’s Day Craft
Hearts, glitter, and all things pink and red—what’s not to love? Valentine’s crafts are always a hit with my kids. We love making heart cards for family, cutting out shapes (great for scissor skills!), and playing with textured crafts like puffy paint hearts. For the full tutorial, click on the title.
Melted Crayon Hearts

Create vibrant, colorful heart-shaped art by melting crayon shavings into a beautiful stained glass effect. This craft is a great way to repurpose old crayons into something new and fun.
Materials:
- Crayons
- pencil sharpener
- wax paper
- iron
- scissors
- heart template
- hole punch
- string
How to Make:
Peel and shave crayons into small pieces. Sprinkle them onto wax paper, fold the paper in half, and gently iron until the crayons melt. Once cooled, cut out heart shapes, punch a hole at the top, and hang them as decorations.
Love Bot Craft

This adorable robot craft is made with toilet paper rolls, making it a perfect Valentine’s Day project with a fun twist. Kids can mix and match heart pieces to create their own unique Love Bot.
Materials:
- Construction paper
- Toilet paper tubes
- markers
- glue
- scissors
- markers
How to Make:
Draw the different parts of the robot in marker on colorful paper, cut them out. Glue them to the tube. Fold two strips of paper to create the arms.
Handprint Heart Suncatcher Craft
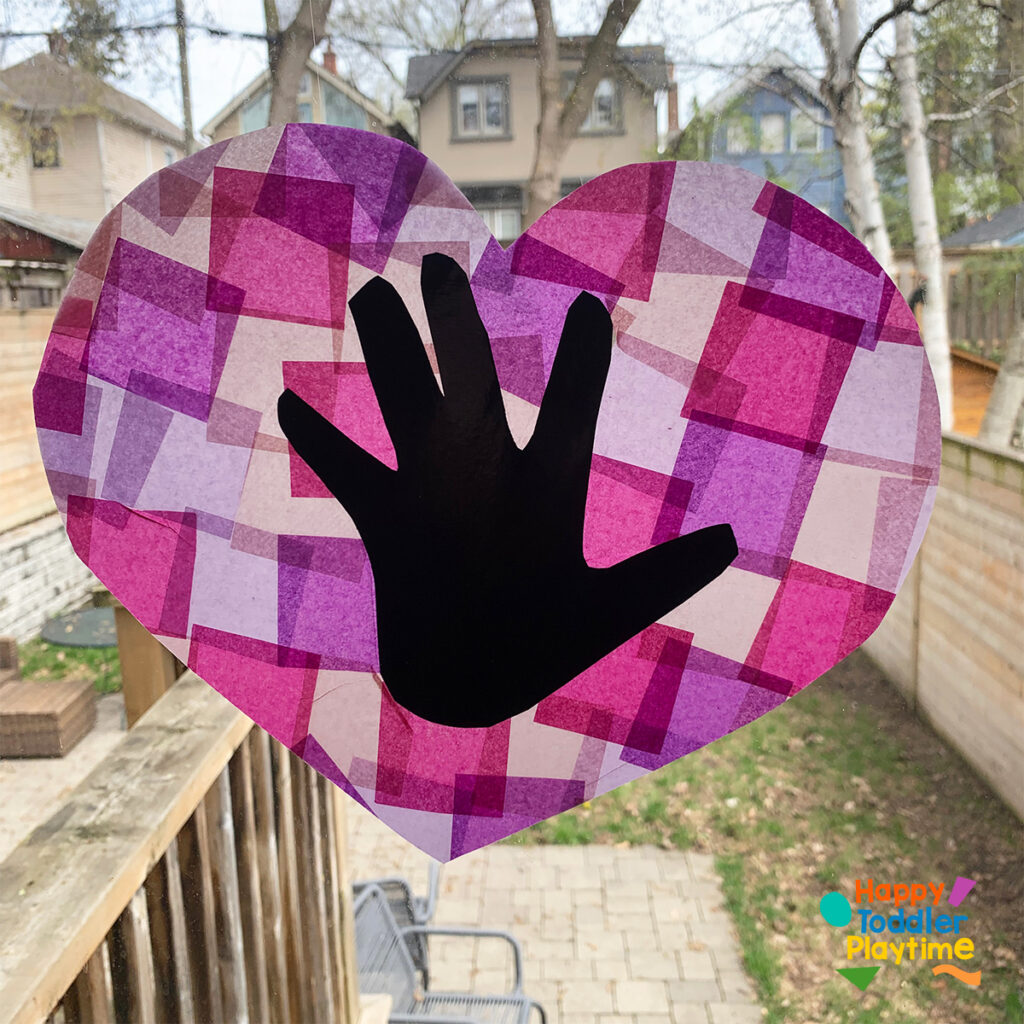
Capture little handprints in a beautiful heart-shaped suncatcher that glows in the window. This craft makes a sweet keepsake for Valentine’s Day.
Materials:
- Contact paper
- tissue pape
- scissors
- cardstock
- black construction paper
How to Make:
Trace your child’s hand on black construction paper. Cut it out and place it on sticky contact paper. Have kids stick tissue paper squares around the hand and then cut out a heart shape.
Cardboard Tube Butterfly Heart Craft

Turn an ordinary cardboard tube into a heart-winged butterfly with this simple recycled craft. Perfect for Valentine’s Day or spring-themed activities.
Materials:
- Cardboard tube
- construction paper
- googly eyes
- foam sheets
- Pom Pom
- glue
- scissors
How to Make:
Cover the tube with construction paper, then cut and attach heart-shaped wings from foam sheets. Add googly eyes or paper eyes, a pom pom nose, and antennae cut from foam sheets.
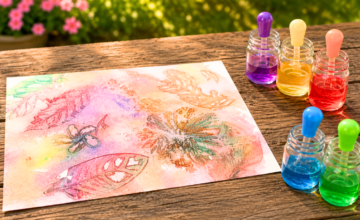
Salted Painted Heart Craft
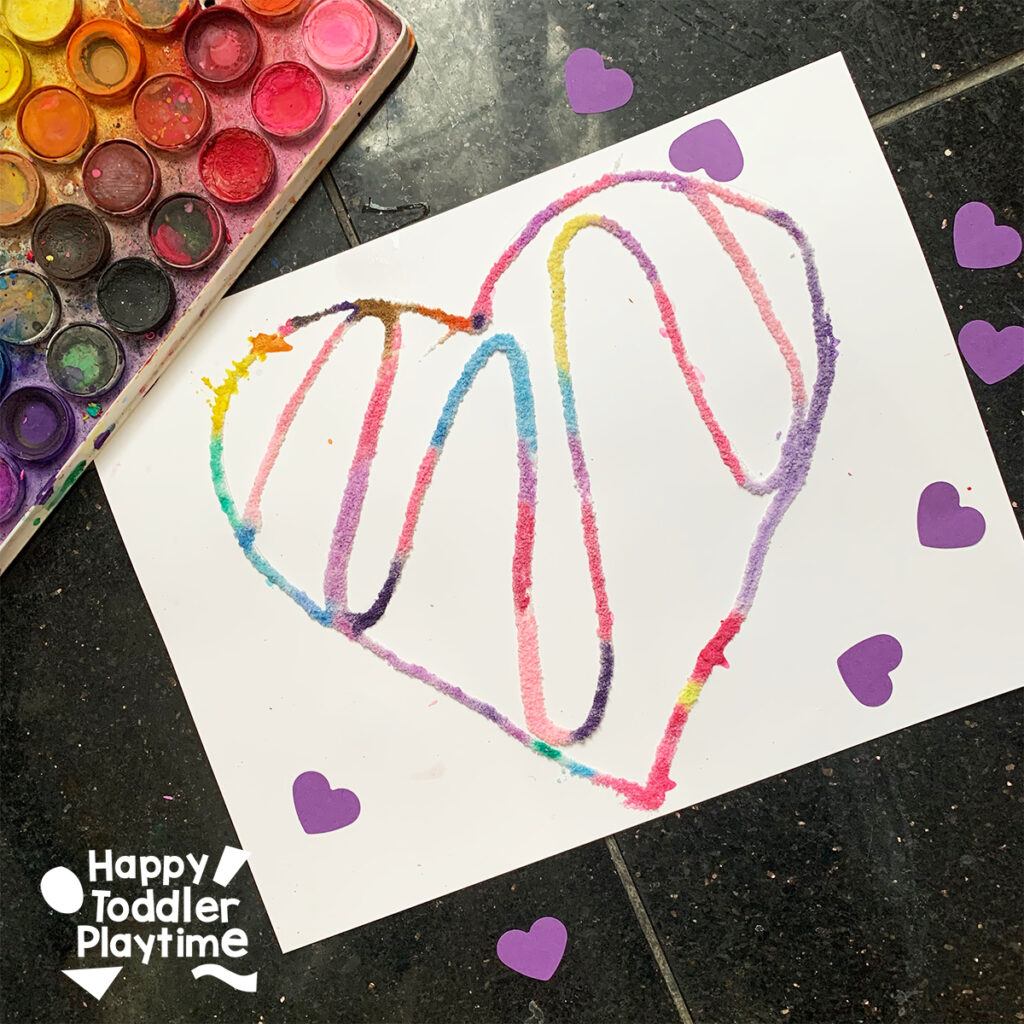
Create a textured, raised heart painting using salt, glue, and watercolor paints. This process art activity is mesmerizing and fun for all ages.
Materials:
- Cardstock
- glue
- salt
- watercolor paint
- paintbrush
How to Make:
Draw a heart outline with glue, sprinkle salt over it, and shake off the excess. Once dry, gently paint over the salt with watercolors and watch the colors spread.
Textured Heart Sun Catchers
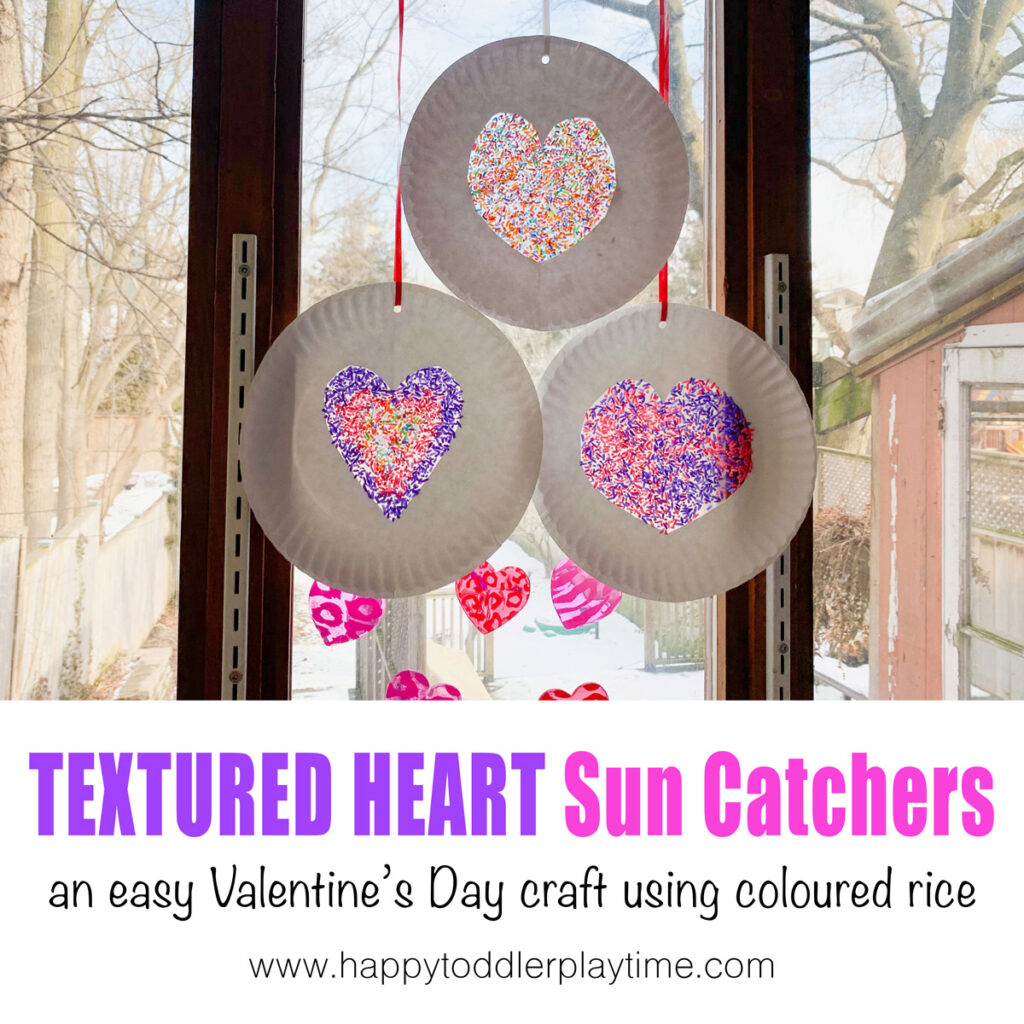
Create a textured, raised heart painting using salt, glue, and watercolor paints. This process art activity is mesmerizing and fun for all ages.
Materials:
- Cardstock
- glue
- salt
- watercolor paint
- paintbrush
How to Make: Draw a heart outline with glue, sprinkle salt over it, and shake off the excess. Once dry, gently paint over the salt with watercolors and watch the colors sprea
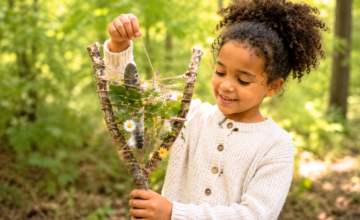
Winter and Snow Crafts
Since my kids adore playing in the snow, we like to bring those winter vibes inside too. Think snowflake February crafts, cotton ball snowmen, and icy watercolor paintings. On days we’re stuck indoors after skiing, these wintery crafts keep the snowy fun going.
Fork Painted Snowy Owl Craft
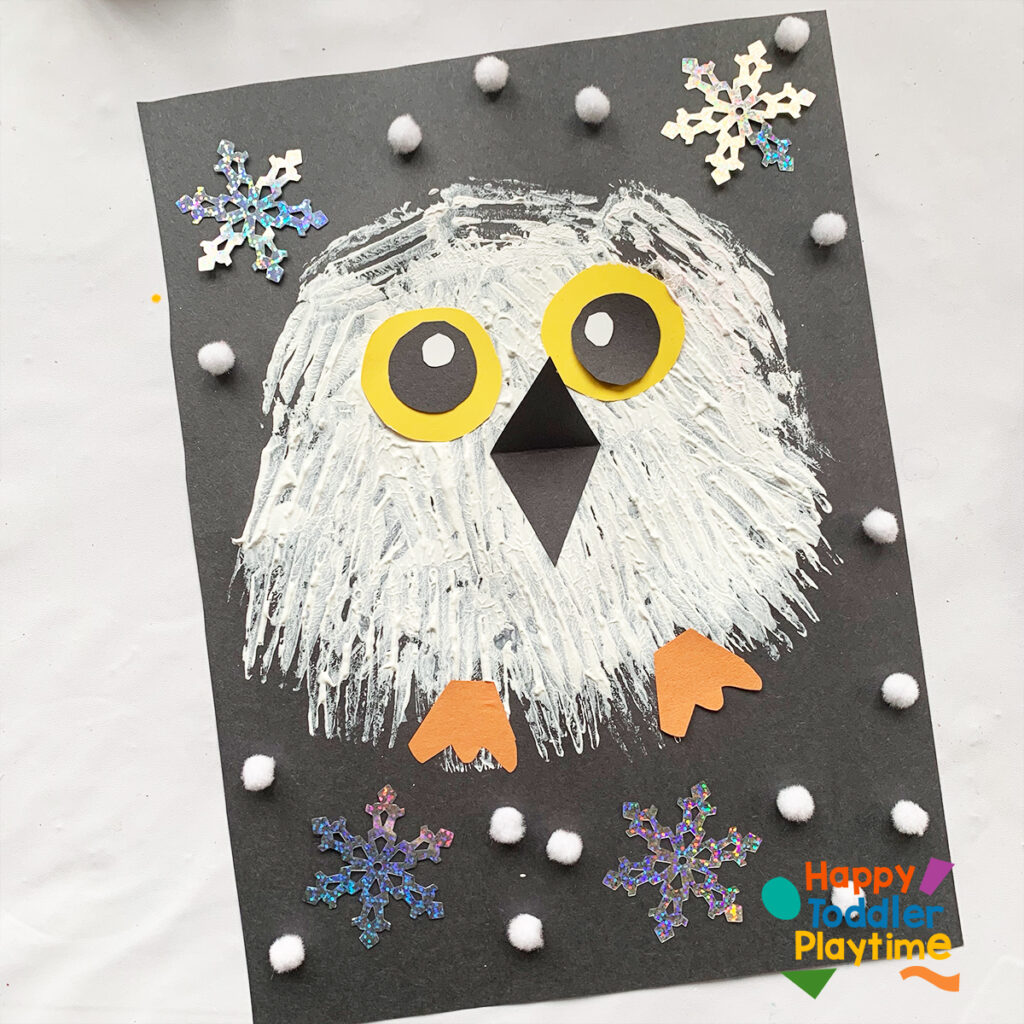
A fork becomes the perfect painting tool to create fluffy owl feathers in this creative winter craft. This activity is great for working on fine motor skills.
Materials:
- Fork
- white pain
- black cardstock
- construction paper
- glue
- scissors
How to Make:
Dip a fork into white paint and stamp it onto black paper to create the owl’s body. Add construction paper eyes, beak, and feet for the finishing touches.
Hot Chocolate Name Craft
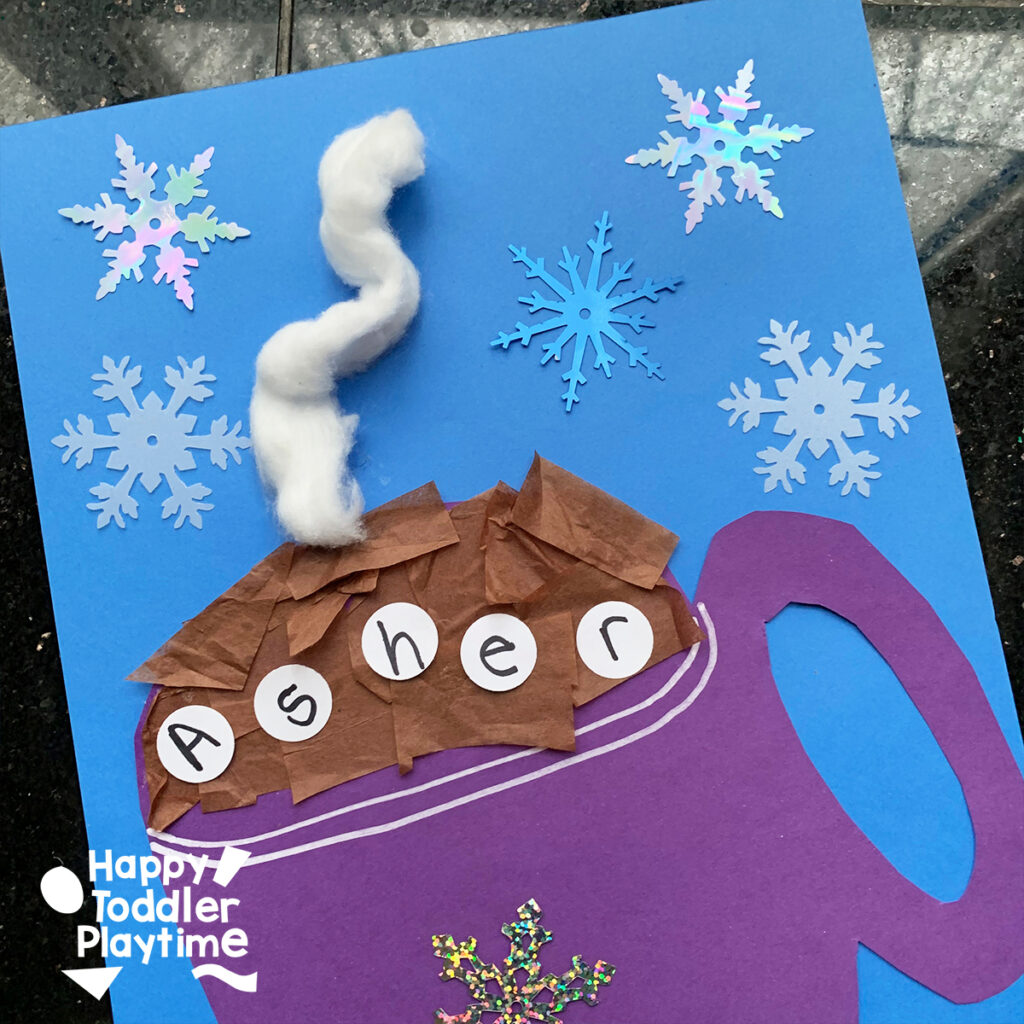
Personalize a cozy hot chocolate mug craft while practicing name recognition. Kids will love decorating their own marshmallow-filled mug.
What You’ll Need:
- Brown tissue paper
- Colored construction apper
- Cotton balls
- White dot sticker for name letters
How to Make:
- Draw or cut out a mug shape from paper. Glue brown tissue paper inside cup.
- Write letters of name on white dot stickers. Stick on brown tissue paper.
- Glue cotton balls on top for steam.
Glitter Snow Penguin
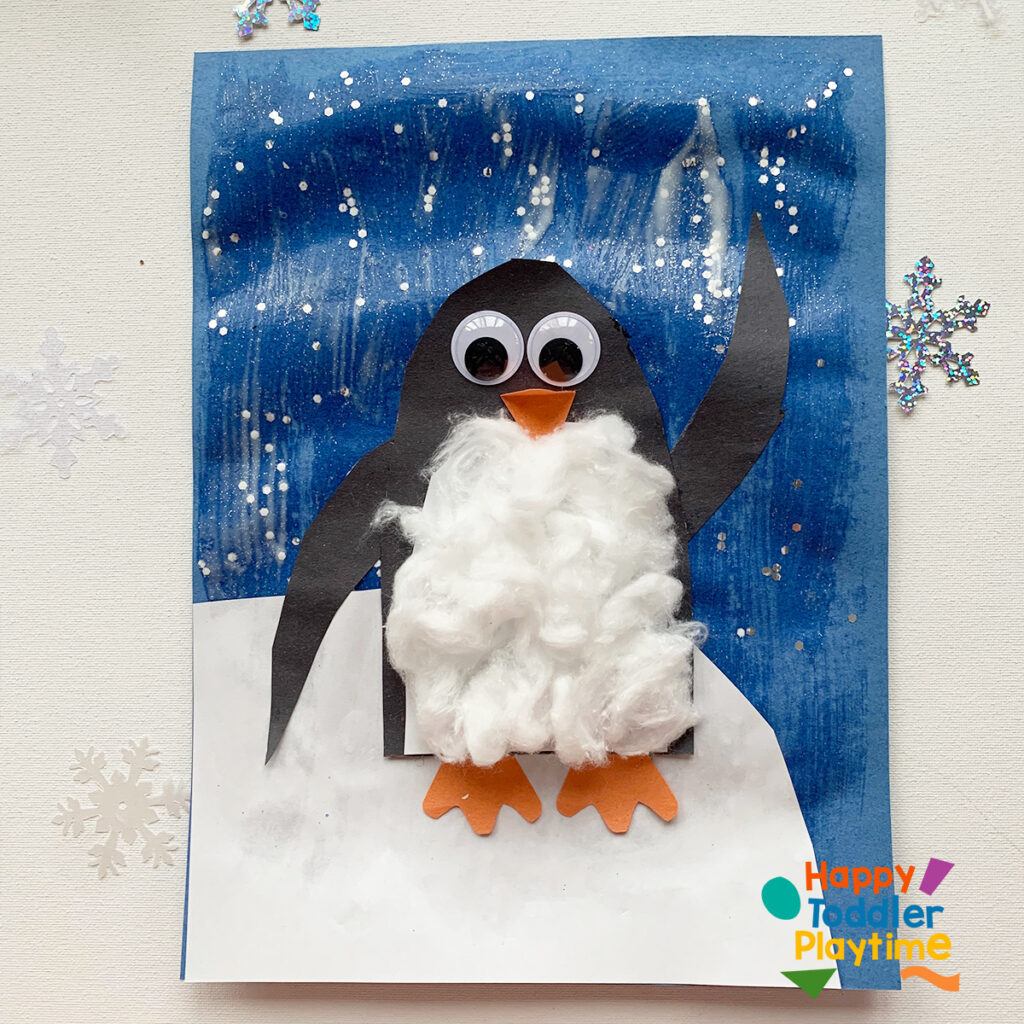
This adorable penguin craft adds a sparkly winter touch with glitter and glue. A fun way to celebrate winter and practice fine motor skills.
What You’ll Need:
- Black, white, orange paper
- White glitter with paint brushes
- Googly eyes
- Cotton balls
How to Make:
- Add glue to blue construction paper and sprinkle white glitter.
- Cut out a penguin shape from black paper and coat the belly with glue. Add cotton balls to the bellow
- Add googly eyes and an orange beak and feet.
Puffy Paint Winter Tree

This craft combines sensory play with artistic expression, creating a tactile and fun experience. Plus, the puffy texture dries into a unique 3D effect that kids will love.
What You’ll Need:
- Tree printable (available for free below) or brown construction paper
- Blue or white construction paper
- Shaving cream
- White glue
- Bowl
- Paintbrushes
Setup:
Mix equal parts shaving cream and glue to create puffy paint. Print out the tree printable below on to blue construction paper or cut a tree trunk and branches shape out of brown construction paper. Glue it to a sheet of blue construction paper. Have your child paint fluffy “snow” on the branches using the puffy paint.
Salt Painted Snowflake Craft

Use glue, salt, and watercolor paints to create a stunning snowflake painting. The salt absorbs the paint, making mesmerizing patterns.
Materials You’ll Need
- Free snowflake printable (find the link below)
- White or blue construction paper or thick paper
- White school glue
- Salt (table salt works best)
- Watercolors or liquid food coloring mixed with water
- Paintbrushes
- Tray or newspaper (to catch excess salt)
How to Make:
Draw a snowflake with glue, sprinkle salt, and let it dry. Dab watercolor paint onto the salt and watch the colors spread.
Paper Plate Winter Tree

A winter tree craft made with a paper plate and paint to celebrate the snowy season. Kids will love creating their own snowy landscapes.
What You’ll Need:
- Paper plate
- Blue paint
- Paint brushes
- Cotton balls
- Glue
- Brown construction paper
How to Make:
Paint the paper plate blue. Set aside to dry. Cut a tree trunk and branches shape out of brown construction paper. Glue to the paper plate. Have your child glue cotton balls onto the tree branches to create fluffy snow.
Sensory Rice Penguin Craft

This sensory-rich penguin craft combines textured rice with a fun winter theme. Perfect for little hands who love hands-on activities.
Materials:
- Black construction paper
- white rice
- glue
- scissors
- googly eyes
How to Make:
Cut out a penguin shape and apply glue to its belly. Sprinkle rice on top, shake off excess, and add details like eyes and a beak.
Handprint Penguin Craft
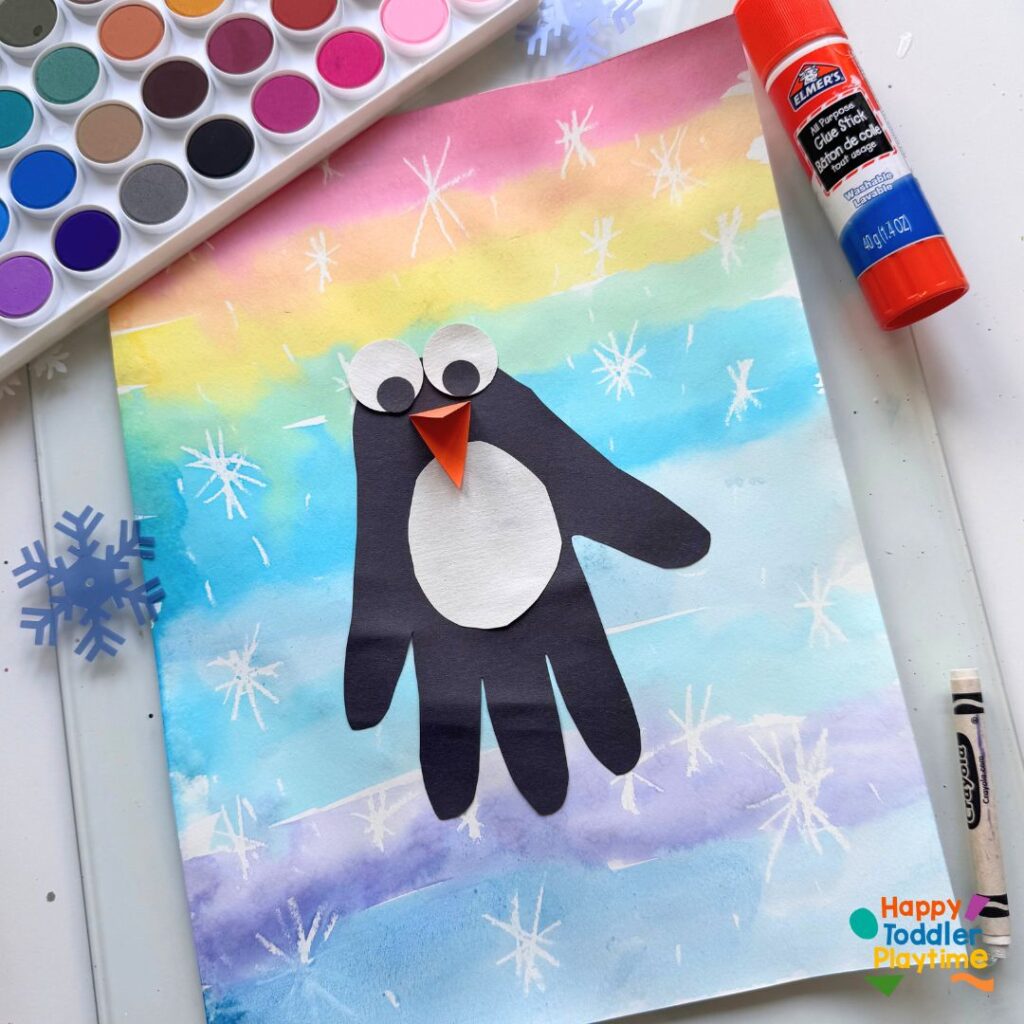
Turn your child’s handprint into an adorable winter penguin. A cute and easy keepsake craft!
Materials:
- Black and white construction paper
- googly eyes
- glue
- scissors
How to Make:
Trace and cut out a handprint from black paper for the penguin’s body. Add a white belly, googly eyes, and an orange beak and feet.
Cork Painted Snowflake Craft

Stamp snowflakes onto paper using corks for an easy and creative winter art project. A great way to practice pattern-making!
Materials:
- Corks
- white paint
- blue paper
- glitter
How to Make:
Dip corks into white paint and stamp onto blue paper in snowflake shapes. Add glitter for extra sparkle.
Tissue Paper Winter Penguin Craft
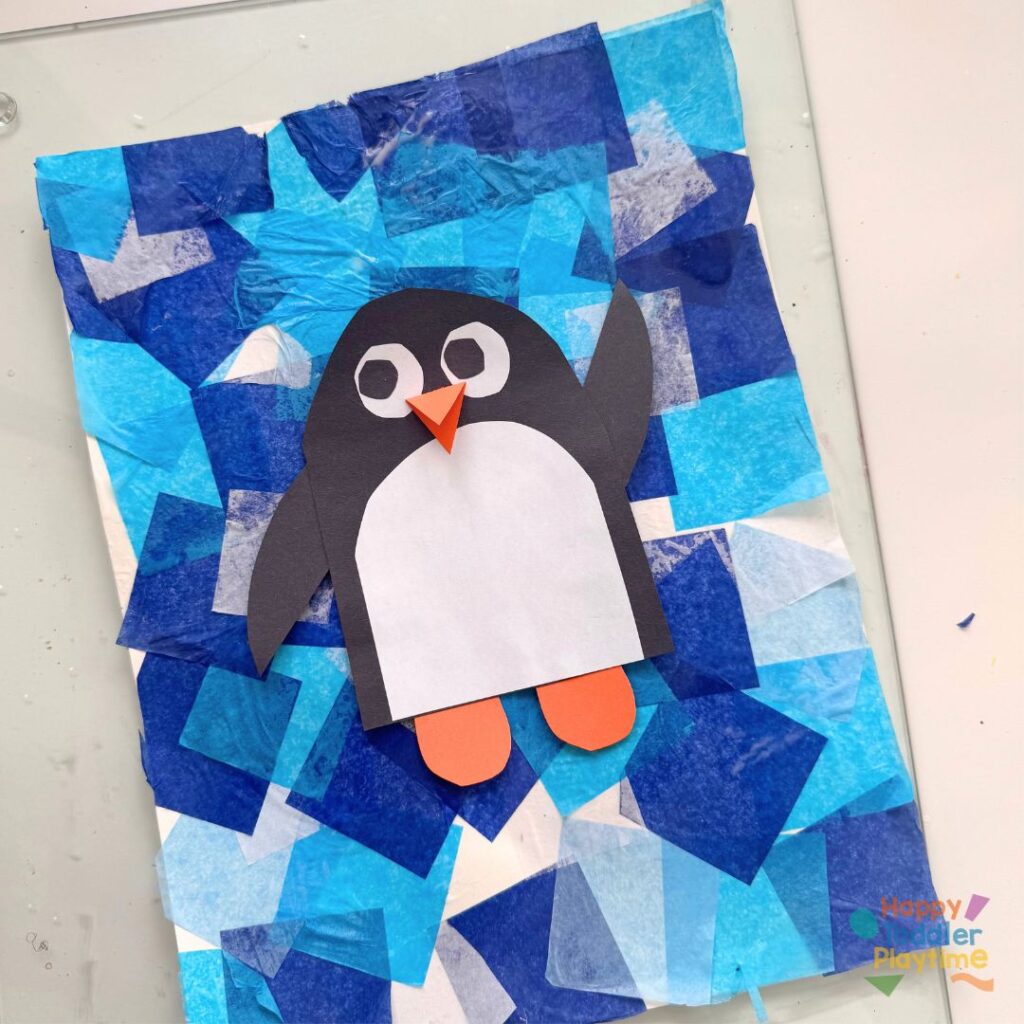
A tissue paper collage penguin craft perfect for winter. Kids will love scrunching and gluing tissue paper to create fluffy textures.
Materials:
- Tissue paper
- black construction paper
- glue
- scissors
- googly eyes
How to Make:
Cut out a penguin shape and glue scrunched tissue paper onto its belly. Add facial details and a beak to complete the craft.
Groundhog Day Crafts
Need more February crafts? We always have a little giggle over Groundhog Day. Will the groundhog see its shadow? Toddlers love simple crafts with cute groundhog faces and shadow-themed activities. It’s also a fun way to talk about weather patterns in a way little ones can grasp.
Groundhog Day Headband Craft With Free Template

This simple and fun headband craft helps kids celebrate Groundhog Day with an adorable groundhog face they can wear. Perfect for pretend play and storytelling!
Materials:
- Greenconstruction paper
- Free headband template (head, mouth, eyes) (grab it here)
- Glue stick
- Scissors
- Brown, beige and black markers
- Tape
How to Create:
Print and cut out the headband template (either the one you can color or the colored one) and color the head brown and black and the nose beige. Outline it in black. Assemble the groundhog’s head by gluing the pieces together. Cut out a headband from green construction paper. Use scissor to cut it in the shape of grass. Measure child’s head and tape accordingly. Attach the completed head to grass headband, sized to fit around a child’s head.
Groundhog Day Chalk Shadow Art

Teach kids about shadows with this fun chalk art activity! A great way to explore the science behind Groundhog Day.
Materials:
- Brown, black construction paper
- Free groundhog printable (find it here)
- Colored chalk
- Q-tip
- Scissors
- Glue stick
How to Create:
Print and cut out the groundhog template and place it onto black construction paper. Use chalk and draw around the outline of the groundhog in straight lines. Blend the chalk with a Q-Tip to create a shadow extending from the groundhog’s body to mimic sunlight and shadow.
Textured Rice Groundhog Day Craft

A sensory-rich craft that brings Groundhog Day to life with textured rice for added fun. Perfect for little hands to explore different materials.
Materials:
- Brown in two shades, black, pink, green and white construction paper
- White watercolor paper
- Glue
- Rice dyed brown (find the instructions for colored rice here)
- Scissors
- Watercolors and paint
- Cotton balls or stuffing
- Black marker
How to Create:
Paint the watercolor paper blue for the background. Cut out the groundhog head shape, nose and ears, inner ears, teeth and eyes from the correct colored paper. Also cut out grass from green construction paper and mound or hole from dark brown construction paper. Glue them on blue background once it is dry. Glue on groundhog head. Add glue all over it. Pour the brown rice on the head until its completely covered. Glue on eyes and nose and ears and teeth. Glue on the cotton balls or stuffing for the clouds.
Paper Bag Groundhog Day Craft

Transform a simple paper bag into a pop-up groundhog puppet. Great for imaginative play and storytelling!
Materials:
- Brown paper bag
- Brown, black, yellow, green, beige, blue and white construction paper
- Glue stick
- Scissors
How to Create:
Cut out green hill for background and green grass and yellow sun from construction paper. Cut out groundhog head, ears and inner ears, eyes, mouth, nose and teeth and the paws from construction paper. Glue them together and draw the mouth and whiskers and the claws on the paws. Roll down the rim of the paper bag. Glue the paws on the front of the bag and the head on the back of the bag at the top. Glue the bag to the green hill. Glue the grass to the bottom of the bag.
Paper Groundhog Day Craft

A simple and fun paper craft to celebrate Groundhog Day! Kids can personalize their groundhog with different expressions.
Materials:
- Construction paper
- White cardstock
- Sponge
- Blue paint
- Glue stick
- Scissors
How to Create:
Use a sponge topping the background of the white cardstock blue. Cut out groundhog head, ears and inner ears, eyes, mouth, nose and teeth and the paws from construction paper. Cut out green grass from green construction paper and sun from yellow construction paper and hill from brown paper. Glue them together and draw the mouth and whiskers and the claws on the paws. Glue the sun, mound to the cardstock once the background is dry. Glue the grass to the bottom of the mound. Glue the paws on the front of the mound and the head just behind them.
Paper Cup Pop-Up Groundhog Day Craft

Make a groundhog that actually pops out of its burrow! This craft adds an interactive element that kids will love.
Materials:
- Paper cup
- Blue paint
- Paint brush
- Popsicle stick
- Cotton ball or stuffing
- Construction paper
- Glue stick
- Scissors
How to Create:
Paint the cup blue and set aside to dry. Cut out groundhog head, ears and inner ears, eyes, mouth, nose and teeth from construction paper. Cut out green grass from green construction paper along with a strip of brown paper that will go all around the cup. Glue the head together and draw the mouth and whiskers. Glue the dirt and grass to the bottom of the cup. Glue the head to a popsicle stick. Make a hole in the bottom of the cup and stick the stick through. Glue the stuffing or cotton balls to the cup in the sky.
Black History Month Projects
February is also a wonderful opportunity to introduce young kids to important stories and people. We love reading picture books that celebrate leaders and artists, and pairing them with creative art projects that spark conversations.
Paper Towel Roll Rocket Ship Craft

A fun outer space-themed craft inspired by “Mae Among the Stars.” Kids will love creating their own rocket ships!
Materials:
- Paper towel roll
- aluminum foil
- glue
- scissors
- colored construction paper
How to Make:
Cover the paper towel roll in foil, cut out and attach fins and a rocket nose from construction paper, and glue tissue paper at the bottom for fiery flames.
Clementine Hunter Inspired Art Project
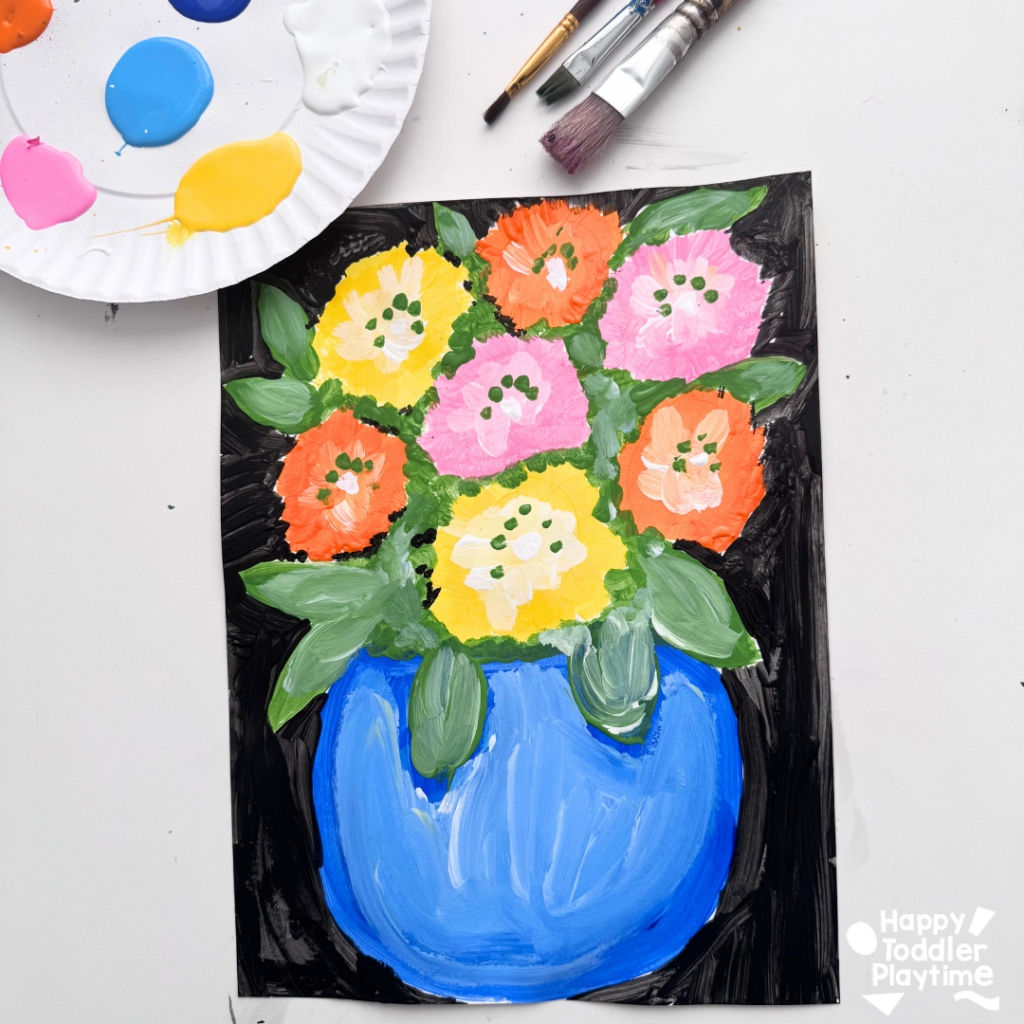
Celebrate the artwork of folk artist Clementine Hunter by painting vibrant Zinnias, just like she did! This craft is a great way to introduce kids to her colorful work.
Materials:
- White cardstock
- washable paints
- paintbrush
How to Make:
Paint colorful flowers on cardstock, using bold brushstrokes. Once dry, outline the flowers with a black paintfor a folk art-inspired look.
George Washington Carver Paper Plate Peanut Craft
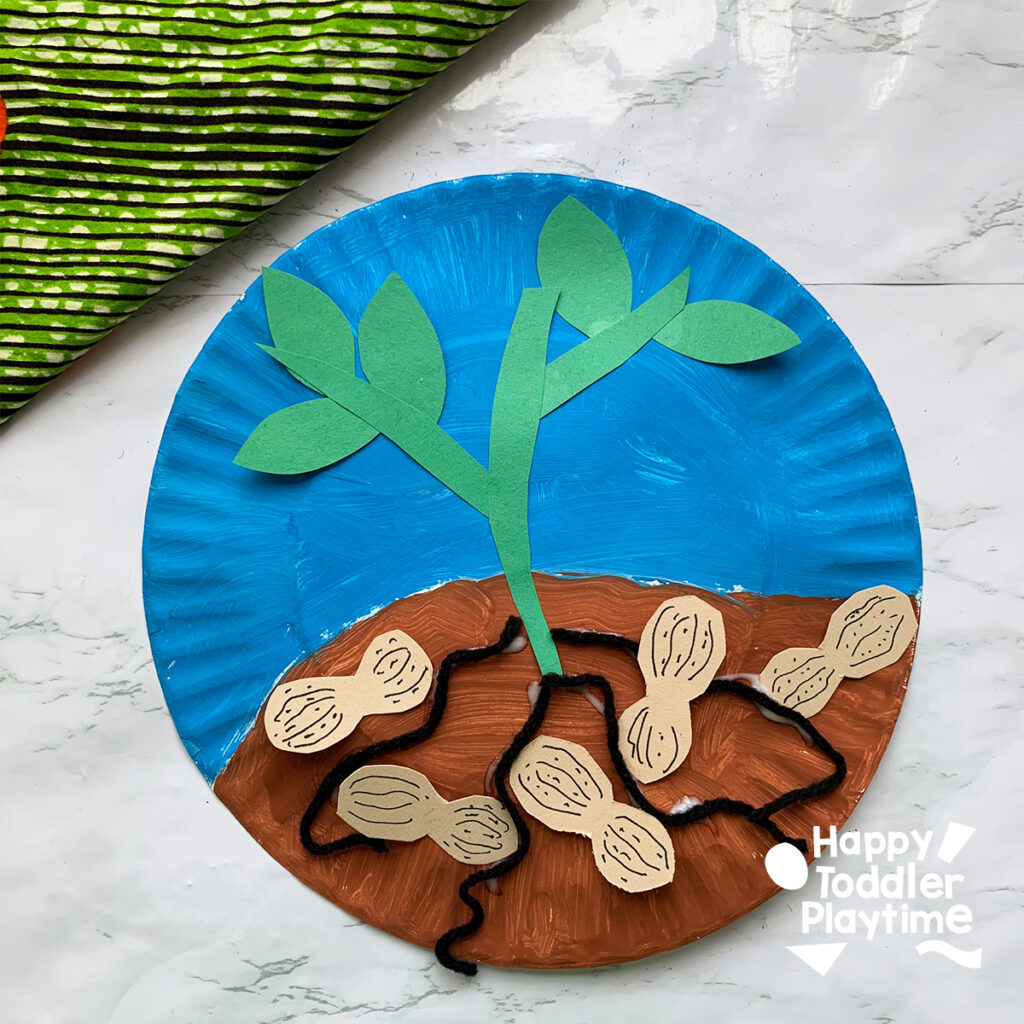
Honor the legacy of George Washington Carver with this simple peanut-themed craft. A great way to learn about his agricultural contributions!
Materials:
- Paper plate
- brown and blue paint
- paintbrush
- black marker
- black yarn
- glue
- scissors
How to Make:
Paint a paper plate brown and blue. Cut out green plant from construction paper. Add yarn roots. Cut out peanuts then add texture using a marker to resemble a peanut shell. Glue them down.
Rosa Parks Rocking Bus Craft
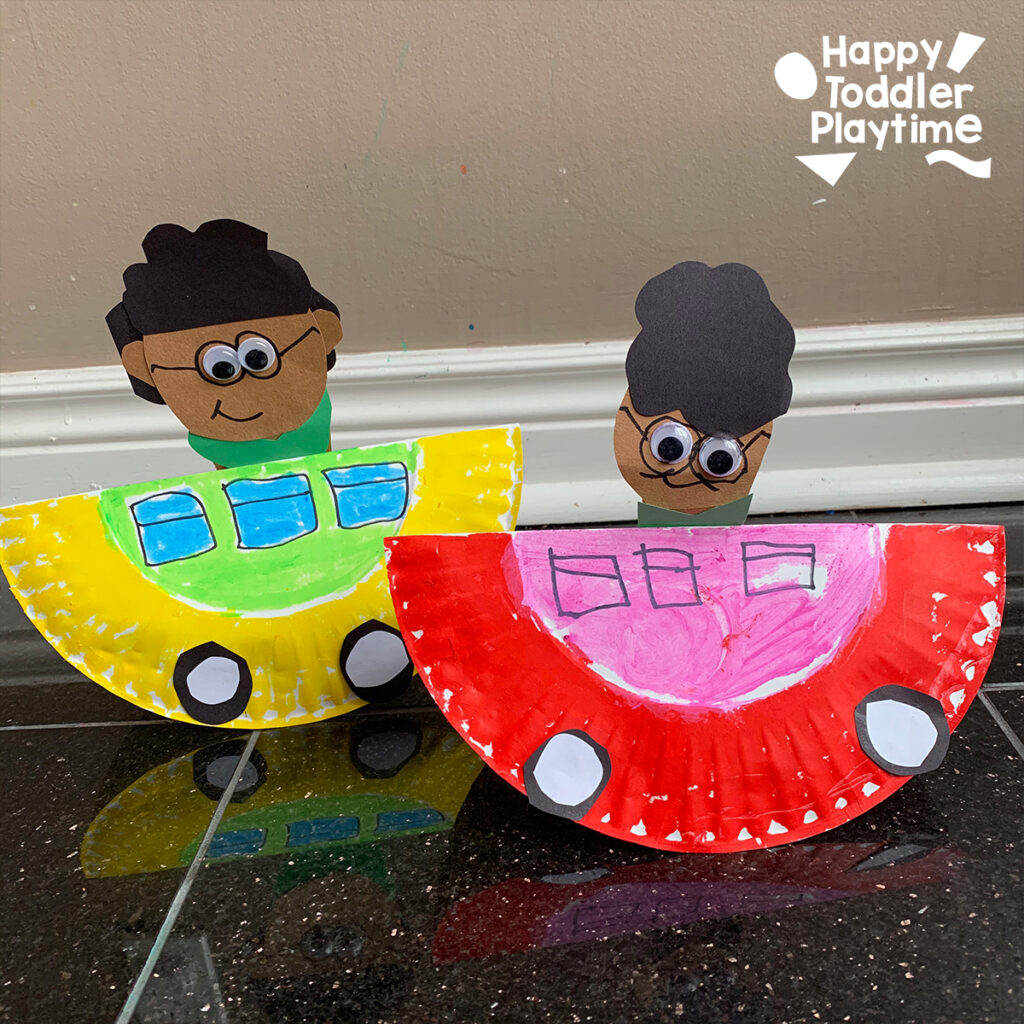
Teach kids about Rosa Parks and the Montgomery Bus Boycott with a fun rocking bus craft. This project helps bring history to life.
Materials:
- Paper plate
- yellow paint markers
- black marker
- construction paper
- glue
- scissors
How to Make:
Paint a paper plate yellow and fold it in half to create a bus. Add wheels, windows, and a drawing of Rosa Parks inside or cut her out of construction paper.
Garret Morgan Traffic Stoplight Cupcake Liner Craft
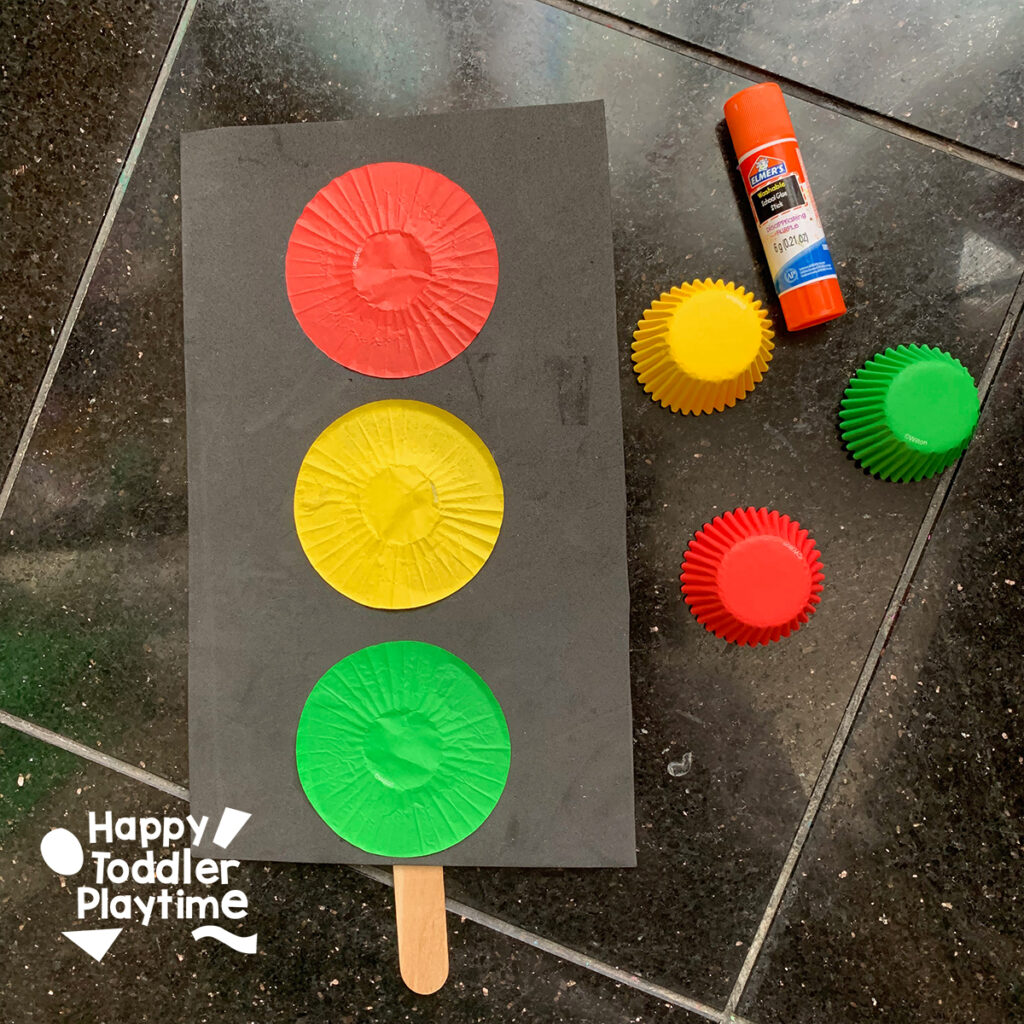
Celebrate Garrett Morgan’s invention of the three-way traffic light with this simple cupcake liner craft. A great way to introduce kids to Black inventors.
Materials:
- Cupcake liners (red, yellow, green)
- black construction paper
- glue
- scissors
How to Make:
Glue red, yellow, and green cupcake liners onto black paper to create a stoplight. Discuss what each color means!
Black History Month Handprint Crafts
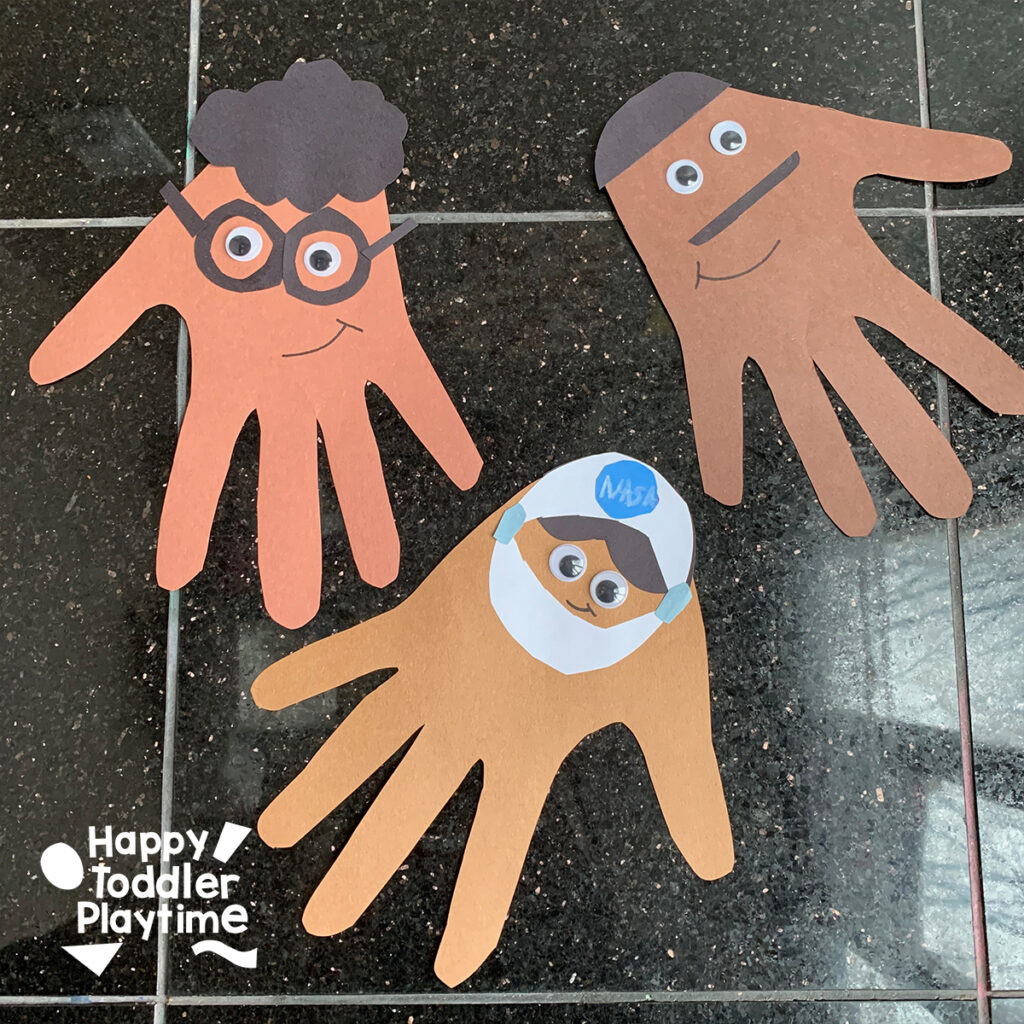
Create a meaningful handprint craft to celebrate important Black leaders and history. A great keepsake for kids!
Materials:
- construction paper
- markers
- glue
How to Make:
Trace and cut out kids hands. Decorate with to look like historical Black figures.
Lunar New Year Crafts
Dragon Puppet
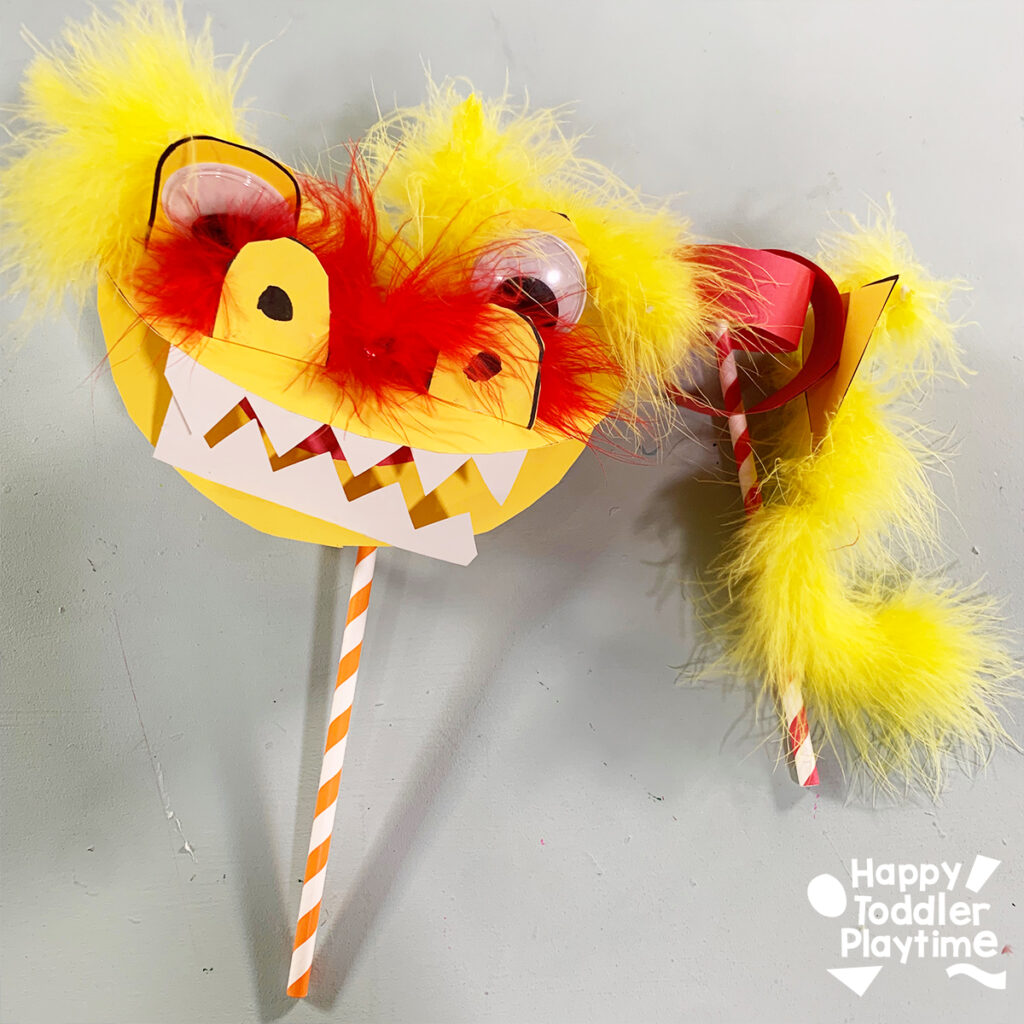
A fun and interactive craft perfect for celebrating Lunar New Year or a dragon-themed storytime. Kids will love making their own movable dragon!
Materials:
- Construction paper
- feathers
- glue
- scissors
- craft sticks
- markers
How to Make:
Cut out dragon shapes from paper, decorate, and attach them to craft sticks for a puppet show.
Rainbow Dragon Craft

Create a colorful dragon using different hues of tissue paper for a striking effect. A great craft for celebrating myths and folklore.
Materials:
- Tissue paper
- toilet paper roll
- glue
- construction paper
- googly eyes
- green Pom Poms
How to Make:
Cover toilet paper roll in green paper. Glue on Pom Pom eyes and nose. Cut out rainbow tissue paper fire. glue it inside the end of the tube.
Bubble Wrap Dragon Craft
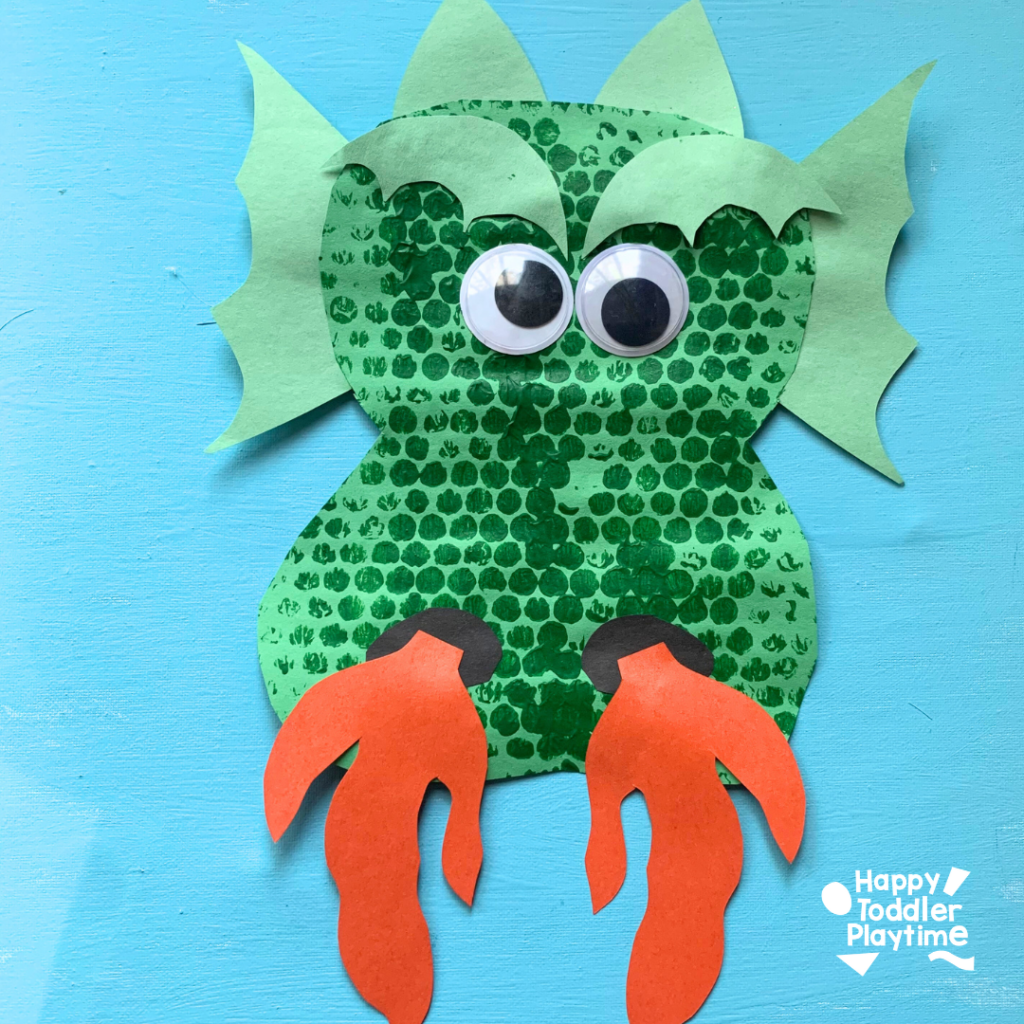
Use bubble wrap to create a scaly effect on a dragon’s body with this unique painting technique.
Materials:
- Bubble wrap
- paint
- construction paper
- glue
- scissors
How to Make:
Dip bubble wrap in paint and press it onto the dragon cutout for a textured look. Cut out and glue onears, horns, eye brown and nostrils and flame.
President’s Day
February crafts aren’t complete with some President’s Day crafts!
Paper Plate Flag Craft

This simple and fun craft lets kids create their own patriotic flag using a paper plate! It’s a great way to celebrate national holidays while practicing fine motor skills.
Materials:
- Paper plate
- red and blue paint
- paintbrush
- white star stickers (or white paint)
- glue
- scissors
- craft stick (optional)
How to Make:
Cut the paper plate in half and paint one section red and white for stripes. Paint a blue square in the corner and add white stars. Glue it to a craft stick for a handheld flag or display it as a decoration.
Fork Painted Fireworks

This mesmerizing science experiment mimics fireworks exploding in water, using simple ingredients found at home. Kids will love watching the colors swirl and mix!
Materials:
- Clear jar or glass
- water
- oil (vegetable or baby oil)
- food coloring
- small bowl
- fork
How to Make:
Fill the jar with water. In a separate bowl, mix a few drops of food coloring into a small amount of oil, then slowly pour it into the water. Watch as the colors slowly disperse like fireworks in the sky!
Fireworks in a Jar

Create a stunning fireworks display using a fork instead of a paintbrush! This process art activity is great for New Year’s Eve, the Fourth of July, or any celebration.
Materials:
- Black construction paper
- red, white, and blue paint (or any colors)
- plastic forks
- paper plate for paint
How to Make:
Dip a fork into the paint and press it onto the paper, fanning it out in different directions to create a firework effect. Repeat with different colors to make a colorful explosion of fireworks!
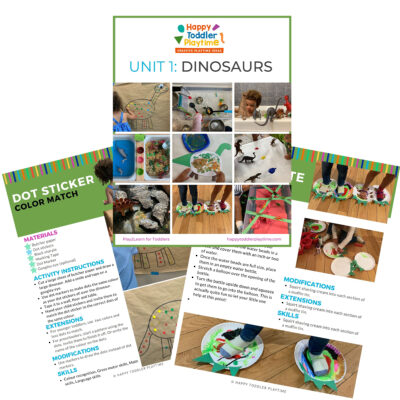
Play2Learn Toddler & Preschool Programs for Curious Toddlers
There is no limit to your toddler’s energy and curiosity. That energy and curiosity although a joy can be challenging at times. Their interest in just about everything around them is what makes them great learners. One and two year olds can soak up so much just from their senses!
But as a teacher or parent that thirst for learning can be exhausting. That is why I created this toddler and preschooler program. To help you get the most out of this time with your curious toddler without having to come up with creative ways to play and interact with them.
Play2Learn for Toddlers includes 20 Units for toddlers. Each 2-week toddler unit has 20 super easy to set up and engaging activities for toddlers 18 months to 3 years.
Play2Learn Preschool which includes 20 Units for preschoolers. Each 2-week preschoolers unit has 20 unique and easy to set up and engaging activities for preschoolers 3 years to 5 years. That’s over 800 learning activities for your toddler and preschooler at your fingertips! So many ideas you and your child will never be bored again!
These toddler and preschool lesson plans and activities will definitely keep you and your toddler and preschooler busy playing and learning!
Click here for more information: Play2Learn
Book: Exciting Sensory Bins for Curious Kids
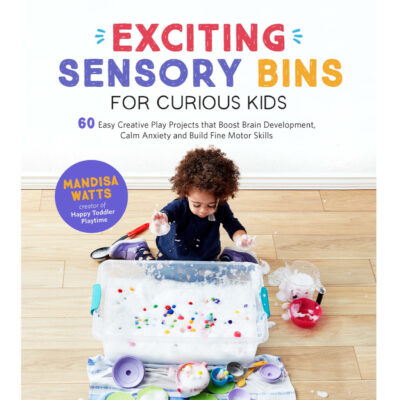
Did you know I wrote a book of sensory bins? Click here for more information Exciting Sensory Bin for Curious Kids. Or grab your copy at Amazon.
Boring afternoons are made exciting with awesome animal-based bins, like Salty Shark Bay or Yarn Farm. Pretend play bins like Birthday Cake Sensory Play or Bubble Tea Party encourage creativity and imagination. And your kids will have so much fun they won’t even know they’re getting smarter with STEAM (science, technology, engineering, art and math) activities like Sink or Float Soup, Magnetic Letter Hunt or Ice Cream Scoop and Count.
Designed for toddlers 18 months and up.
Book: Super STEAM Activity Book for Kids
Learning all about science, technology, engineering, art, and math sets kids up for scholastic success―and it can be so much fun! Watch kids enjoy building STEAM skills as they color friendly fish, help water find its way to tree roots, solve math problems with mazes, and more.
Find out more and grab your copy here.
Designed for preschoolers 3 years old and up.
Book: Big Book of Riddles for Kids
Riddle me this: What’s an exciting way to practice critical thinking while having a blast? The Big Riddle Book for Kids, of course! From hilarious puns to tough brain teasers, kids can build problem-solving skills with hundreds of riddles tha. t show them how to think outside the box.
- 350 riddles for kids—Have hours of fun with riddles, puns and jokes, and math and logic puzzles that’ll get their wheels turning!
- Level up their skills—Riddles get trickier as kids progress through the book, challenging them as they get better at solving puzzles!
- Double-check their work—Kids can check their answers in the back of the book with a handy answer key.
Help children expand their minds while having fun with this puzzle book for kids!
Designed for kids ages 6 years old and up.
TV Show: Curious Crafting
I’m so excited to share my crafting TV show Curious Crafting which launched in July 2022 on TVOkids and TVOkids YouTube! Season 2 aired in August 2023! My show was also nominated in 2023 for Best Live Action Preschool Series by the Youth Media Alliance Awards of Excellence.
Curious Crafting Season 1 is also now airing in Australia on ABC! Watch it here!
Set in the ultimate crafting space, Curious Crafting is a short form pre-school age series about the joy of making crafts. I lead a rotating cast of adorable little preschoolers (including my own) making magic out of common household objects.
In each episode we transform recycled items into magical crafts like a milk carton school bus, paper bag puppet or cotton pad turtle. The crafters learn and laugh their way through each activity while demonstrating what their young imaginations can create.
Curious Crafting shares the adventure and joy of making art with takeaway lessons for creating crafts at home.
This show designed for toddlers and preschoolers 2.5 years old and up.