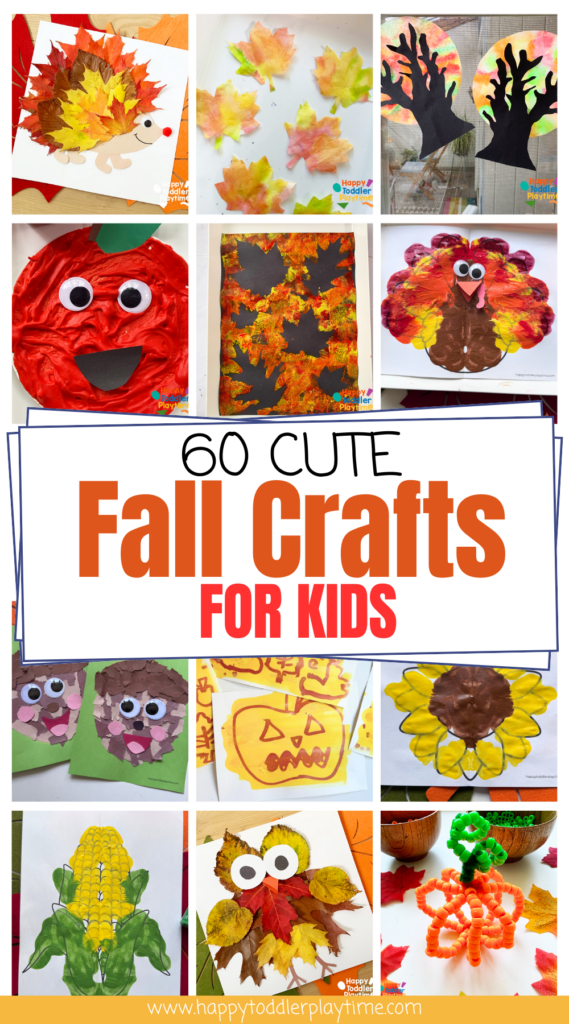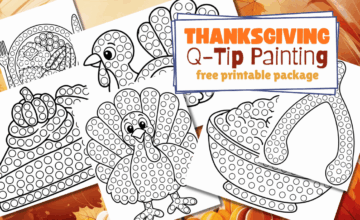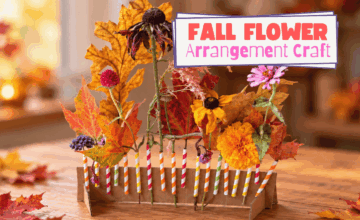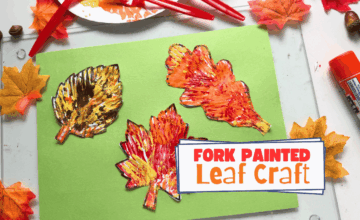

Looking for fun and simple fall crafts for toddlers, preschoolers and kids? You’re in the right place! Autumn is the perfect time to get creative with colorful leaves, cute pumpkins, woodland animals and all the wonderful natural treasures found outside in fall.
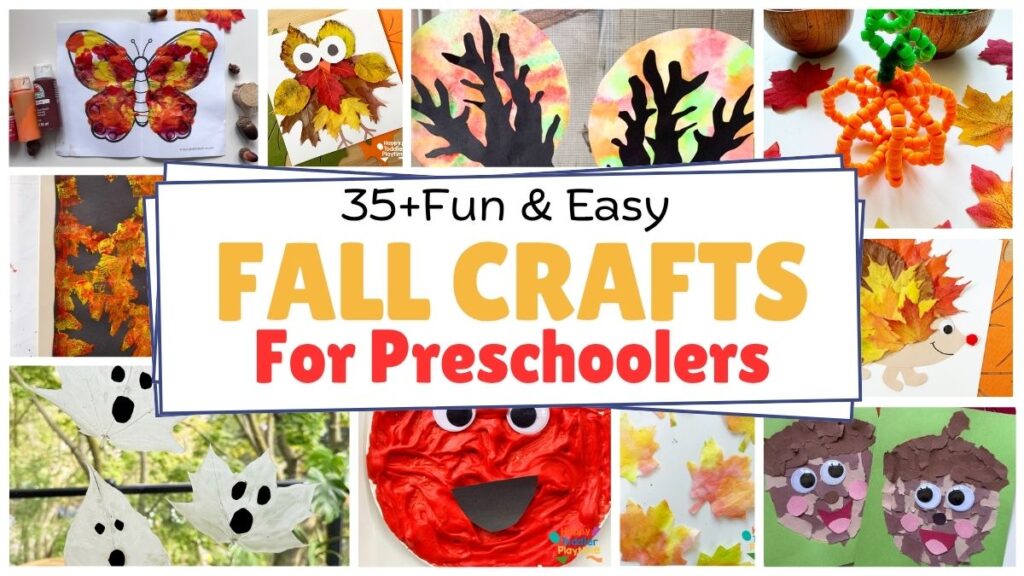
These fun and easy fall crafts are simple, creative and ideal for preschoolers, school-age children and families to enjoy together.
Whether you need a simple weekend activity, a classroom art project or a quick craft for a rainy afternoon, you’ll find plenty of inspiration here.
Check out this list of fabulous fall crafts that your kids will love to make!
RELATED… Find out what other supplies are good to have when doing activities with kids here.
Fall Animal Crafts for Preschoolers
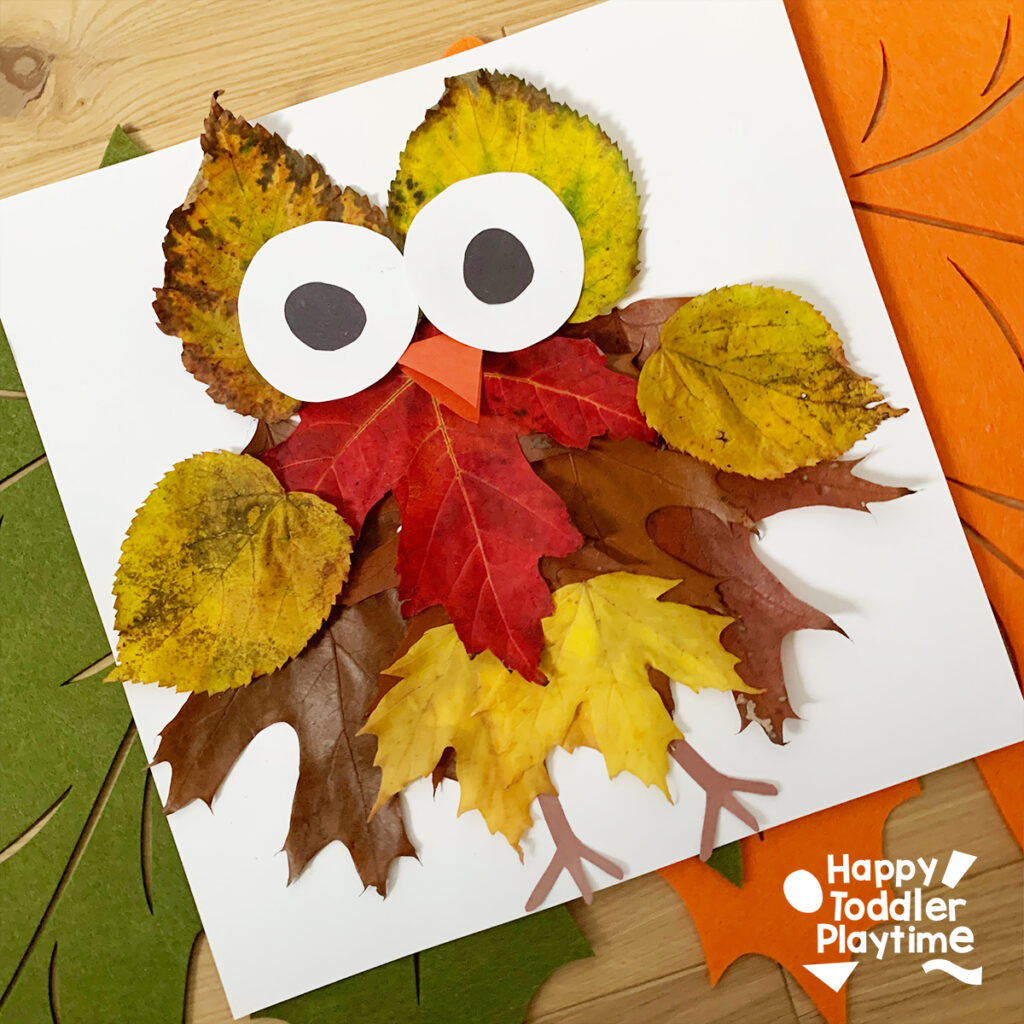
1. Leaf Owl Craft
This is one our favorites. The kids loved making their unique owls using leaves they collected.
Materials You’ll Need
- Glue
- Fallen leaves
- White, black, orange and brown construction paper
- Scissors
How to Make
- Start by venturing outdoors with your little one to collect fallen leaves. Look for leaves of various shapes and sizes to add character to your owl creations.
- Choose a few leaves to use as the owl body and wings.
- Choose a leaf leaves that are similar in choose and size and shape and use they for the wings fo the owl.
- Apply glue to the back of each leaf you collected and start attaching them to the owl’s body. Overlap the leaves to create the appearance of feathery plumage.
- Then, cut two large circles from the white paper for the eyes. Cut two smaller circles from the black paper to create the pupils. Finally, cut two feet from the brown paper.
- Glue the white eye circles onto the owl’s body, and then attach the black pupil circles onto the white circles.
- Glue the orange beak beneath the owl’s eyes, slightly overlapping them. Glue the feet to the bottom of the leaves.
2. Torn Paper Acorn Craft
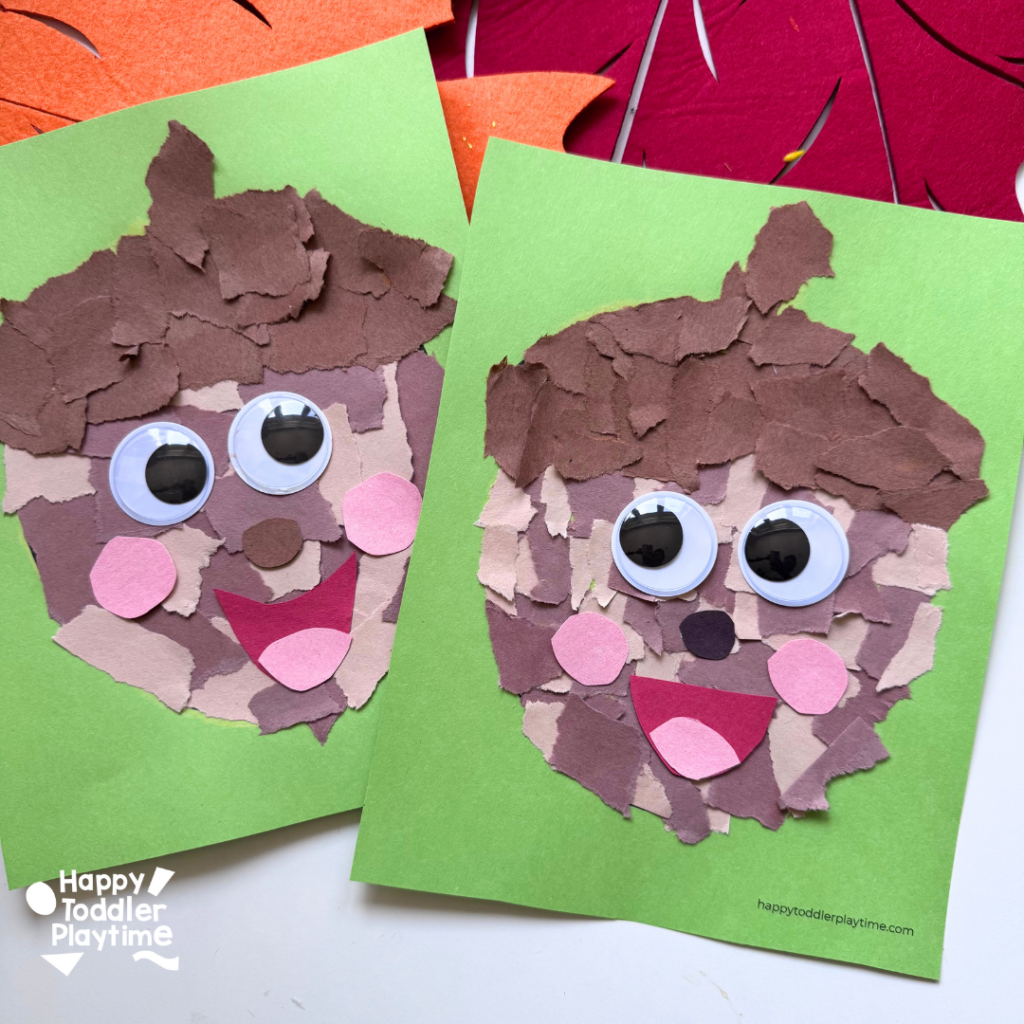
My toddlers love tearing paper. The ripping sound, the way the edges fray—it’s the perfect fine motor workout disguised as fun. We paired it with an acorn template, a few shades of brown paper, and googly eyes, and created this cute fall acorn craft.
Materials You’ll Need
- Brown construction paper in at least two to three shades (for texture)
- Acorn template (free printable available below)
- Green, pink, and red construction paper (for leaves and cheeks)
- Glue stick or white school glue
- Googly eyes
- Scissors (optional, but the tearing is the fun part!)

How to Make
- Start by printing out the free acorn template on green construction paper. Find it below:
- Give your child brown construction paper in different shades. Invite them to tear the paper into small pieces.
- Apply glue to the nut portion of the acorn. Glue down a mix of light and dark brown pieces of paper. If you only have two shades of brown only use the light brown paper.
- Add glue to the cap section of the acorn template. Stick down the torn paper pieces, overlapping them so no white shows through. Use the darker shade of brown paper.
- Glue on googly eyes, cut tiny cheeks out of pink or red paper, and even add a smile.
3. Leaf Printed Squirrel Craft
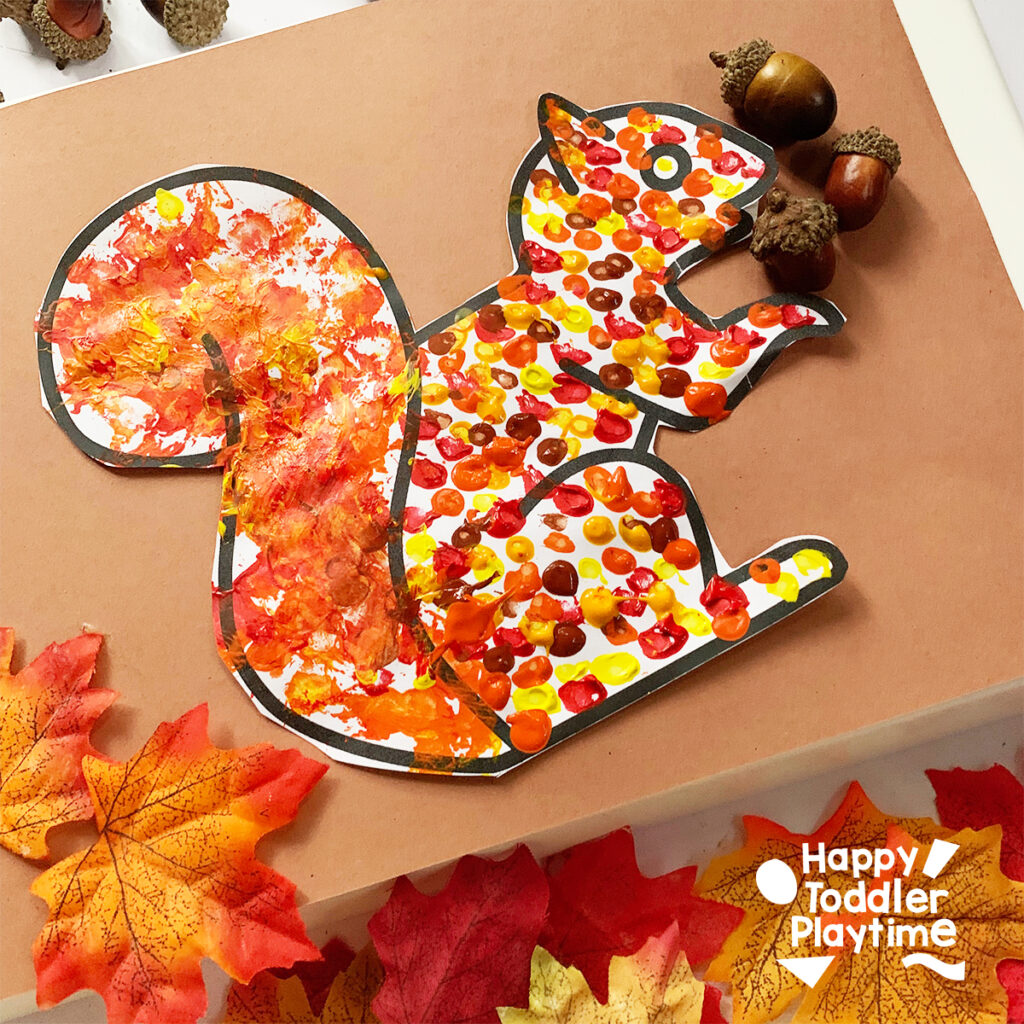
We love trying out new ways of painting and used a few on this cute squirrel craft. From leaf printing to painting with a q-tip this project has a bit of everything.
Materials
- Our FREE squirrel template
- Paint brush
- Fall coloured paints
- Fallen leaves
- Q-tips
- A paper plate
- Construction paper
- Glue
How to Make
- Grab your leaves and paint. Paint one side of the leave and press it onto the squirrel’s tail on your template. Keep going until you’ve got a tail bursting with leafy prints!
- Dip the Q-tip into your fall paints and dot them all over the squirrel’s body.
- Let it dry. Cut it out and glue it to a sheet of coloured construction paper.
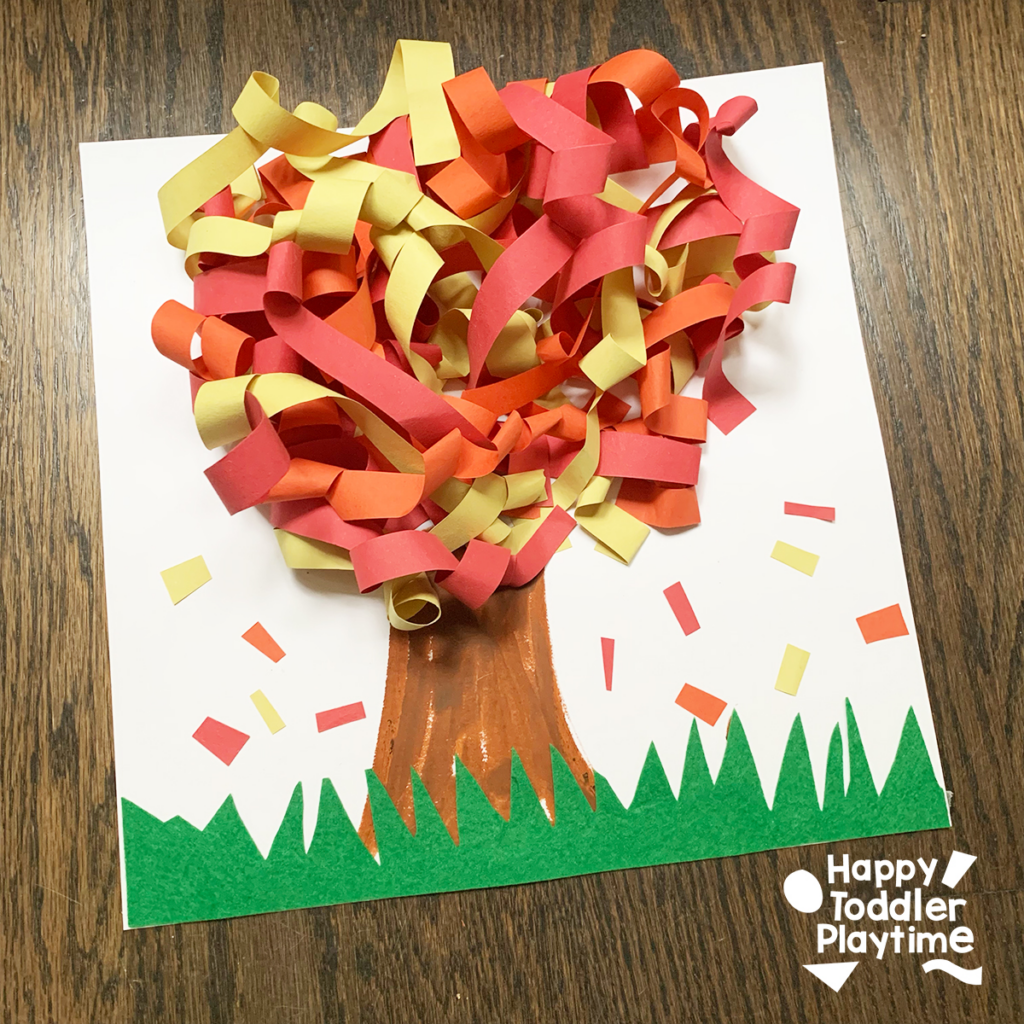
4. Paper Strip Fall Tree Craft
The kids loved twisting the paper for this easy paper strip fall tree. A great way to show off all the various colors of fall.
Materials
- White card stock
- Brown paint stick (or brown crayon/marker)
- Red, orange, and yellow construction paper
- Scissors
- Green felt
- Glue
- Double-sided tape (preferably with a dispenser for easy use)
How to Make
- On your white card stock, draw the trunk of a tree using the brown paint stick.
- Cut construction papers lengthwise into one-inch strips.
- Attach the strips in a circle above the trunk using glue or double side tape. Start twisting it. When you reach the end, secure it with a piece of double-sided tape and stick it within the tree circle you made.
- Continue the twisting and taping process until you’ve transformed all the paper strips into twirling leaves and your tree is full.
- Cut a grassy shape from the green felt and stick it to the bottom of your tree using double-sided tape, creating a lovely base.
- From your extra strips, cut off a few small rectangular pieces. Glue them around the paper just below the tree.
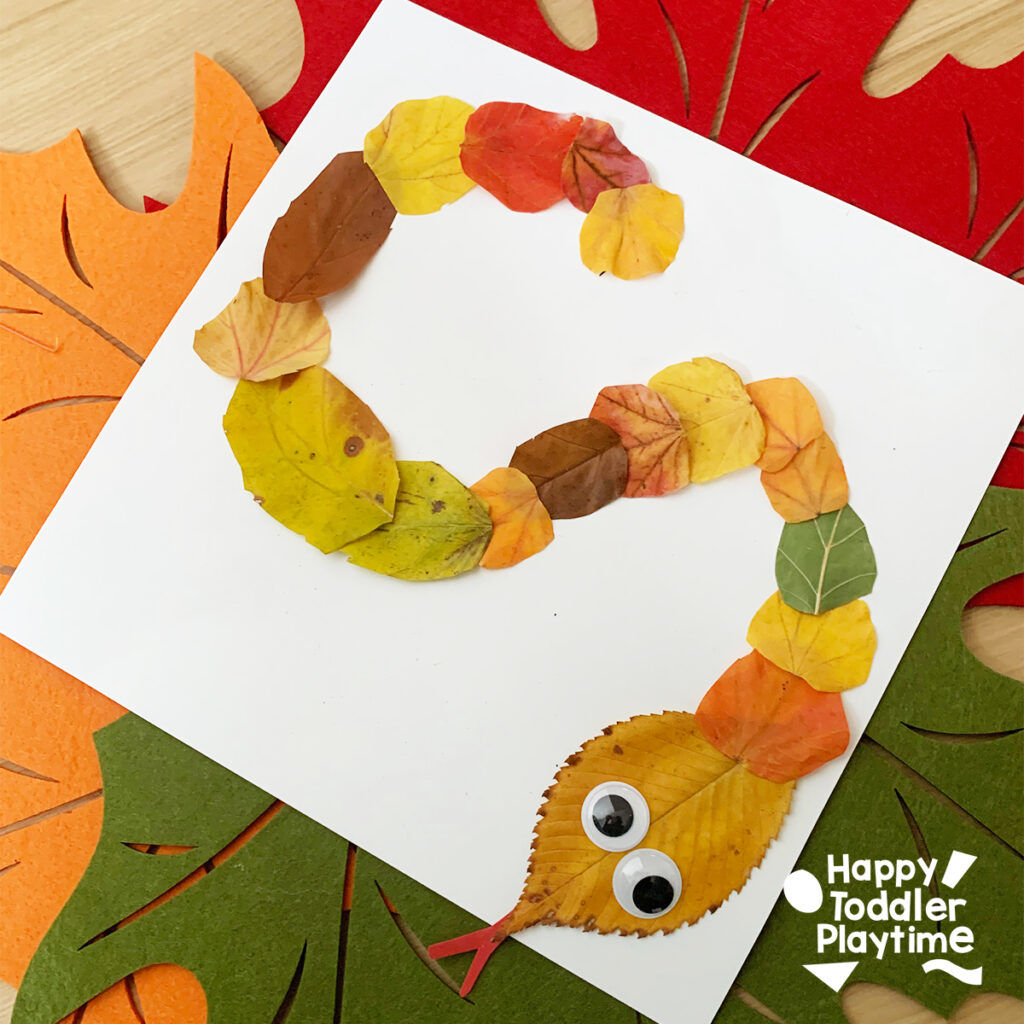
5. Leaf Snake Craft
Have a snake fan at home? Use fall leaves to make this fall Leaf Snake Craft! My kids aren’t big fans of snakes but loved making this adorable guy.
Materials
- Freshly fallen leaves
- Glue
- Red and white construction paper
- Scissors
- Googley eyes
How to Make
- Leaf Collection: Begin your crafting adventure by venturing outdoors to collect a handful of freshly fallen leaves. Look for leaves of different shapes and sizes to add character to your leaf snake.
- Head Start: Cut a snake tongue shape out of the red construction paper. Choose a leaf that looks like a snake head, rounded and pointy. Glue the snake tongue to one end. Glue both to a sheet of white construction paper. Draw the shape of the snake either an S shape or a spiral or whatever you link! This will be the guide for where you glue the leaves for the snake body.
- Eye-catching: Glue a pair of googley eyes onto the head to give your leaf snake a whimsical and friendly expression.
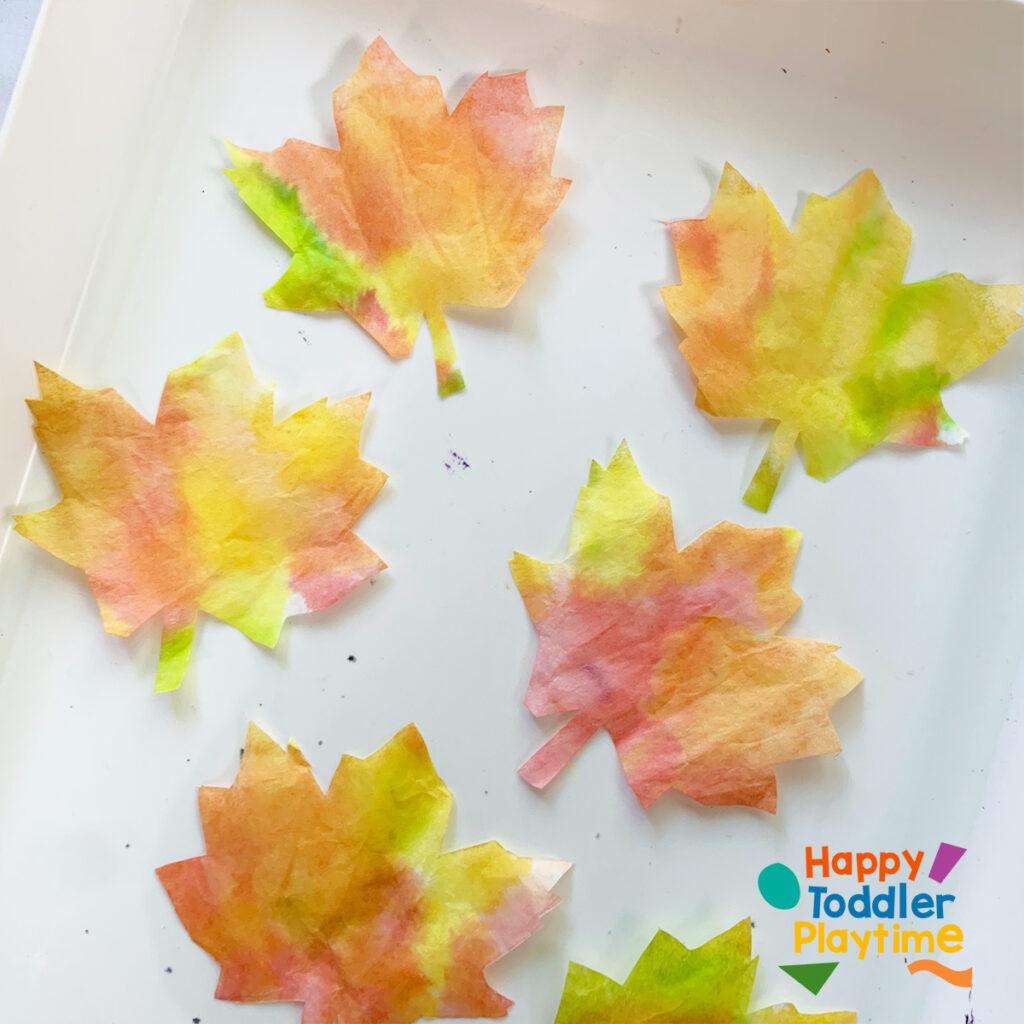
6. Coffee Filter Leaves Craft
Coffee Filter Leaves Craft is a fun fall craft for toddlers and preschoolers. A fun fine motor craft idea using eye droppers!
Materials
- Coffee Filters
- Cups or bowls
- Eye droppers
- Food coloring
- Spray bottle
- Water
- Leaf for tracing
- Pencil
- Scissors
- Double sided tape
- Optional: String and single hole punch to turn the leaves into a garland
How to Make It
- Grab a few small bowls or cups and fill them with water. Add a few drops of food coloring in fall colours like orange, red, yellow, orange and green, to the water. Add a small eye dropper to each.
- Grab a few coffee filters and and color them completely with coloured water using the eye droppers.
Take a spray bottle filled with water and spray the coffee filter until its completely wet but not soaking. Try not to wet it too much otherwise the color will run a lot but if your little one does it ok! I encourage my kids to color in several coffee filters so they have a bunch to spray.
Set it aside to dry. - Once the coffee filters are dry, fold the coffee filters in half and them in half again. Take a leaf from outside and trace it on the folded coffee filter with a pencil. Cut out the leaf outline
- Display your leaves on a window using double sided tape or cut a piece of yarn or string and poke a small hole in each leaf and string them along the string to create a leaf garland. Or you can tape them to a piece of string on the back to create the garland.
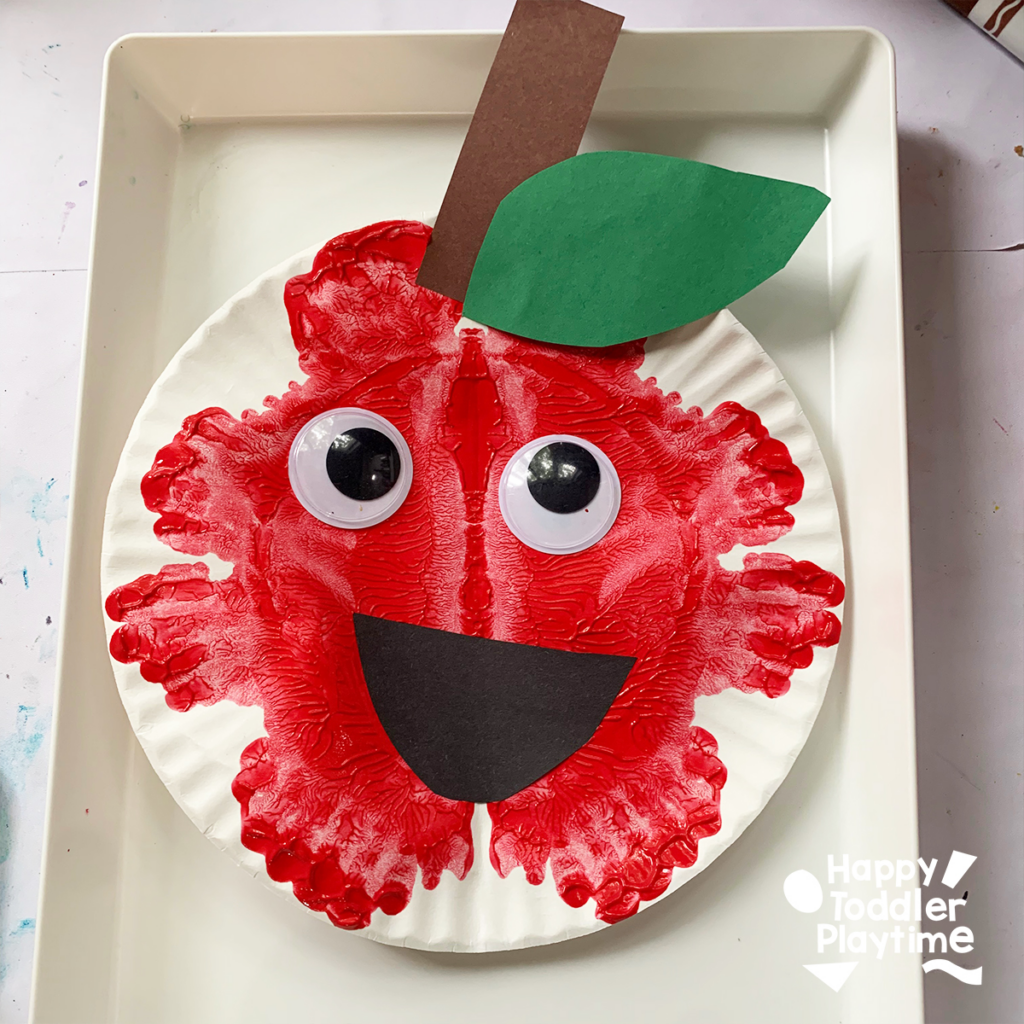
7. Paint Splat Apple Craft
This Paint Splat Apple Craft is especially fun because it turns a red blob of paint into an adorable apple with just a few simple shapes.
Materials
- Paper plates
- Red, green, or yellow paint
- Black construction paper
- Green and brown construction paper
- Googly eyes
- Glue
How To Make It
- Take your paper plate and fold it in half and light crease the center. Open it up again and put some red paint all over one side of the paper plate.
- Fold the plate in half again and invite your little one to use their fingers to move the paint inside the paint all over. Place something on the table just in case some of the paint oozes out of the paper plate.
- Open the plate up and check out the cool symmetrical shape that they made. You can talk about symmetry here with you child (no matter their age) and show them that the shape is the same on both sides of the fold.
- Cut out a smile for the apple from black construction paper. Glue it on to the pumpkin, along with the googley eyes.
- Cut out a stem and a leaf and glue the, to the top of the apple.
8. Straw Painted Fall Tree Craft
Sometimes it’s fun to change up the painting tools and use something unexpected. We used straws to make leaves on fall trees for this craft and the results were great.
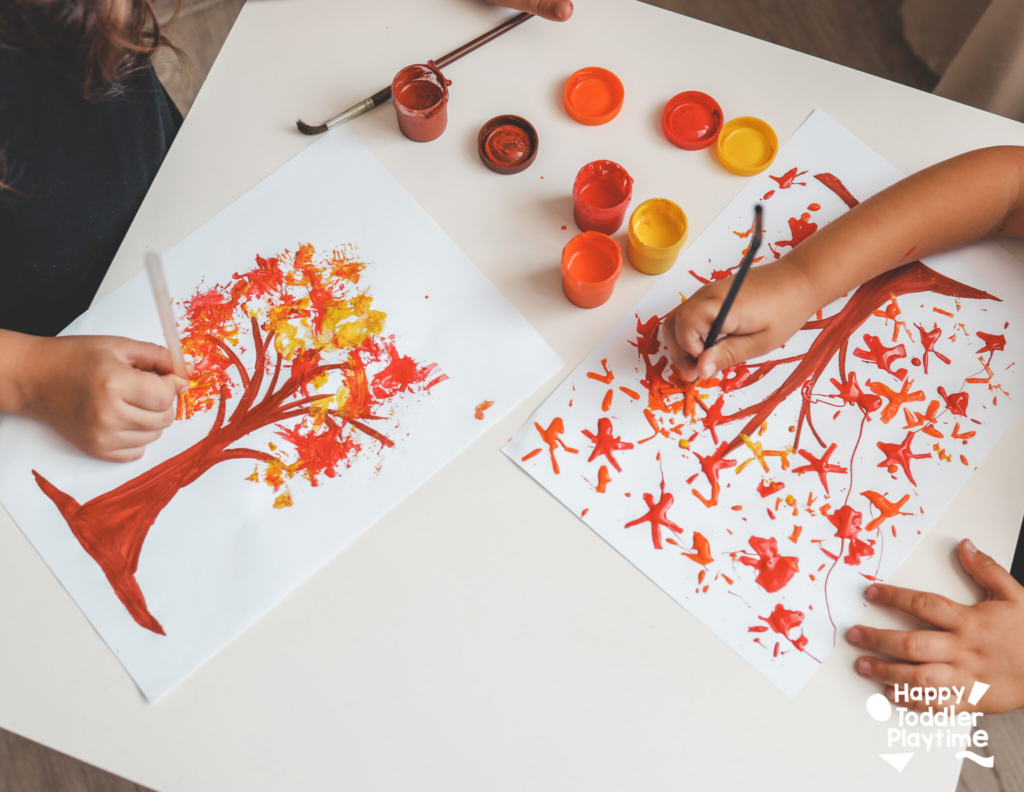
Materials
- Straws
- Fall colored paints
- A sheet of white paper
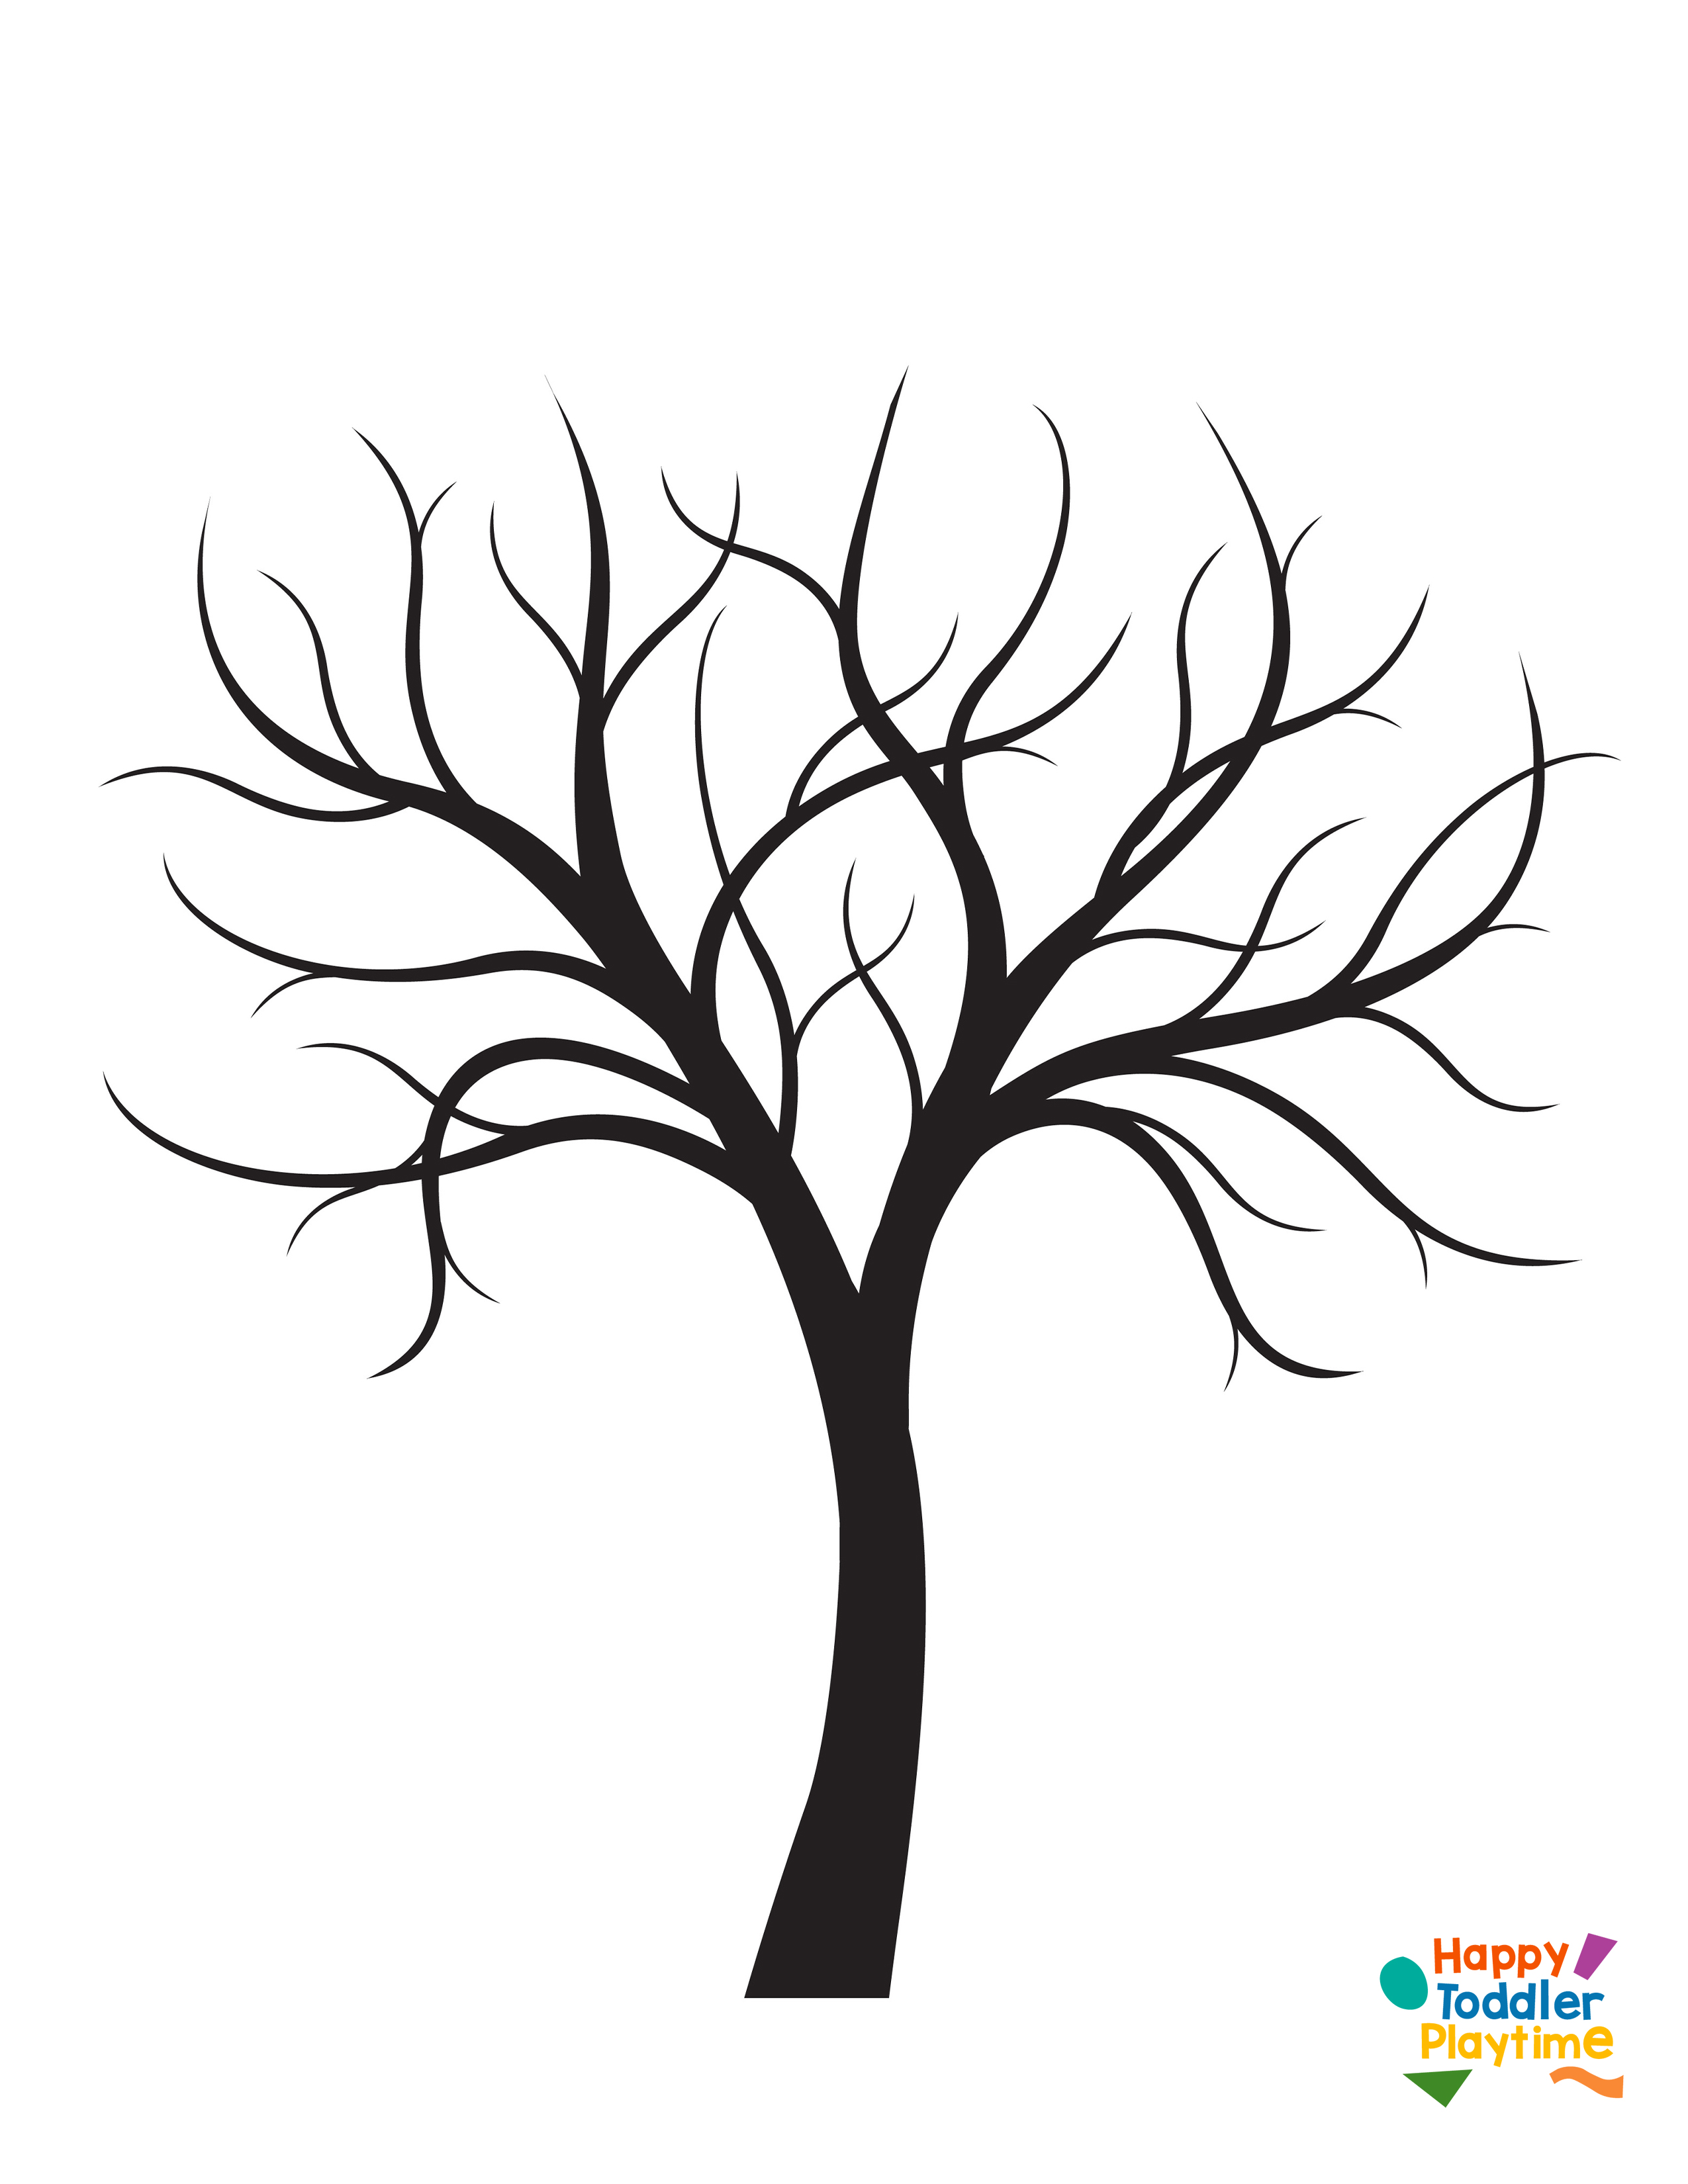
- Our free tree printable template
- Scissors
How to Make It
- Start by printing our free tree printable template. This will serve as the beautiful canvas for your child’s masterpiece.
- Grab a straw and, using the scissors, cut one end of it into four equal parts. Gently bend these parts backward to create a star-like shape.
- Pour your fall paints into shallow dishes. Dip the star-shaped end of your straw into a paint color of your choice.
- Press the straw onto the branches of the tree to create vibrant leaves. Feel free to mix and match colors, giving your tree a full, rich canopy of fall foliage.
9. Black Glue Fall Art
Black glue art is a fun and unique way to bring a new dimension to your kid’s artwork, combining bold lines with bright colors to make the designs really stand out.
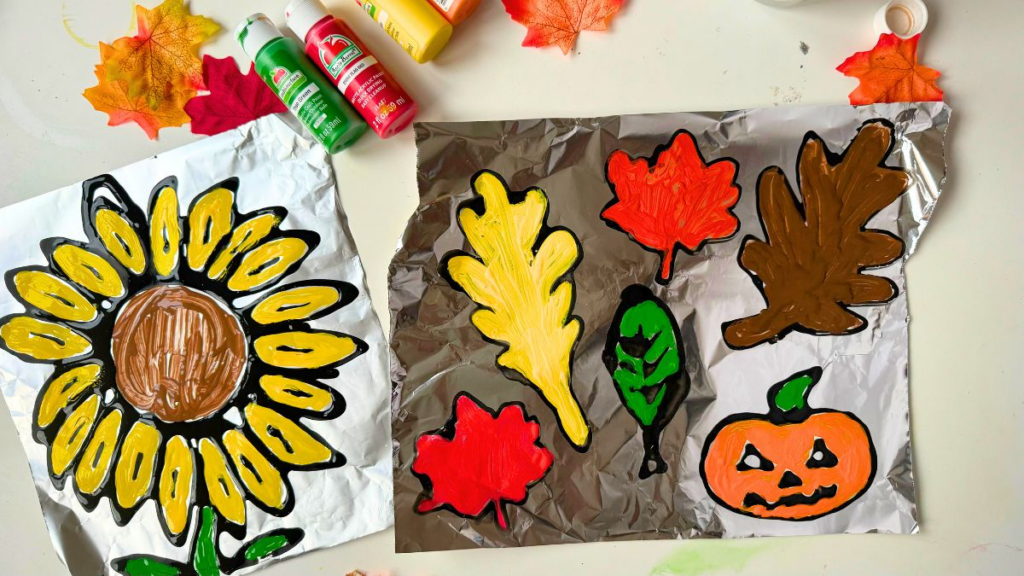
Materials
- Bottle of school glue
- Black paint
- Aluminum foil
- Acrylic paint in different colors
- Paint brushes
How to Make
- To make the black glue, I like to start with a half-empty bottle of school glue. Add about 1/3 to 1/2 of black paint into the glue bottle, screw the cap back on, and give it a good shake.
- Cut a piece of aluminum foil to the desired size and lay it flat on a table. Use the black glue to draw shapes, patterns, or even a picture directly onto the foil. Let the glue dry completely before moving on to the next step.
- Once the black glue is dry, use acrylic paints to fill in the different sections of your design.
- Once you’ve finished painting, allow the piece to dry completely.
10. Pine Cone Owl Craft
Looking for a nature-inspired craft that’s both adorable and easy to make? Check out this adorable Pine Cone Owl Craft! My kids loved giving their owls unique faces.
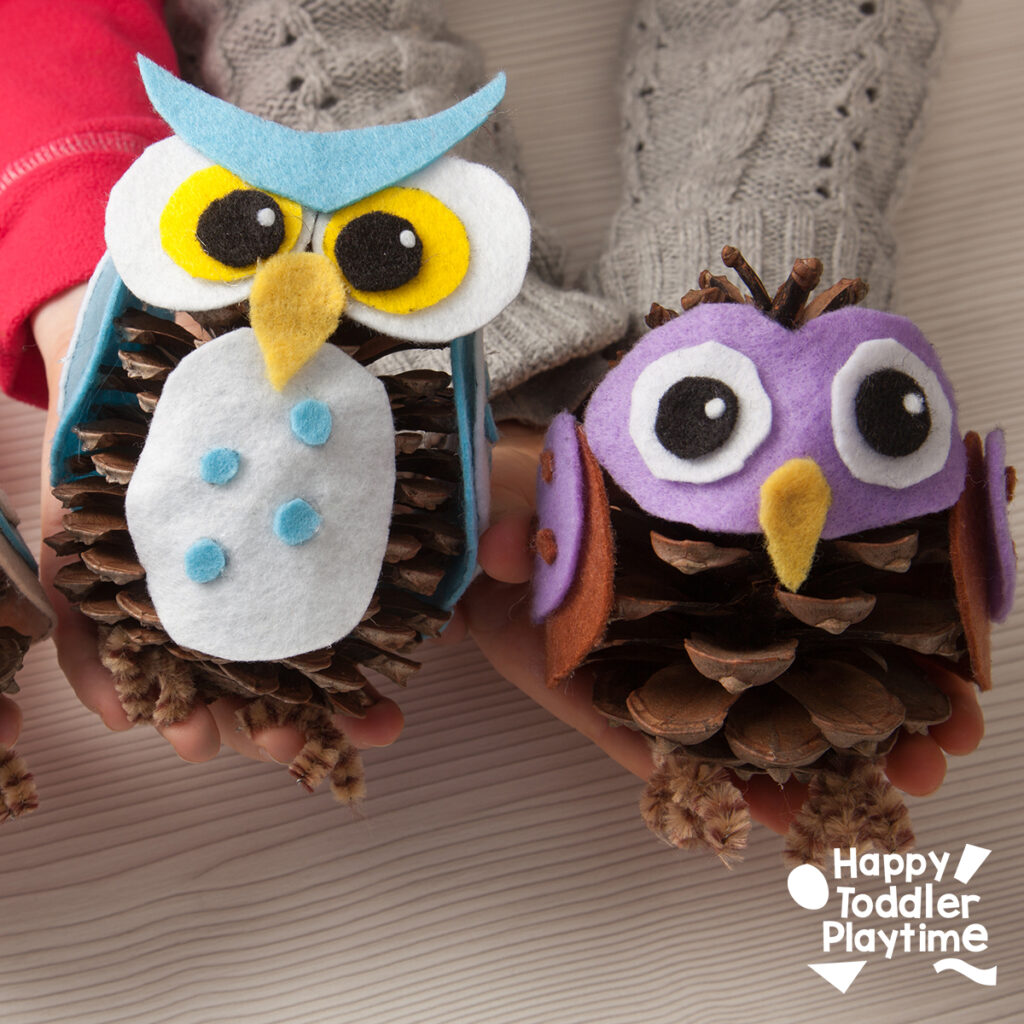
Materials
- Pine cones
- Craft felt in various colors
- Scissors
- Craft glue or hot glue gun
- Brown pipe cleaners
- Protective work surface
How to Make
- Collect pinecones from outside.
- Choose felt colors for the eyes and wings of your owls.
- Cut out two round circles from the coloured felt to serve as the owl’s eyes. Then two large white circles and two slightly smaller black circles and then two very very small white circles. Glue them together using the craft glue.
- Cut out eye brows from the same coloured felt. Glue them to the top of the eye brows. Also cut out a small beak from yellow or orange felt.
- Cut out wing shapes from the felt. These can be curved or pointed, depending on the style you prefer. If you want to add texture, glue small craft feathers to the wings. Or cut out small dots from the the felt and glue them to the wings.
- Use craft glue or a hot glue gun to attach the felt eyes and wings to the pine cone owl’s body.
- Fold brown pipe cleaner in half and then half again. Use scissors to cut along the folds. Twist three pipe cleaners together to create a foot for the owl. Repeat for the second foot. Glue the pipe cleaner feet to the bottom of the owls. If you like you can also add a felt belly to your owl by cutting out an oval and glue it tithe fron of the owl. Add some small cut out felt dots for flair!
11. Leaf Fox Craft
When the leaves start to change and the air turns crisp, celebrate the season by turning a fallen maple leaf into an adorable fox craft?
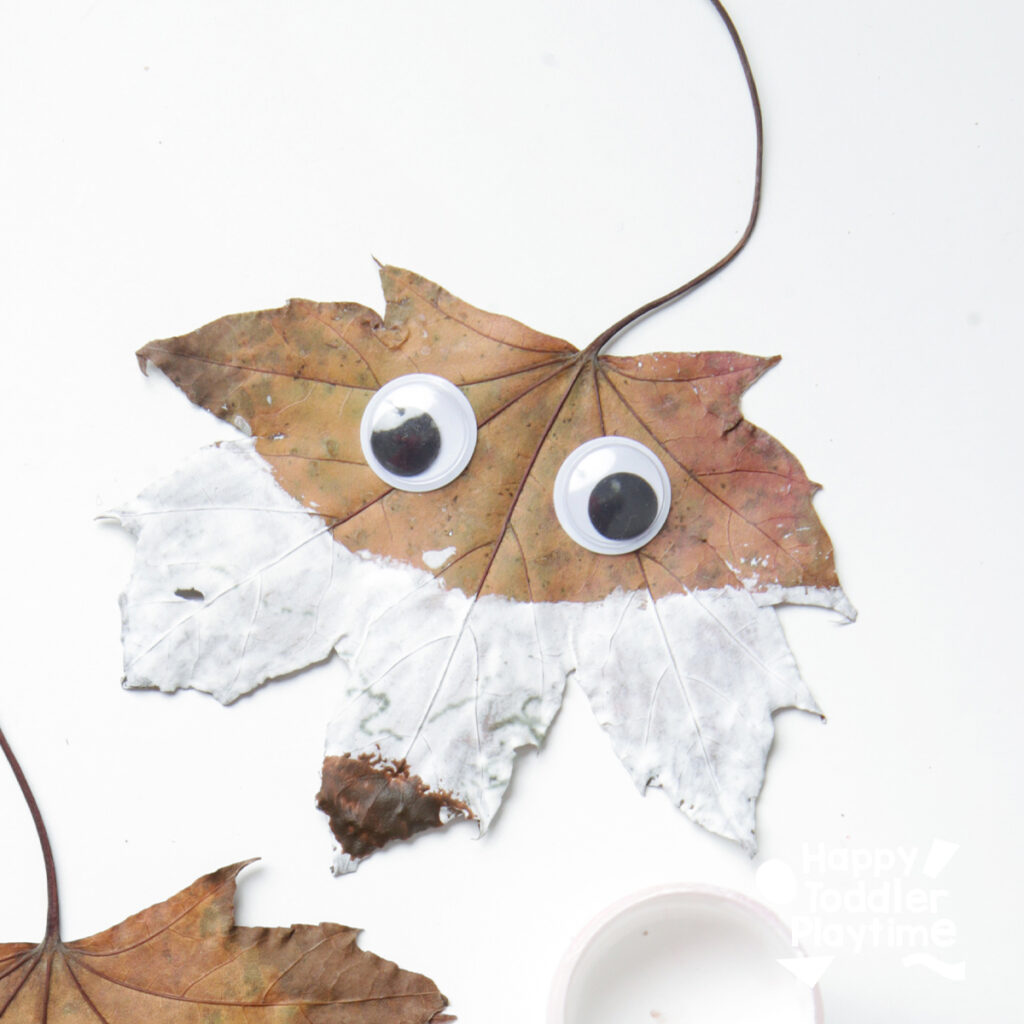
Materials
- Fallen maple leaf
- White and brown acrylic paint
- Paintbrush
- Googly eyes
- Craft glue or adhesive dots
How to Make It
- Collect a leaf
- Paint t the entire bottom portion of the leaf with white acrylic paint. Except for the pointy nose. Paint that brown or black. Let it dry.
- Glue on googley eyes.
12. Color Changing Invisible Ink
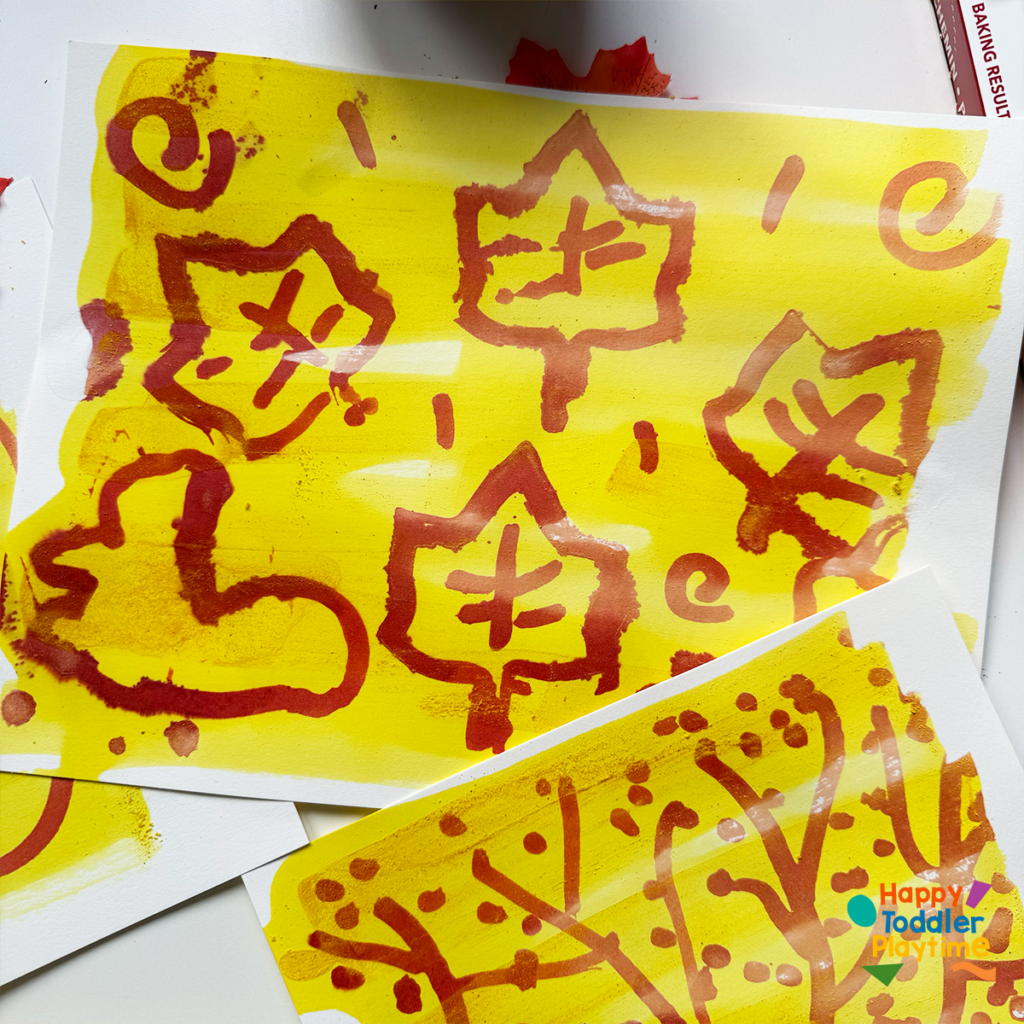
Materials
- 1/2 cup of water
- 1 tablespoon of baking soda
- 1/2 cup of rubbing alcohol
- 1 tablespoon of turmeric
- Q-tip (for drawing)
- Paintbrush (for revealing the ink)
- Small bowls for mixing
How To Make It
- In a small bowl, mix 1/2 cup of water with 1 tablespoon of baking soda. Stir well until the baking soda dissolves. This will be your invisible ink.
- Dip a Q-tip into the water and baking soda mixture, and use it to write a message or draw a picture on a piece of white paper. Let the paper dry completely so the “ink” is no longer visible.
- In a separate bowl, mix 1/2 cup of rubbing alcohol with 1 tablespoon of turmeric. Stir well to create the solution that will reveal the invisible ink.
- Once the paper is dry, use a paintbrush to gently paint the alcohol and turmeric mixture over the areas where you drew or wrote. Watch as the hidden message or picture appears on the paper.
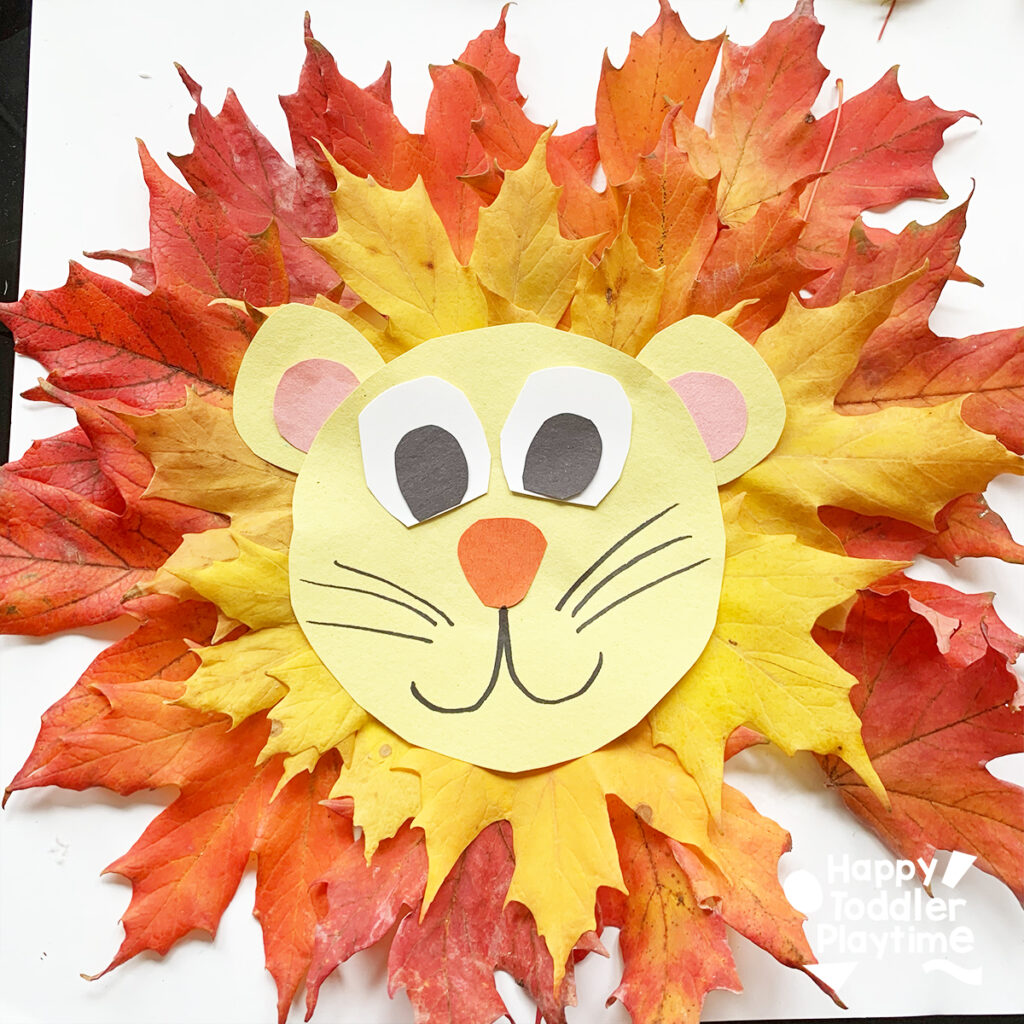
13. Lion Leaf Craft
As the leaves paint the ground with their vibrant hues, roar into the world of creativity with our Lion Leaf Craft!
Materials
- Freshly fallen leaves
- Glue
- Yellow, pink, red, white, and black construction paper
- Scissors
- Black marker
How To Make It
- Start by heading outdoors and collecting a variety of freshly fallen leaves.
- Cut a large circle from the yellow construction paper. This will be the lion’s face. Also cut out two small ears from the yellow paper. From pink paper cut out the inner ear.
- Cut two small circles from the white construction paper and glue them onto the lion’s face to create the eyes. Then, cut two smaller circles from the black construction paper and glue them onto the white circles for the pupils. Glue the inner ears to the ears and glue them to the back of the lion’s head.
- Cut a small oval shape from the red construction paper for the lion’s nose. Glue it onto the center of the yellow circle, just below the eyes. Use the marker to draw a smile and whiskers. Set it aside to create the lion’s leaf mane.
14. Dry Leaves Fall Tree Craft
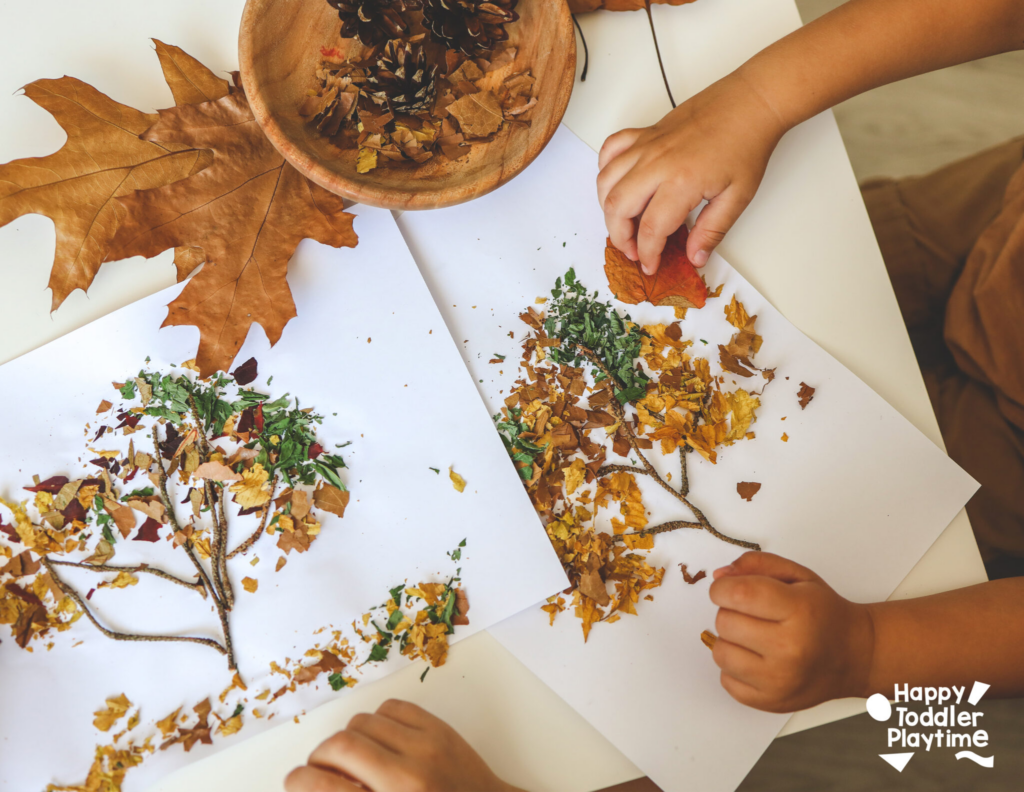
We have just the thing to kickstart your child’s seasonal artwork – our fabulous dry leaves fall tree craft with free tree templates!
Materials
- Free tree templates or sticks
- Dried leaves in a variety of colors and shapes
- Glue
How to Make It
- Grab our free tree templates to get started. Print them out on a sturdy paper to hold the texture and weight of the dried leaves. Alternatively, you and your little one can find small twigs and use them to craft your tree.
- Go on a leaf hunt with your child, collecting a variety of dried leaves that catch your eye. It’s a fantastic opportunity for a nature walk!
- Crush the leaves in a ziplock bag and gllue the leaves onto the tree template. Or use the sticks to create a tree, glue them down and then glue the crushed leaves to that.
15. Hedgehog Cotton Craft
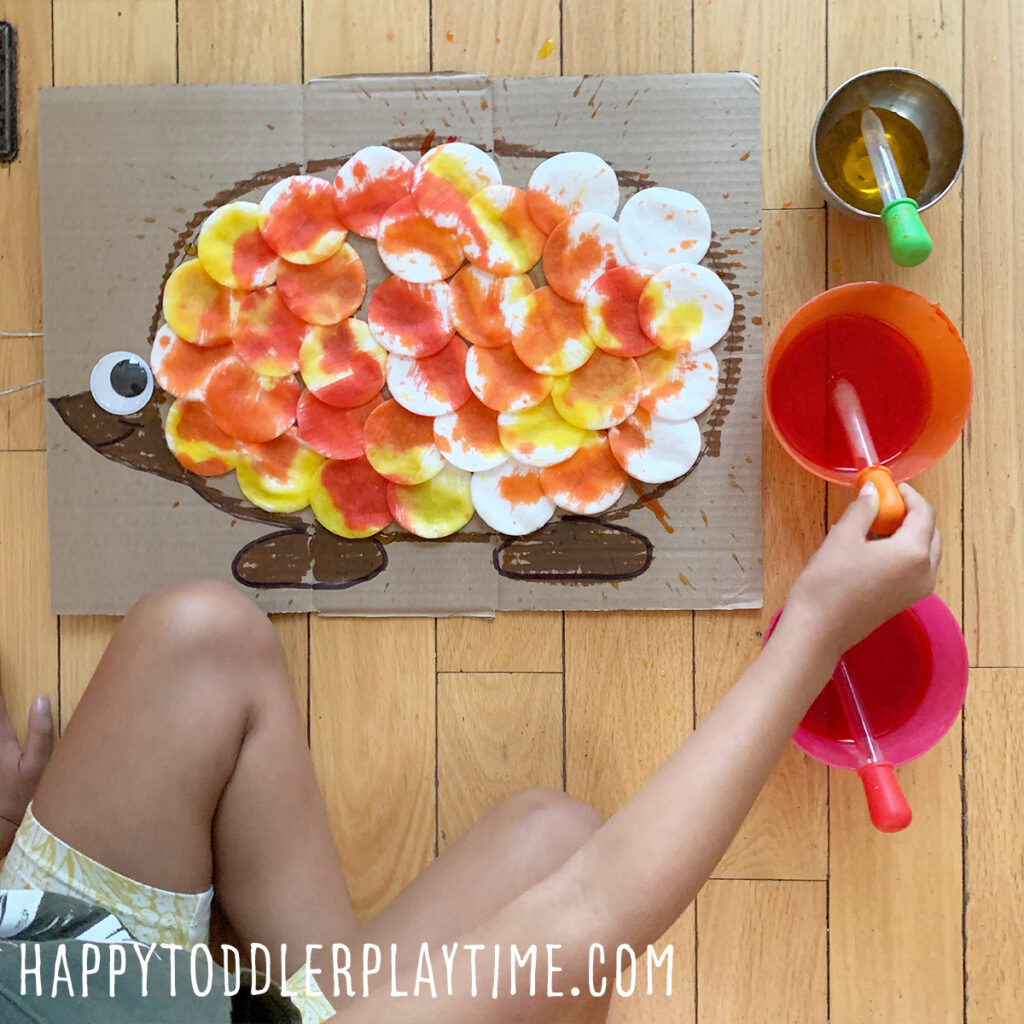
Hedgehog Cotton Ball Craft is a fun and easy fine motor craft for kids. It makes an adorable craft and activity to do this fall!
How to Make It
- Grab a piece of cardboard. You’ll want it to be large enough to fit the hedgehog and have extra room around it to help to keep the mess down.
- Use your sharpie and draw the outline of the hegdegod. Hand the piece of cardboard to your little one to do the rest.
- Hand them a squeeze bottle of glue or glue stick and invite them to trace the top of the hedgehog with the glue. Also have them squeeze glue all inside the hedgehog. Then have them stick cotton pads in the glue to create the hedgehog.
- Next, have then glue down a googley eye.
- If this is the first time your little one is using an eye droppers I suggest practicing using them with just water before adding the food colouring.
- Once they get the hang of squeezing and letting go to draw the water up the eye dropper you can add yellow, orange and red food colouring into bowls of water.
- Invite your child to use the eye droppers to colour the cotton pad hedgehog!
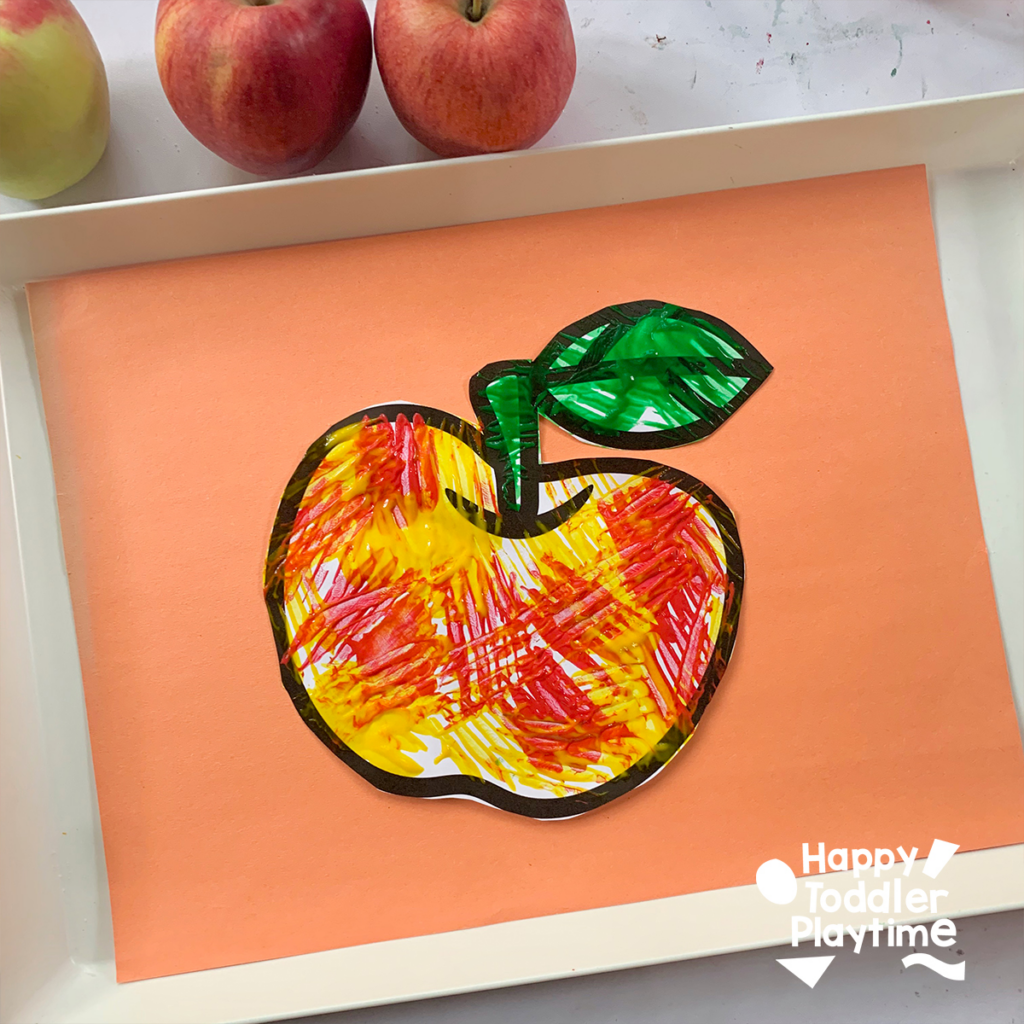
16. Fork Painted Apple Craft
Materials
- Free printable apple template
- Washable kids paint (red, green, and yellow)
- Plastic forks
- A surface to work on (like a big piece of cardboard or a disposable tablecloth) to contain the mess
- Construction paper
- Glue
- Scissors
How to Make It
- Pour a little green, red and yellow paint onto a palette or a disposable plate.
- Guide your child to dip the back of the fork into the paint and then press it onto the apple template. They can make patterns, mix colors, and let their creativity soar.
- Let your apple dry. Once dry, use scissor to cut it out and glue it to a piece of construction paper.
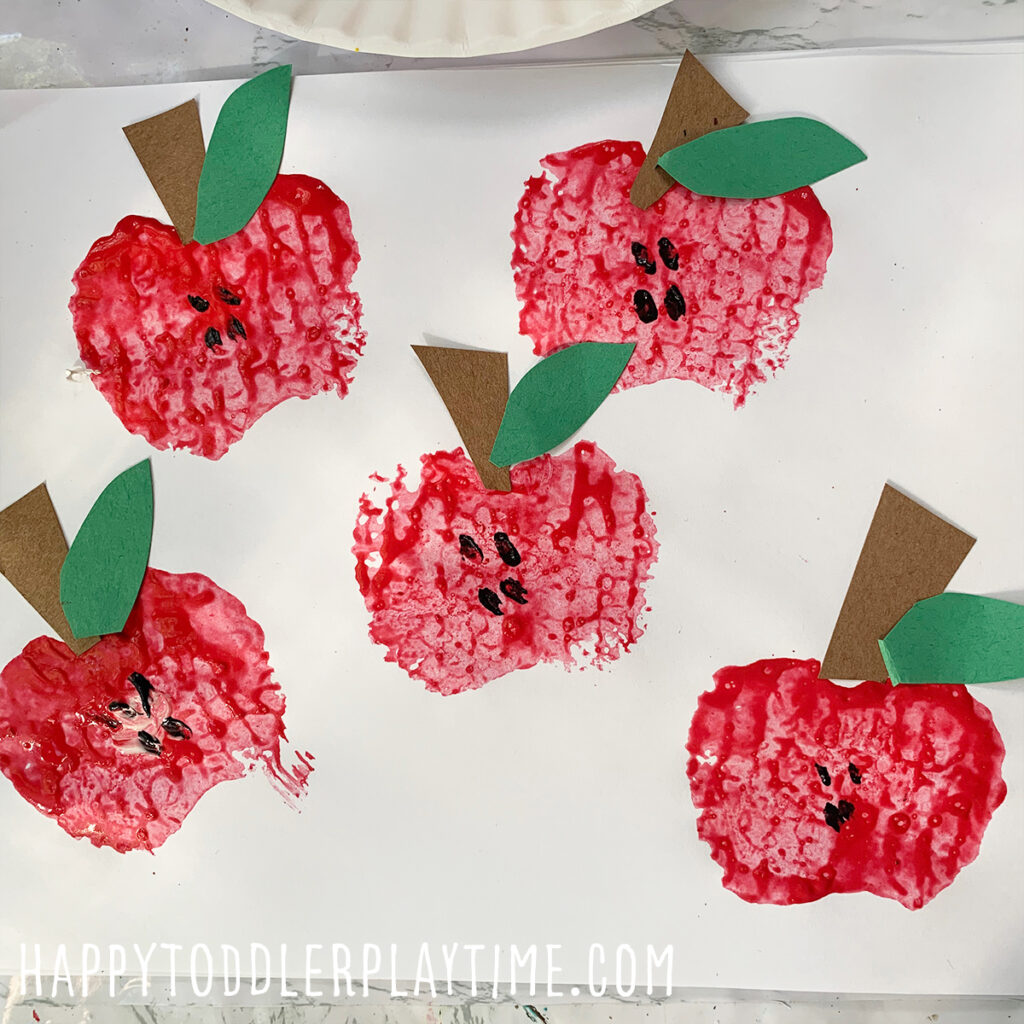
17. Apple Sponge Stamping Craft
Apple sponge stamping is a great alternative to apple stamping with real apples this fall! Make apple stamps and eat the yummy apples!
Materials
- Sponges
- Washable kids paint
- brushes
- white paper
- brown and green construction paper
- craft glue
How to Make It
- Grab a few kitchen sponges. For this activity you won’t want to use sponges that are too thick. The width of a normal kitchen sponge is perfect.
- Draw the shape of an apple on one side of the sponge using a marker. To draw an apple. To make an apples shape, I start out by drawing a heart and then make the bottom flat instead of pointy. In this case you will also want to cut a small dip at the bottom.
- Use a pair of scissors to cut the sponge into the shape of an apple. I cut three sponges into apple shapes.
- Grab a paper plate and pour out some red, yellow and green washable kids paint. Take one of the sponges and dip it into the paint. Take a sheet of white paper and stamp the sponge on the paper to create an apple.
- Grab your brown and green construction paper and cut out small stems and leaves. Attached them to the top of the apples using glue. Pour out a small amount of black paint and finish off by taking a small paint brush and making four black apple seeds in the center of the apple
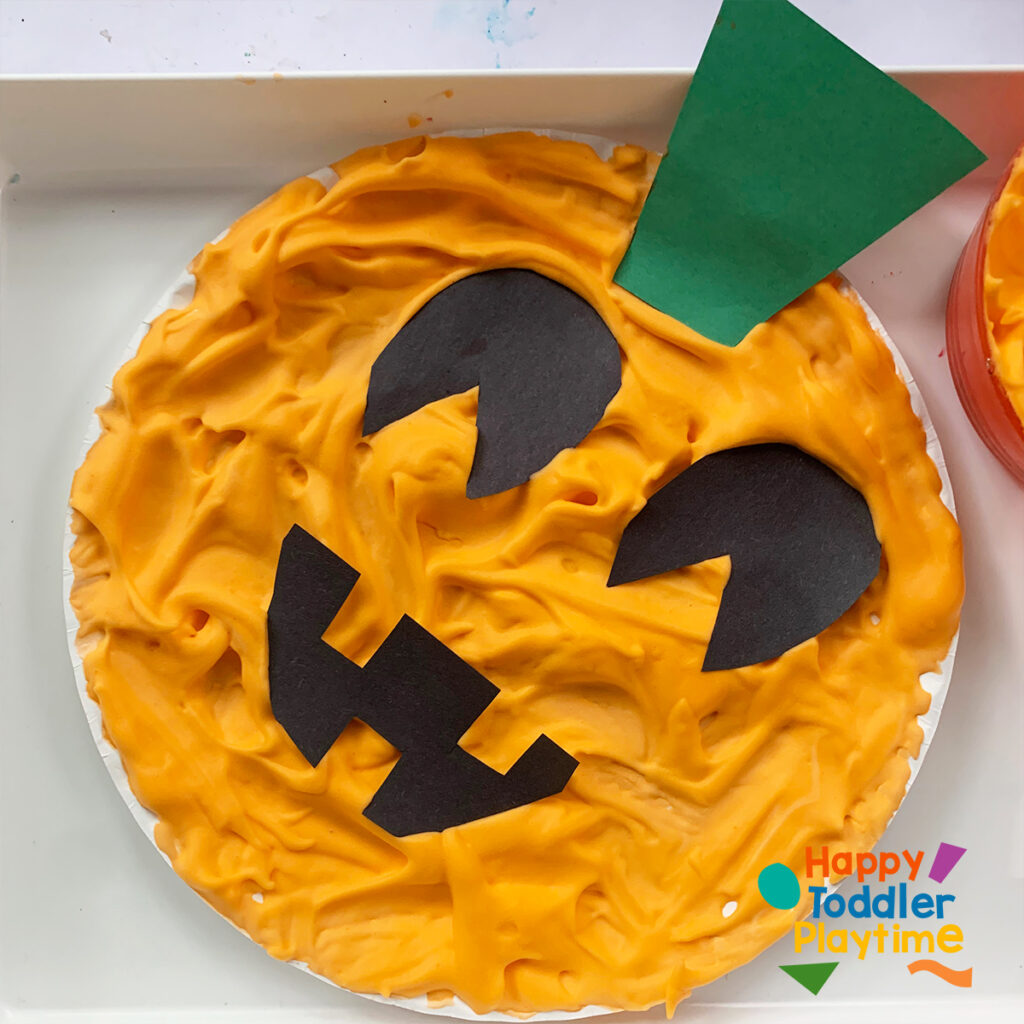
18. Paper Plate Puffy Paint Pumpkin Craft
Puffy Paint Pumpkin Craft is fun and easy fall craft for kids! An amazing sensory craft for toddlers and preschoolers and kids alike!
Materials
- 1/2 cup white school glue
- 1/2 cup shaving cream (add a little more shaving creaming to increase the puffiness of the paint)
- Orange food colouring
- Bowl
- Craft stick
- Paint brush
- Paper plate
- Green and black construction paper
- Scissors
How to Make it
- Take a paper plate using a regular paint brush, paint the orange puffy paint all over the paper plate.
- Use scissors to cut out a stem from green construction paper.
- Cut out a face for your pumpkin including eyes, mouth and nose from black construction paper. Place them on top of the paper plate in the orange puffy paint.
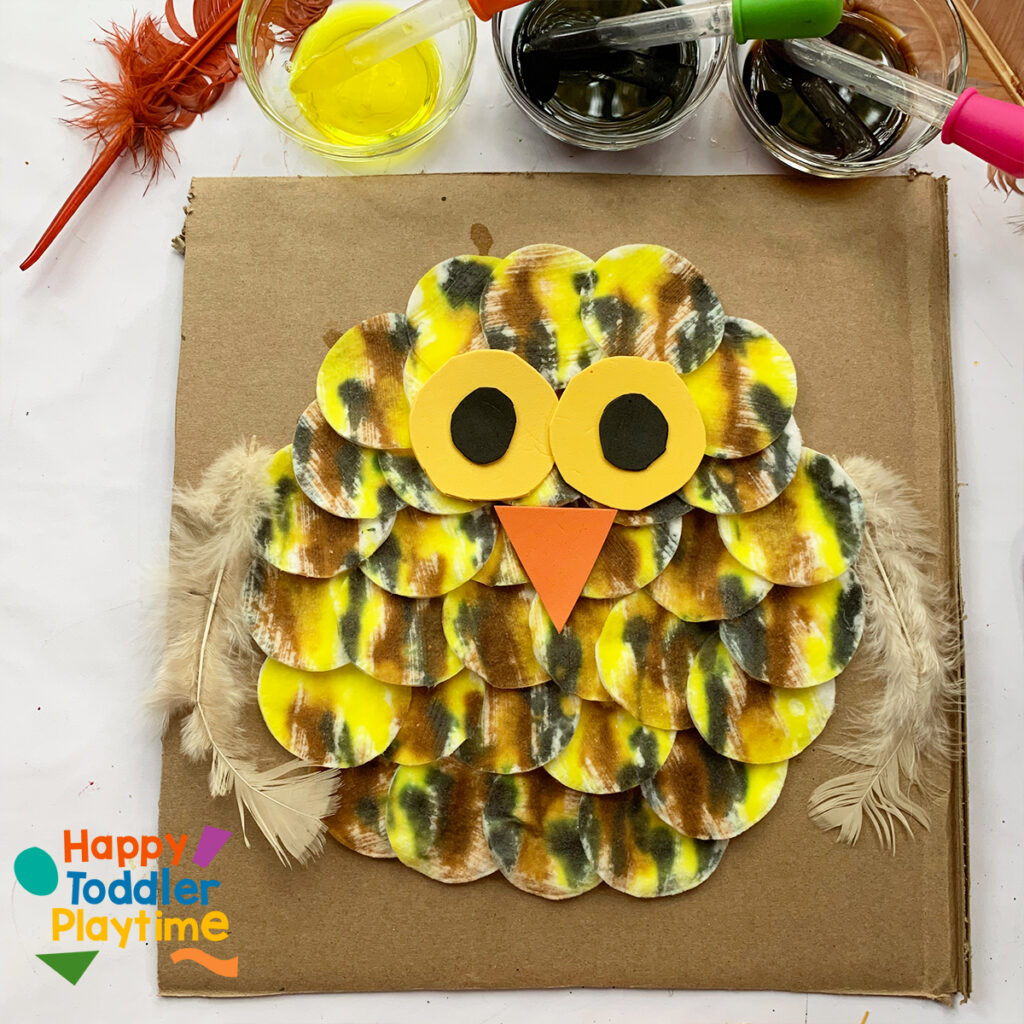
19. Cotton Pad Owl Craft
Cotton Pad owl craft is a cute craft using cotton pads and coloured water. This easy to set up idea is a fun activity for Fall!
Materials
- Cardboard
- Marker or pencil
- Cotton Pads
- Glue
- Scissors
- Eye droppers
- Yellow, brown and black food colouring
- Bowls
- Water
- Yellow, black and orange foam sheets
How to Make it
- Grab a piece of cardboard. You’ll want it to be large enough to fit the owl and have extra room around it to help to keep the mess down and for the feather wings. Trace the outline of a owl with a marker or pencil.
- Pour glue all over the middle of the owl body.
- Stick cotton pads in the glue, covering the entire middle of the owl.
- Fill two bowls or cups with a small amount of water and add a few drops of brown, yellow and black food colouring to each, respectively. Add eye dropppers to each.
- Practice using the eye droppers so they get the hang of squeezing and letting go to draw the water up the eye dropper.
- Invite your child to use the eye droppers to colour the cotton pad owl wings. There is a technique to making the cotton pad look like wings. Squeeze out the water in the cotton pad in a downward motion, creating almost a line of colour on the cotton ball line! Start with yellow and then brown and finally black.
- Cut out two large circles from foam sheets and two smaller circles from black foam sheet. Glue the black circle to the yellow circle. Cut out a triangle beak from orange foam sheet. Stick them on to the cotton pad owl.
- Glue a feather to either side of the owls body.
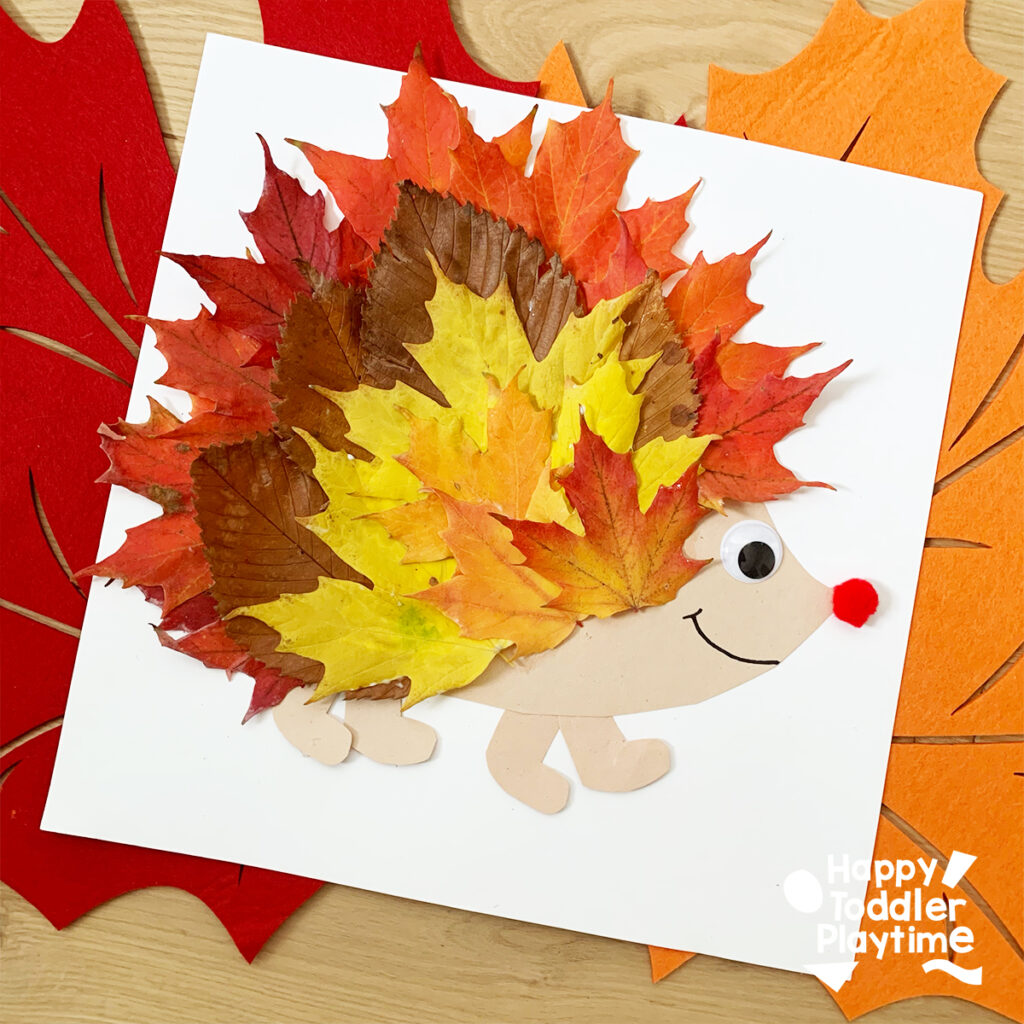
20. Hedgehog Leaf Craft
Prepare to get a little prickly with our Hedgehog Leaf Craft! This delightful project is perfect for embracing the fall season!
Materials
- Freshly fallen leaves
- Glue
- Beige or light brown and white construction paper
- Scissors
- Googley eye
- Pom Pom
- Black marker
How to Make it
- Leaf Collection: Start by venturing outdoors to collect a handful of freshly fallen leaves. Look for leaves of varying sizes and colors to give your hedgehog character.
- Hedgehog Body: Cut out an oval or rounded shape from the beige or light brown construction paper. This will serve as the hedgehog’s body. Also cut out four small feet for the hedgehog. Glue these to the oval. hen glue this to a white sheet of construction paper.
- Leafy Spines: Apply glue to the back of each leaf and stick them onto the construction paper body. Overlap the leaves slightly, positioning them so that they resemble the spines of a hedgehog. Continue this process until you’ve covered the entire body with leaves.
- Adorable Eyes: Attach a googley eye to the hedgehog’s face using glue. Place it at one end of the body to give your hedgehog personality.
- Nose and Mouth: Glue on a small Pom Pom just below the eye for the nose. You can also draw a line for a smiling mouth.
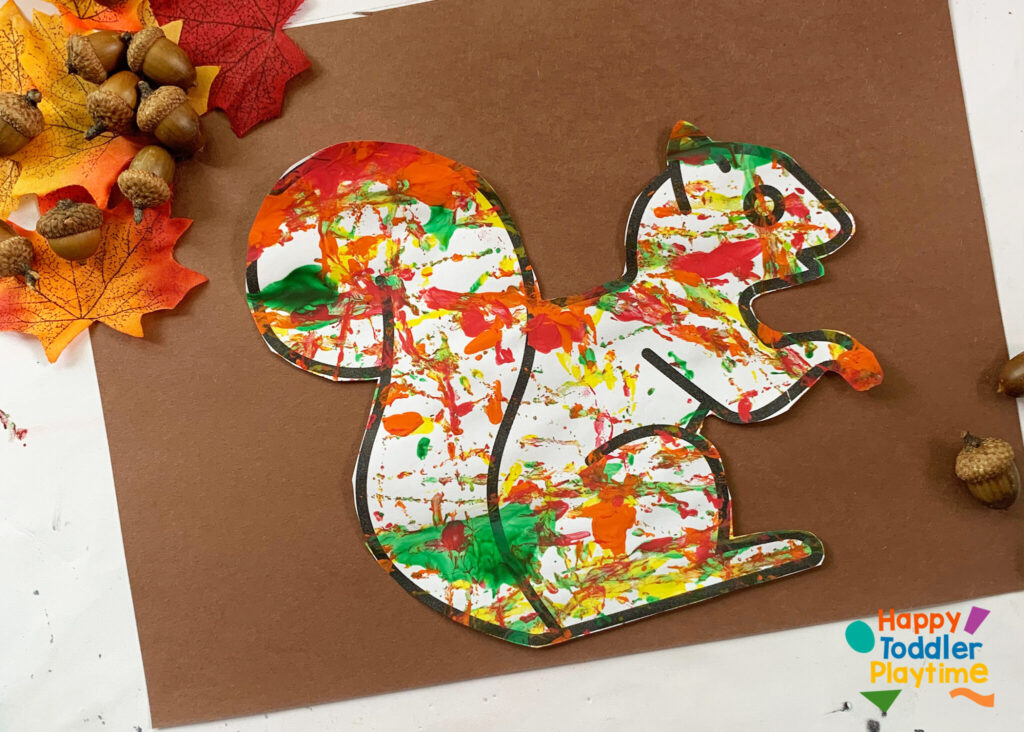
21. Acorn Painted Squirrel Craft with Free Template
Acorn Painted squirrel craft is an adorable and easy fall craft! A fun gross motor painted craft for kids of all ages to try this fall.
Materials
- Acorns
- Squirrel Template (download for free below)
- Washable kids paint (red, yellow, green, orange)
- Painter’s tape
- Cardboard box or tray
- Scissors
- Glue
- Construction Paper
How to Make it
- Download and print the free squirrel template (see supplies list below).
- Tape it to the bottom of a cardboard box or deep tray using a small amount of painter’s tape.
- Squeeze out a few drops of washable kids paint in red, green, yellow, or orange all over the page.
- Place several acorns inside the cardboard box or tray.
- Invite your child to shake the box or tray to move the acorns around in the paint and to decorate the squirrel in the fall colors. Challenge them to shake as hard as they can without loosing any acorns!
- Once the squirrel is decorated the desired amount, set it aside to dry or use a blow drier to dry it faster.
- Cut it out with scissors and glue it to a sheet of construction paper.
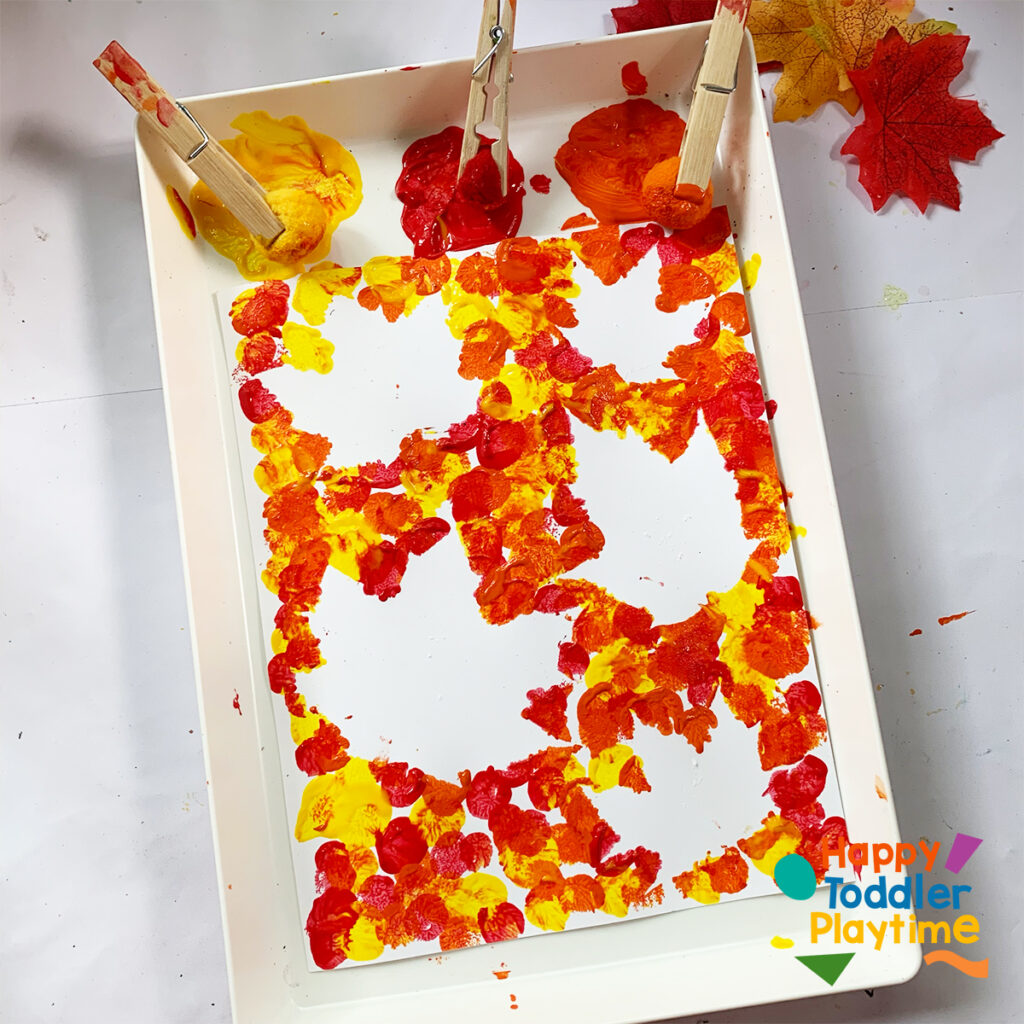
22. Pom Pom Leaf Resist Art
Pom Pom Leaf Resist Art is a fun and easy craft for toddlers and preschoolers. Use real leafs to make a colourful art for fall!
Materials
- Pom Poms
- White card stock
- Fallen Leaves
- Painter’s tape
- Washable kits Paint in red, yellow and orange
- Clothes pins
How to Make it
- Grab some fallen leaves from outside. For this activity fresh leaves work best.
- Arrange them on a sheet of white card stock and secure them with a small rolled up piece of tape.
- Attach clothes pins to three pom poms, coloured red, yellow and orange.
- Pour out some red, yellow and orange paint on to a paper plate or paint pallet.
- Protect your table with a plastic table cloth or butcher paper.
- Invite your little one to dip the Pom Poms into the paint and paint all around the leaves. Cover all the white spaces with whatever colour you choose!
- Remove the leaves to reveal the negative space below in the shape the leaves.
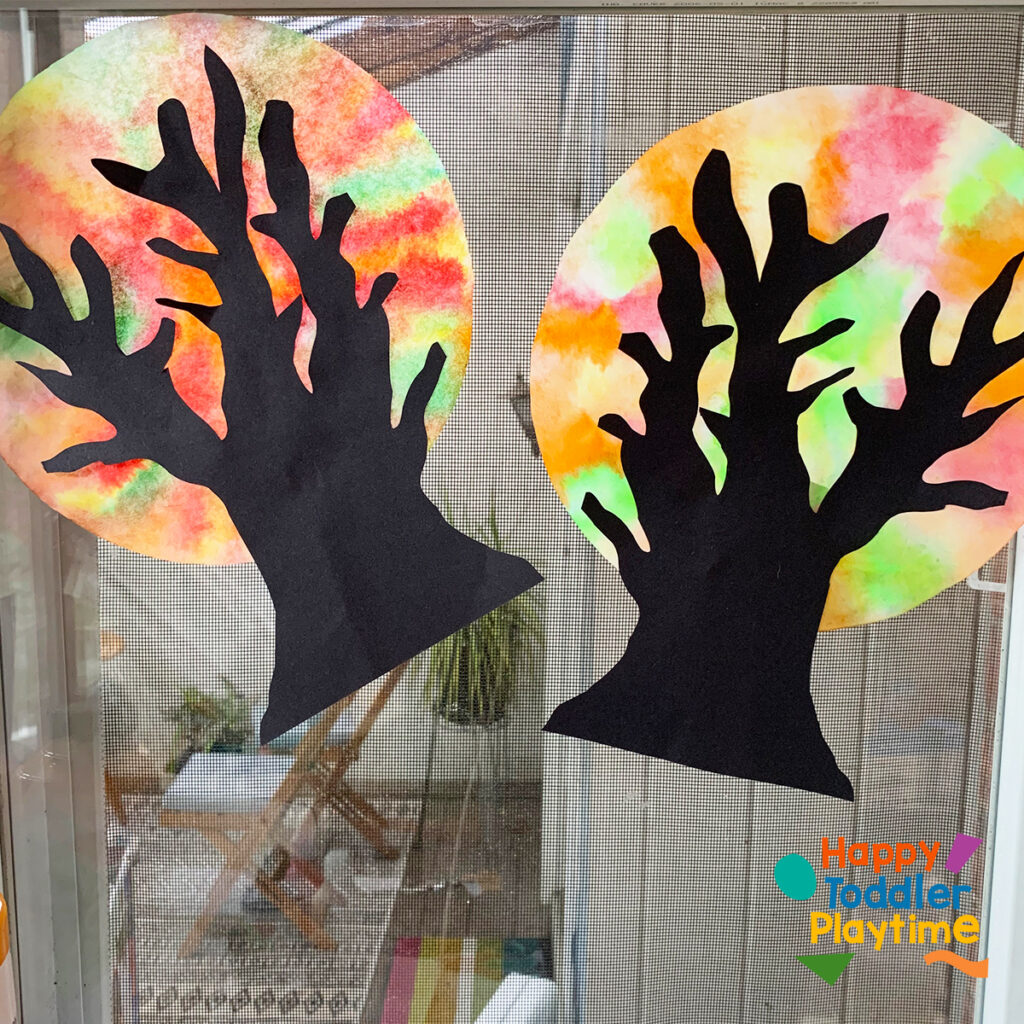
23. Coffee Filter Tree Craft
Coffee Filter Tree Craft is a fun fall craft for toddlers and preschoolers. A fun fine motor idea that creates a stunning craft!
Materials
- Free tree templates
- Coffee Filters
- Washable markers
- Spray bottle
- Water
- Black construction paper
- Scissors
- Glue
- Double sided tape
How to Make it
- Grab a few coffee filters and color them completely with washable markers. I used fall colors like orange, red, yellow, orange and green.
- Take a spray bottle filled with water and spray the coffee filter until its completely wet but not soaking. Try not to wet it too much otherwise the color will run a lot but if your little one does it ok! I encourage my kids to color in several coffee filters so they have a bunch to spray.
- Set it aside to dry.
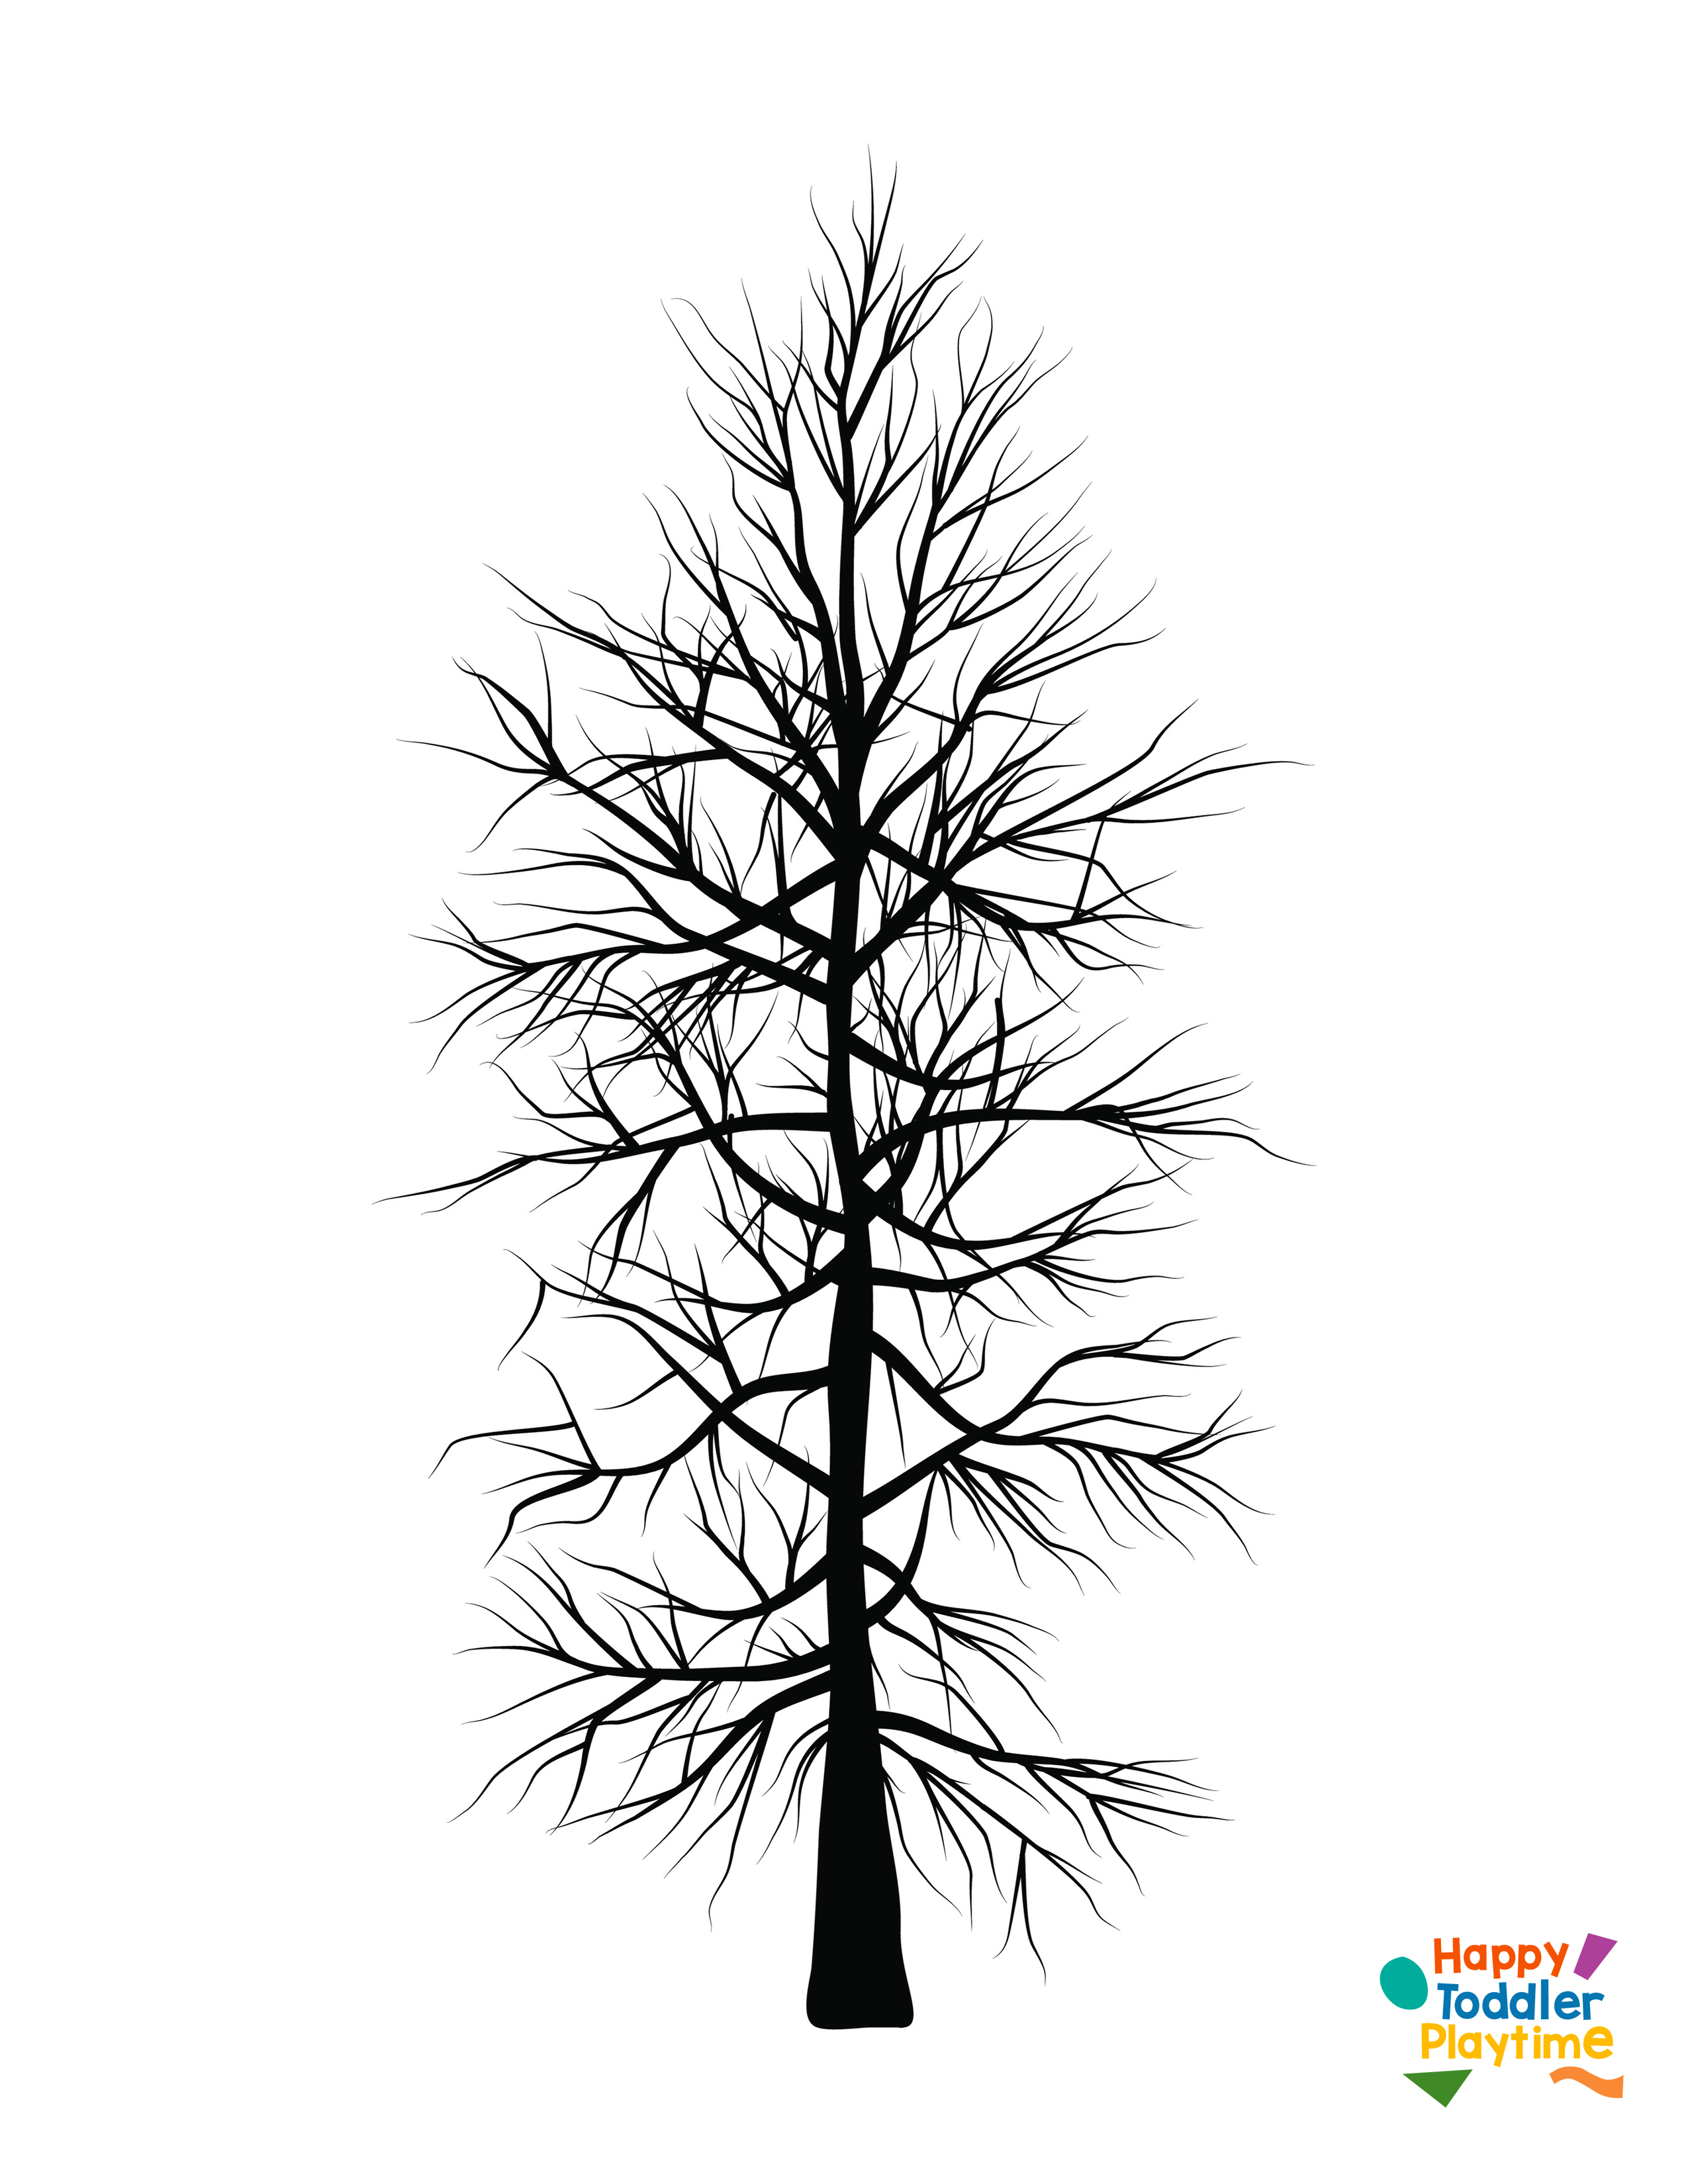
- Cut out the outline of a tree with branches from black construction paper. Or print out the tree template below and use it as a guide to cut out the outline of tree from black construction paper. (Alternatively, you can cut out a trunk and branches separately and invite your child to design and glue them to the coffee filter in the shape of a tree.)
- Once the coffee filter is dry, glue the black tree outline to the coffee filter.
- Display you tree craft on a window using double sided tape.
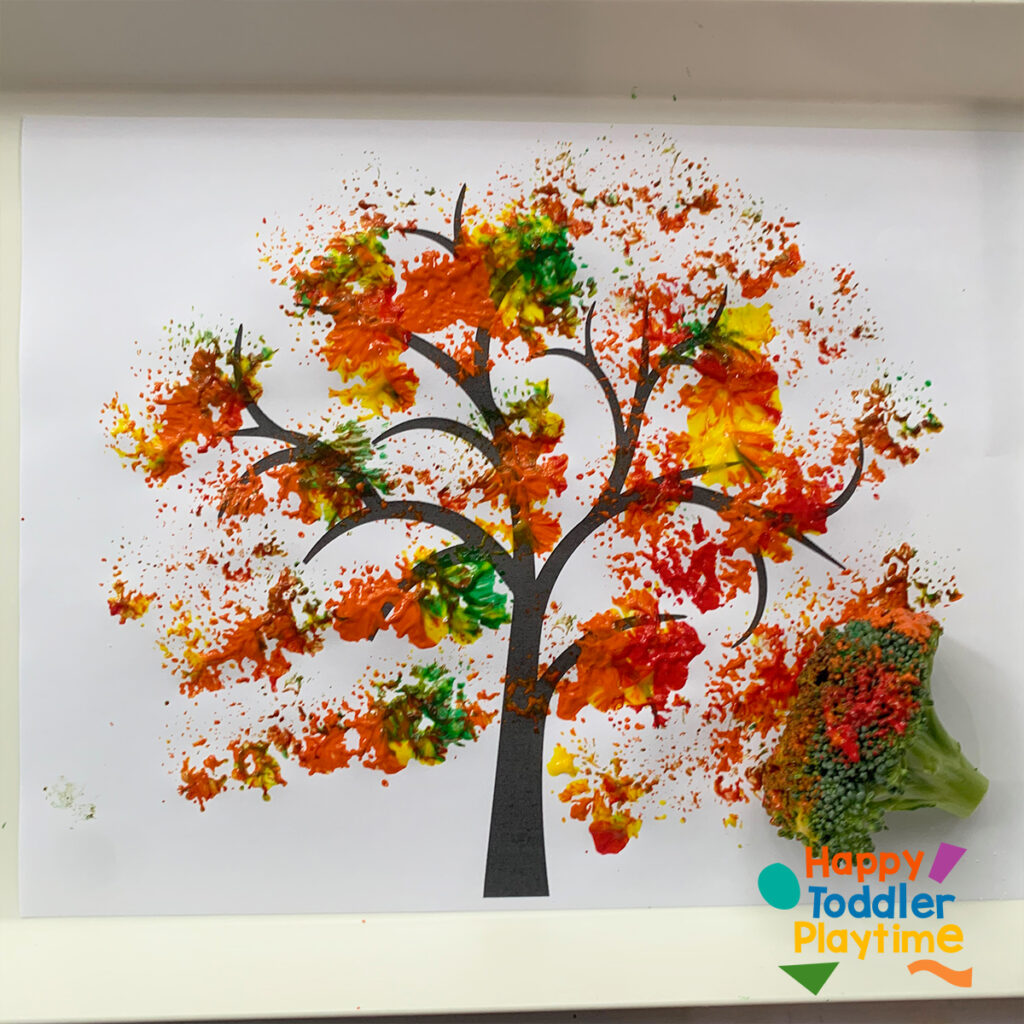
24. Broccoli Painted Fall Tree Craft with free printable
Broccoli Painted Fall Tree Craft is a fun and easy way to craft this Fall. Create a colourful tree using broccoli!
Materials
- Tree template
- Washable kids paint
- Broccoli
How to Make it
- Download and print the tree template using the link in the supplies section below.
- Pour out some washable kids paint in fall colours such as yellow, orange, red, green or brown.
- Cut off a piece of broccoli and dip it into the paint. Dip it into several colours at once and them start printing it all over the tree printable creating a tree with multiple coloured leaves.
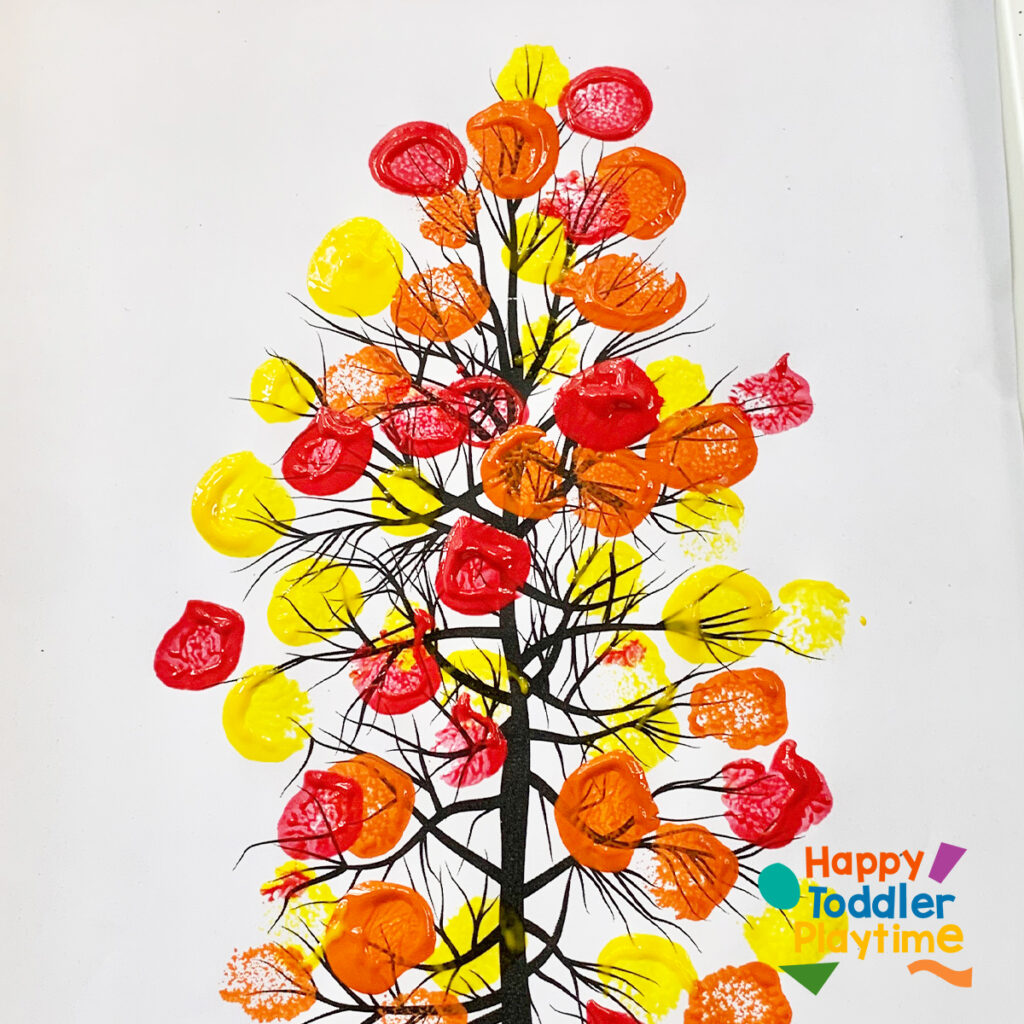
25. Pom Pom Fall Tree Craft with Free Tree Printable
Pom Pom Fall Tree is a fun and easy way to craft this fall. Create a colourful fall tree with Pom Poms using my free tree printable!
Materials
- Tree template
- Pom Poms
- Painter’s tape
- Washable kits Paint in red, yellow and orange
- Clothes pins
- Cardboard box, tray or butcher paper or table cloth to protect surfaces
How to Make it
- Protect your table with a plastic table cloth or butcher paper or use a cardboard box or tray to paint in.
- Download and print the tree printable using the link in the supplies section below. Tape it to the tray or cardboard box or to table protected with a table cloth, or butcher paper.
- Attach clothes pins to three pom poms, coloured red, yellow and orange.
- Pour out some red, yellow and orange paint on to a paper plate or paint pallet.
- Invite your little one to dip the Pom Poms into the paint and paint all around the tree. Cover all the branches with the different coloursto create leaves!
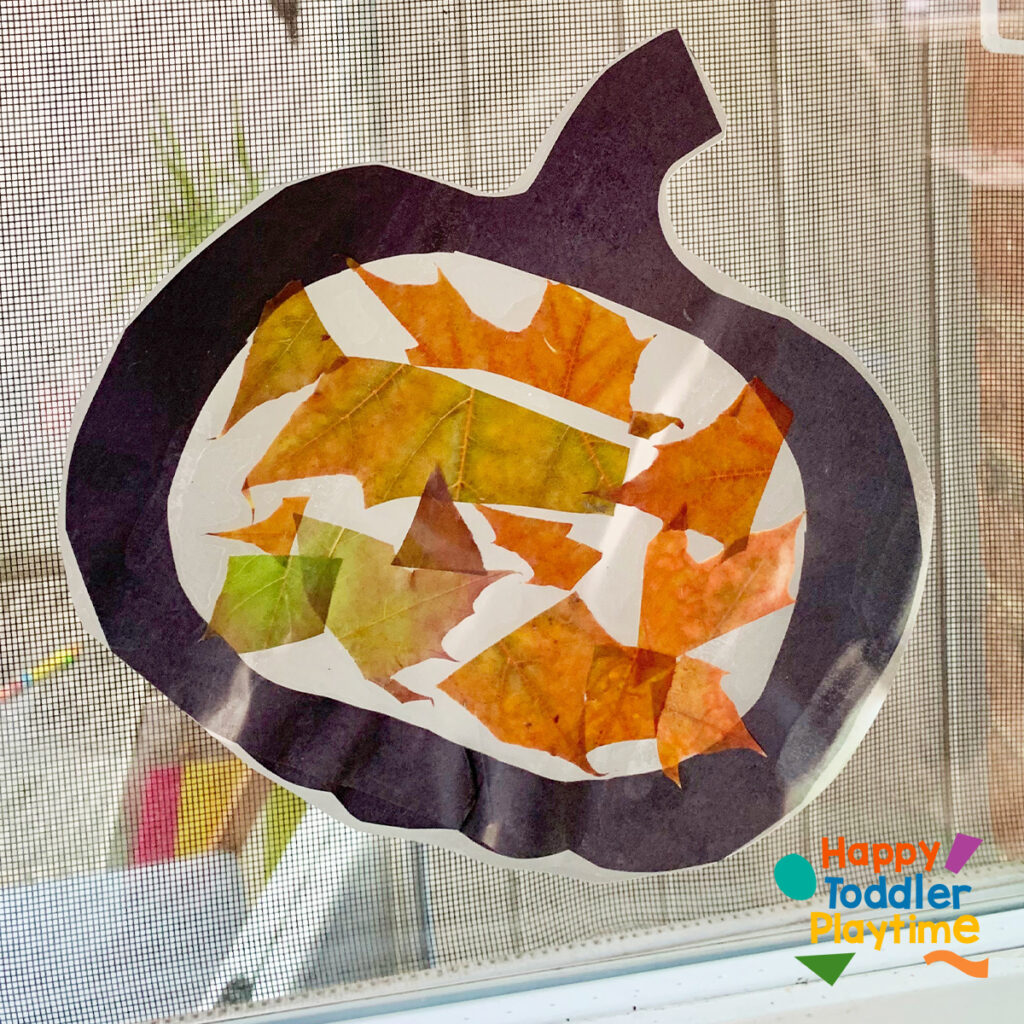
26. Nature Pumpkin Suncatcher Craft
This nature pumpkin suncatcher craft is perfect for Fall and Halloween. Make a pumpkin suncatcher using leaves in all the colours of fall!
Materials
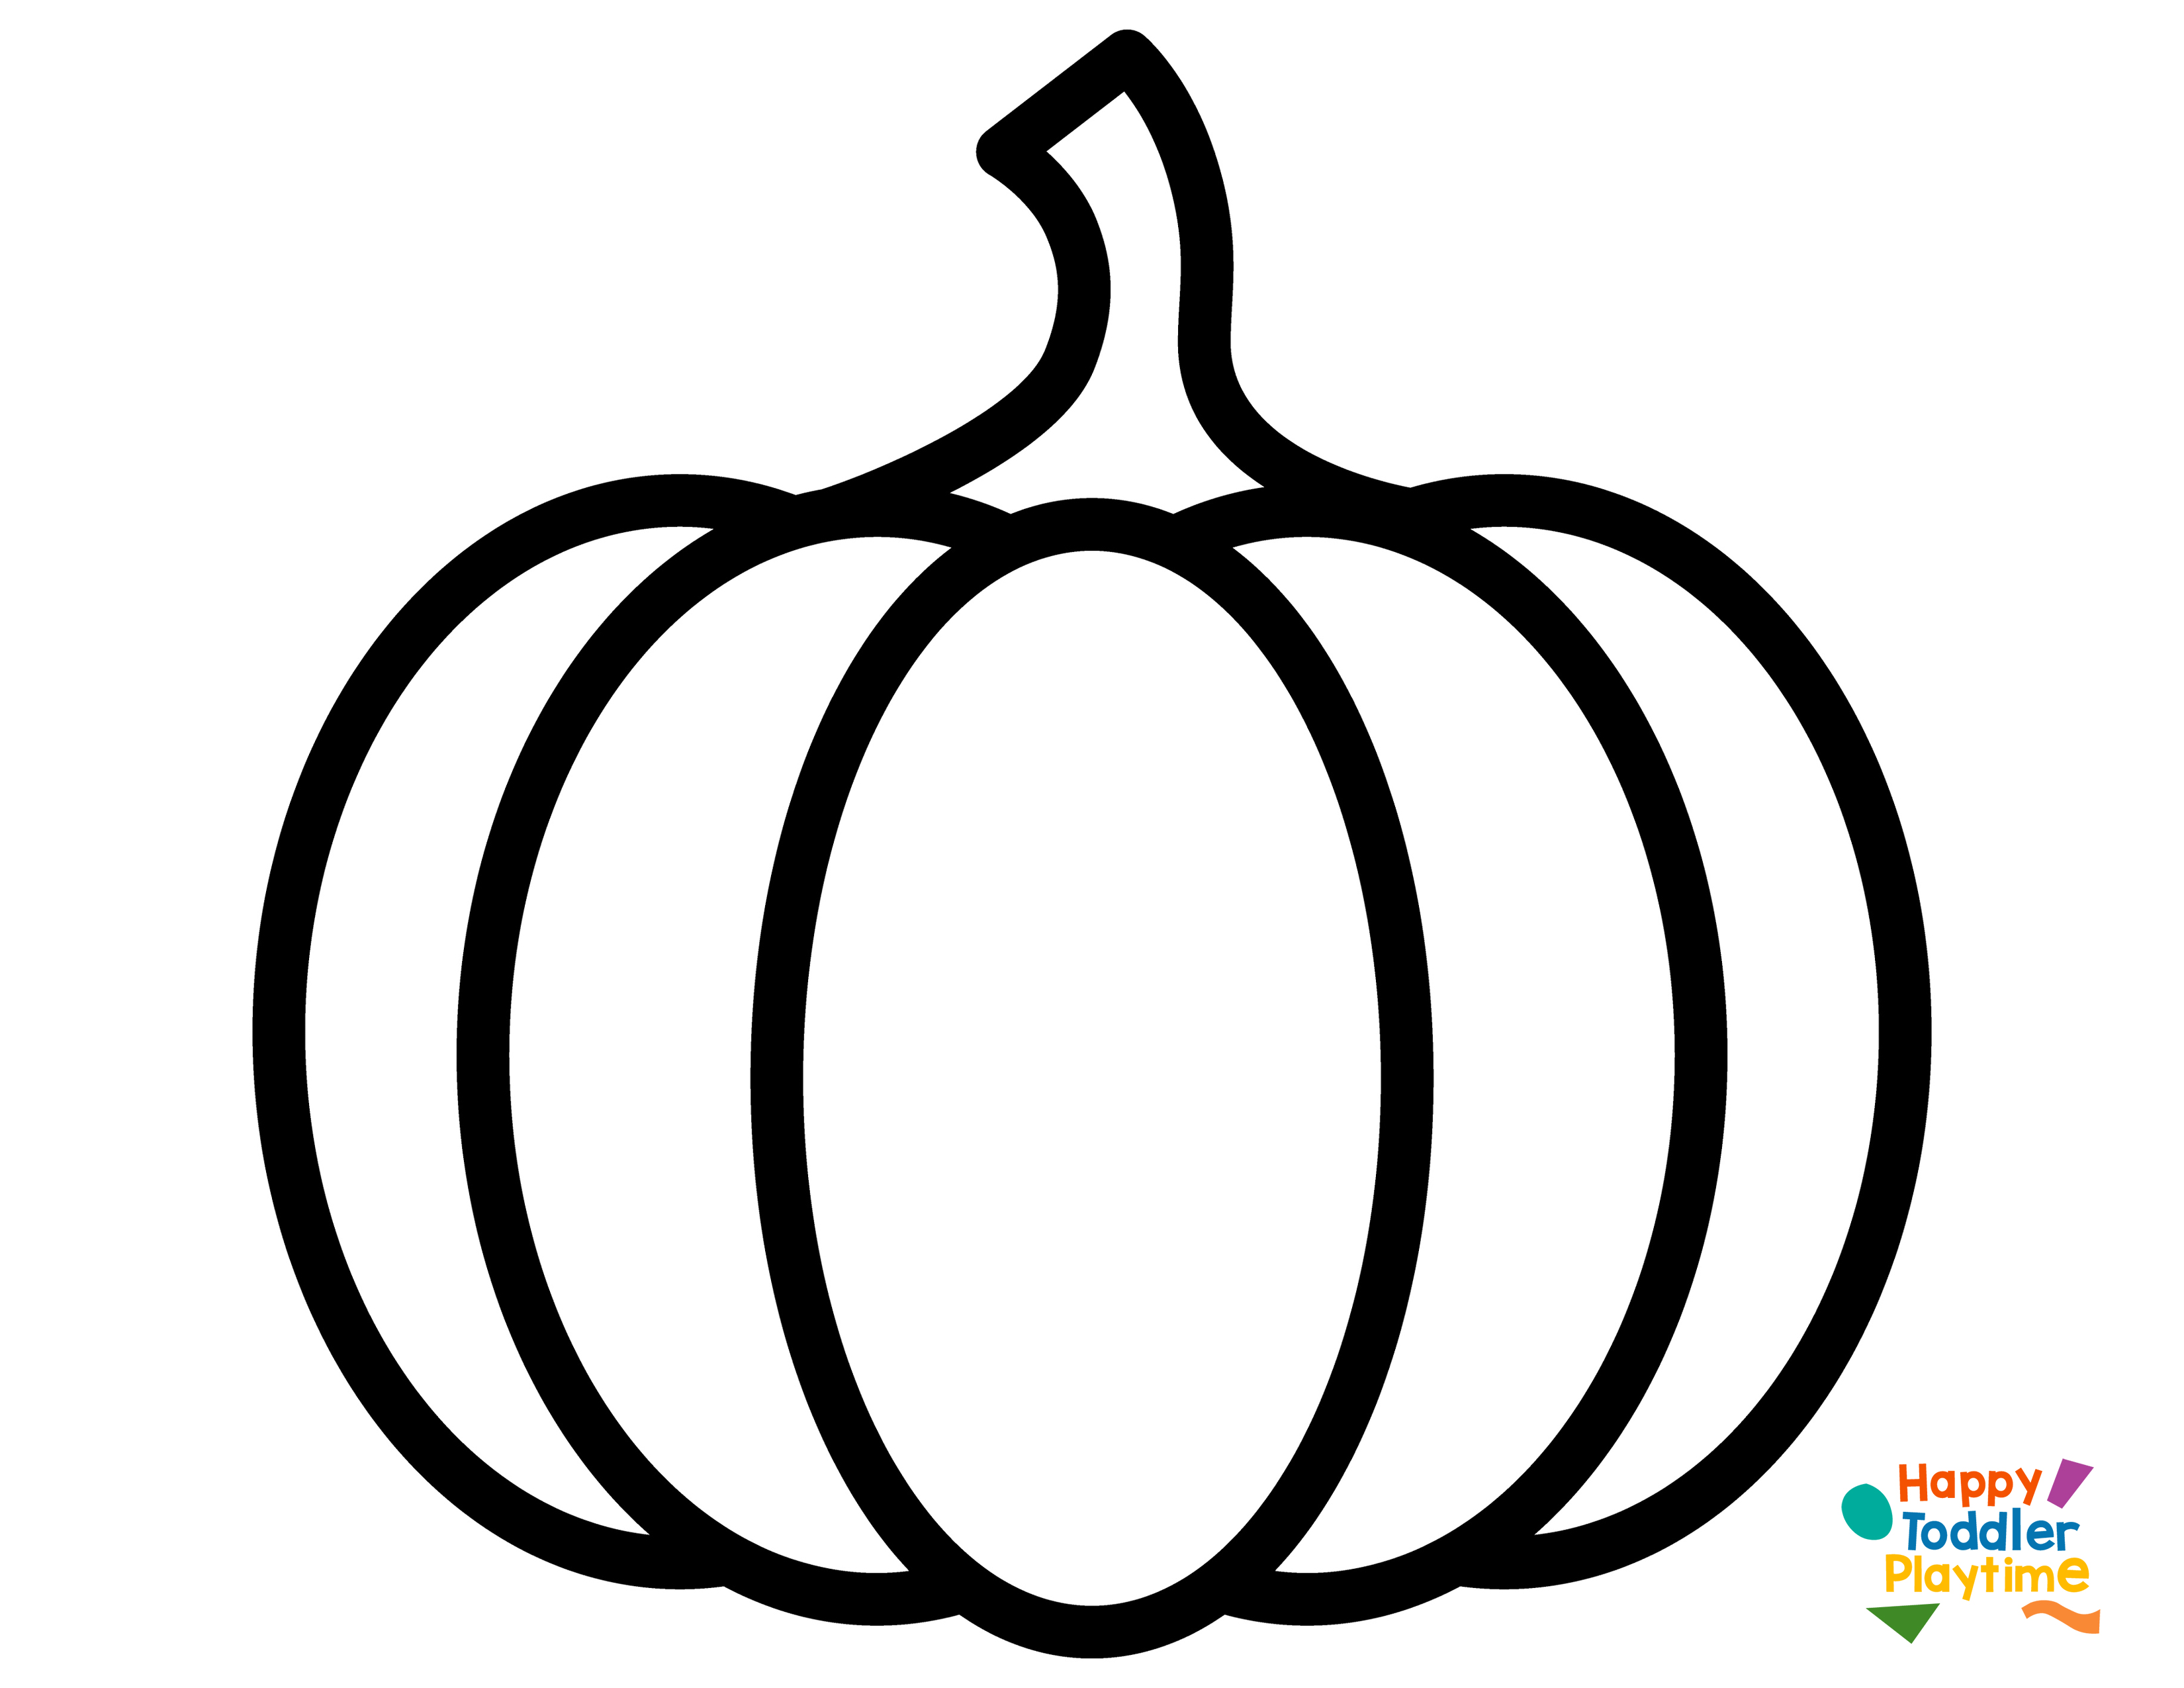
- Pumpkin Template (download for free below)
- Black Construction paper
- Contact paper
- Leaves
- Child Safe Scissors (click here for my favourites as well as tips on teaching scissors skills to toddlers and preschoolers)
How to Make it
- Print and cut out the free pumpkin template. You can downlaod it for free using the link in the supplies section.
- Take a piece of black construction paper and use the template to cut out the outline of the pumpkin with the center of the pumpkin cut out.
- Take a piece of contact paper to a table using painters tape, with the sticky side of the contact paper facing up. Stick your pumpkin outline on the contact paper.
- Head outside and collect some fallen leaves. You don’t want them to be too dry though.
- Have your little one cut the leaves using scissors (best for older kids) or tear them with their hands (best for toddlers).
- Use the leaf pieces to decorate the inside of the pumpkin.
- Cut another piece of contact paper off and lay it on top of your decorated pumpkin craft.
- Cut out of the outline of the pumpkin.
- Display in a window using double sided tape.
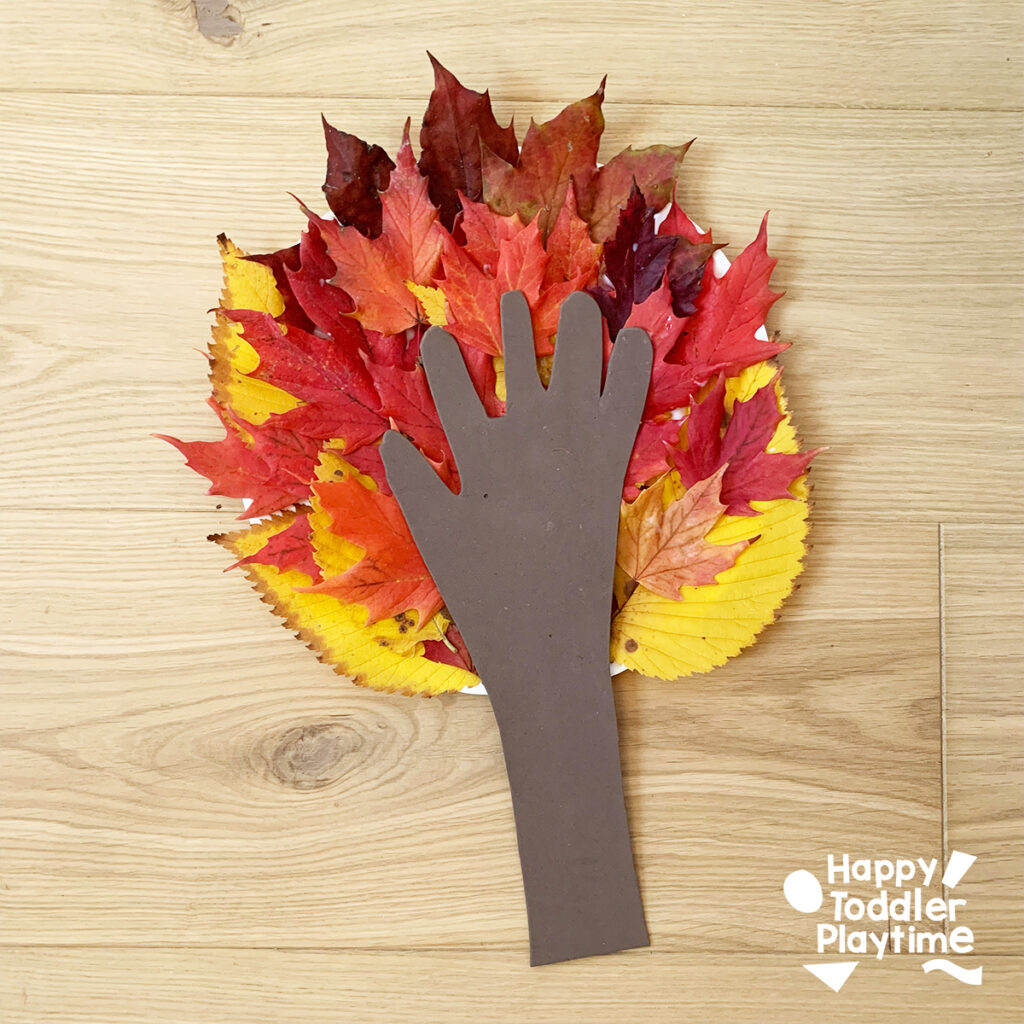
27. Paper Plate Fall Tree Craft
Our Paper Plate Fall Tree craft—a simple, yet visually stunning project perfect for little hands eager to celebrate the season!
Materials
- Paper plate
- Colorful leaves (real or artificial)
- Brown foam sheet or construction paper
- Glue
- Crayons
- Pencil
- Scissors
How to Make it
- Laying The Foliage: Start by taking your paper plate as the backdrop. Now, take those vibrant leaves and begin to glue them onto the plate. Think of it as creating the lush canopy of your tree.
- Layering Up: For a fuller and more dynamic tree, layer your leaves. It gives depth and dimension, making your tree truly pop! You can also cut the stems of the leaves.
- Creating The Trunk: Here’s a personal touch! Trace your arm and hand on the brown foam sheet or construction paper. This becomes the trunk and branches of your tree. Once you’ve got a shape you’re happy with, cut it out.
- Branch Out: Glue your hand-and-arm cutout onto the paper plate and leaves, positioning it so it looks like the branches are peeking out from under the colorful leaves.
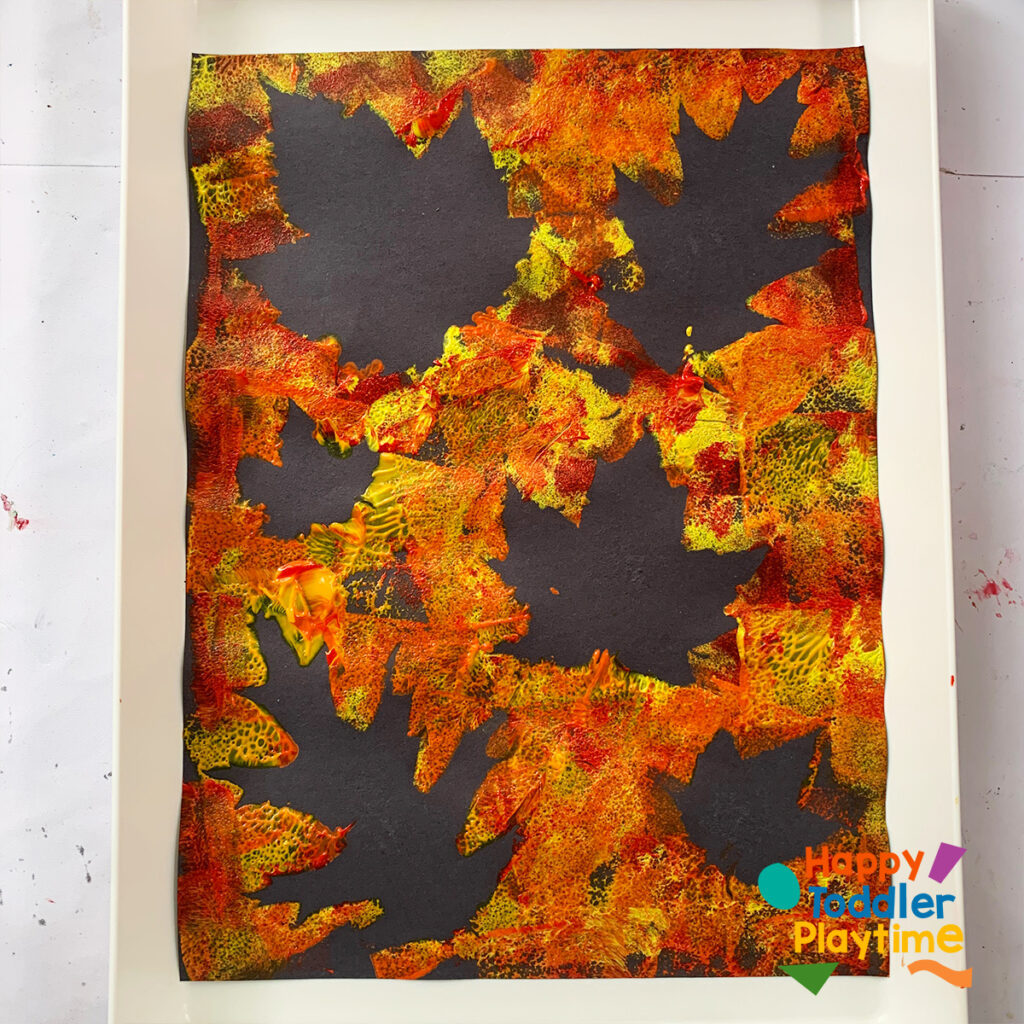
28. Sponge Painted Leaf Resist Art
Sponge Painted Leaf Resist Art Leaf Resist Art is a simple and fun Fall craft for toddlers and preschoolers.
Materials
- Sponges
- Black construction paper
- Fallen Leaves
- Painter’s tape
- Washable kits Paint in red, yellow and orange
How to Make it
- Grab some fallen leaves from outside. For this activity fresh leaves work best.
- Arrange them on a sheet of black construction paper and secure them with a small rolled up piece of tape.
- Cut a sponge into small pieces and use one piece to paint.
- Pour out some red, yellow and orange paint on to a paper plate or paint pallet.
- Protect your table with a plastic table cloth or butcher paper.
- Invite your little one to dip the sponge into the paint and paint all around the leaves. Encourage them to dip the paint into all the colours to make different shades of red, yellow and orange. Cover all the black spaces with colour!
- Remove the leaves to reveal the negative black space below in the shape the leaves.
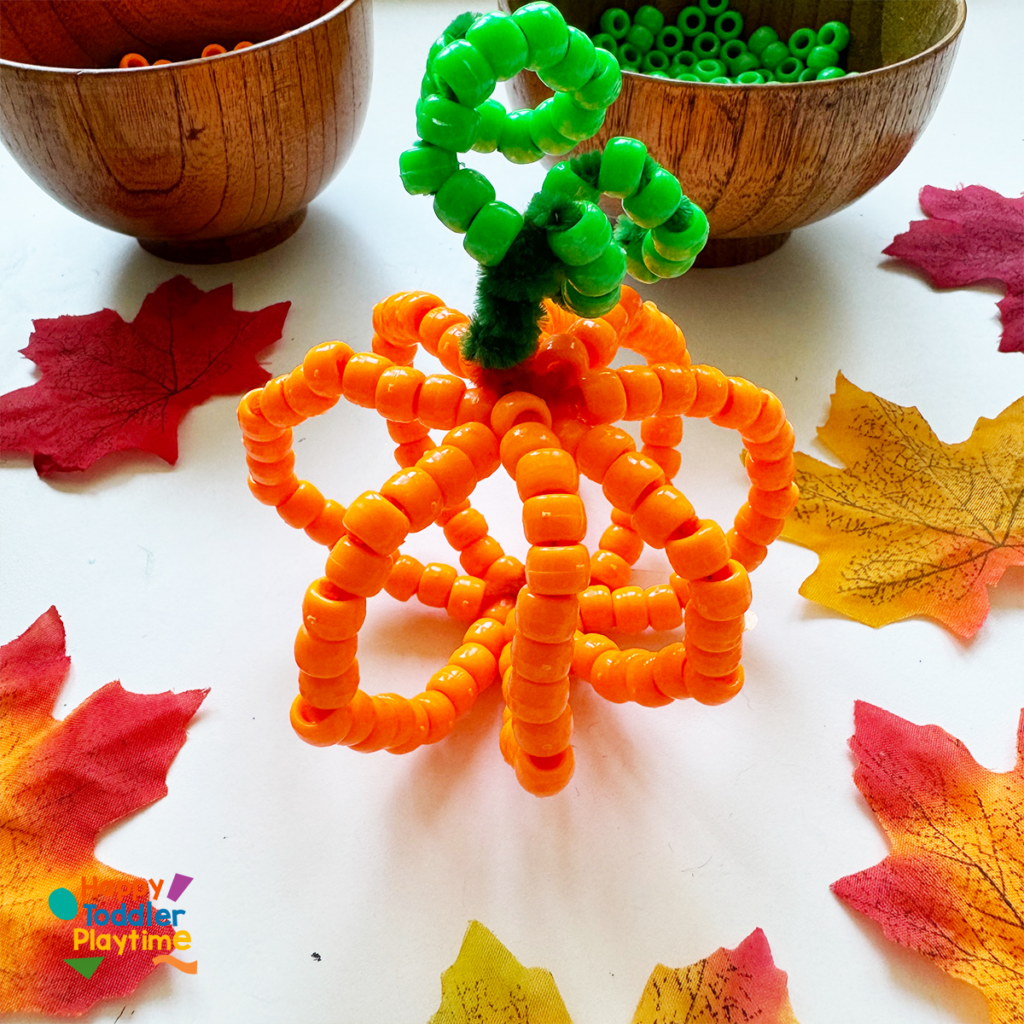
29. Beaded Pumpkin Craft
With just a few simple materials—beads and pipe cleaners—your child can create their very own beaded pumpkin that’s perfect for decorating around the house or as a cute addition to your Fall or Halloween décor.
Materials
- Orange and green pony beads
- Orange and green pipe cleaners
- Bowls to hold beads
How To Make It
- Prepare the beads: Start by placing the orange and green pony beads in small bowls. This makes it easy for your child to grab and string the beads.
- Shape the pumpkin: Gather four (4) orange pipe cleaners and grip them in the middle and twist them a few times to connect them. Then separate each end to \ create a star shape. Be sure that each end are the same length.
- Add the beads: Begin stringing orange pony beads onto the pipe cleaners. As your child strings the beads, they can leave about 2 inches at the end of the cleaner. Continue until all 8 ends of the pipe cleaner are filled with pony beads. Once the beads are in place, brings all 8 ends up together in the middle. Twist the ends of the pipe cleaner together again to lock them in.
- Create the stem: To make the pumpkin’s stem, take a small green pipe cleaner and wrap it around the top of the pumpkin. Twist it up until all the orange pipe cleaner part is covered. Add green beads to each end of the green pipe cleaner. Leave the end free and twist it over to secure the beads.
- Finish the pumpkin: You can bend the stem in different directions to give it a more playful or curly look. Use your finger or a pencil. If your child wants, they can make multiple pumpkins and connect them with additional pipe cleaners to create a fun pumpkin chain!
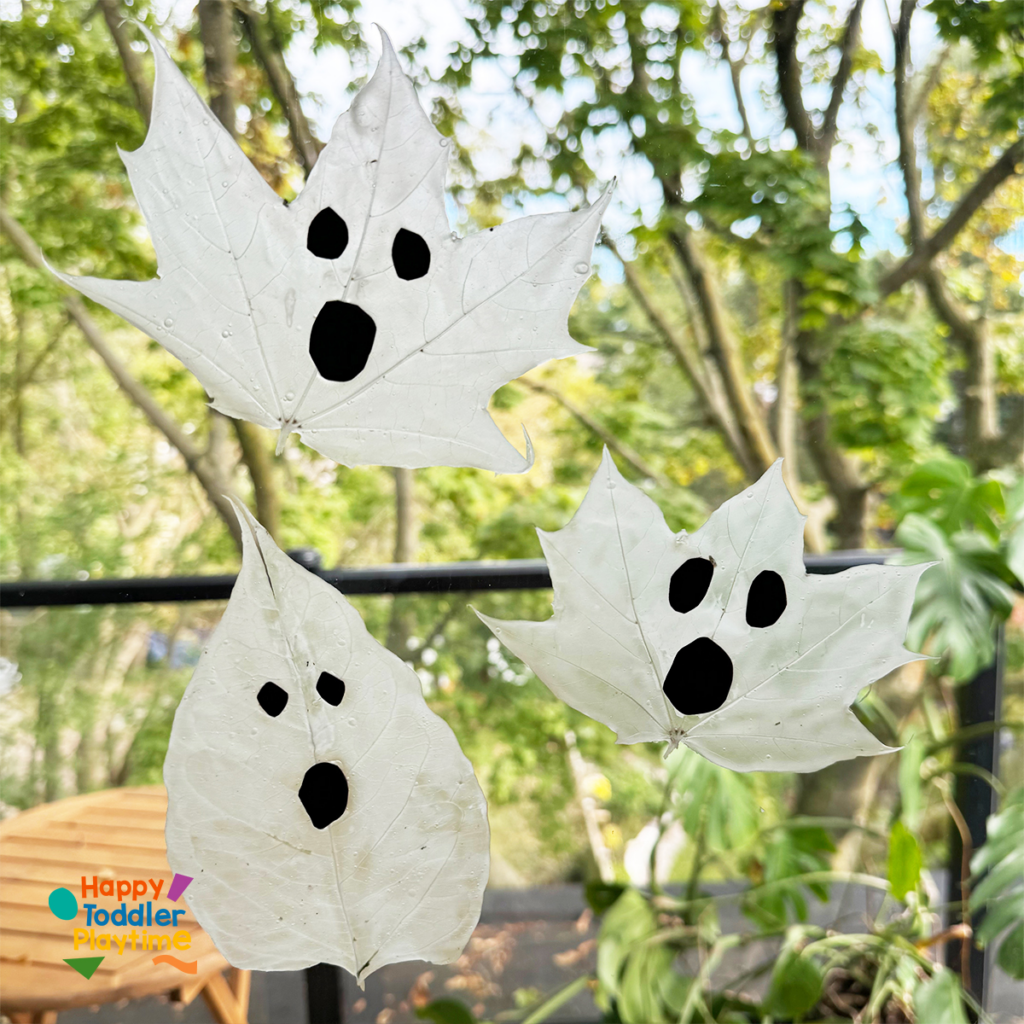
30. DIY Ghost Leaf Window Stickers
Create these not so spooky ghost leaves window stickers using freshly fallen leaves and school glue. Super easy to make and the results are spook-tacular!
Materials
- White school glue
- Paintbrush
- Black construction paper
- Fresh leaves (not too dry)
- Scissors
How To Make It
- Prep the leaf: Start by choosing a large, fresh leaf. It’s important that the leaf isn’t too dry because you need it to hold its shape during the drying process.
- Apply the glue: Use a paintbrush to cover the entire back of the leaf with a thick (the more glue you can add the better and easy it will be to peel away later) layer of white school glue. Be generous with the glue to ensure a sturdy ghost sticker.
- Add the ghost face: Cut out small eyes and a mouth from black construction paper. Arrange the eyes and mouth on top of the glue layer to create the ghost face. Then, add another layer of glue over the construction paper to seal it in place.
- Dry and peel: Set the leaf aside to dry for at least 24 hours. Once the glue has completely dried, carefully peel the glue off the leaf. The ghost design will remain in the dried glue, leaving you with a spooky leaf sticker to place on your window!
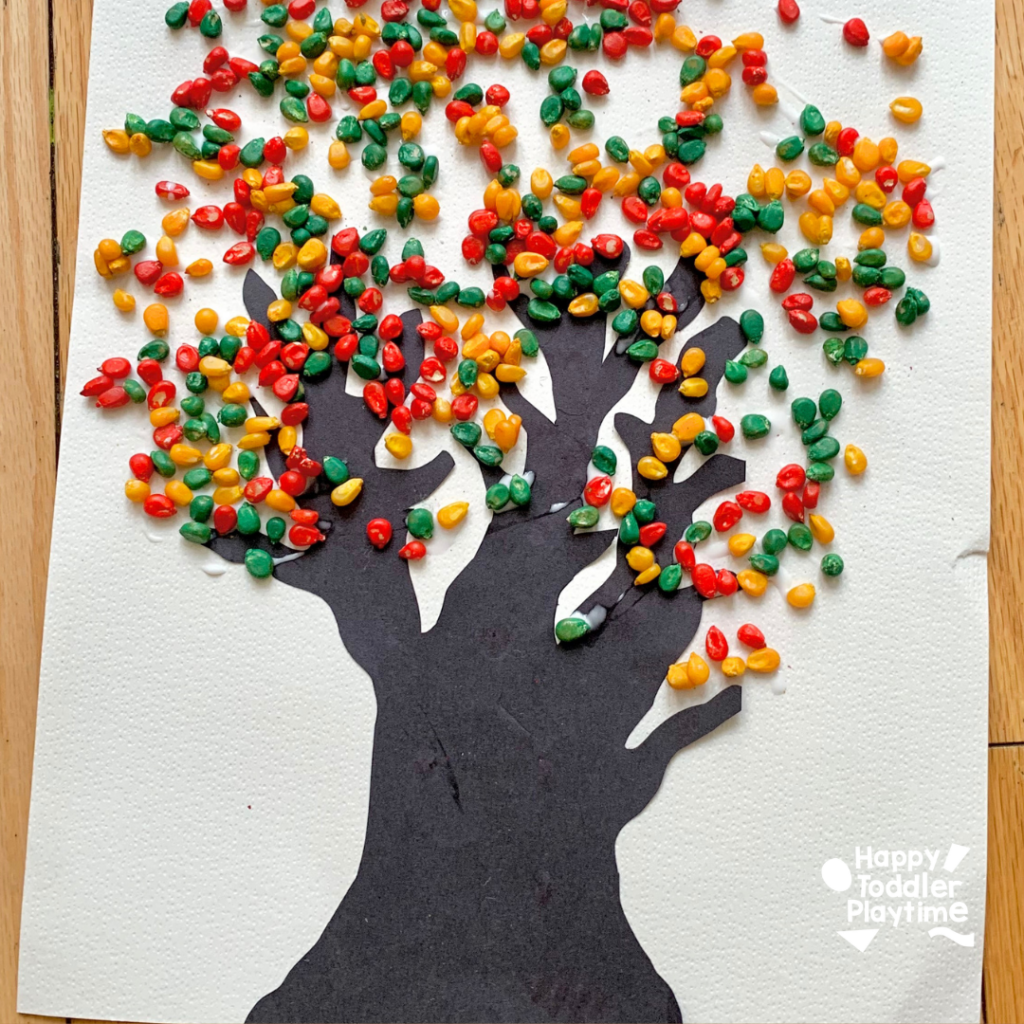
31. Dyed Corn Fall tree Craft
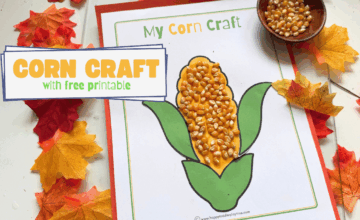
One of our favorite thing to do in the fall – dye corn. It can be used for some many activities from sensory bins to crafts to science experiments.
Materials
- Popcorn kernels or dried corn kernels or popping corn (it is called different things but it is all the same thing dried corn kernels)
- Acrylic paint in various colours
- Ziplock bags
- Wax paper
- Tray
How To Make It
- Gather your supplies.
- Add 1 cup of corn kernels to a ziplock bag.
- Add about 1 tablespoon of acrylic paint the desired colour. I made green, blue, and red coloured corn. I also made orange but the colour looked more yellow than orange. Bright colours like purple and pink would be nice as well.
- Seal the bag tightly and shake and massage the paint into the kernels until its completely evenly distributed. Add more paint if the colour isnt as vibrant as desired.
- Line a tray with wax paper or parchment paper.
- Open the bag and spread the kernels out on the tray. Try to spread them out as thinly as possible so that it takes less time to dry.
- Set it aside to dry. It will take at least 2-3 hours to fully dry. But depending on how much paint you use it may take longer. Ensure that the kernels are fully dry before letting your child play with them to prevent paint transfer.
- Once the kernels are fully dry, use your fingers to separate the kernels that may have stuck together.
- Your corn kernels are ready to use in crafts, learning activities or sensory play!
32. Bean Mosaic Fall Crafts
Use beans and seeds and acorns to create these adorable mosaics. Craft acorns, pumpkins and leaves or create more abstract items
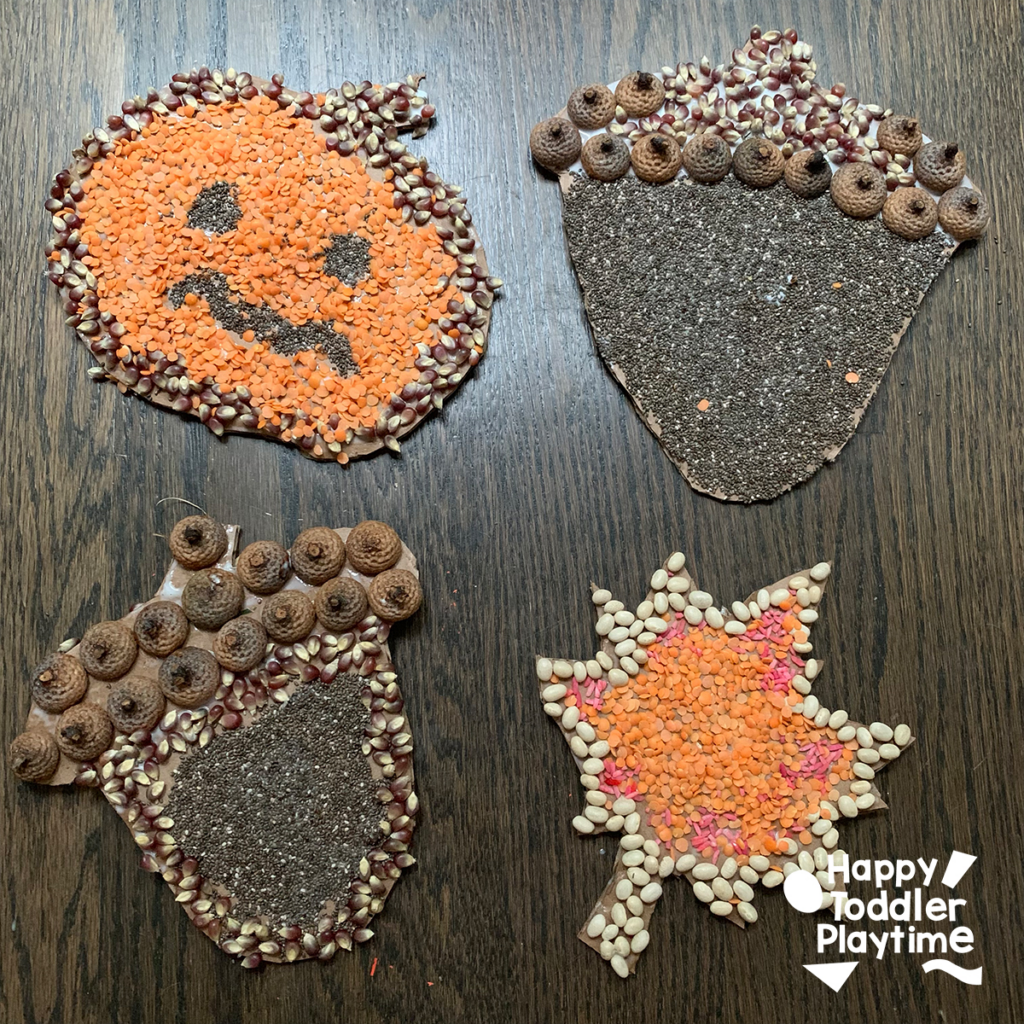
Materials
- Assorted beans (think red kidney, black beans, lentils)
- Various seeds (like sunflower or pumpkin seeds, chia seeds)
- Kernels of corn
- Colored rice (You can easily dye rice with some food coloring)
- Tops of acorns
- Cardboard
- Scissors
- Glue
- Paintbrush
- Bowls or containers to hold you seeds and beans
How To Make It
- Shape It Up: Start by cutting your cardboard into fun fall shapes. Think pumpkins, swirling leaves, or even little acorns. These will be your canvas!
- Sticky Business: Using the paintbrush, generously spread glue all over one side of your cardboard shape. Here’s a tip: If your kiddo loves to be hands-on, let them use their fingers to spread the glue. It’s a sensory delight!
- Nature’s Canvas: Now, it’s time to decorate! Let your imagination run wild. Lay beans to outline the shapes, fill in with colored rice, use acorn tops as little hats for the acorns, or even create patterns with seeds and kernels. Remember, there’s no right or wrong – it’s all about having fun and being creative!
- Dry Time: Once you’ve covered your cardboard shape in nature’s best, let it dry thoroughly. This might be a great time for a snack break!
- Display Your Art: When it’s all dry, you can pin your creations on walls, attach a magnet to the back for fridge art, or even tie a string to hang them as autumn ornaments!
33. Cotton Ball Fall Tree Craft
The texture of this one is my favorite and the kids love painting with cotton balls! Easy but the results are stunning.
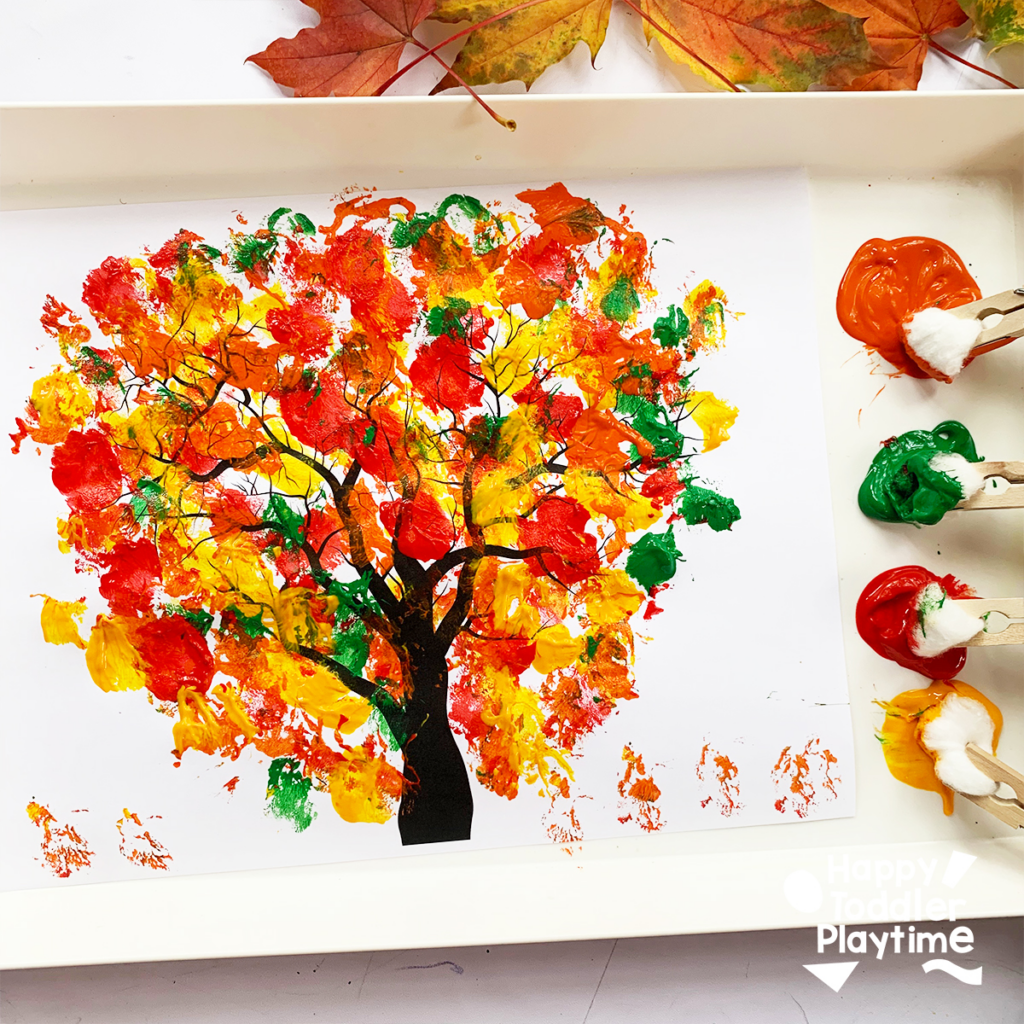
Materials
- Tree Template
- Cotton balls
- Clothespins
- Fall-colored paint (think deep reds, glowing oranges, and sunny yellows)
How To Make It
- Preparation Station: Start by printing out your tree printable. This will be the canvas for our fall foliage masterpiece.
- Clip and Dip: Attach a cotton ball to the end of a clothespin. This nifty combo will be our paintbrush. You can create a few for different colours.
- Palette Play: Pour out your fall-colored paints onto a paper plate. Imagine the colors of a forest during sunrise, and you’ll have the perfect shades!
- Dab-a-Tree: Dip your cotton ball ‘brush’ into a paint color of choice and start dabbing onto the branches of your tree printable. Mix and match the colors, overlap them, and watch as your tree bursts into a fluffy, colorful spectacle!
- Dry and Display: Once your tree is covered in cotton ball printed leaves, set it aside to dry. And voilà! You’ve just captured the essence of fall in a crafty creation.
34. Salt Painted Apple Craft
My kids love salt painting. a slow painting idea that is great for an after school activities.
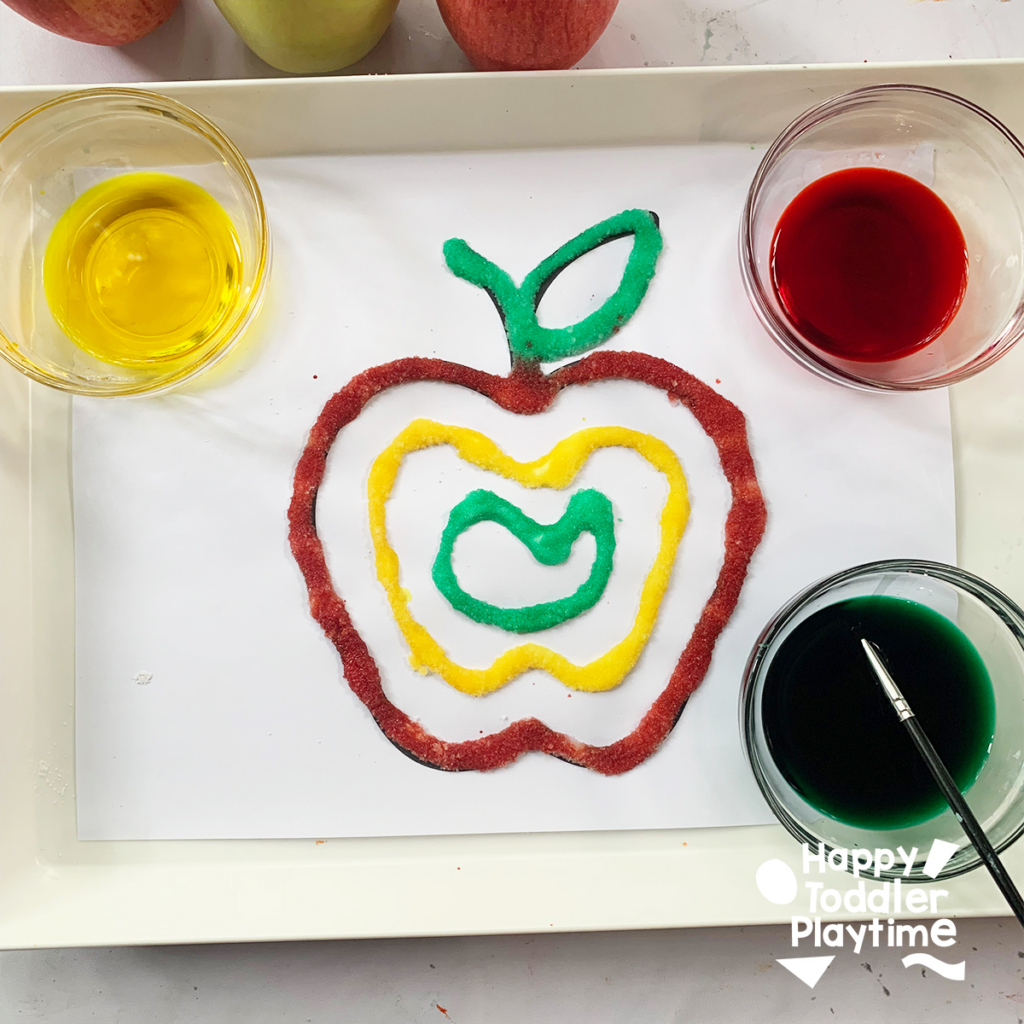
Materials
- Free printable apple template (available on our blog here)
- Food coloring and water
- Small bowls
- A small paintbrush
- Salt
- Bottle of glue
- A tray to contain the mess
How To Make It
- Start with the Basics: Begin by printing our adorable apple template. You’ll find it’s the perfect canvas for little hands to work on.
- Glue Time: Place the apple template in a tray. Hand over the glue to your kiddos and let them trace the outline of the apple with it. It’s a great way to practice those fine motor skills. They can create a design inside the apple or on the outside. You can assist them by pencilling in a few lines for them depending on their age.
- Sprinkle the Salt: Here comes the magic! Ask them to sprinkle a generous amount of salt over the glue. Shake off the excess in the tray and you have a sparkling white apple ready for some color. All the glue and salt to dry.
- Color Mixing: In small bowls mix red, yellow and green food coloring with water.
- Decorating: Using a small paint brush invite your child to dip the brush in the coloured water and then lightly touch the salt lines. As they brush the colors on, they will witness the magical spread of colors seeping along the salt lines, creating a beautiful watercolor effect.
35. Rice Pumpkin Craft
This textured craft is a popular with my kids. They love painting with the glue and then shaking the rice off at the end. So satisfying!
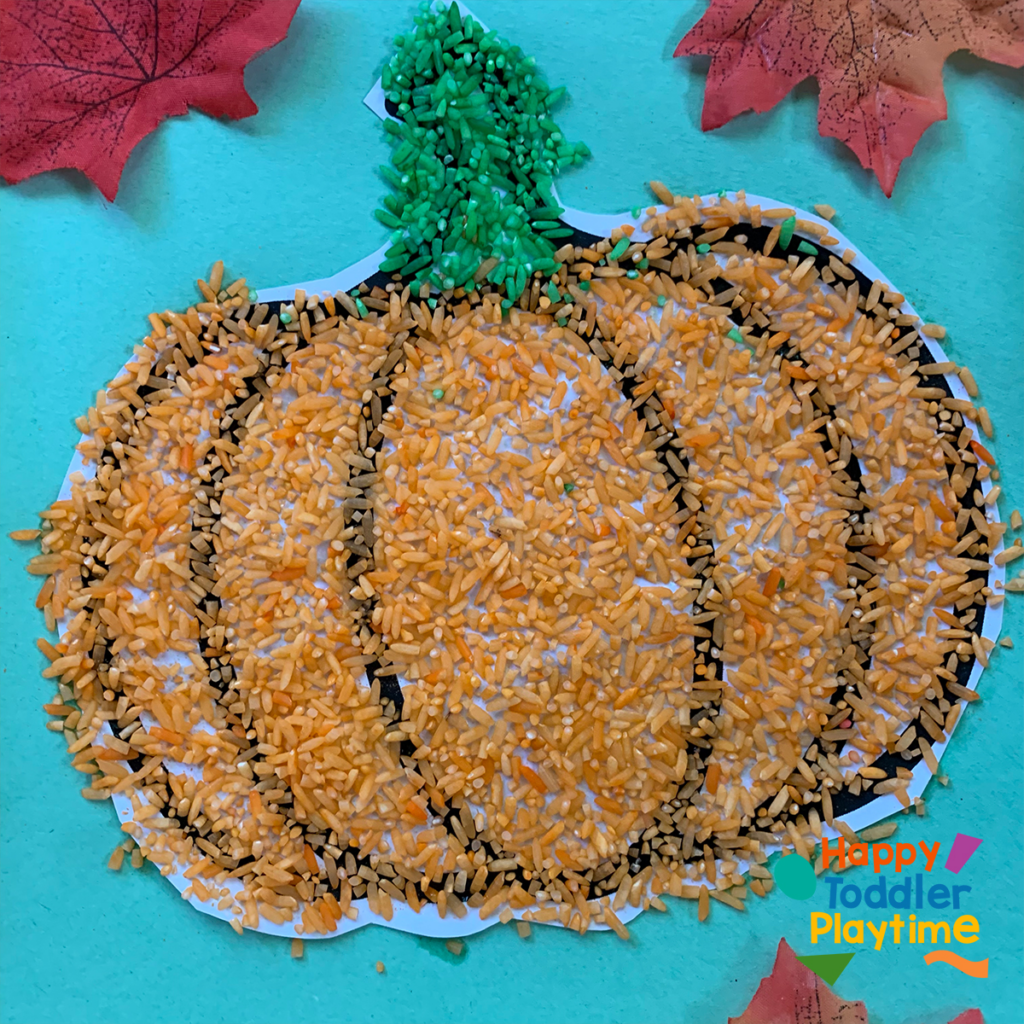
Materials
- Pumpkin Template
- Orange and green coloured rice
- Bowls
- Construction paper
- Scissors
- Glue
- Paint brush
How To Make It
- Cut out pumpkin template and glue it to a piece of construction paper.
- Pour glue into a bowl and use a paint brush to spread glue all over the pumpkin. Do not put any glue on the stem. Remind your little one this but if they do don’t worry.
- Now for the fun part! Pour orange and green coloured rice into two separate bowls. Learn how to make coloured rice here.
- Place your pumpkin into a bow, sensory bin or on a tray. Sprinkle lots of orange rice all over the pumpkin!
- Lift the paper up and remove the excess rice. Add any glue to areas left blank.
- Use the paint brush to add glue to the stem of the pumpkin.
- Sprinkle on green colored rice. Left the picture up and remove the excess rice.
Free Fall Templates and Coloring Pages
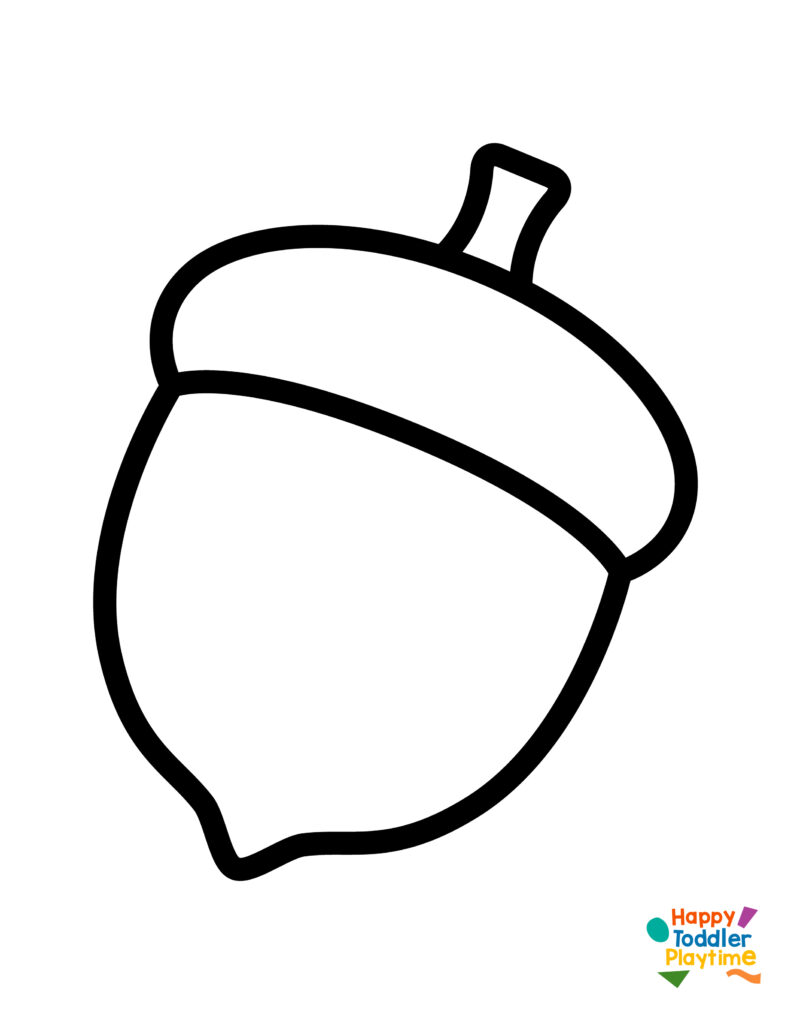
Acorn Templates for Crafts. My free acorn templates are the perfect way to create arts and crafts with your toddler or preschooler during fall.
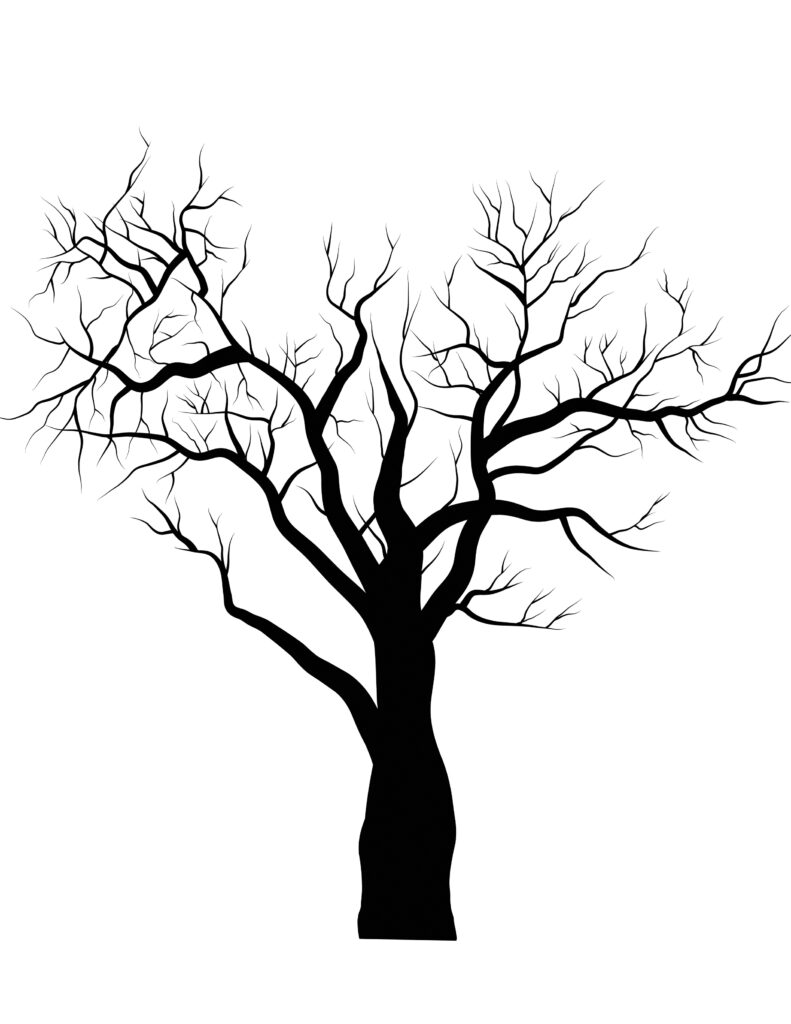
Tree Crafts with Free Templates. My free tree templates are the perfect way to create arts and crafts with your kids during any season especial fall and spring.
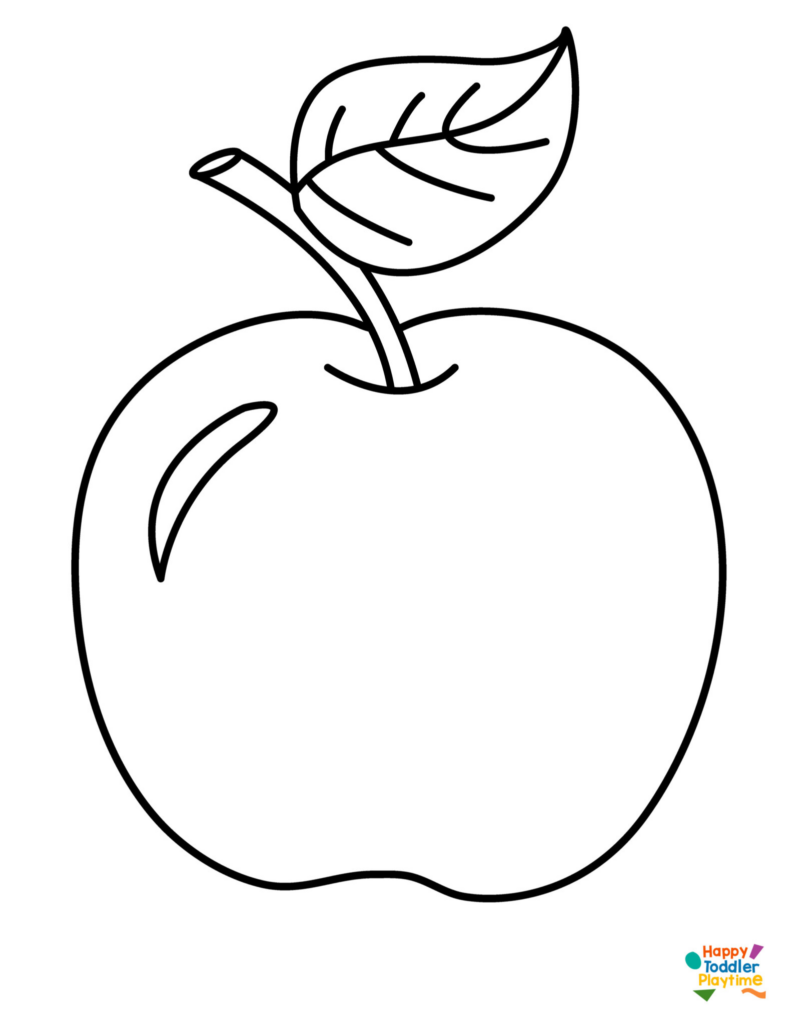
Free Apple Templates for Arts & Crafts. This apple template is the perfect way to create crafts with kids this fall. A wonderful and easy way to get crafty with kids of all ages.
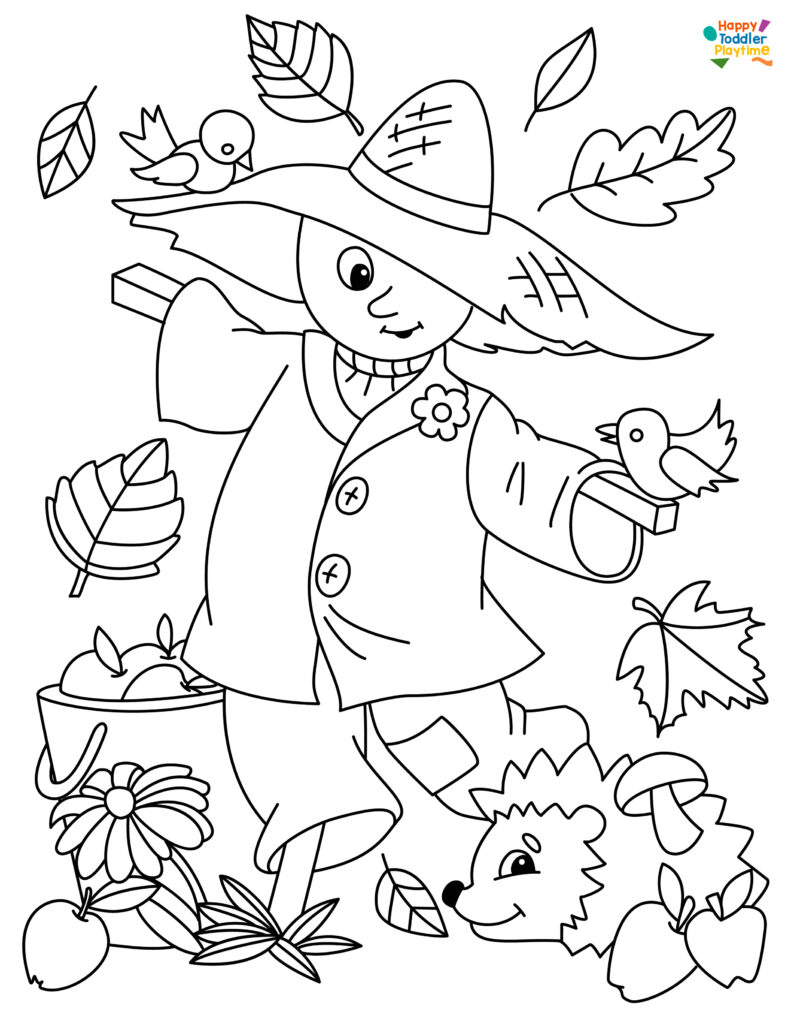
Fall Coloring Pages. My Fall Coloring Pages for Kids are a wonderful way to immerse kids in the beauty of fall, just print and let their creativity flourish.
FAQs About Easy Fall Crafts
Q: What supplies do children need for fall crafts?
This is the best part of crafting in the fall, you can find almost all of your supplies just lying on the ground! The vast array of colorful leaves that fall are one the best fall craft supplies. In addition to leaves in every color of fall, most crafts use basic supplies such as paper, glue, child-safe scissors, crayons, paint and natural items like leaves, twigs and pinecones.
Q: Are these fall crafts suitable for preschoolers?
Yes! Many fall crafts are suitable for preschoolers with adult supervision. Choose simple projects with larger materials and help children with cutting or gluing when needed.
Play2Learn Toddler & Preschool Programs for Curious Toddlers
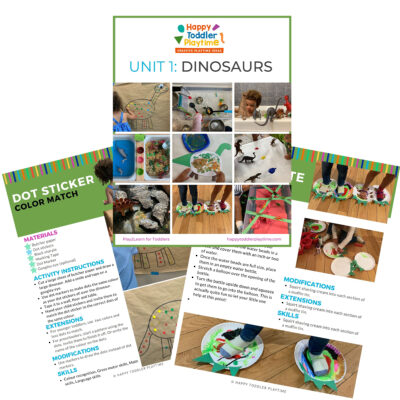
There is no limit to your toddler’s energy and curiosity. That energy and curiosity although a joy can be challenging at times. Their interest in just about everything around them is what makes them great learners. One and two year olds can soak up so much just from their senses!
But as a teacher or parent that thirst for learning can be exhausting. That is why I created this toddler and preschooler program. To help you get the most out of this time with your curious toddler without having to come up with creative ways to play and interact with them.
Play2Learn for Toddlers includes 20 Units for toddlers. Each 2-week toddler unit has 20 super easy to set up and engaging activities for toddlers 18 months to 3 years.
Play2Learn Preschool which includes 20 Units for preschoolers. Each 2-week preschoolers unit has 20 unique and easy to set up and engaging activities for preschoolers 3 years to 5 years. That’s over 800 learning activities for your toddler and preschooler at your fingertips! So many ideas you and your child will never be bored again!
These toddler and preschool lesson plans and activities will definitely keep you and your toddler and preschooler busy playing and learning!
Click here for more information: Play2Learn
Book: Exciting Sensory Bins for Curious Kids
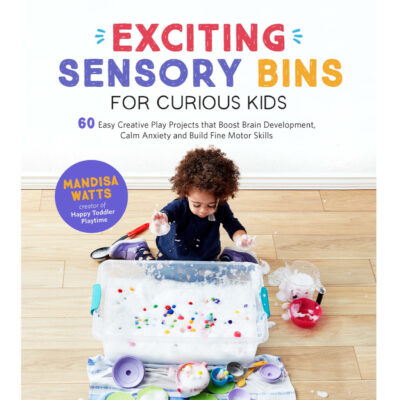
Did you know I wrote a book of sensory bins? Click here for more information Exciting Sensory Bin for Curious Kids. Or grab your copy at Amazon.
Boring afternoons are made exciting with awesome animal-based bins, like Salty Shark Bay or Yarn Farm. Pretend play bins like Birthday Cake Sensory Play or Bubble Tea Party encourage creativity and imagination. And your kids will have so much fun they won’t even know they’re getting smarter with STEAM (science, technology, engineering, art and math) activities like Sink or Float Soup, Magnetic Letter Hunt or Ice Cream Scoop and Count.
Designed for toddlers 18 months and up.
Book: Super STEAM Activity Book for Kids
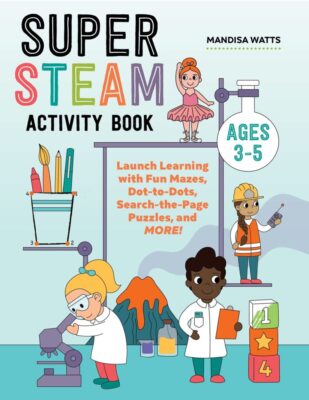
Learning all about science, technology, engineering, art, and math sets kids up for scholastic success―and it can be so much fun! Watch kids enjoy building STEAM skills as they color friendly fish, help water find its way to tree roots, solve math problems with mazes, and more.
Find out more and grab your copy here.
Designed for preschoolers 3 years old and up.
Book: Big Book of Riddles for Kids
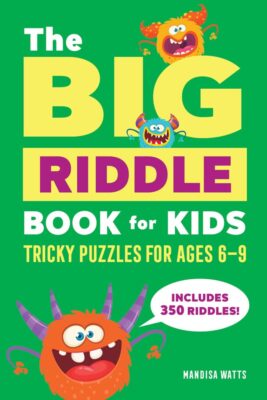
Riddle me this: What’s an exciting way to practice critical thinking while having a blast? The Big Riddle Book for Kids, of course! From hilarious puns to tough brain teasers, kids can build problem-solving skills with hundreds of riddles tha. t show them how to think outside the box.
- 350 riddles for kids—Have hours of fun with riddles, puns and jokes, and math and logic puzzles that’ll get their wheels turning!
- Level up their skills—Riddles get trickier as kids progress through the book, challenging them as they get better at solving puzzles!
- Double-check their work—Kids can check their answers in the back of the book with a handy answer key.
Help children expand their minds while having fun with this puzzle book for kids!
Designed for kids ages 6 years old and up.
TV Show: Curious Crafting
I’m so excited to share my crafting TV show Curious Crafting which launched in July 2022 on TVOkids and TVOkids YouTube! Season 2 aired in August 2023! My show was also nominated in 2023 for Best Live Action Preschool Series by the Youth Media Alliance Awards of Excellence.
Curious Crafting Season 1 is also now airing in Australia on ABC! Watch it here!
Set in the ultimate crafting space, Curious Crafting is a short form pre-school age series about the joy of making crafts. I lead a rotating cast of adorable little preschoolers (including my own) making magic out of common household objects.
In each episode we transform recycled items into magical crafts like a milk carton school bus, paper bag puppet or cotton pad turtle. The crafters learn and laugh their way through each activity while demonstrating what their young imaginations can create.
Curious Crafting shares the adventure and joy of making art with takeaway lessons for creating crafts at home.
This show designed for toddlers and preschoolers 2.5 years old and up.